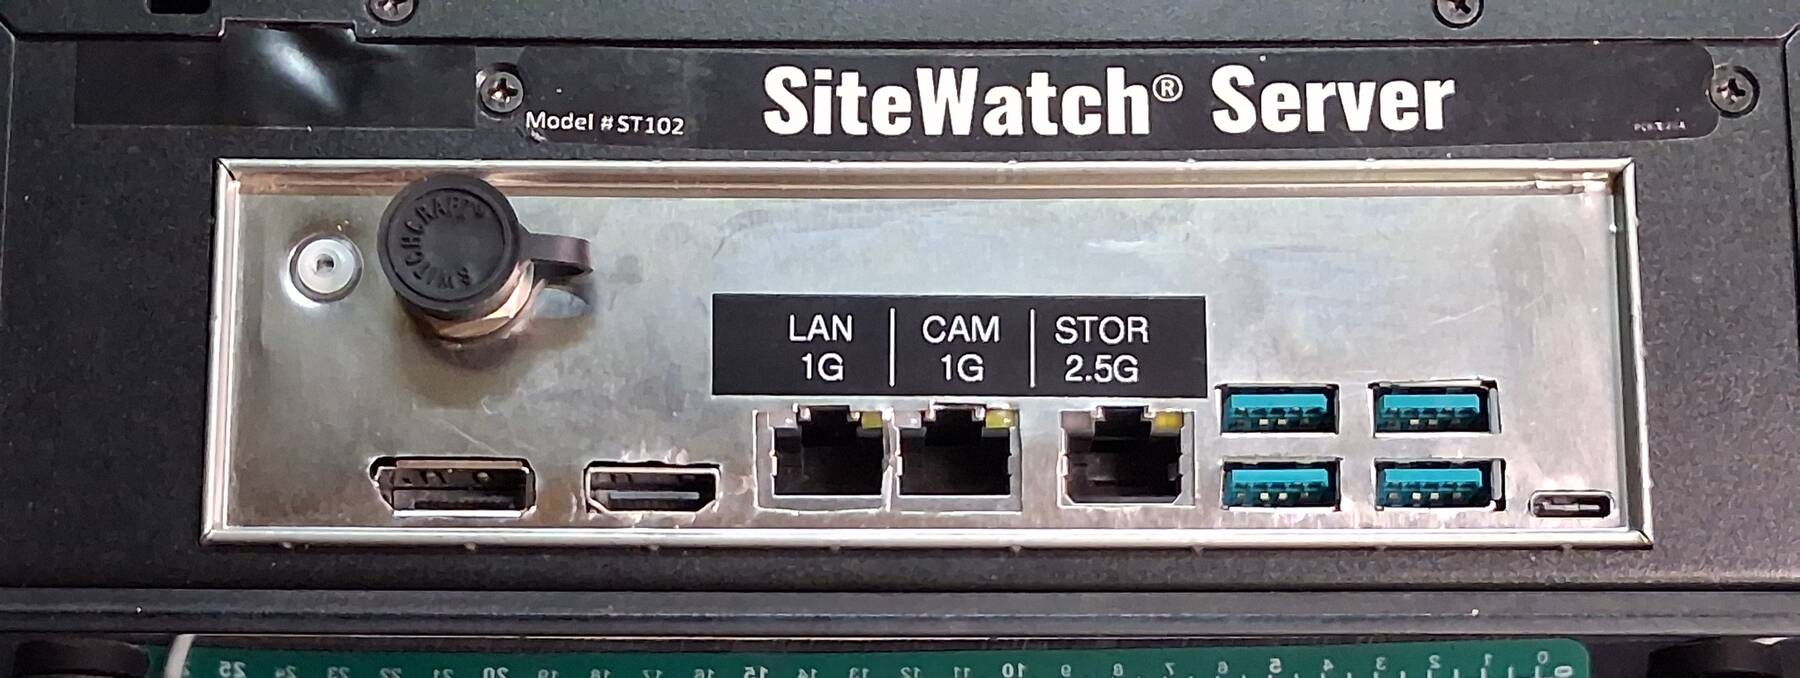
pixy (DFI ITOX ST102-CS-SVR)

Summary
TODO
Notes
TODO
Hardware
| Make | DFI |
| Year | 2021 |
| Model | DFI TGU173 |
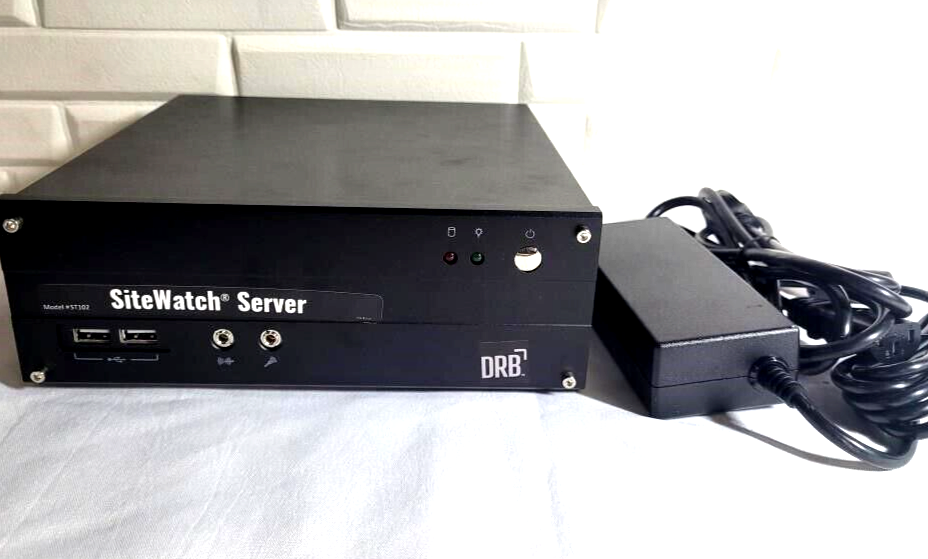
| Chassis | DFI ST100 |
| Power Supply | EDAC EA10523C-120 12V 5.0A |
| Processor | Intel Core i3-1115G4E |
| Memory | 32GB DDR4 2666 (Micron MT40A2G4WE chips) |
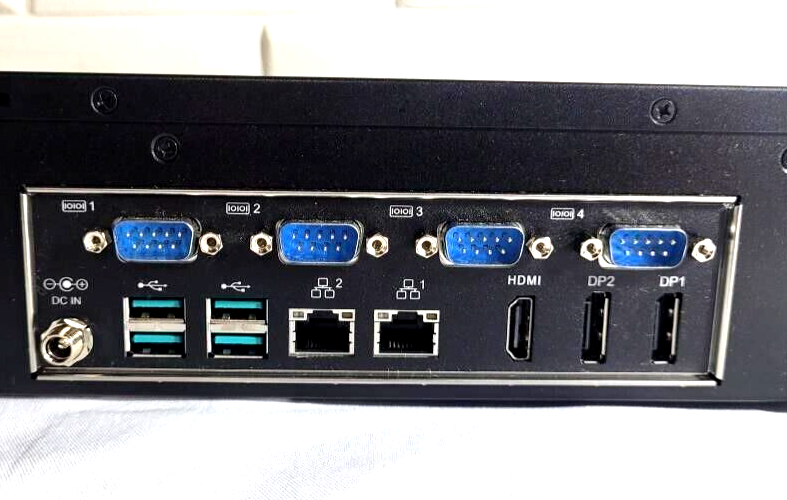
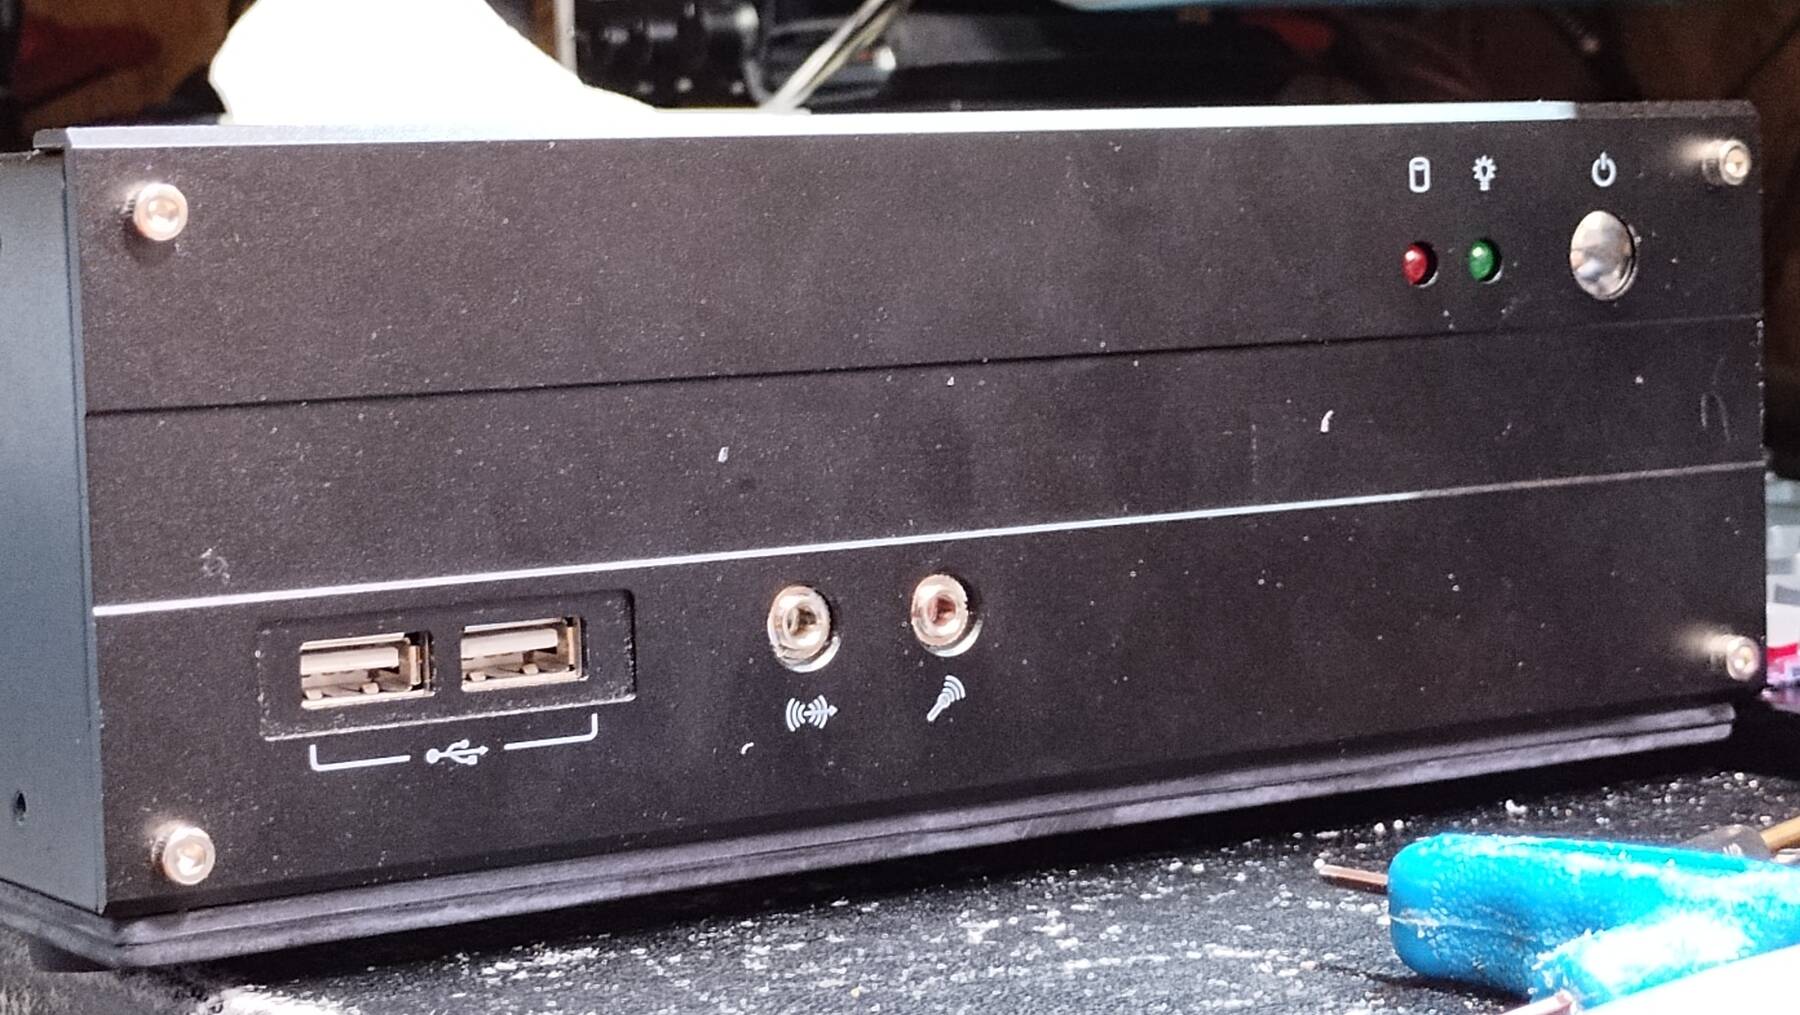
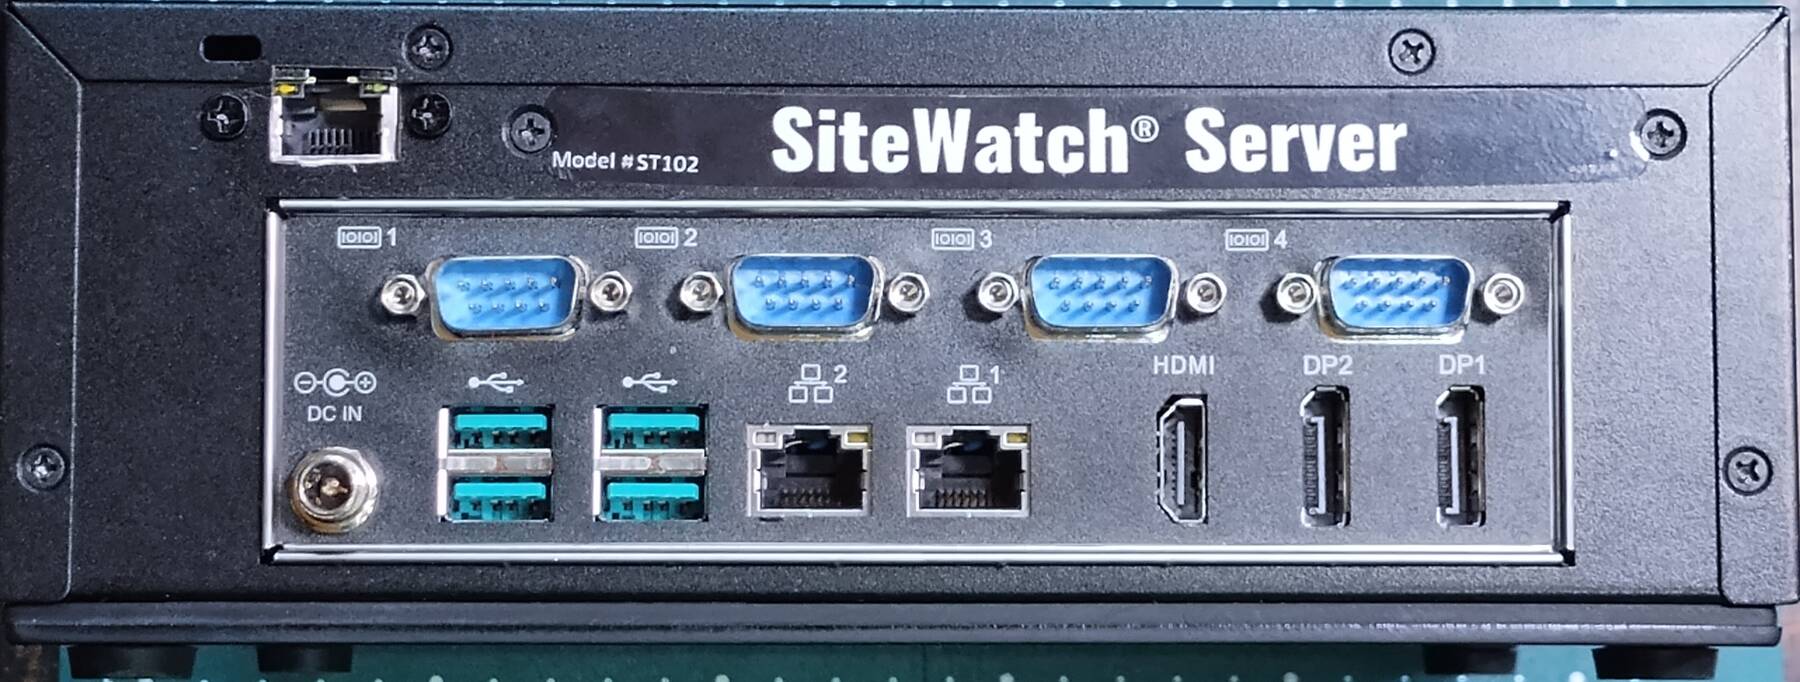
| Ports | 4x USB A 3.1 Gen2 |
| USB C 3.2 Gen2 | |
| 3x RJ-45 LAN | |
| HDMI 2.0b | |
| DisplayPort 1.4 | |
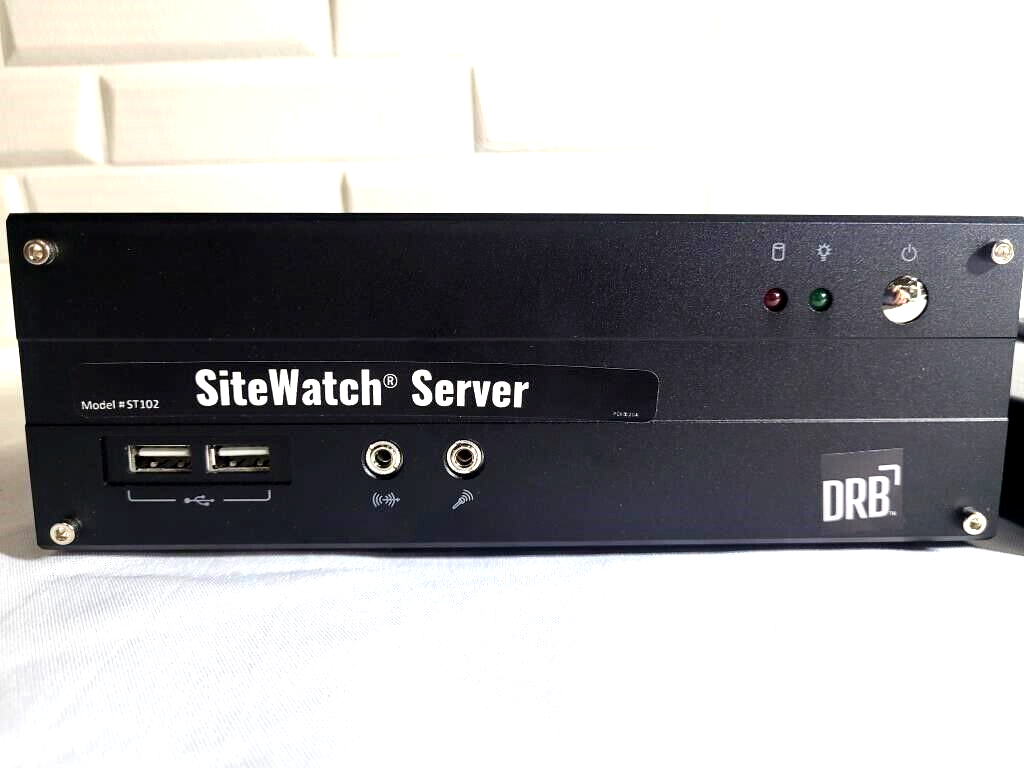
| 2x Front USB A 2.0 | |
| 2x Front Audio Jacks | |
| Graphics | Intel UHD Graphics G4 |
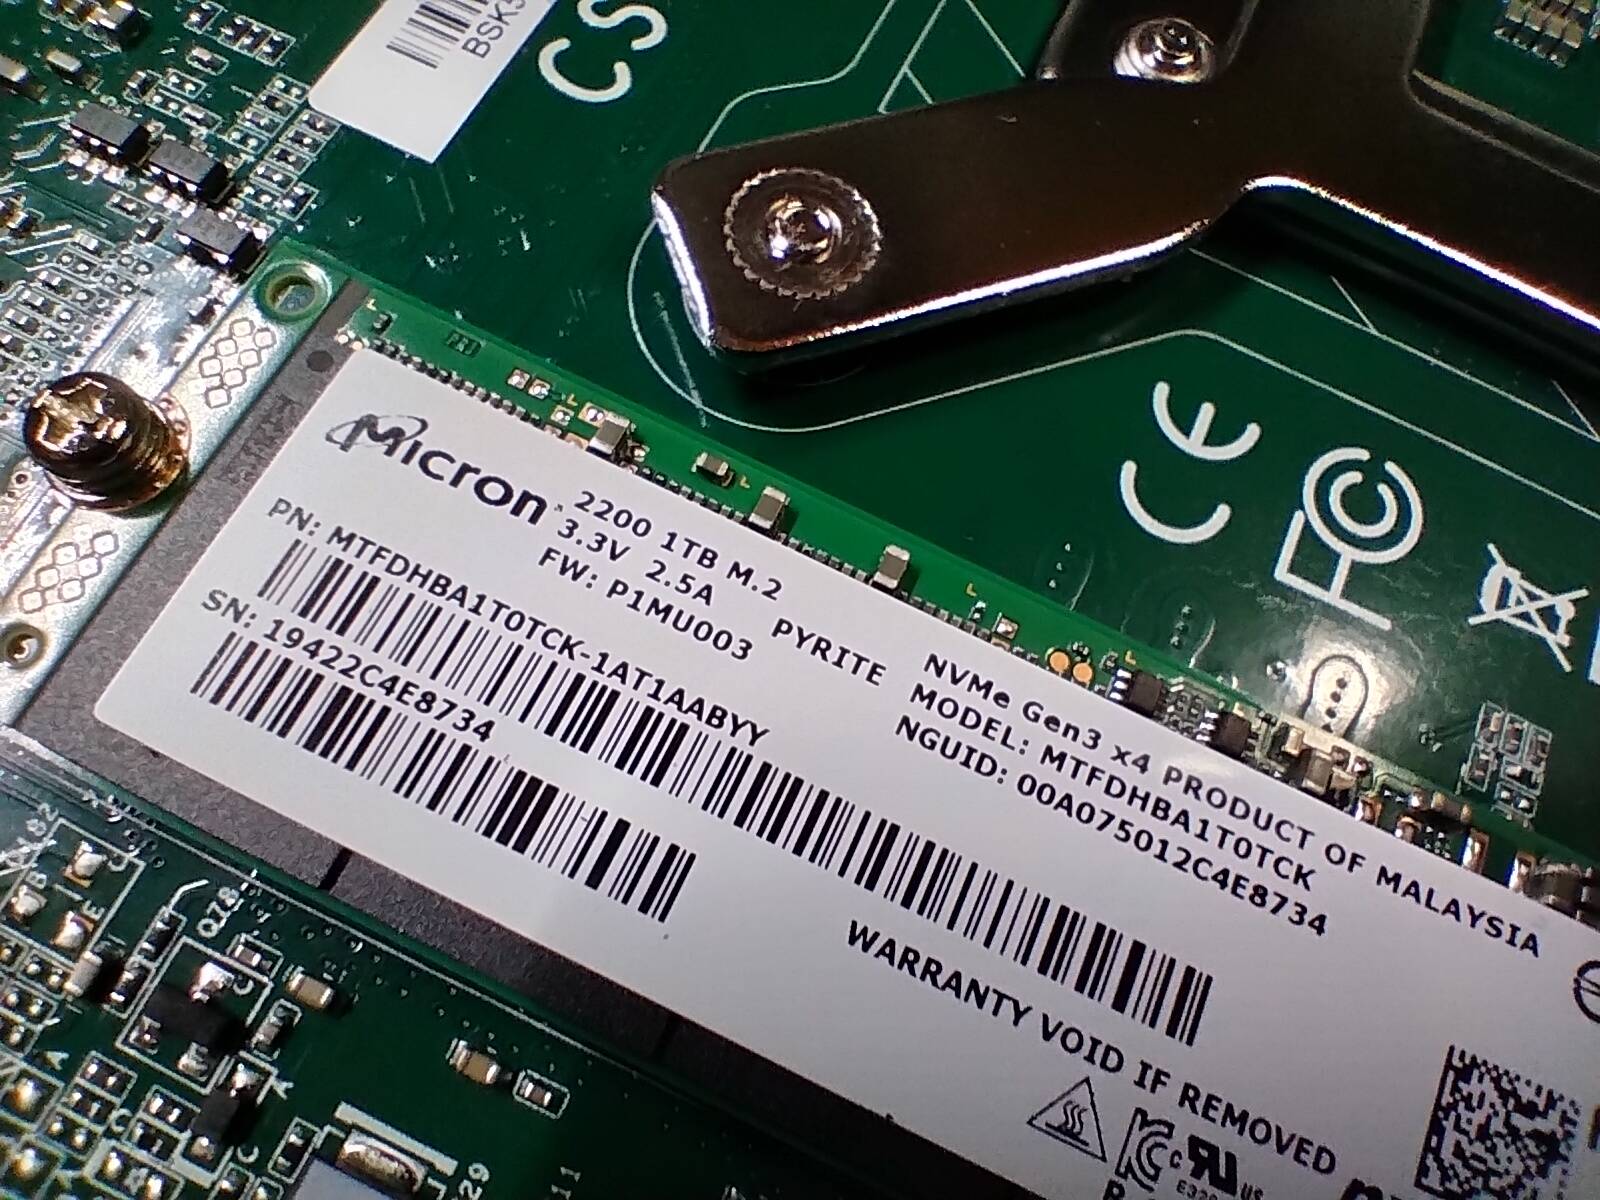
| Storage | 1TB M.2 NVMe SSD Micron MTFDHBA1T0TCK |
| 1TB M.2 SATA SSD Colorfire CF400 | |
| 5TB USB WD My Passport 2627 | |
| Display | - |
| Int. Peripherals | Intel I210 Gigabit Ethernet |
| Intel I210 Gigabit Ethernet | |
| Intel I225-LM 2.5 Gigabit Ethernet | |
| Coral Mini PCIe Accelerator | |
| Ext. Peripherals | - |
| Dimensions | |
| Length/Depth | 23.0 cm |
| Width | 21.9 cm |
| Height/Thickness | 7.5 cm |
| Weight | 2.29kg (5 lbs 1 oz) |
Software
| Operating System | Debian 13 |
| Unique applications |
Log
A moderner frigate machine
I was looking for something to replace Yamato since it is GPU crashy. Intel 8th gen seemed like a decent compromise between cost, performance, and something that I thought would be stable. I ran across this little server with two NICs in a compact ITX case. The price seemed OK, though it was more than other capable mini PCs. I hoped to avoid the whiny fans though so I went for it.
Nice drives
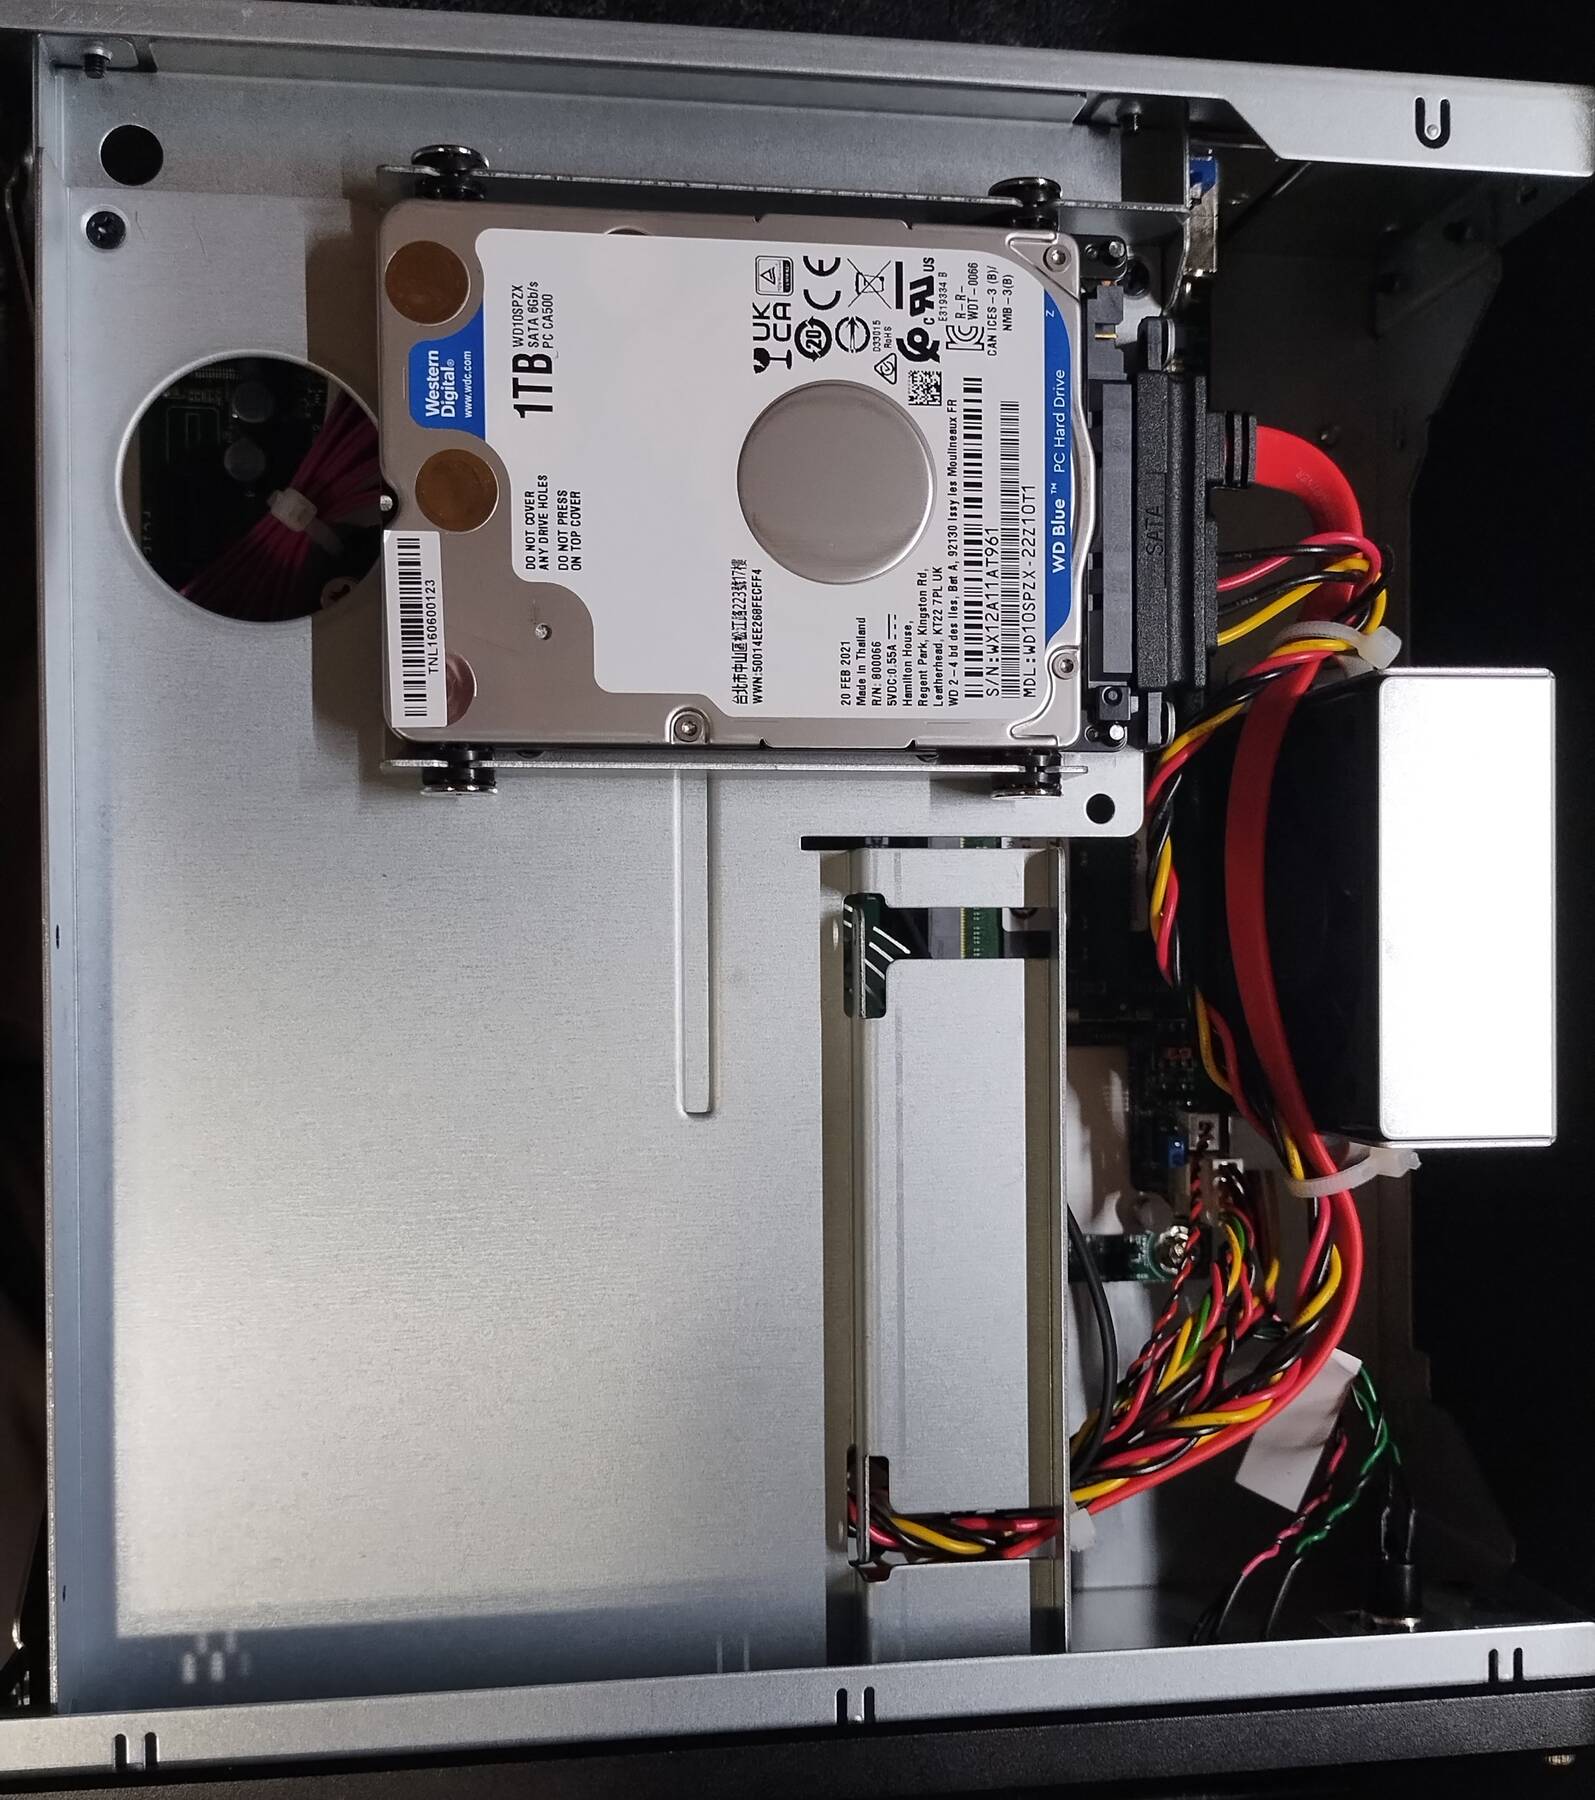
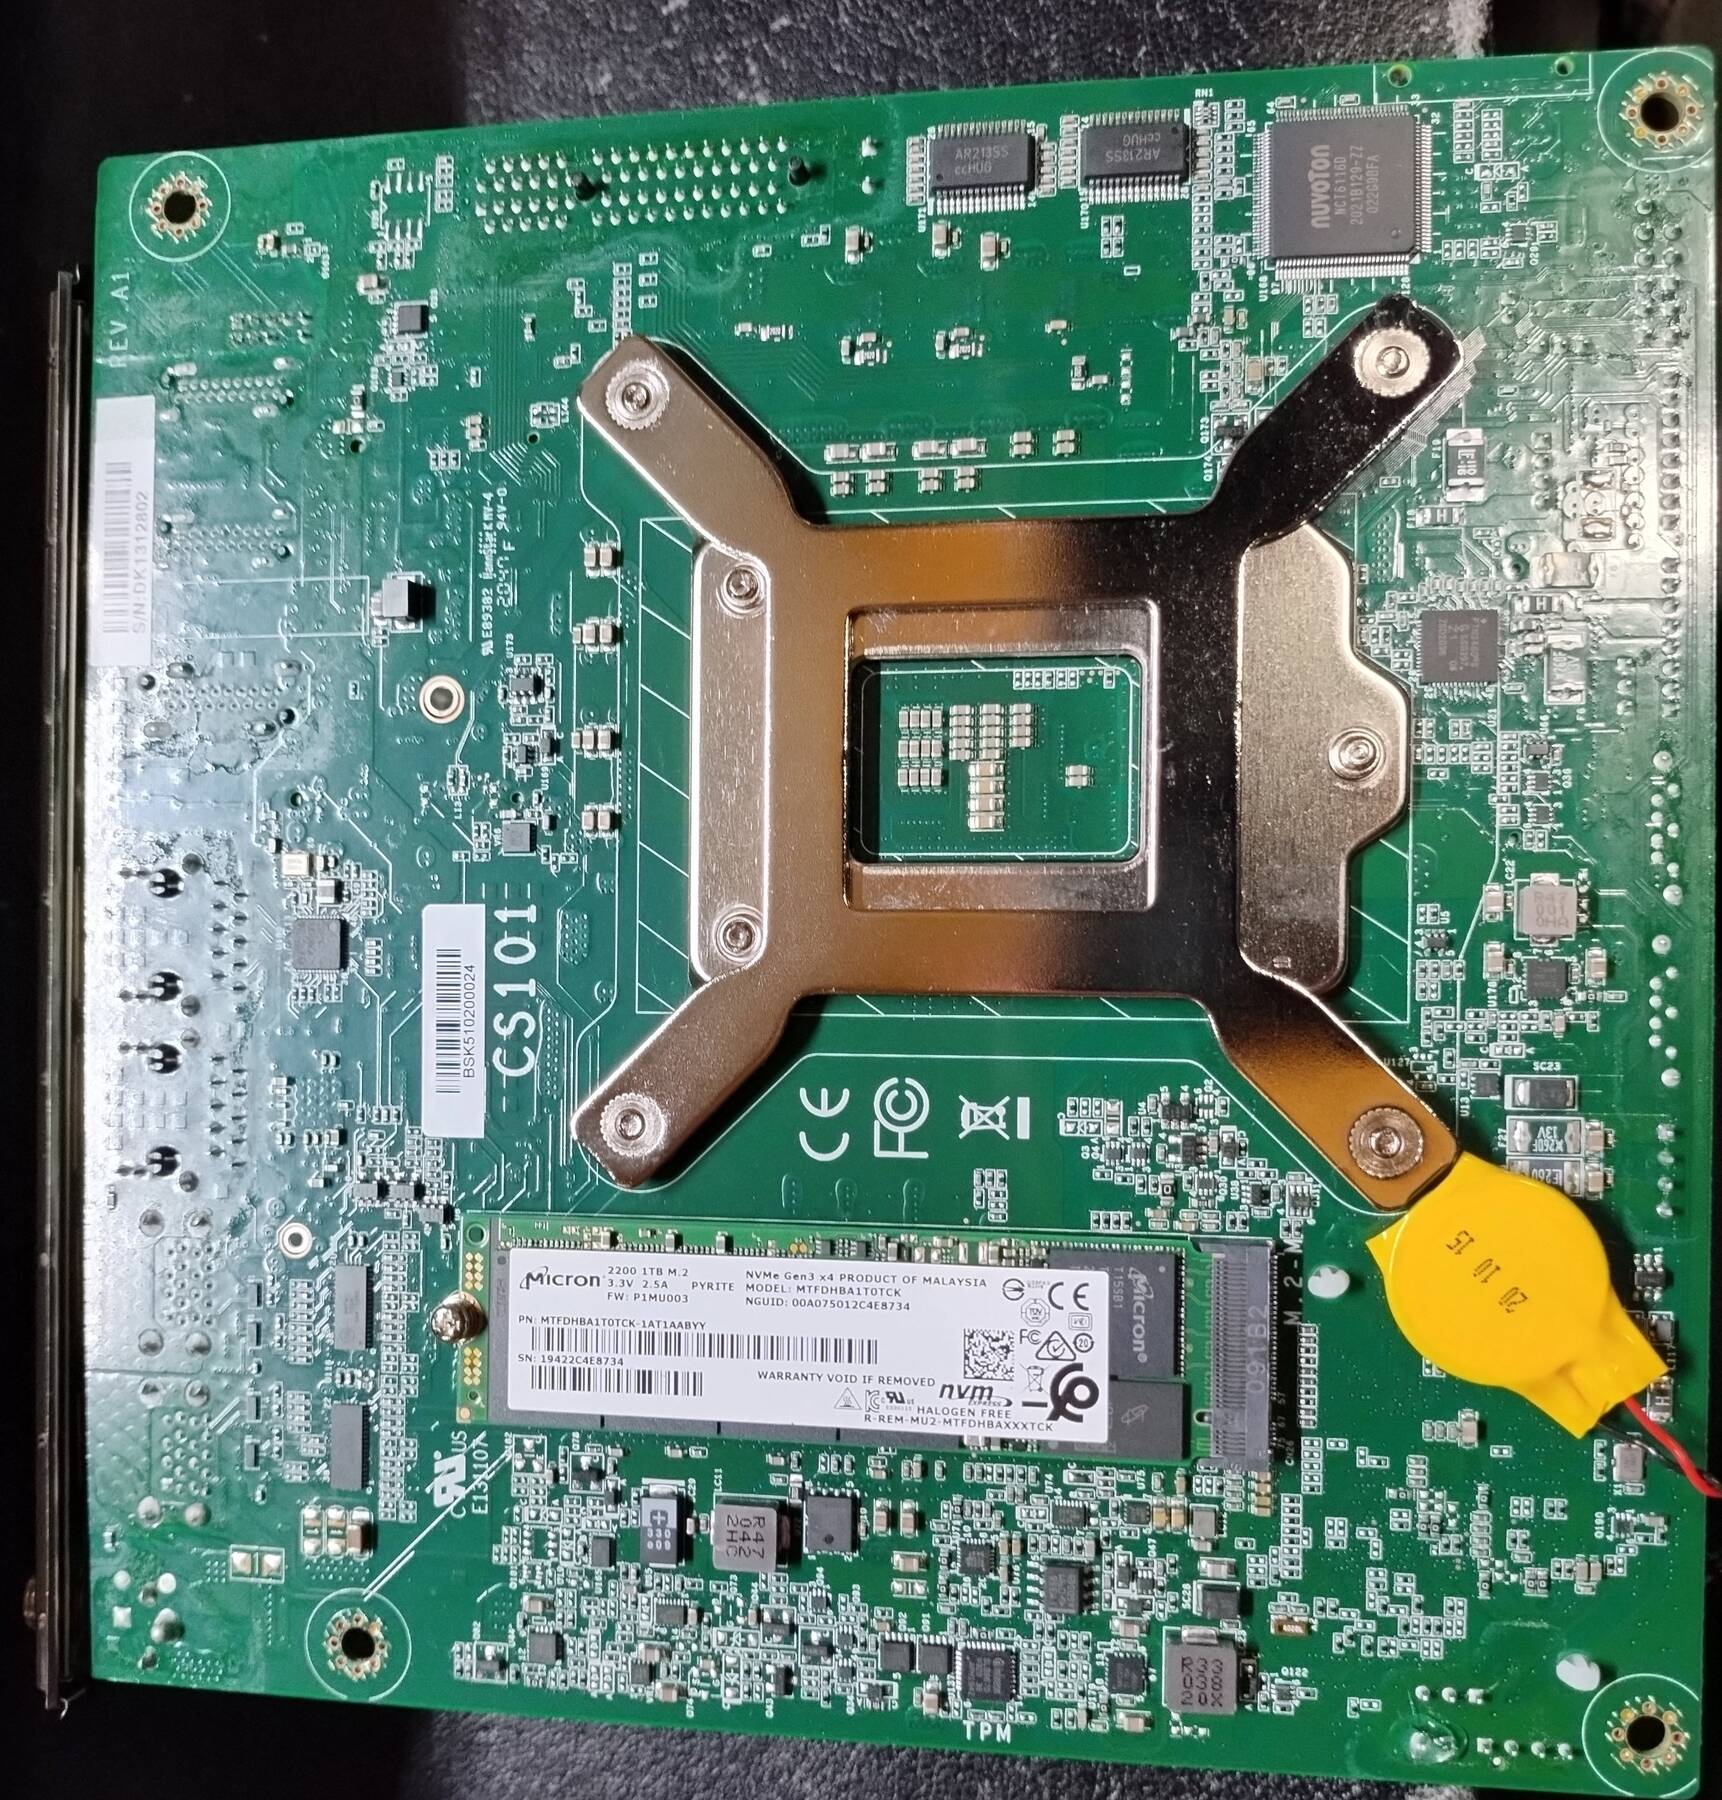
I got the machine and opened it up. It had a 1TB 2.5" drive. I thought this was the Windows drive so I pulled it, but Windows kept booting. I looked around, but none of the M.2, Mini PCIe, or PCIe slots were occupied. Pulling the board I found another M.2 slot on the bottom populated with a 1TB NVMe SSD. It's a bit older so the write speed isn't all that, but 2.5 GB/s reads, and 570 MB/s writes is pretty good.
I didn't know what drives there were going in, but after finding these two I feel pretty good about how much I paid.
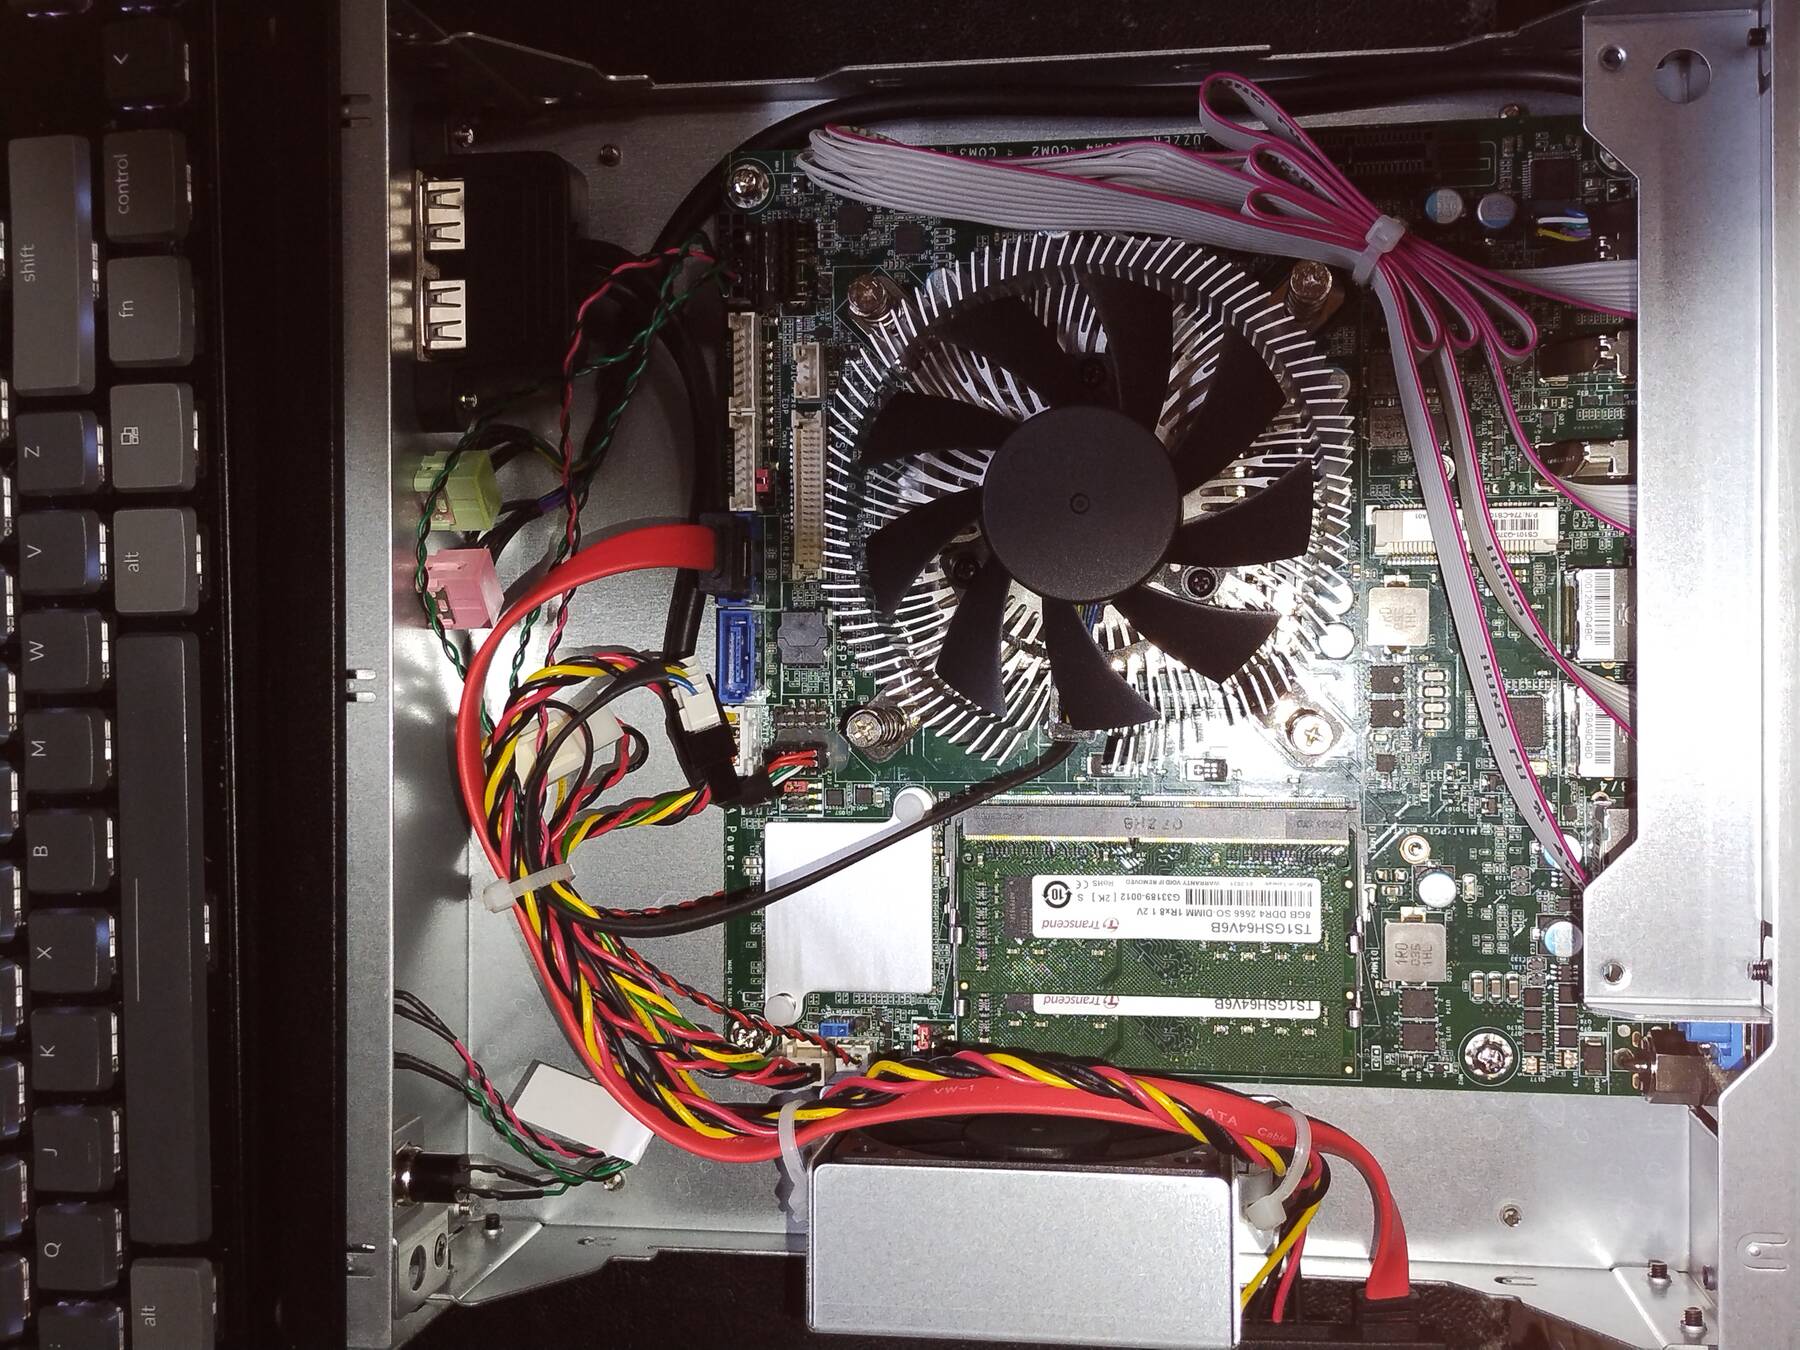
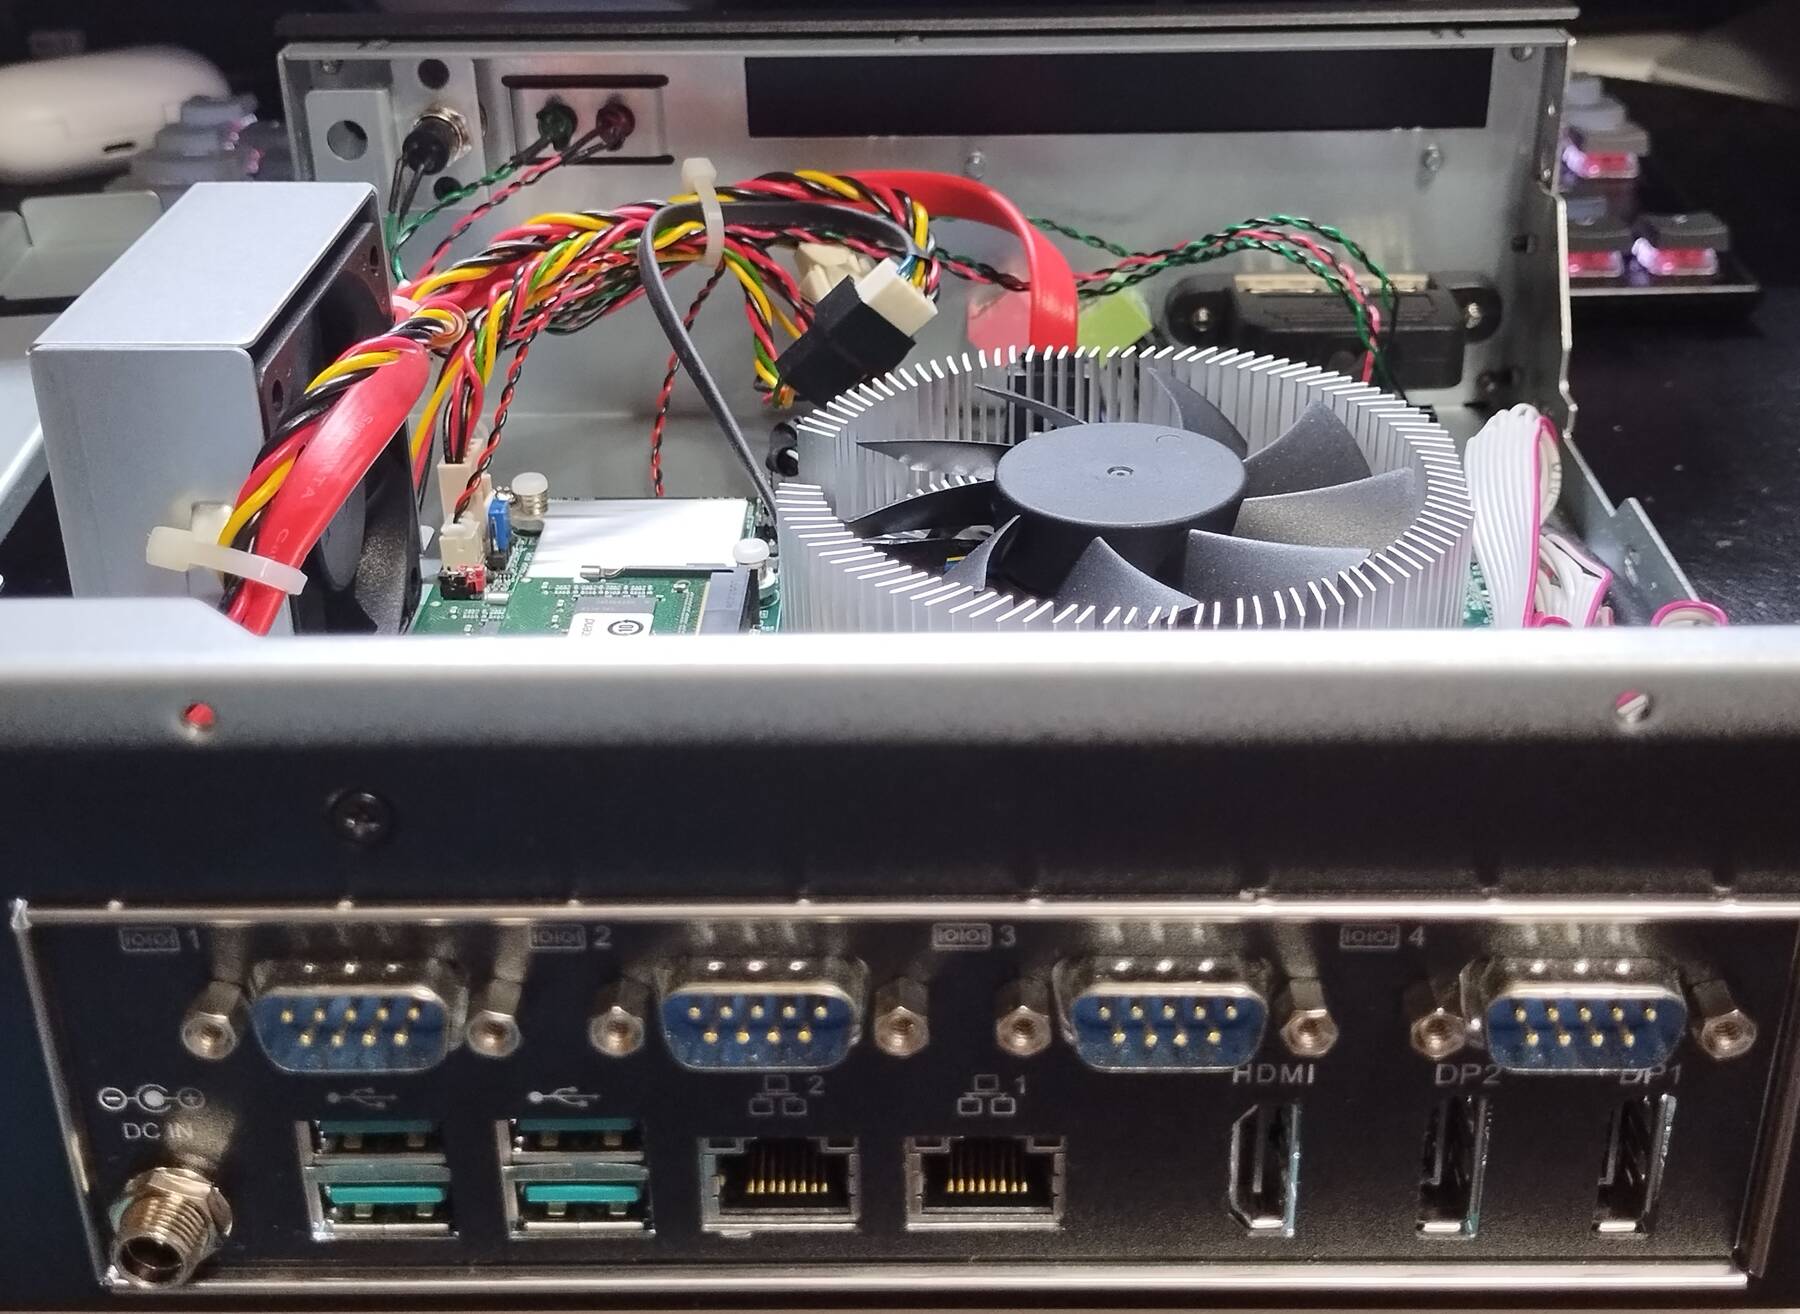
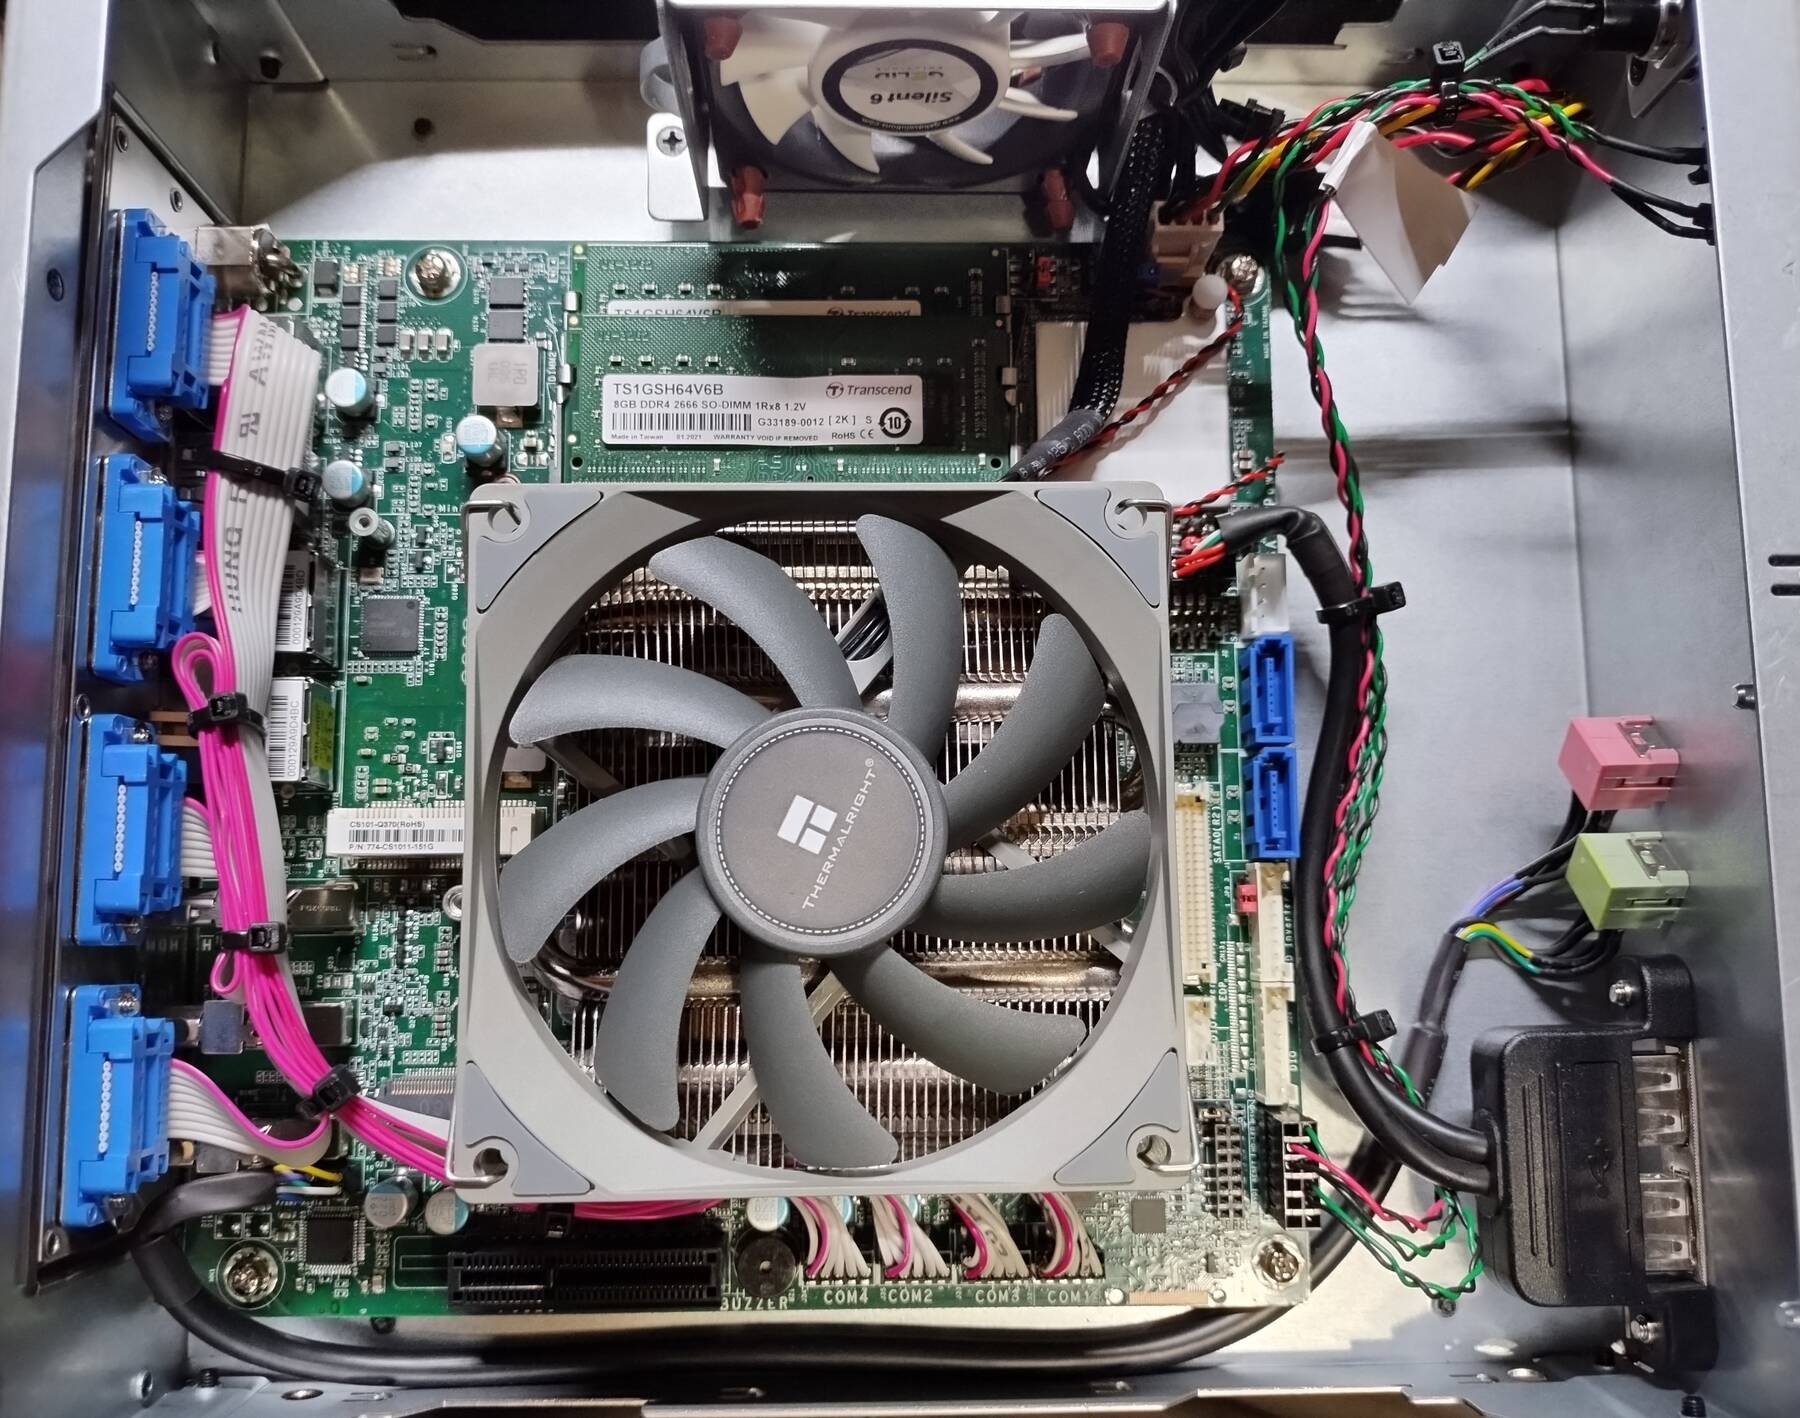
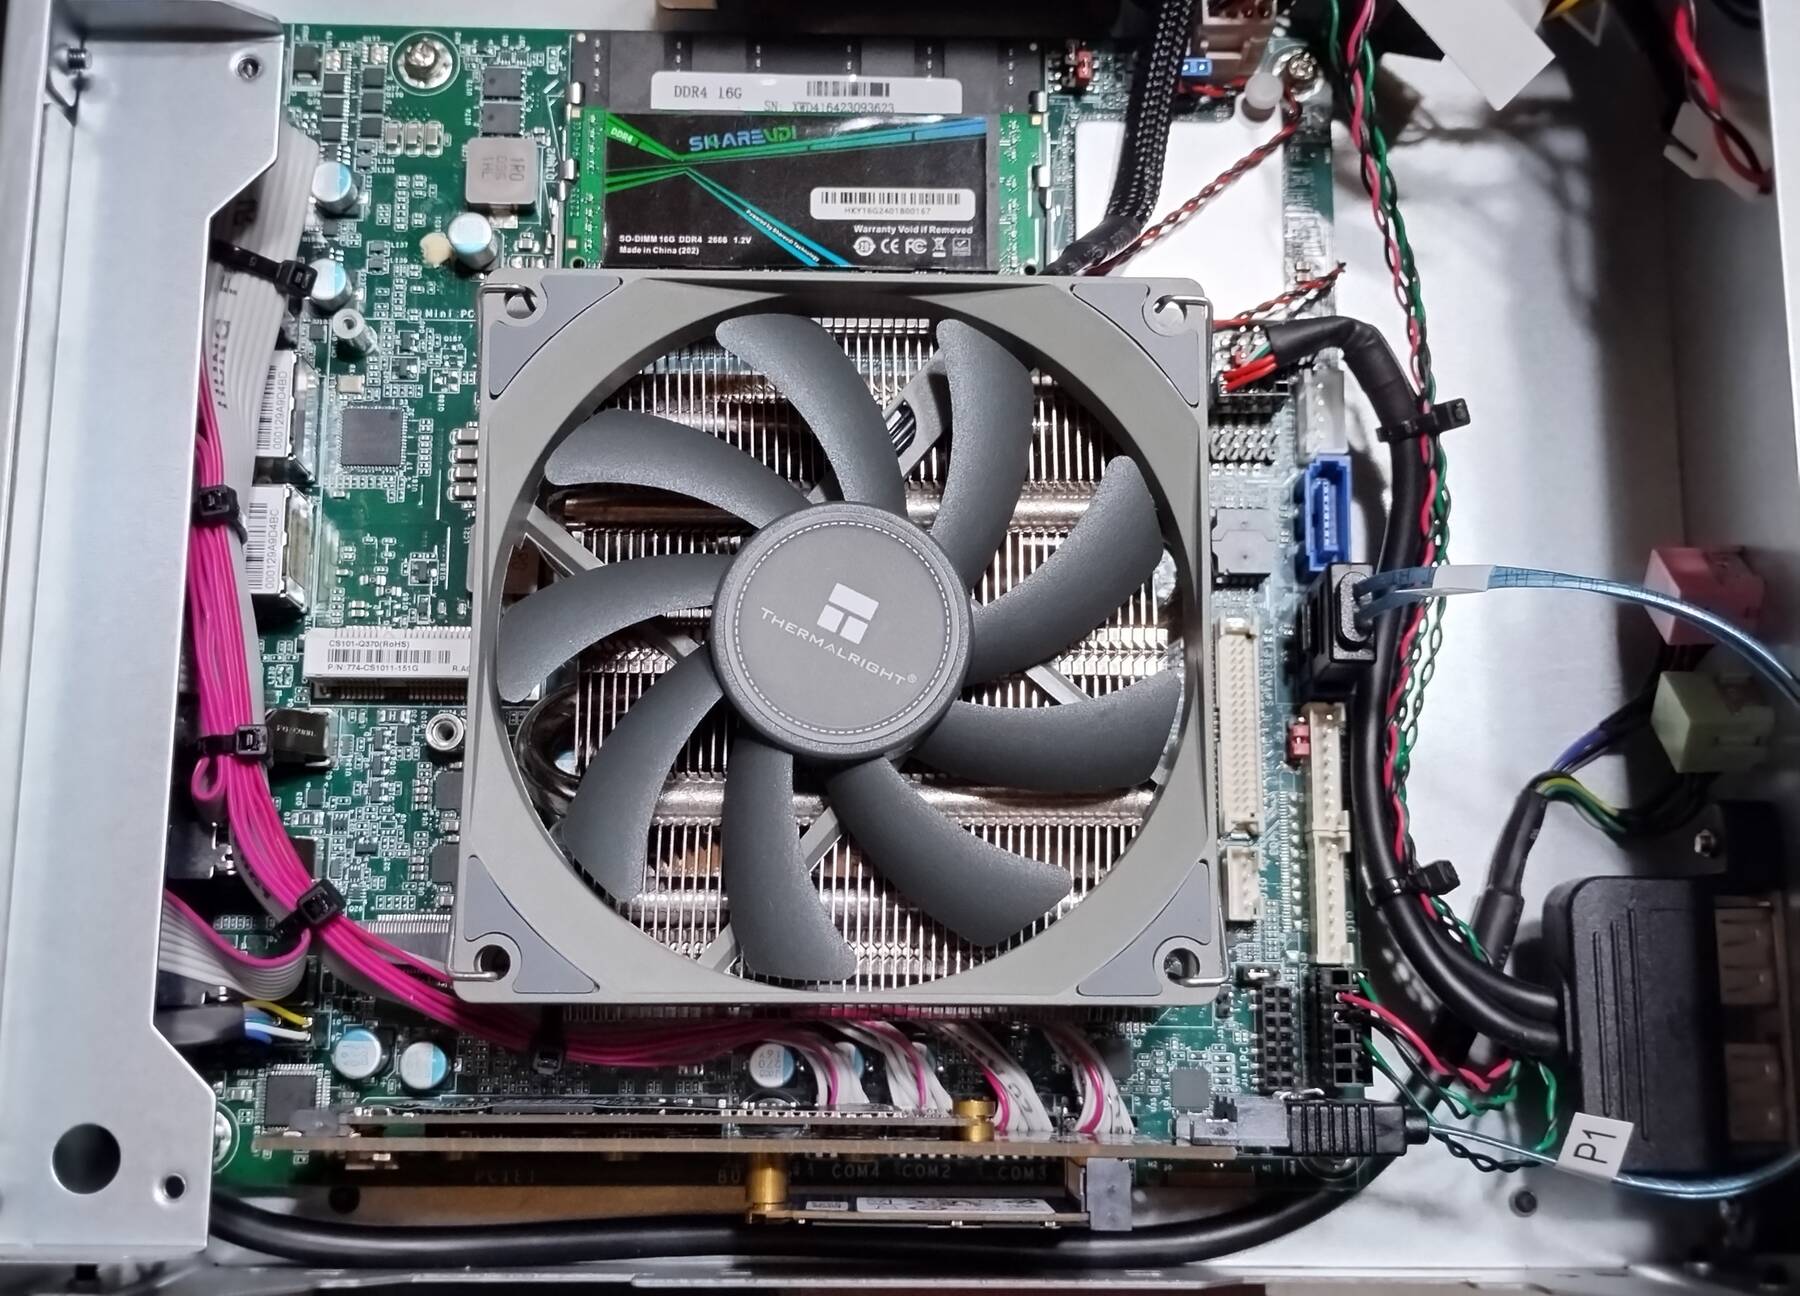
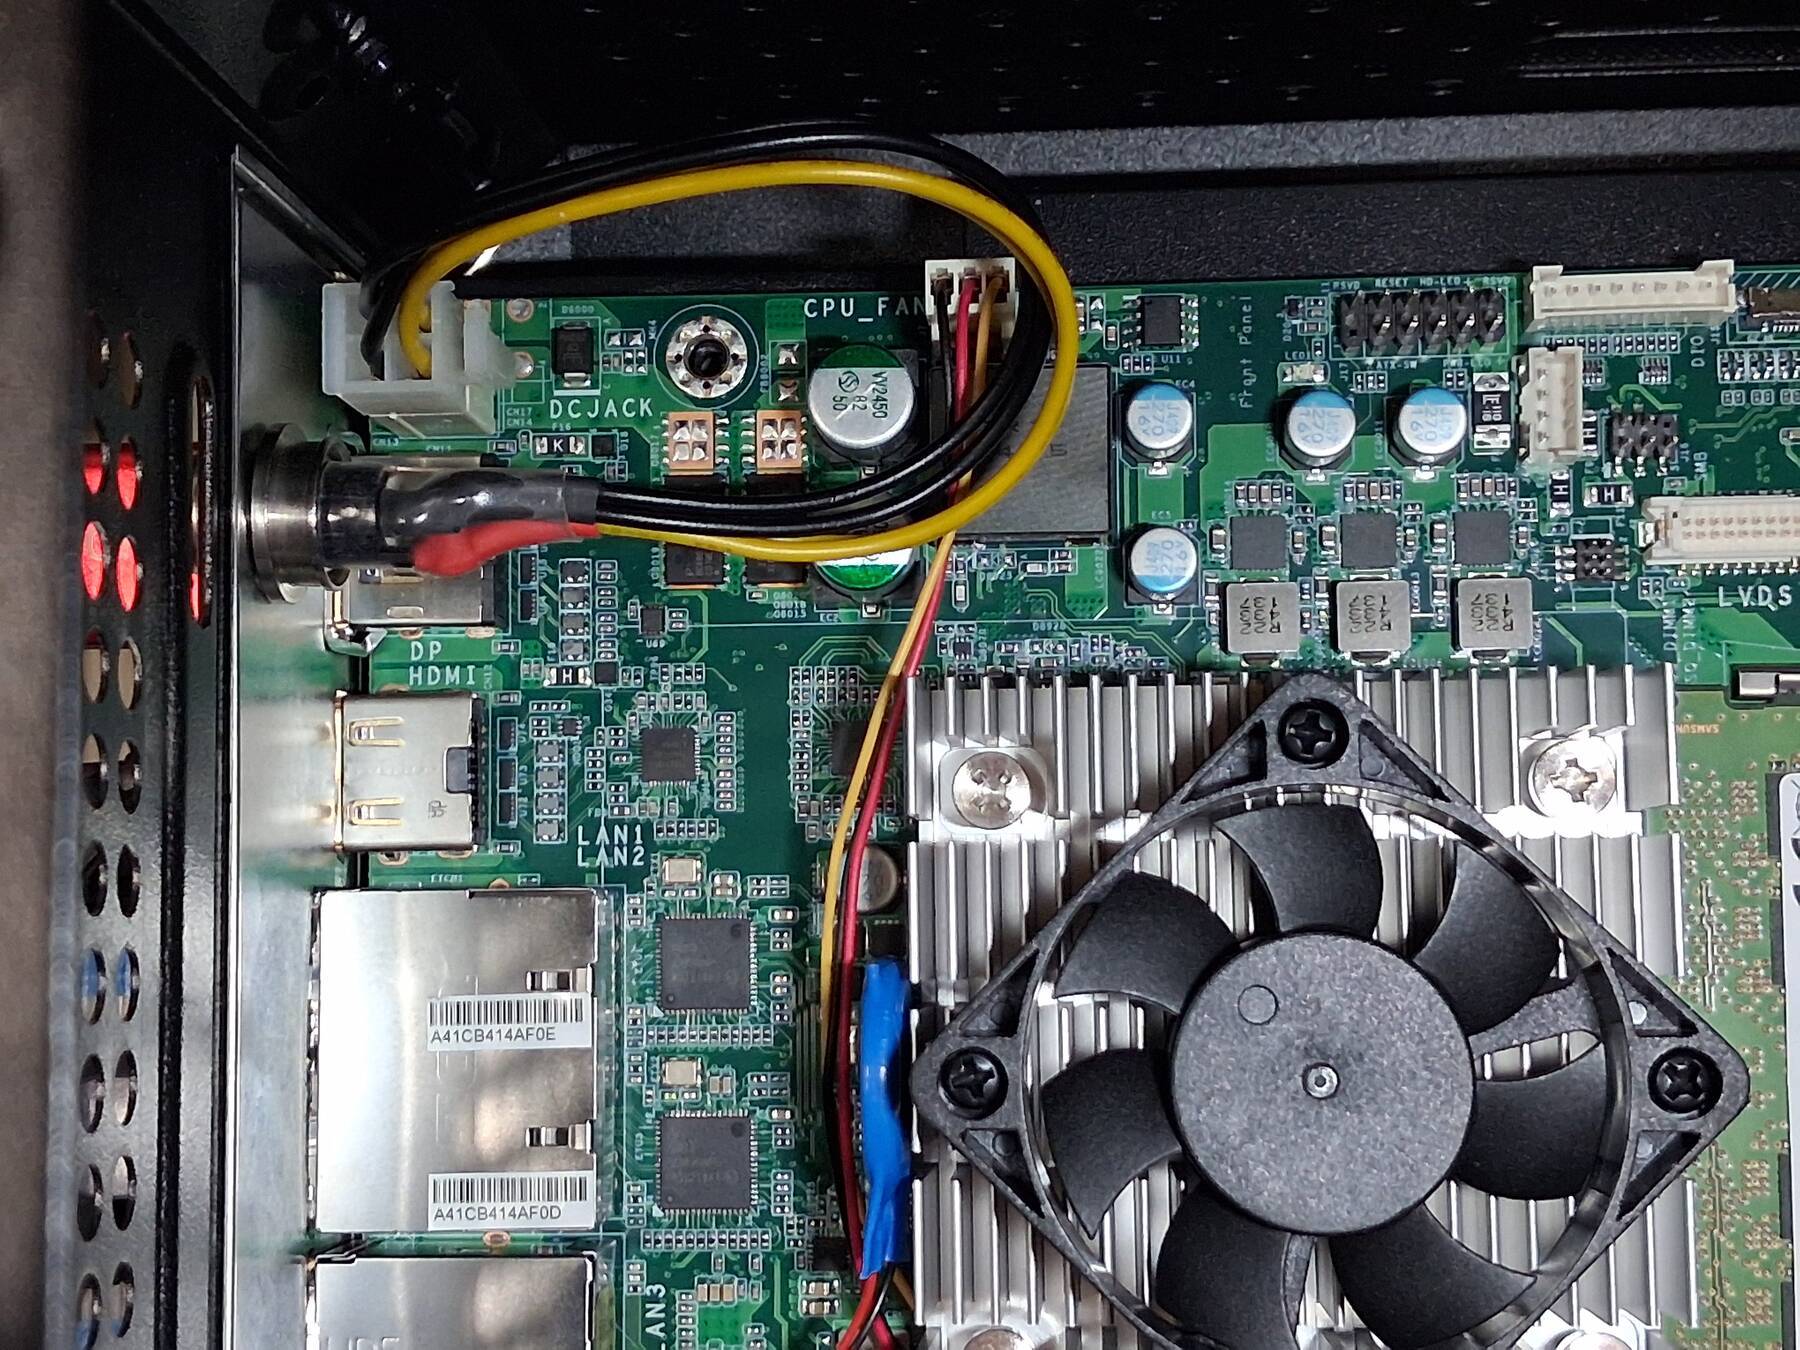
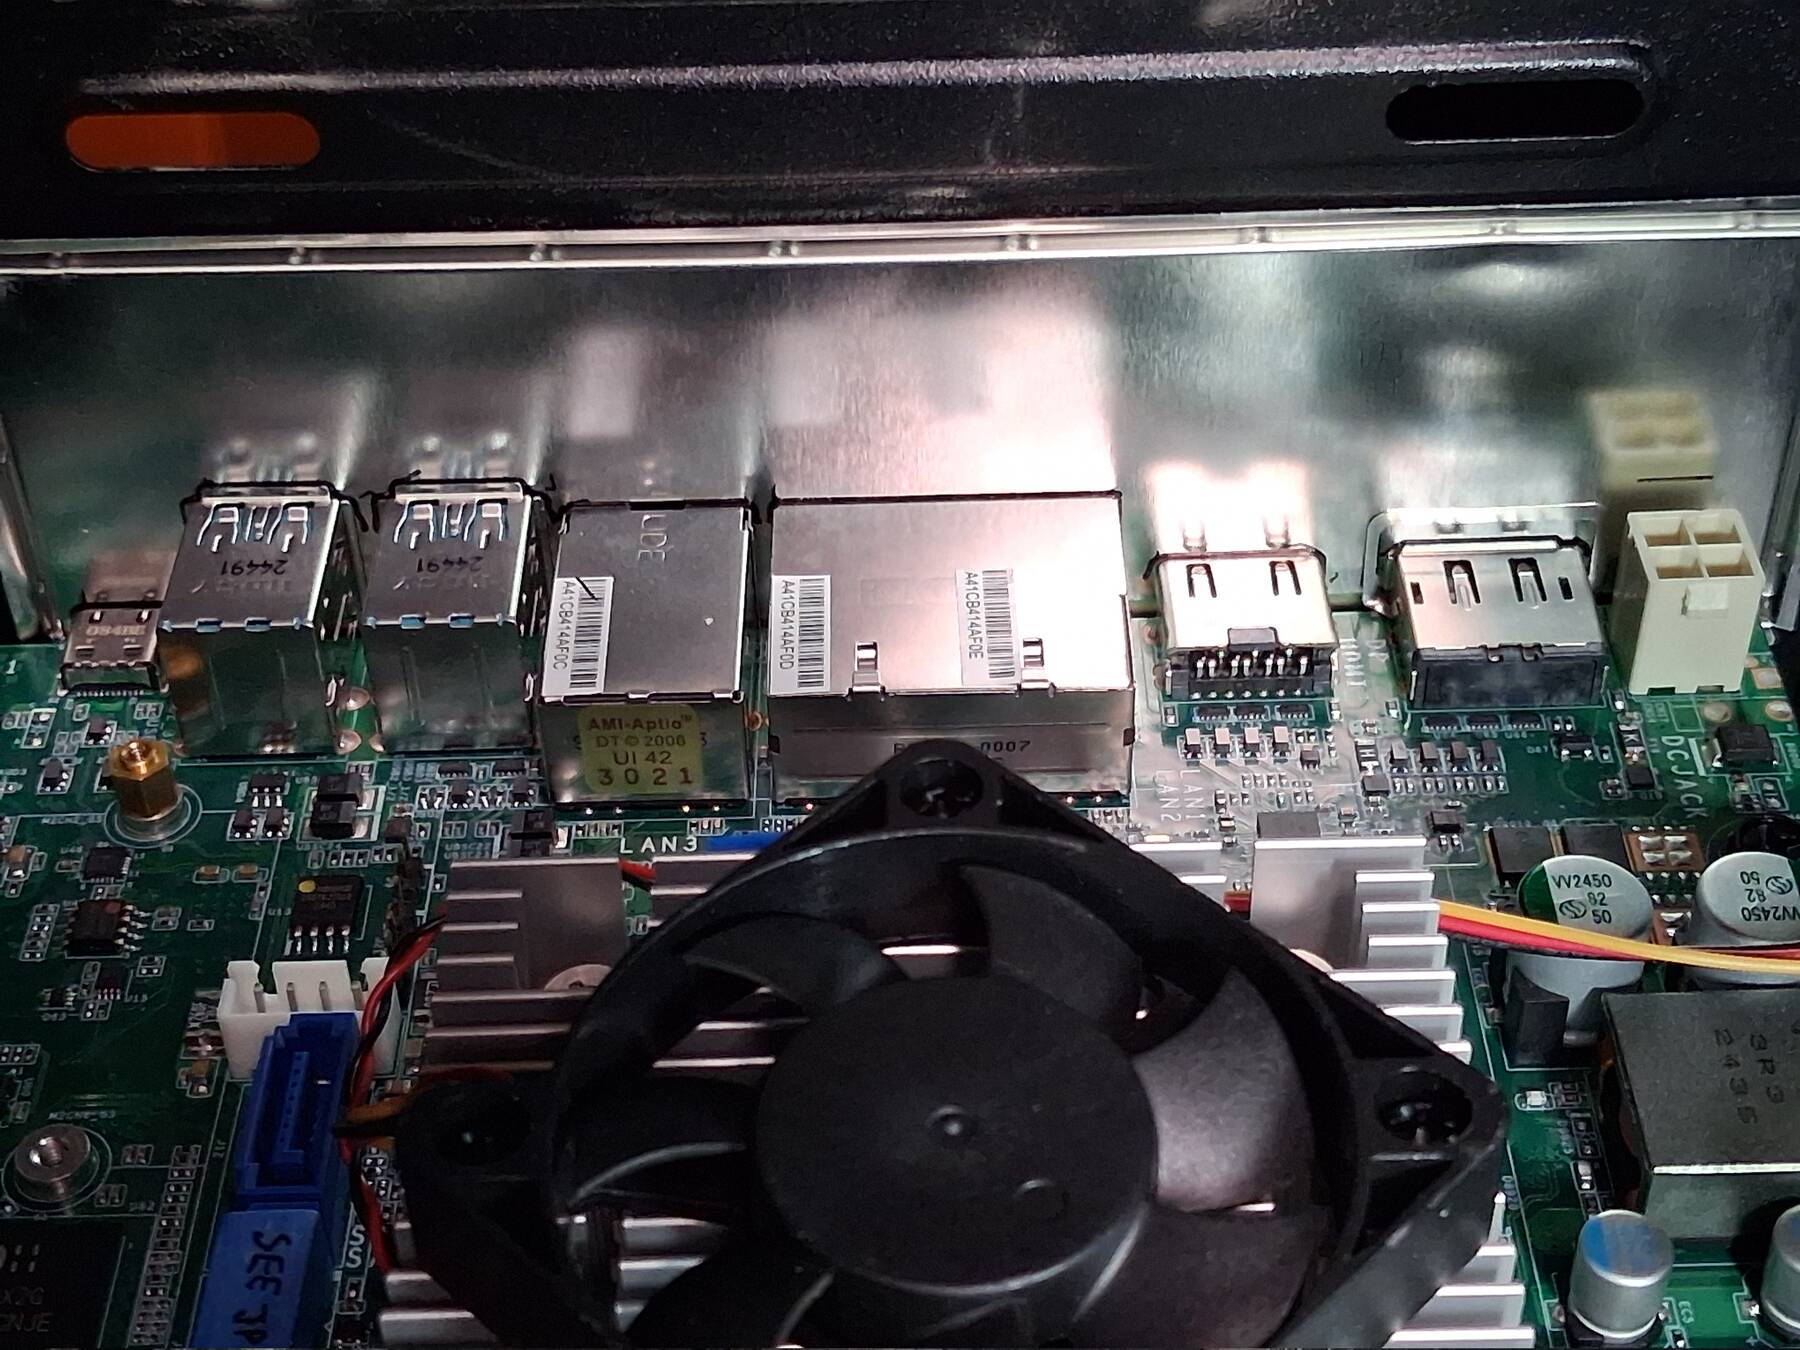
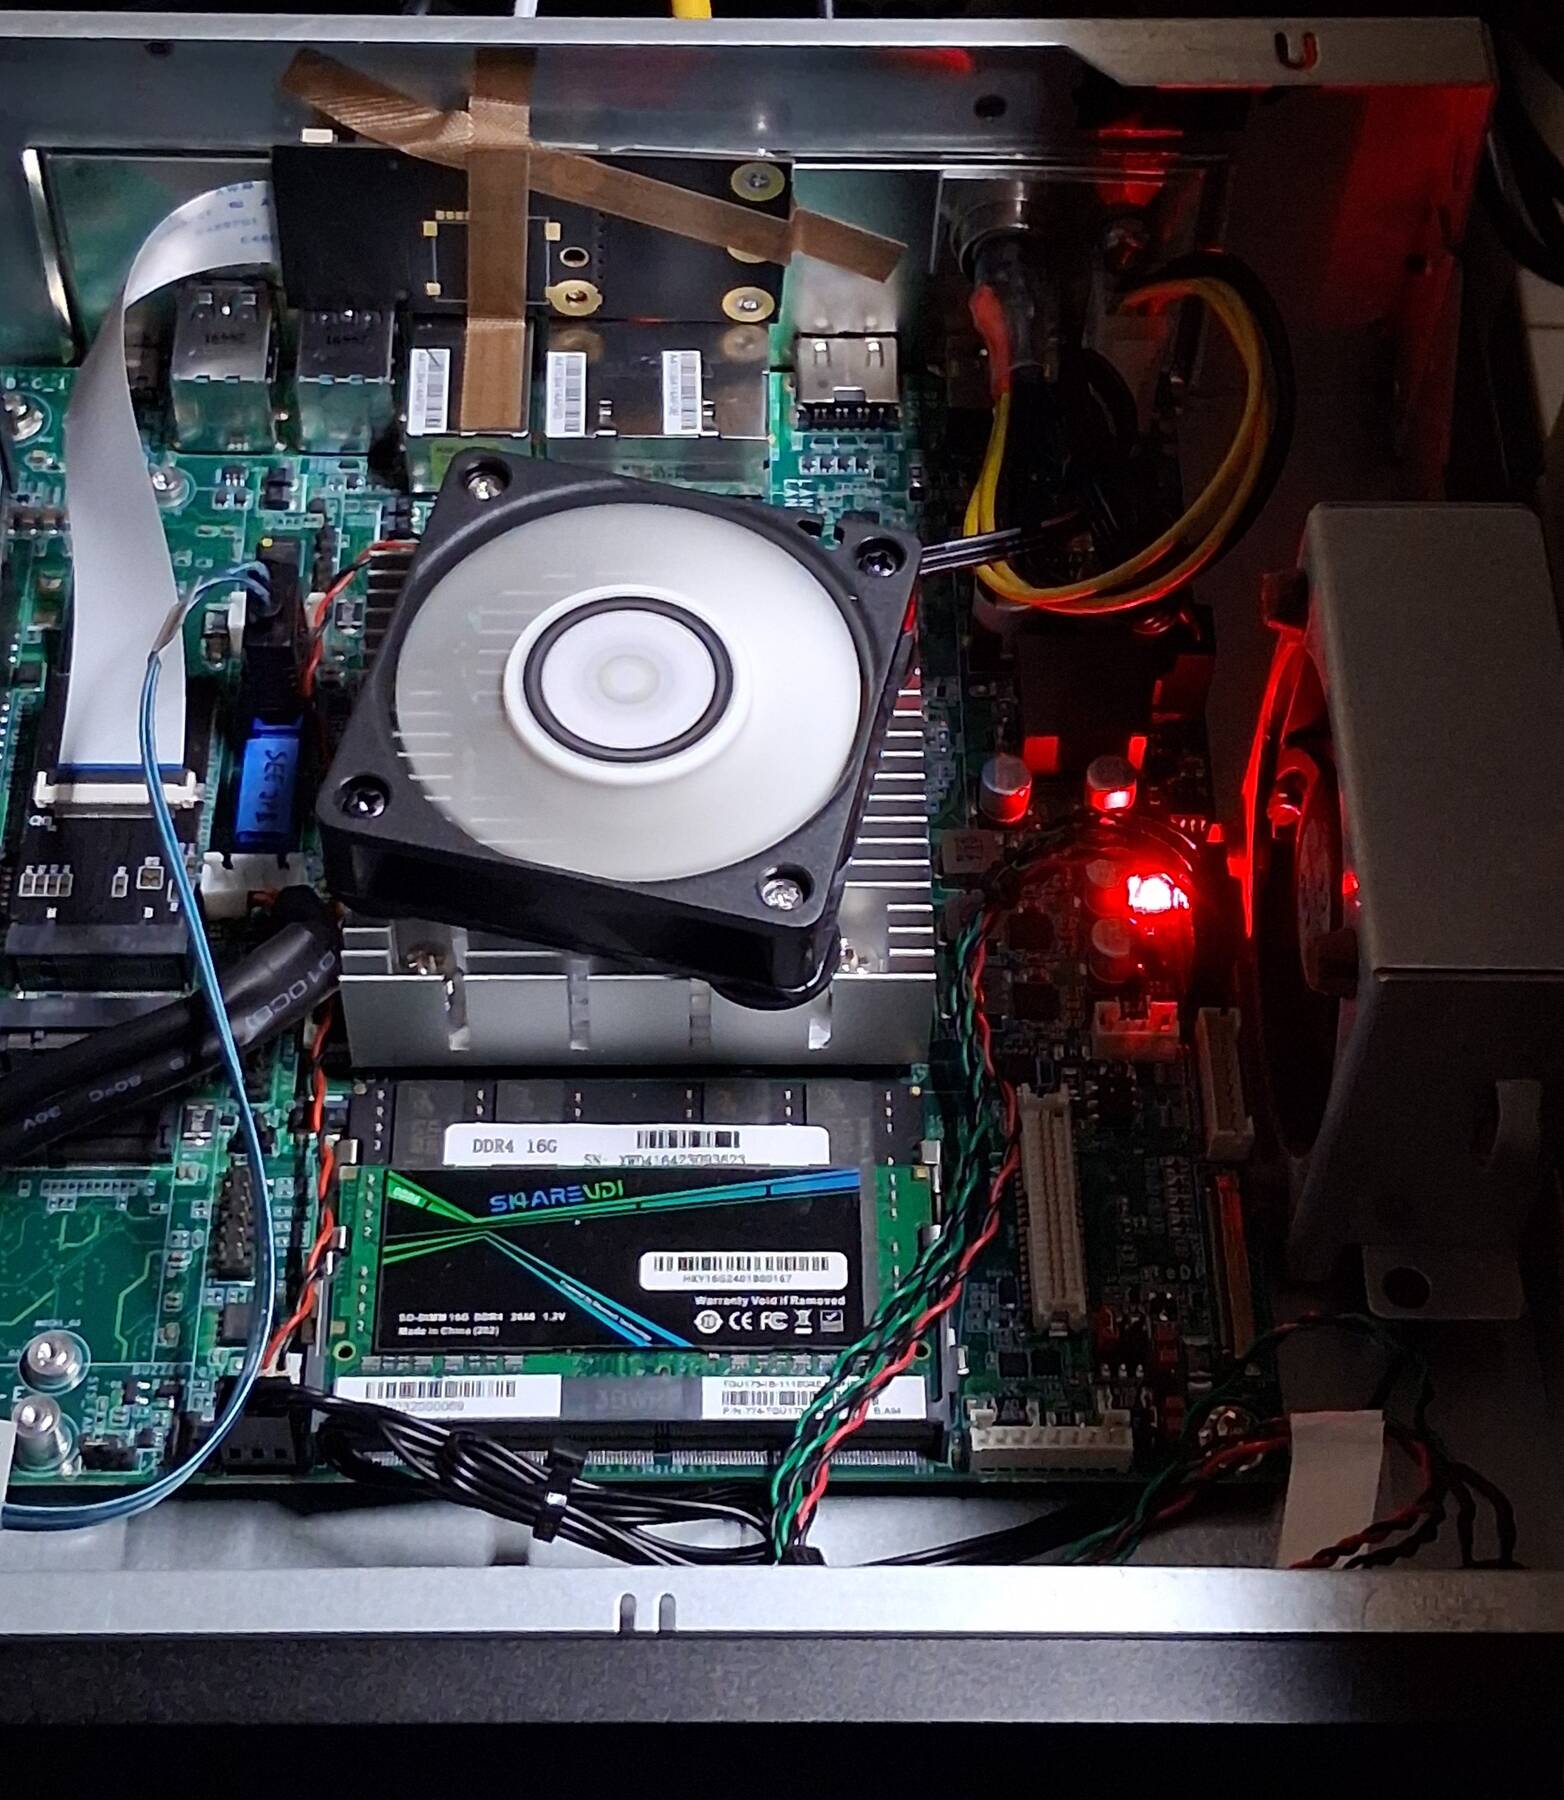
Not so quiet, Case mod
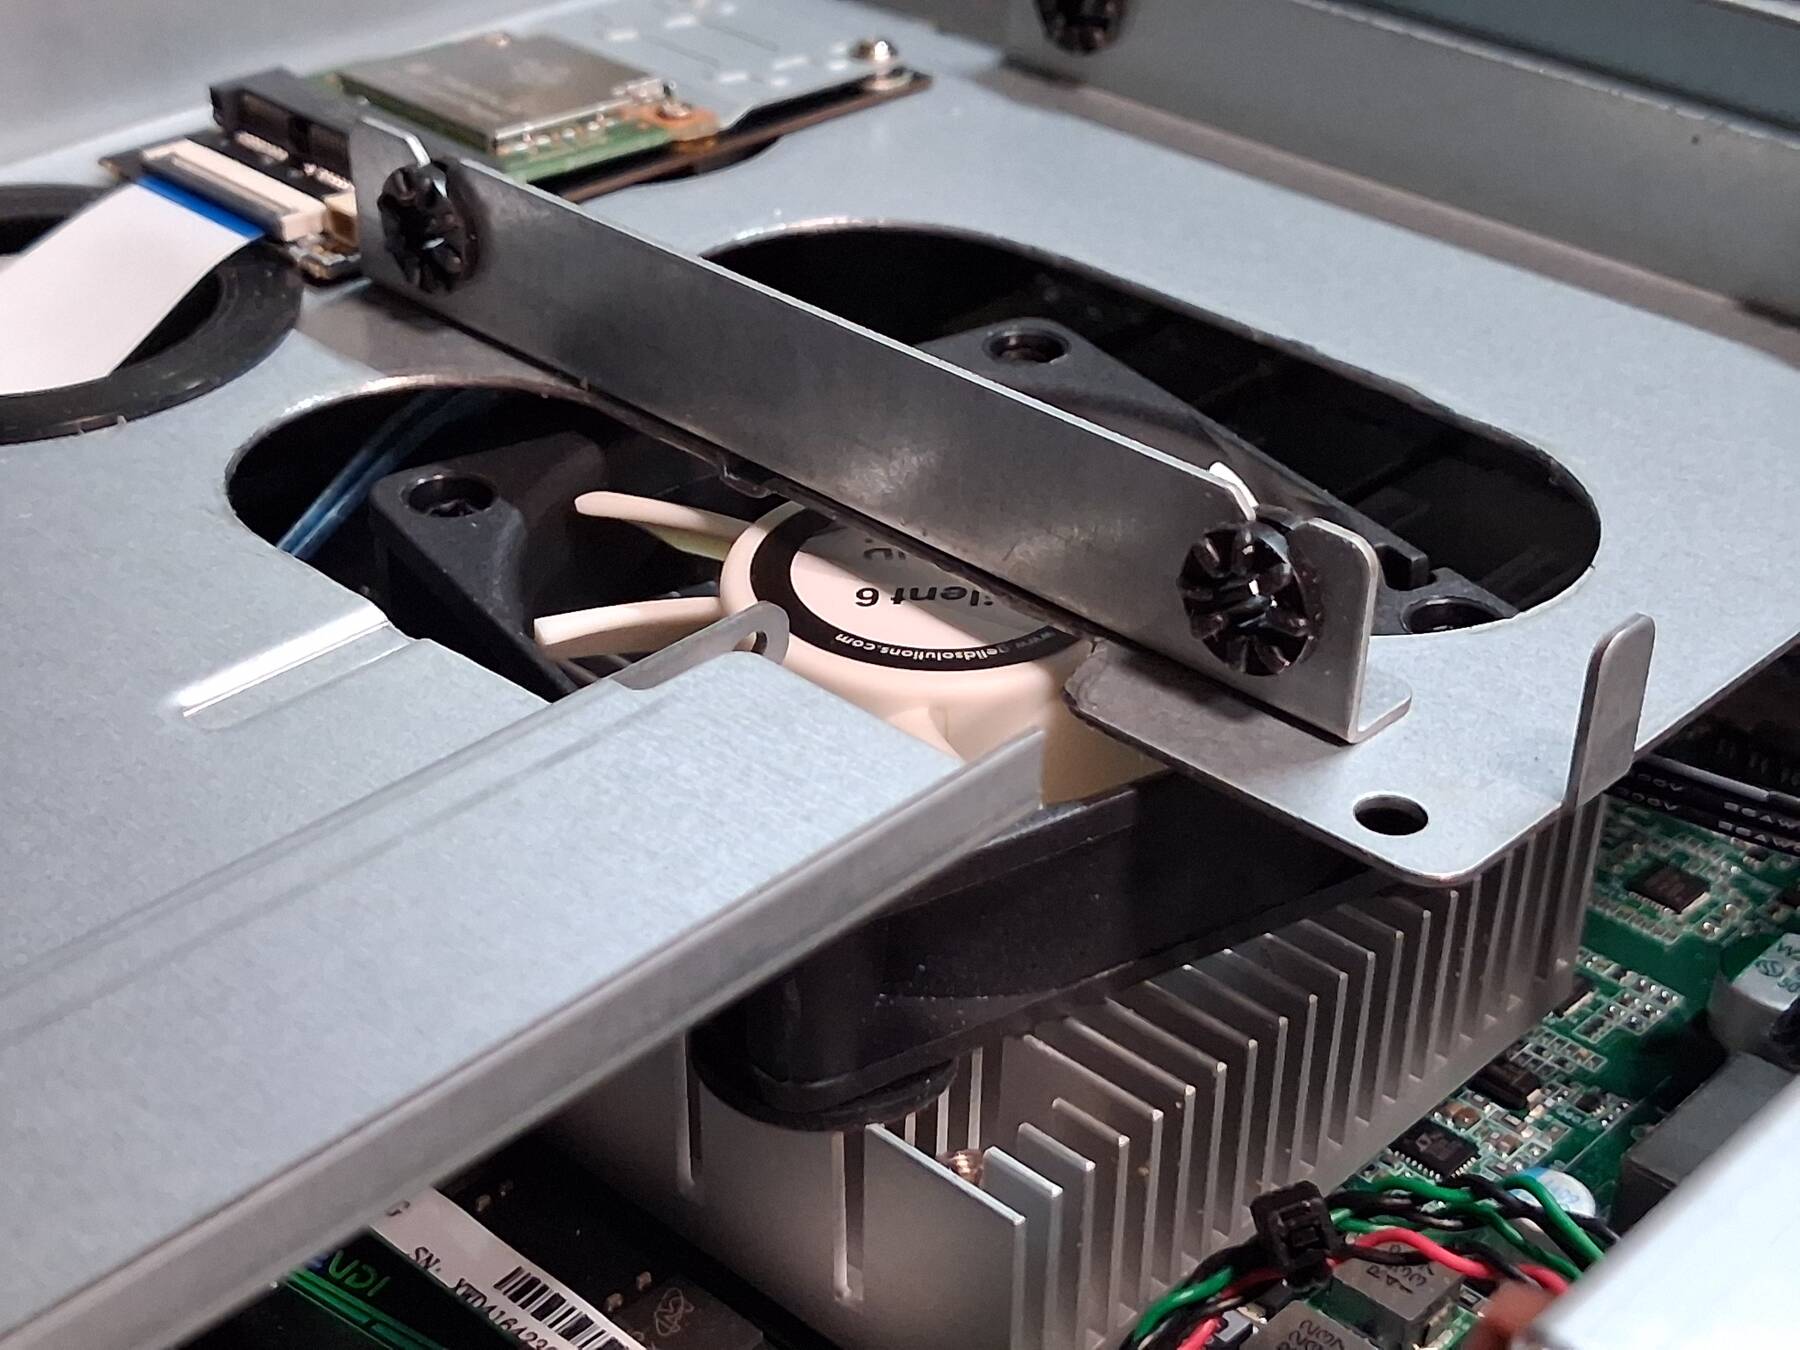
It turned out to be pretty loud. Due to the fan configuration only the CPU fan could be controlled. I happened to have a spare Thermalright AXP90 X36 cooler which fit the 75x75mm mount of the LGA 1151 socket. I installed it, but due to component locations I had to flip the mounting bracket. With the mounting bracket flipped it no longer fit behind the motherboard. So I modded the case.
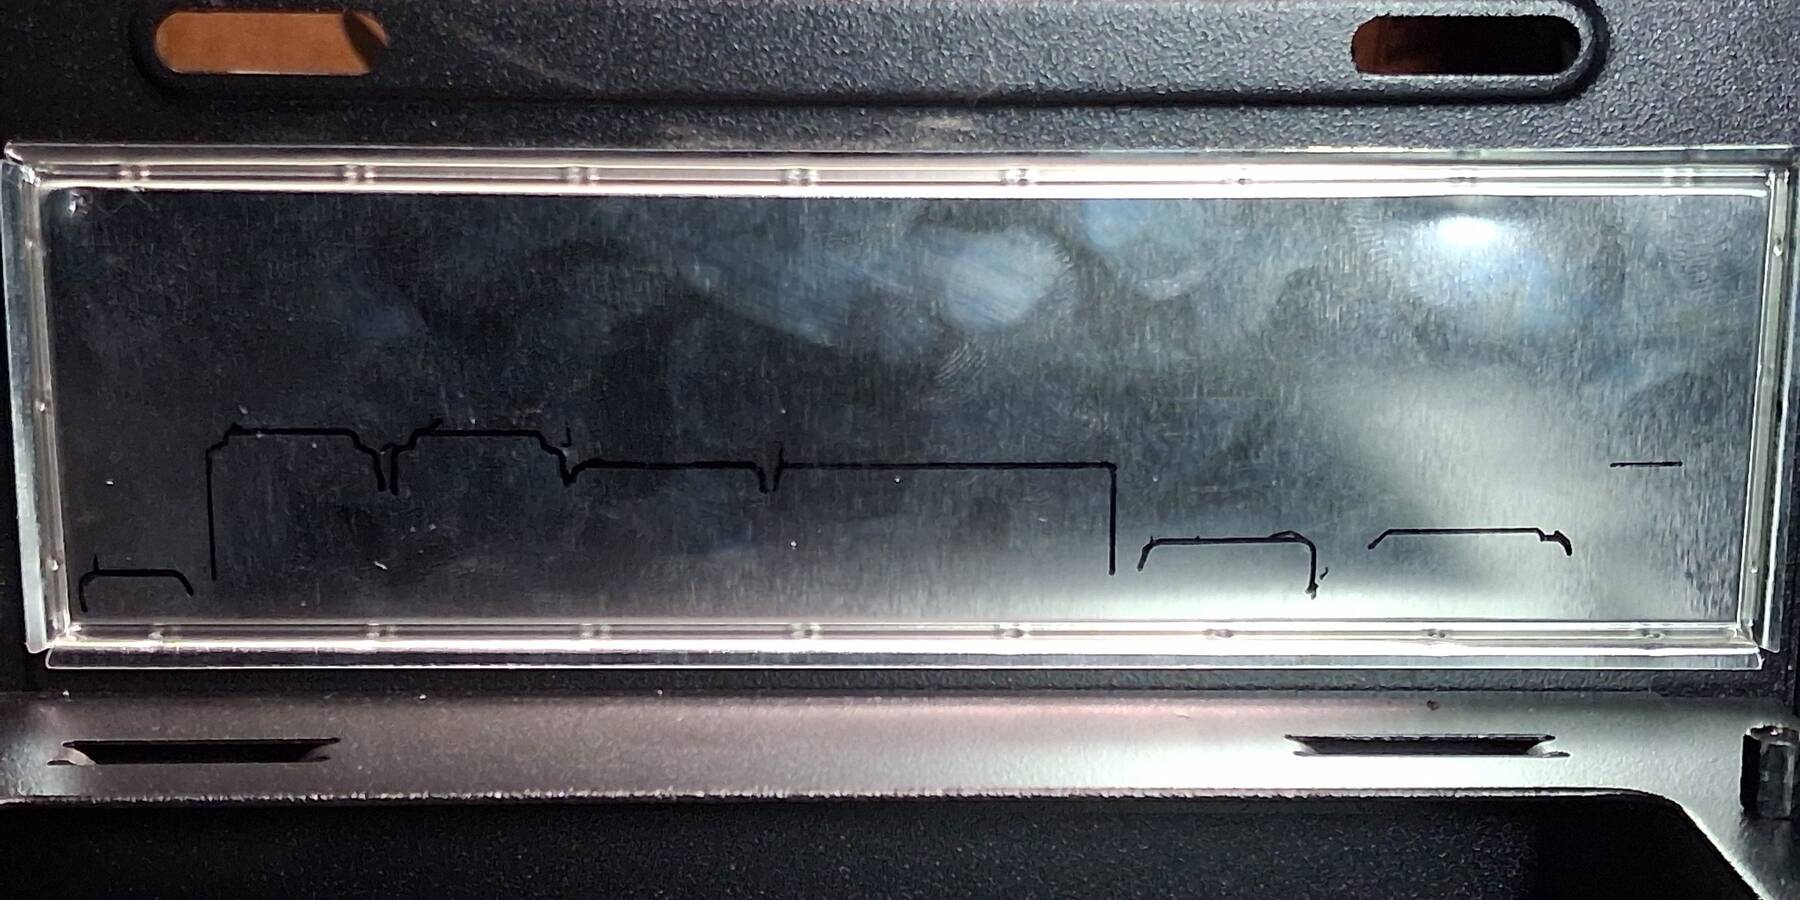
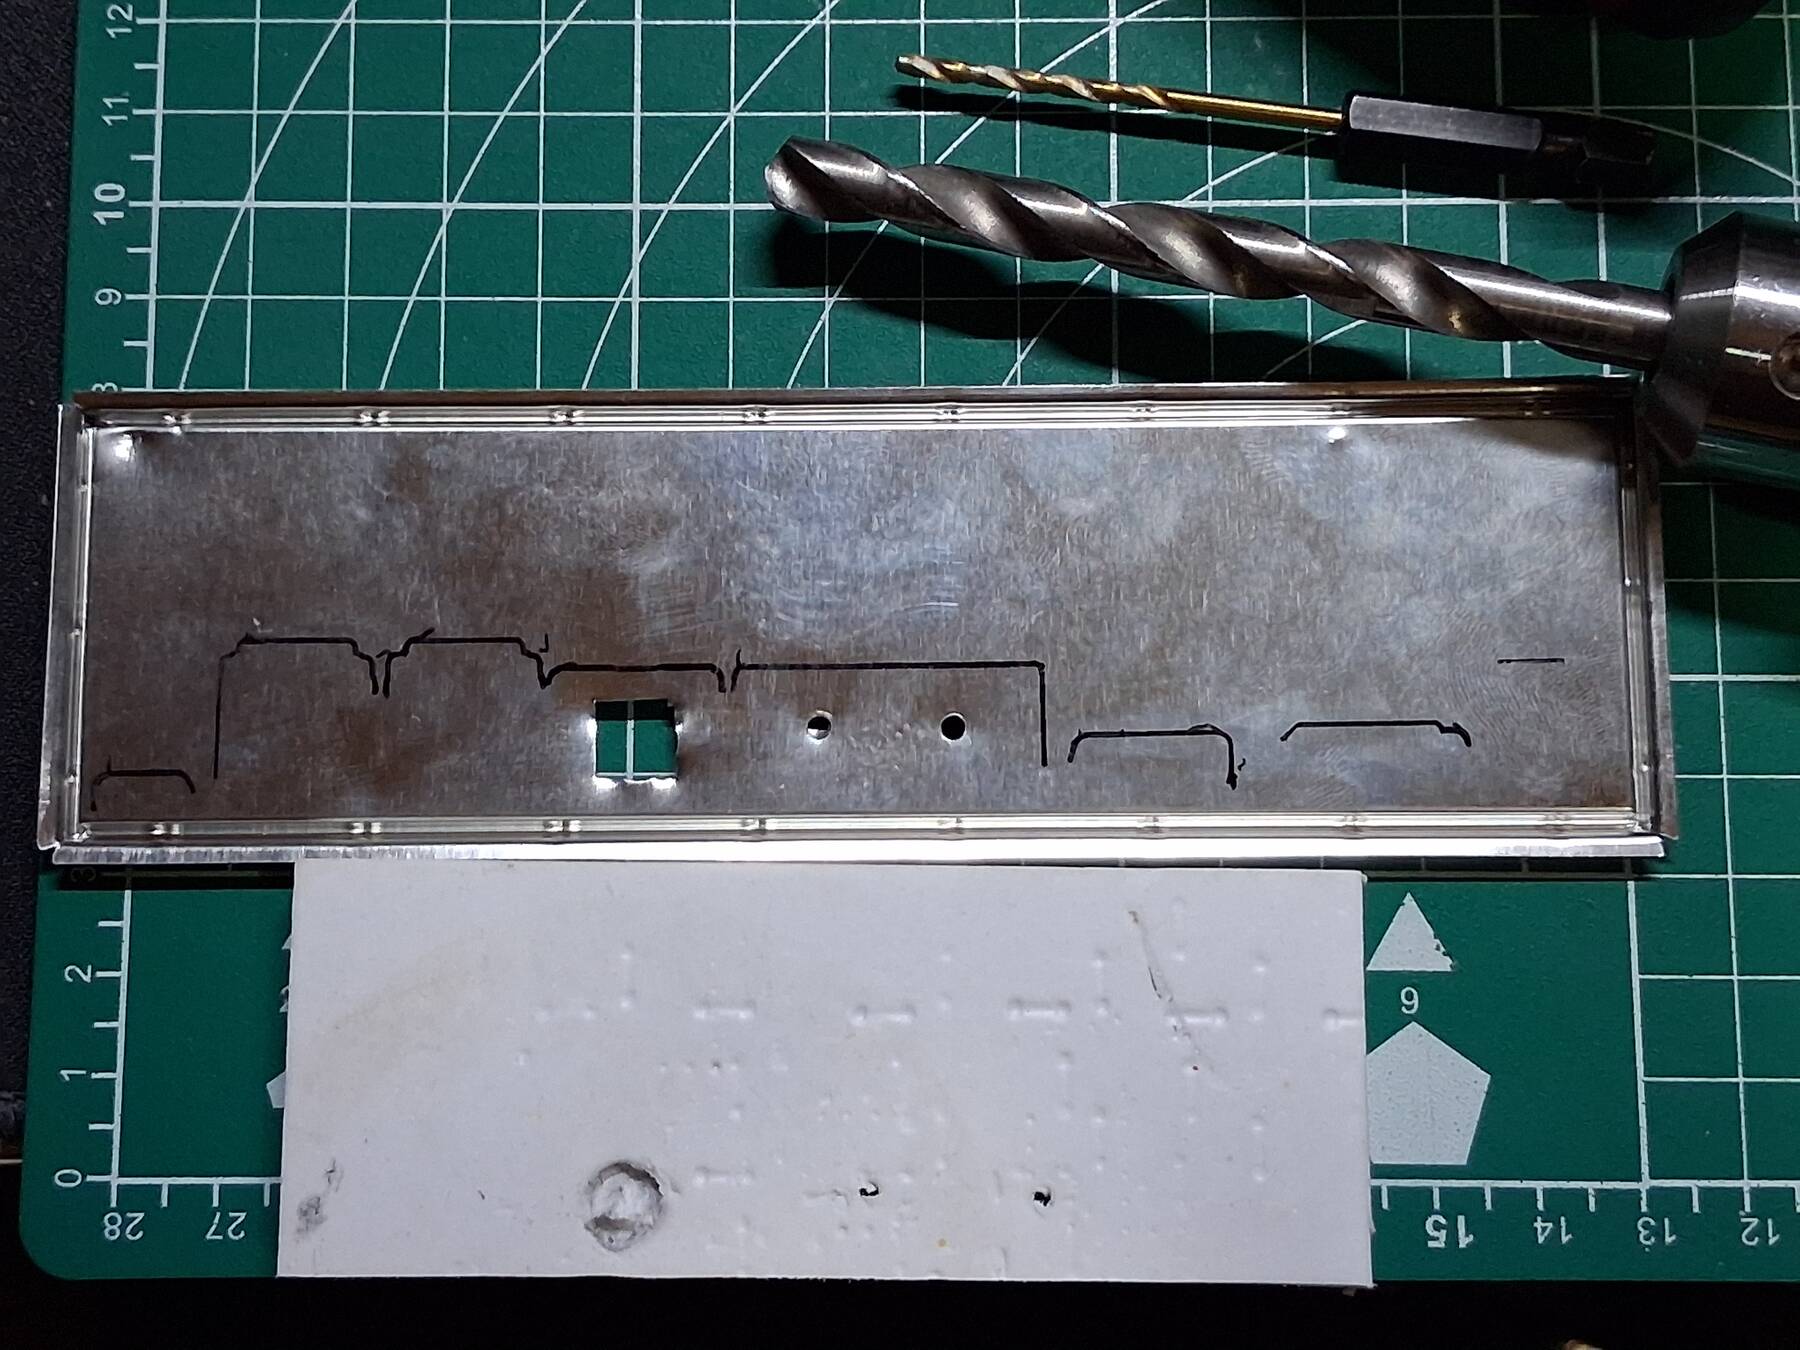
The new heatsink is more massive, but the fan is very close to the drive mounting plate. I'm probably going to remove the plate, but I sketched out a some possible holes I could cut to let air flow. The new cooler weighs 258g, while the old one was 164g. It is also a bit heavier because the larger fan which also has a plastic frame.
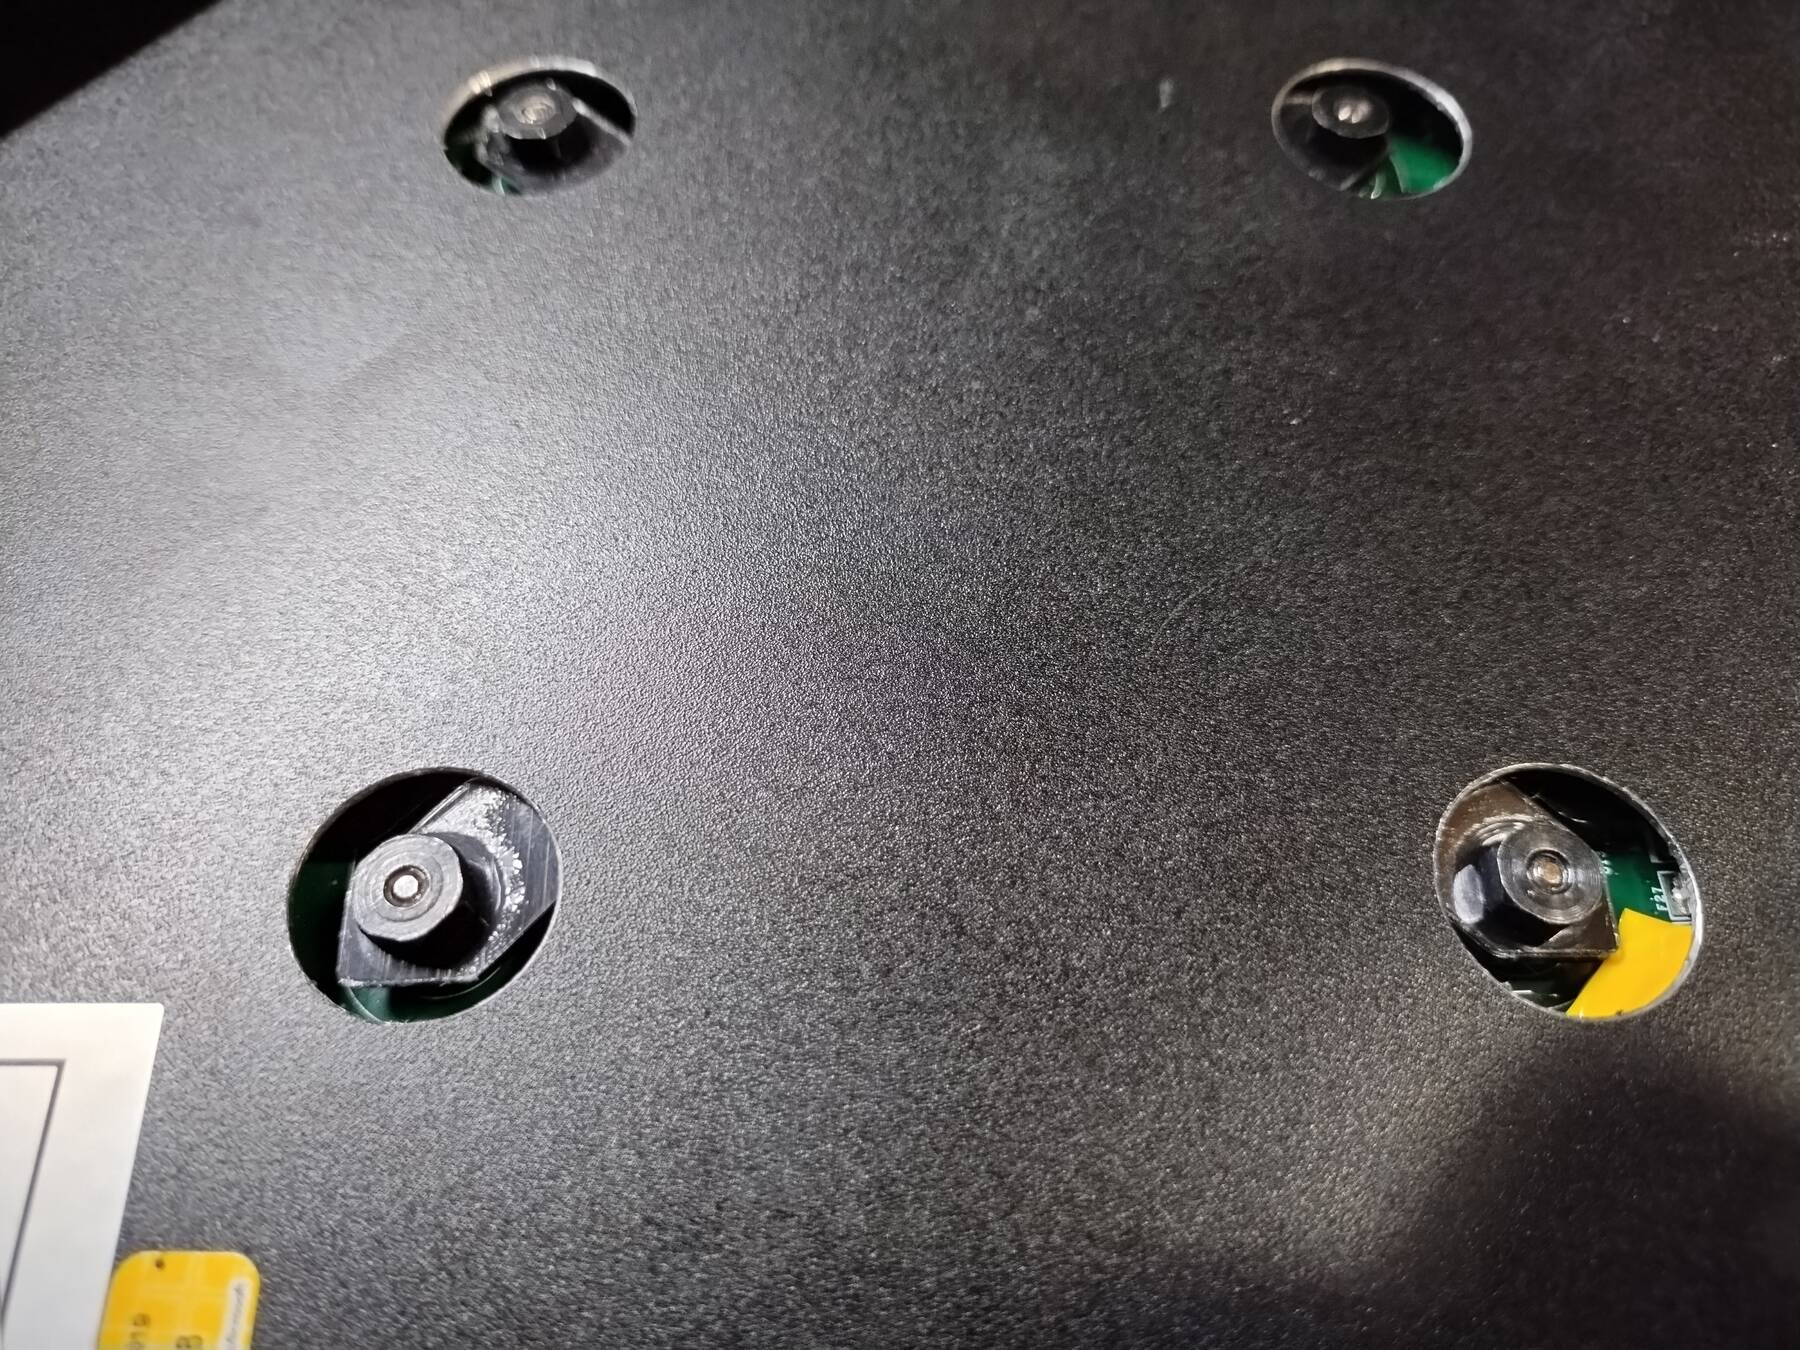
It's not the prettiest, but I took two measurements for each heatsink nut from the motherboard stand-offs then located the new holes. I started with a step drilled hole, then sketched in the rest of the bracket and filed it out.
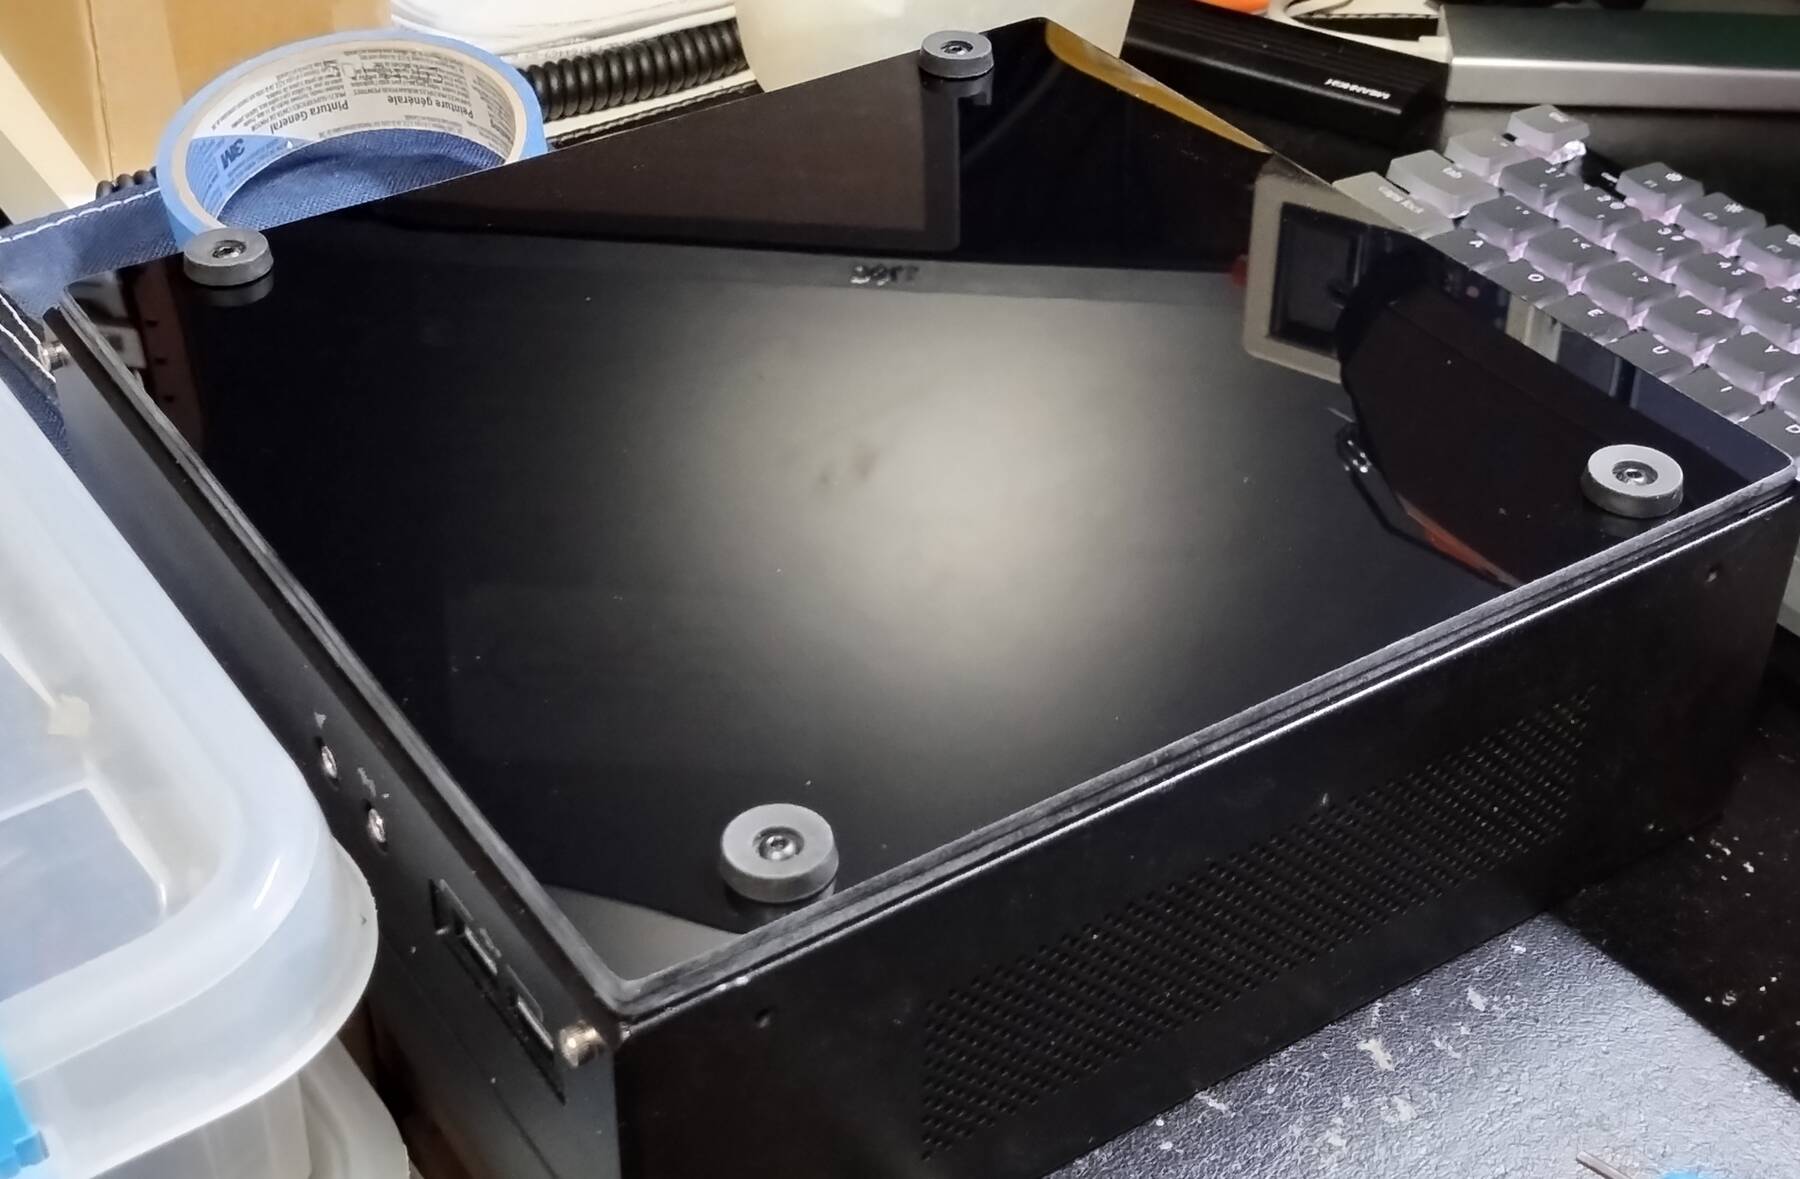
I had to trade the rubber feet out for slightly taller ones, but I have an idea for a slightly better solution. The current solution leaves exposed holes, and steel bits on the bottom that might scratch things. My plan is to get a piece of metal/wood/plastic, and mount it under the case with some little spacers, then attach the original rubber feet to that.
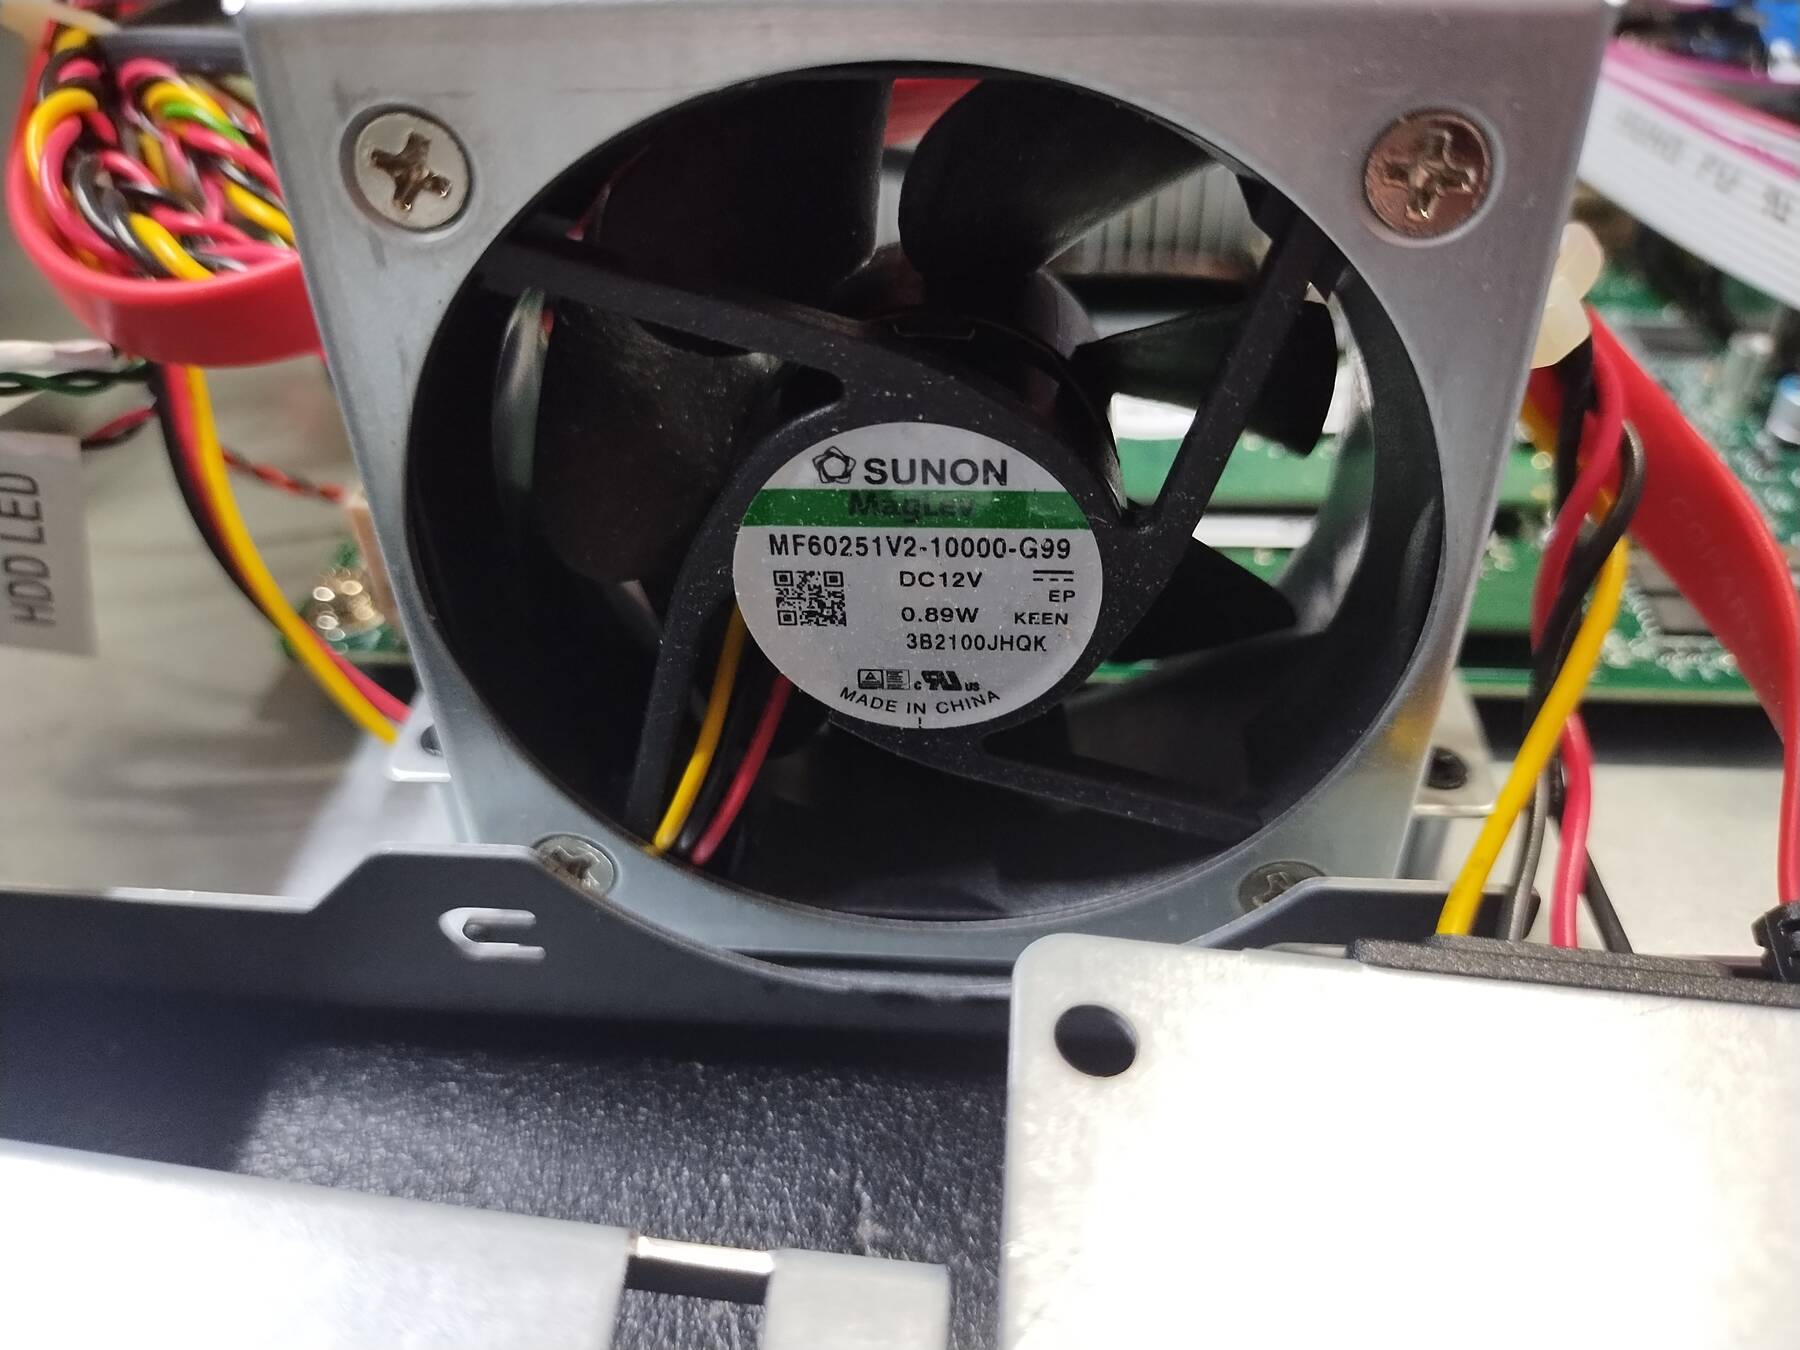
The fan situation is just a single 4-pin header that was split. The CPU fan was controlled by PWM, but the chassis fan got straight 12V.
I traded the 60mm chassis fan for a Gelid Silent 6, but since I couldn't control it, I used a 3-pin adapter with a resistor in-line (10 or 12 ohm I think) to cut the voltage a bit. After tuning the BIOS fan control this machine is no louder than the workstation it sits on.
Serial Setup
My workstation has a serial port header. This machine has 4 serial ports, and the ability to redirect the console to one or more. So I went to work putting a serial header in dreadnought which lead to a whole saga of my workstation breaking.
That put a nice damper on things so this sat for a few days.
Serial Setup Again
The serial console is working great for accessing BIOS, but we need a proper OS install with serial support too. Why stop there though. We need to install the OS with the serial console.
What does that look like? You grab your regular install ISO, unpack it, modify some things, repack it, and you're off to the races. Right? No, you failed. We've got other things to do though so I did the install the old fashioned way.
If you want to read about my failure (or maybe my future success) you can check out: Installing with serial consoles
So the install is done, but we're not done discovering new ways to fail. Onwards to the next cool thing. Ansible configuration management. That's right, we're going to automate every last bit of configuring this machine from configuring serial ports, to docker, and frigate.
Our starting point is a machine with a configured network interface, and an SSH server, both of which were achieved by the installer.
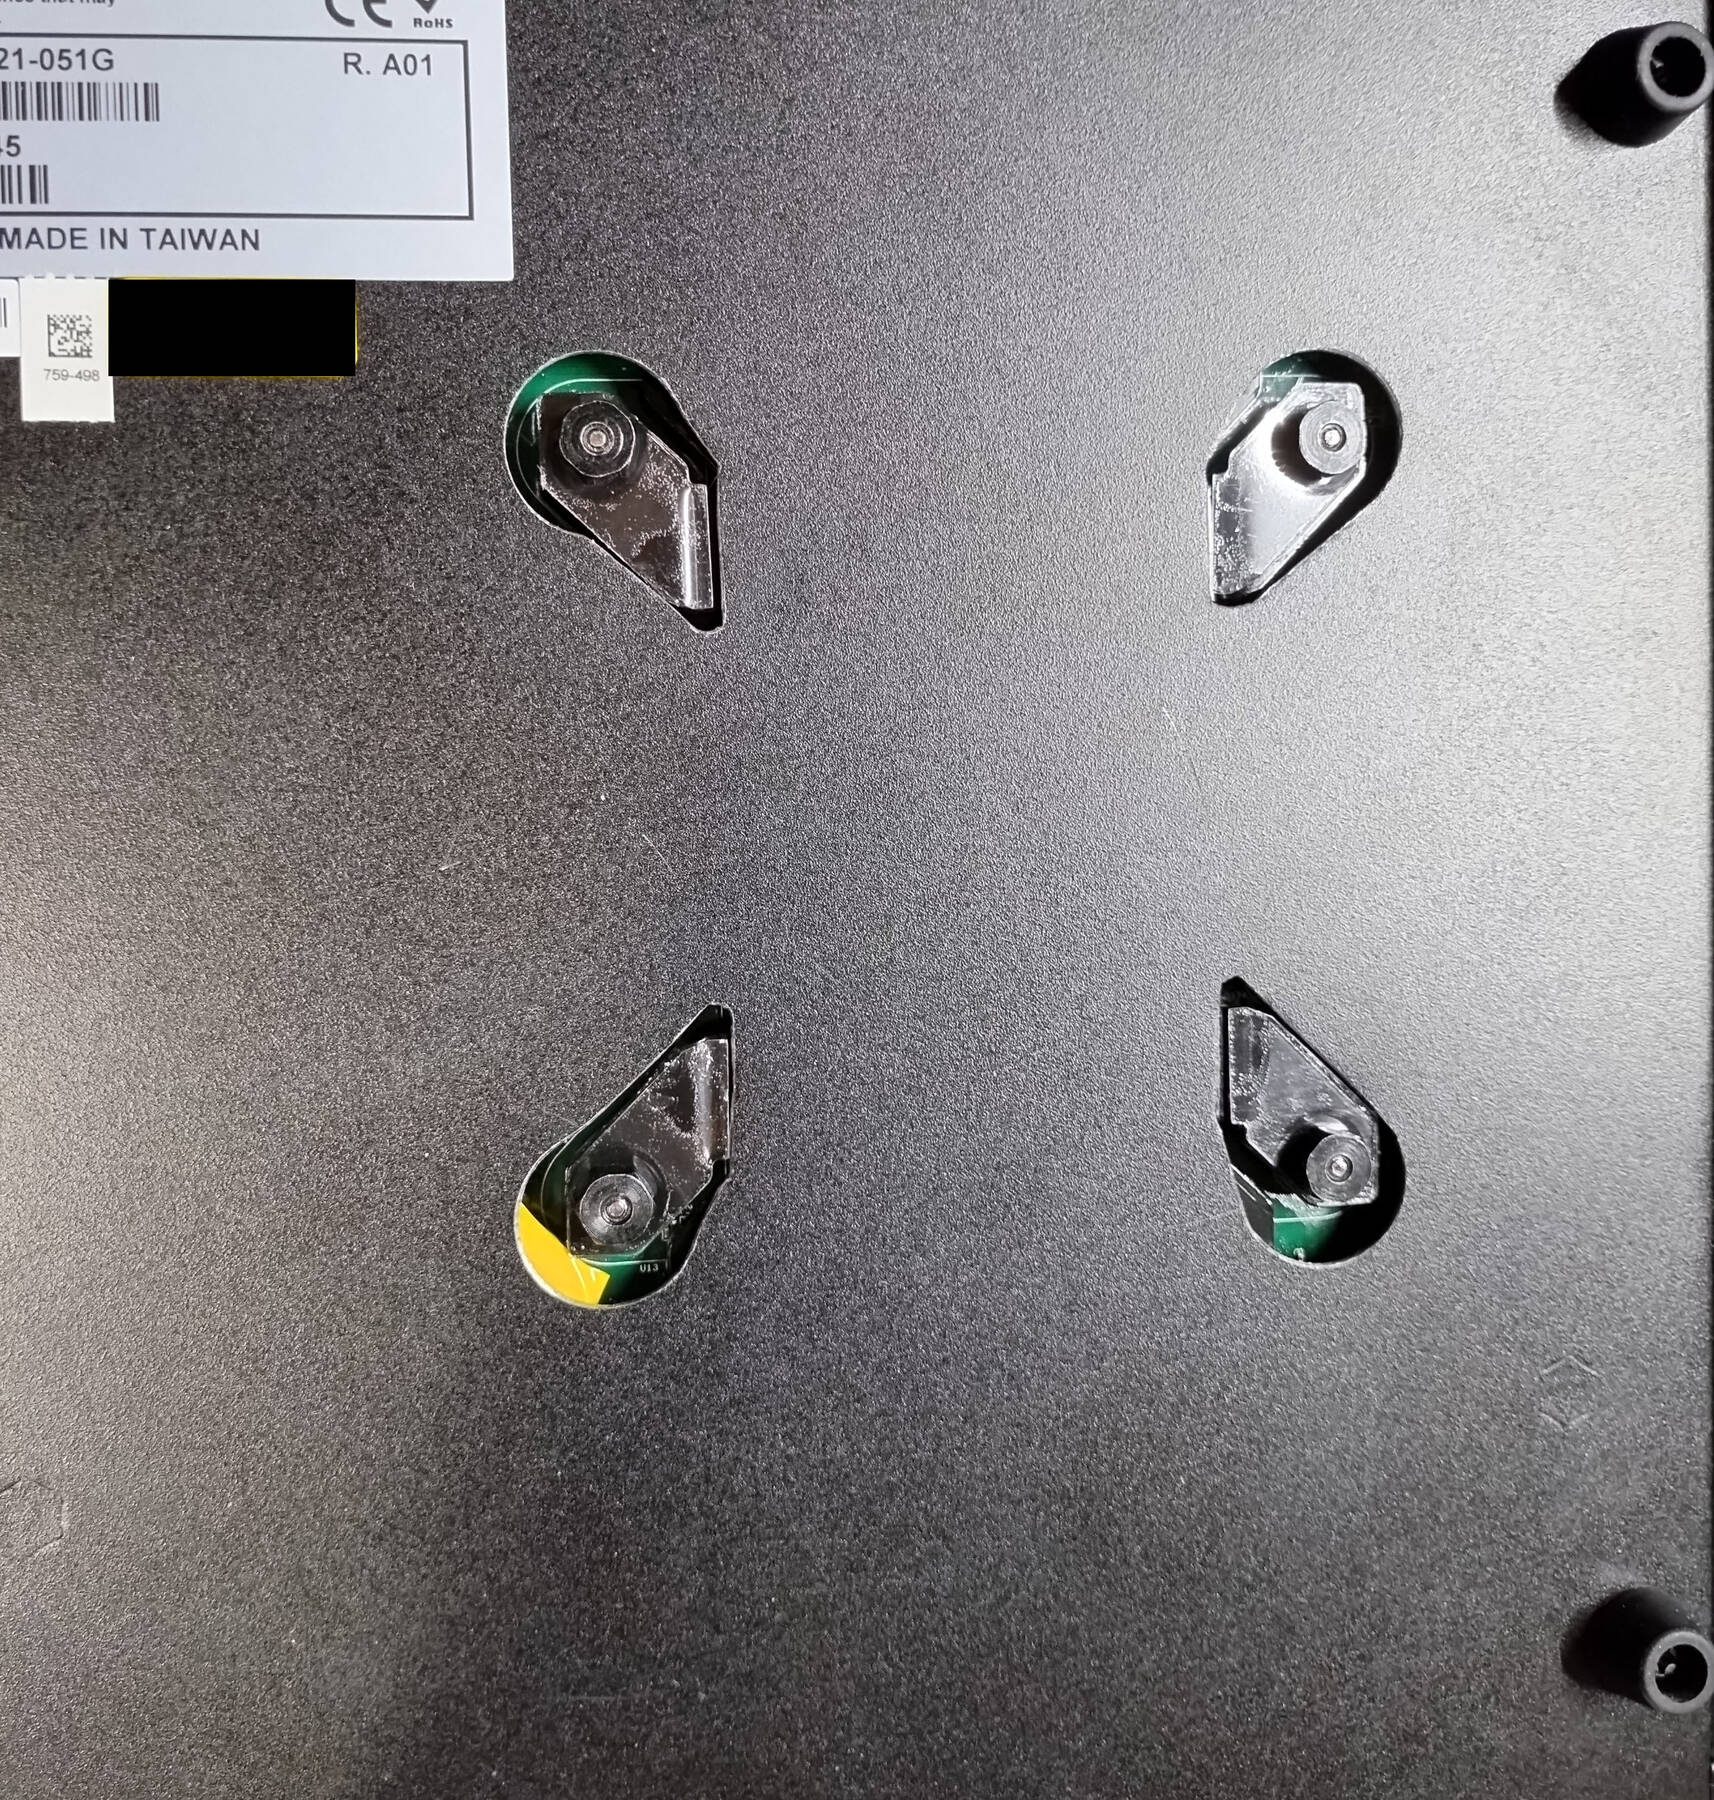
Hiding the heatsink holes
Previously, I cut holes in the bottom of the case. They need to be covered to prevent scratching things, and to look nice.
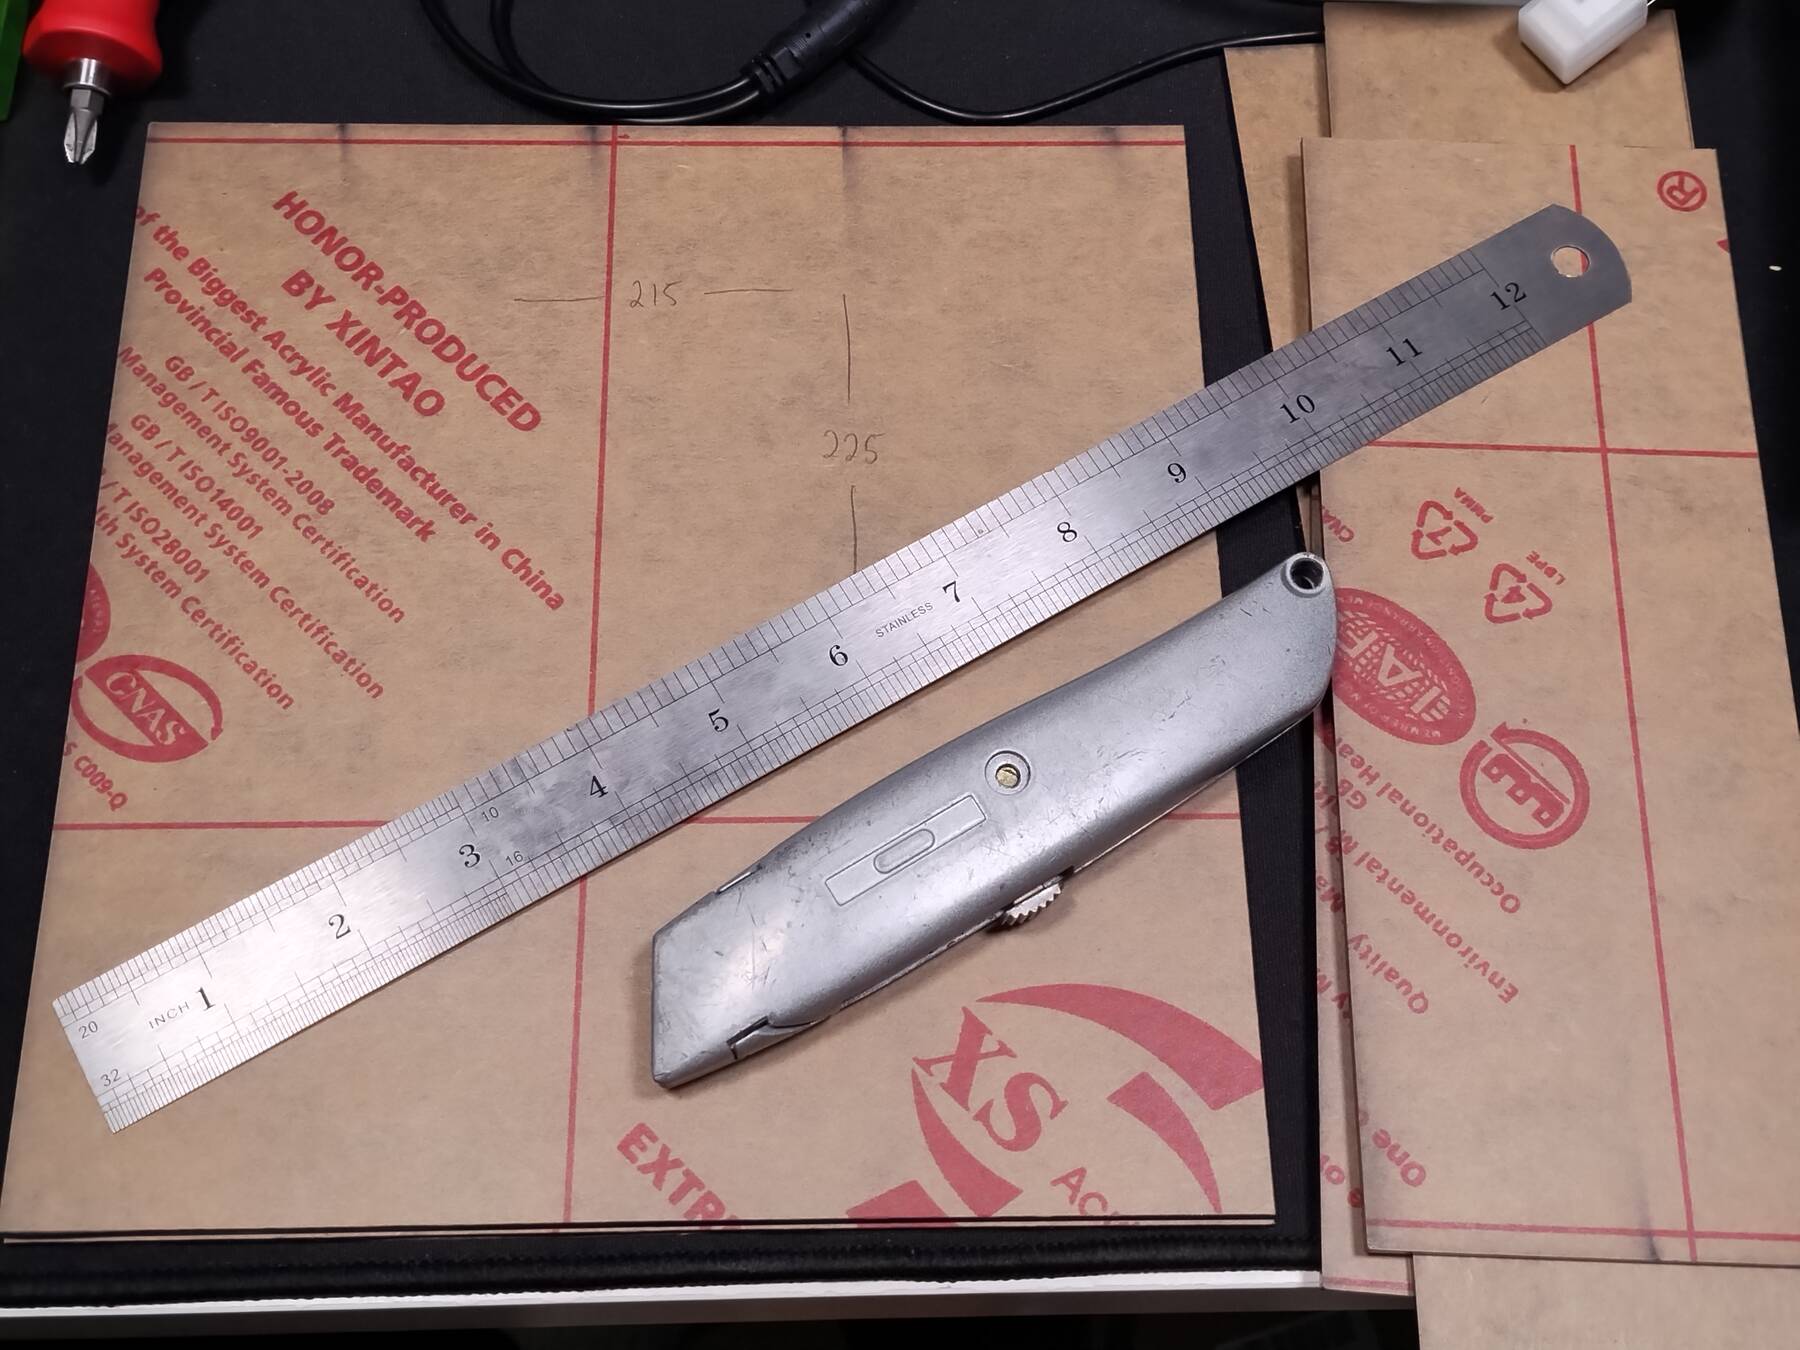
I got some acrylic sheets. The plan was to use one with a cut-out to fit around the CPU cooler mounting bracket, then a second one to cover it up.
To cut them to size I used a steel straight edge, and a utility knife to score both sides. The first attempt failed with the break wandering. Next I scored more deeply, and clamped them to a table with a wood block, and used a second wood block to snap the piece off. The amount of force needed to snap them was still surprising. No pictures of the process.
For the middle cut out I just drilled a hole, and used the scroll saw to cut a window. The finish is rough, but that gets covered up.
The sheets are held on by the original feet with some longer M3 button head screws.
More memory
I wanted more memory, but didn't have it, or did I?
I had a single 16GB stick, and forbidden had a 16GB stick. I looked at them, and they are both Micron chips. The first stick was marked D9TBJ, and the other D9TZX.
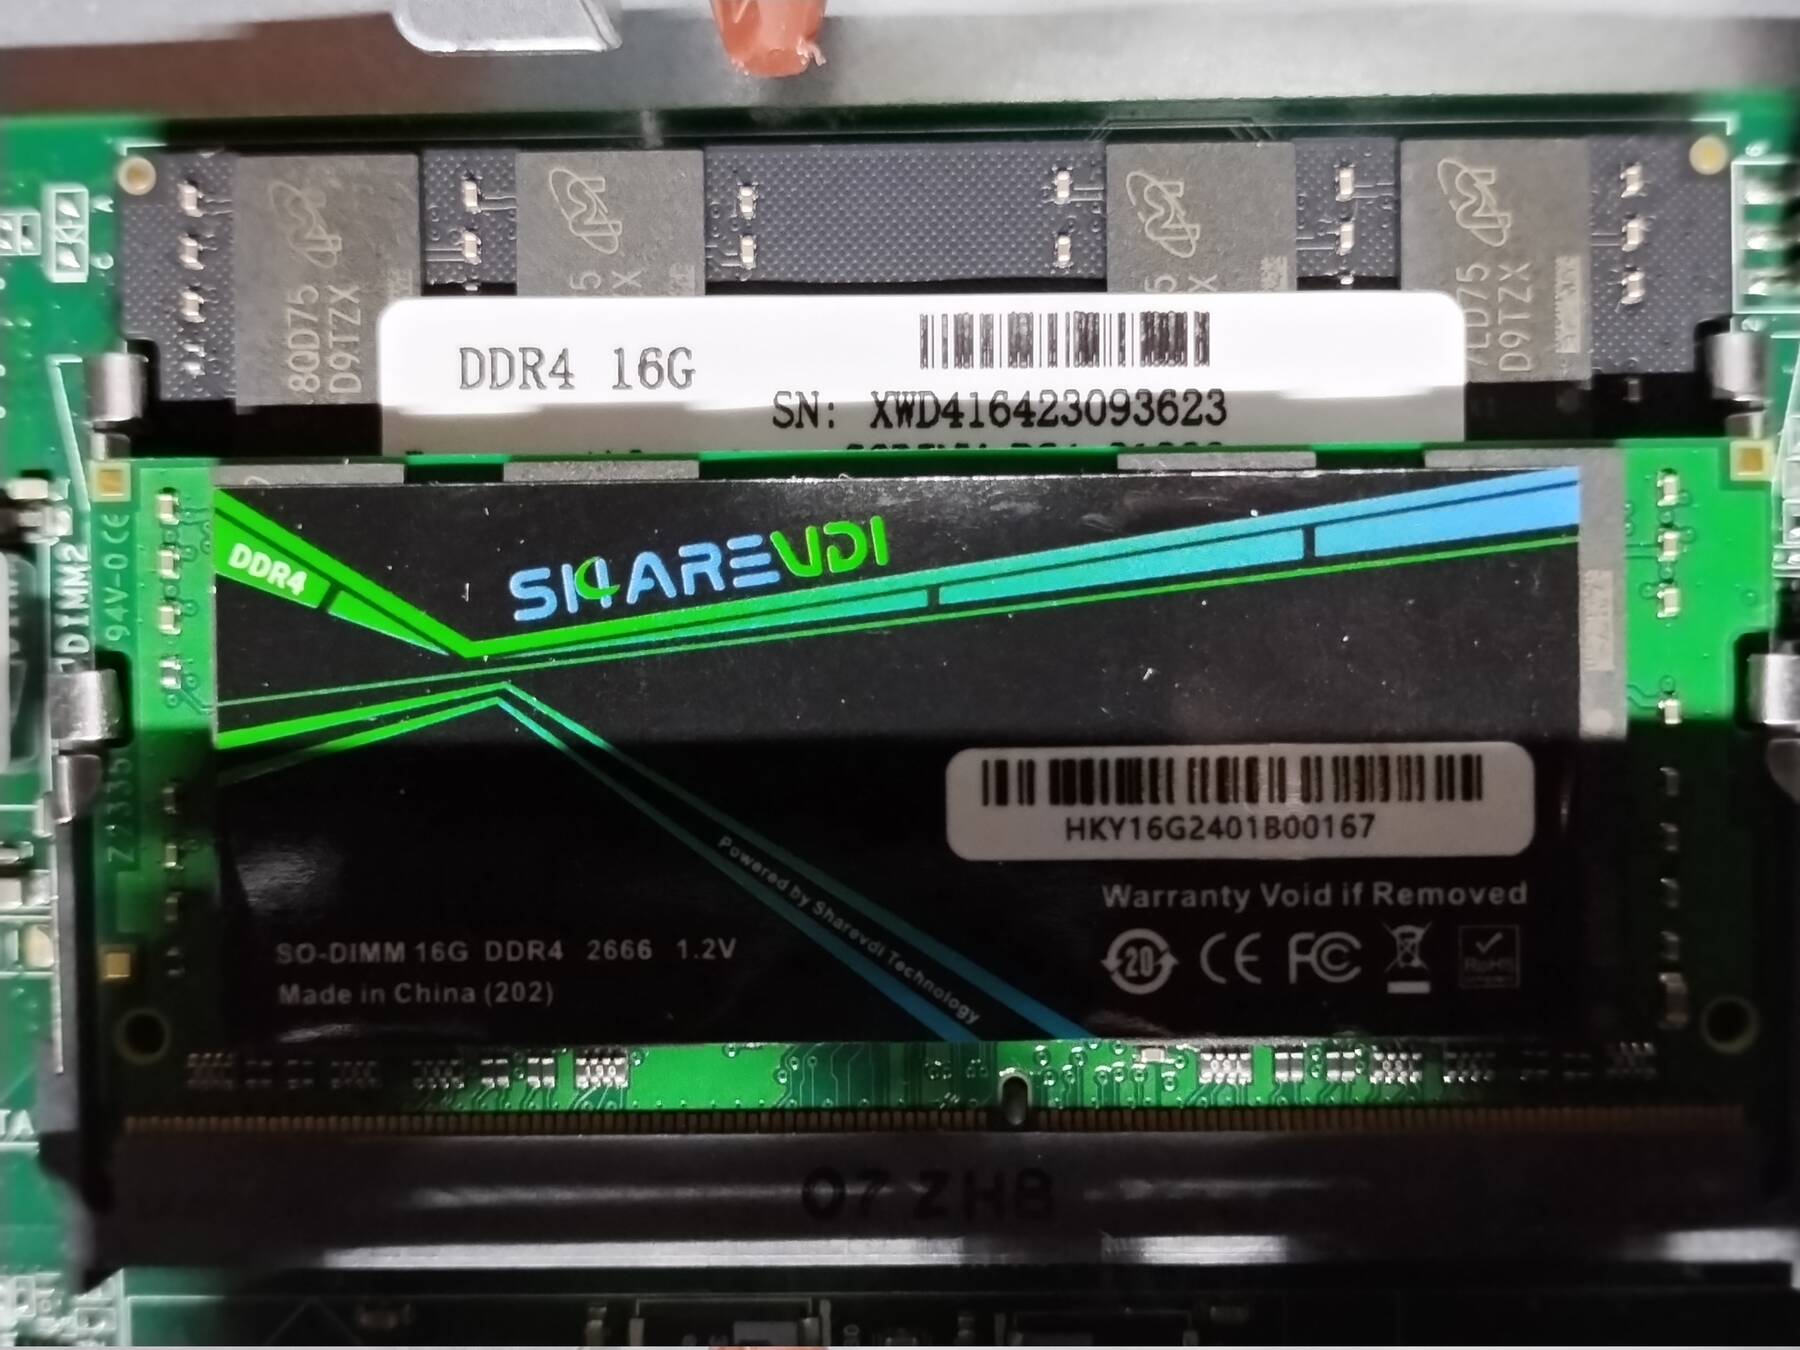
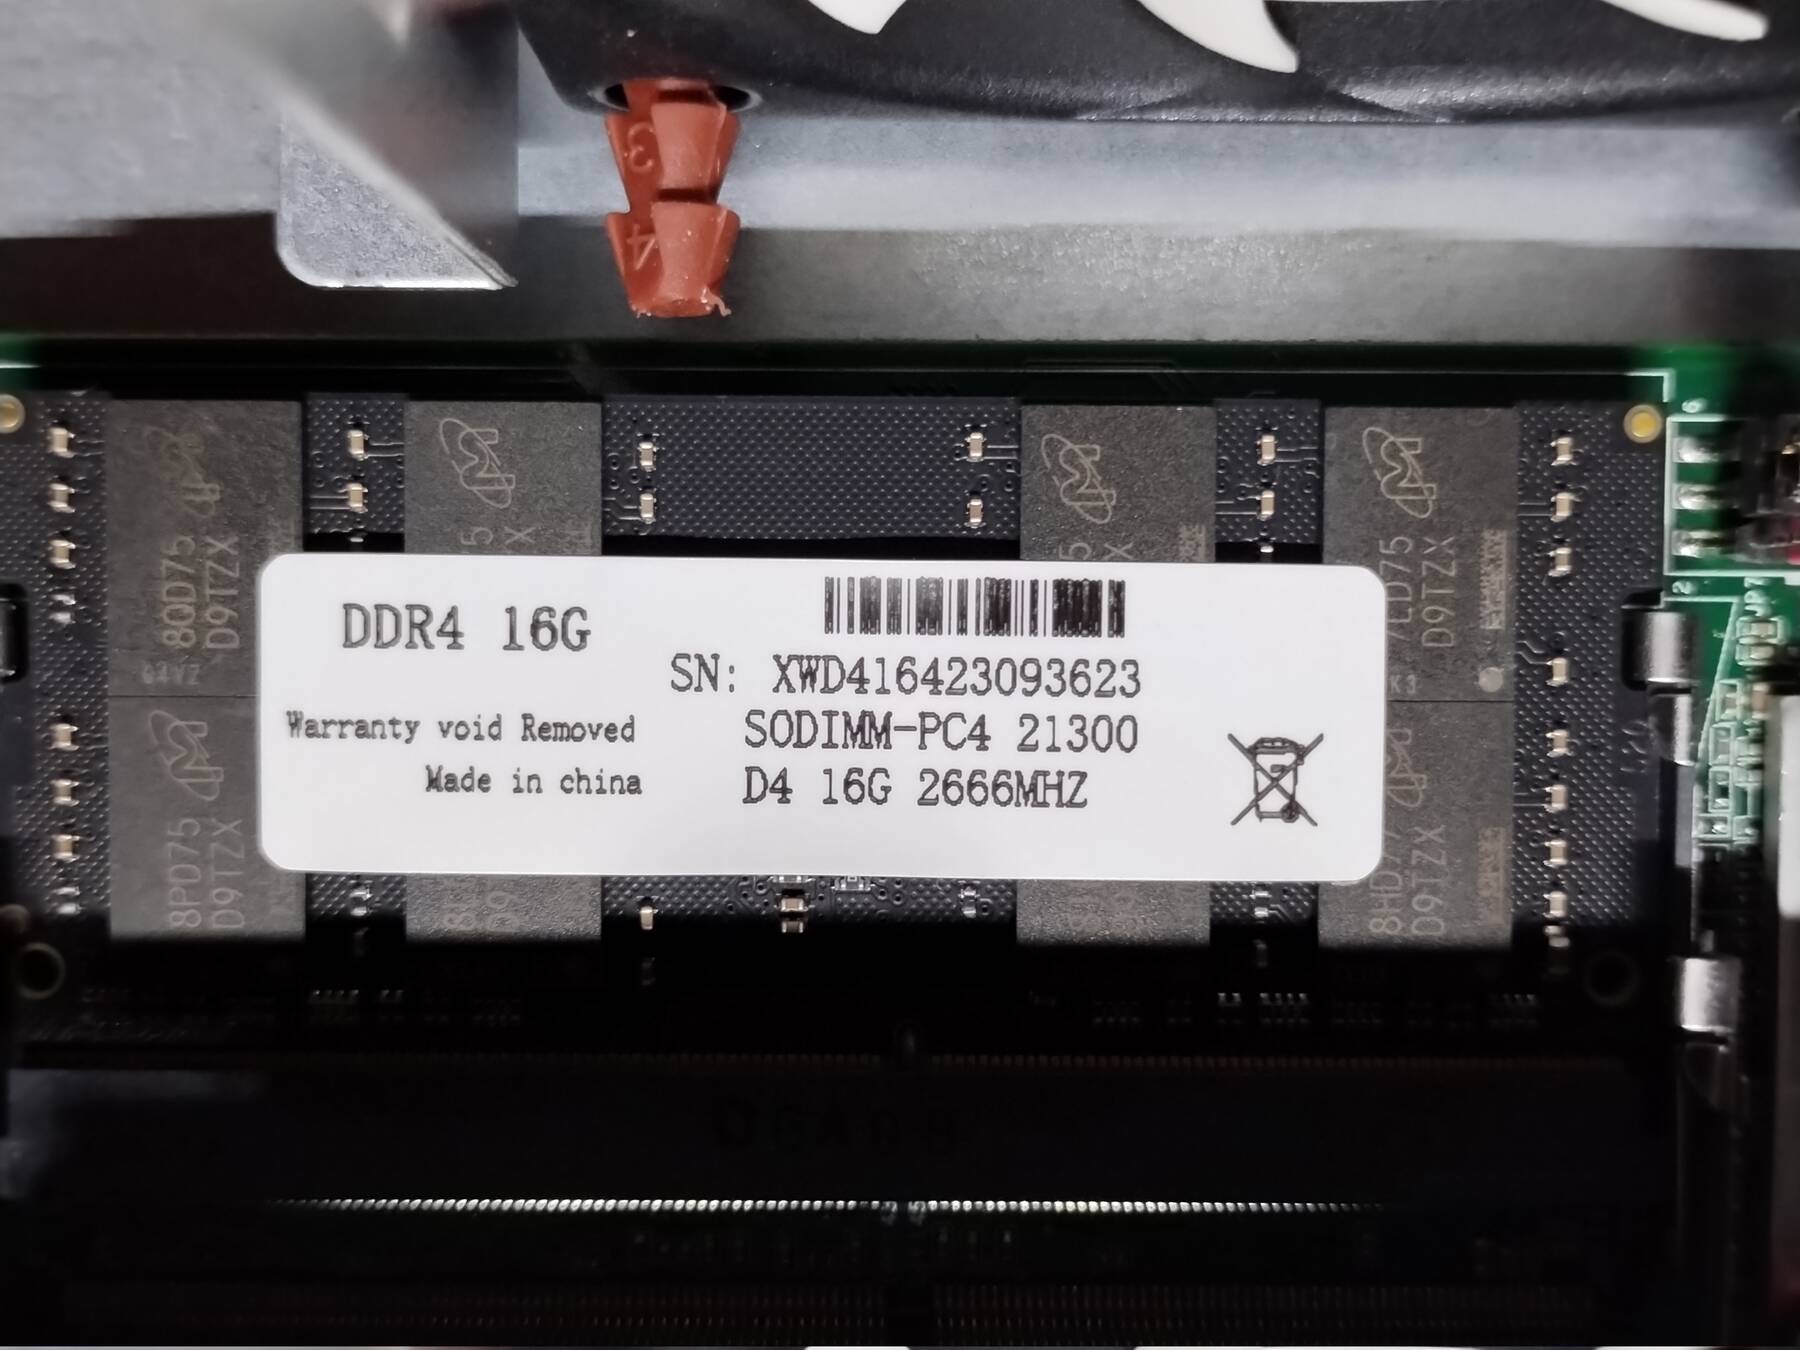
Micron has a FBGA parts decoder that will give you the part number. Then you can look up the data sheet, which lets you decode the last bit of the model number, and actually tell how fast your chips are.
| FBGA Code | Part Number | Speed | CL |
|---|---|---|---|
| D9TBJ | MT40A2G4WE-083E:B | 2400 | 16 |
| D9TZX | MT40A2G4WE-075E:D | 2666 | 18 |
Noting that these were both marked as DDR4-2666 you can see that cheap RAM sellers like to inflate numbers. Anyway, my old sticks were Transcend TS1GSH64V6B (DDR4-2666 CL19) so even the slower stick is a slight improvement.
When I loaded them up the machine chose DDR4-2666 CL19, so I ended up at the same speed, but now I've got 32GB.
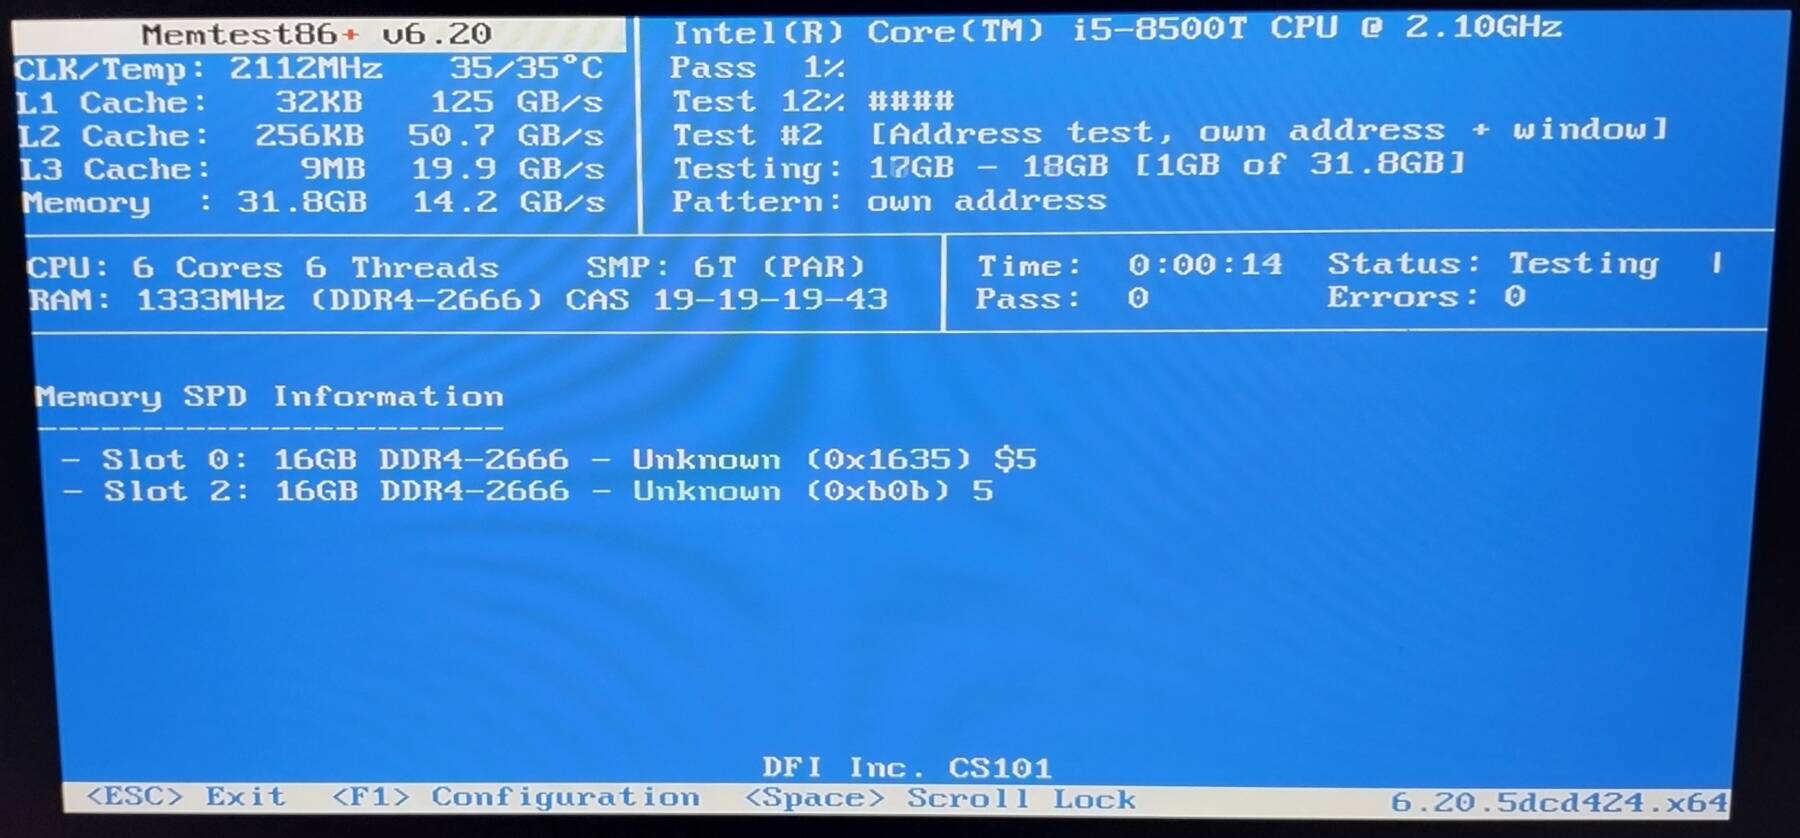
- Memtest86+ bandwidth weirdness
Of course I had to run a memtest to ensure these two different sticks got along. I got worried when I tested this machine before because the bandwidth Memtest86+ reports seems quite low.
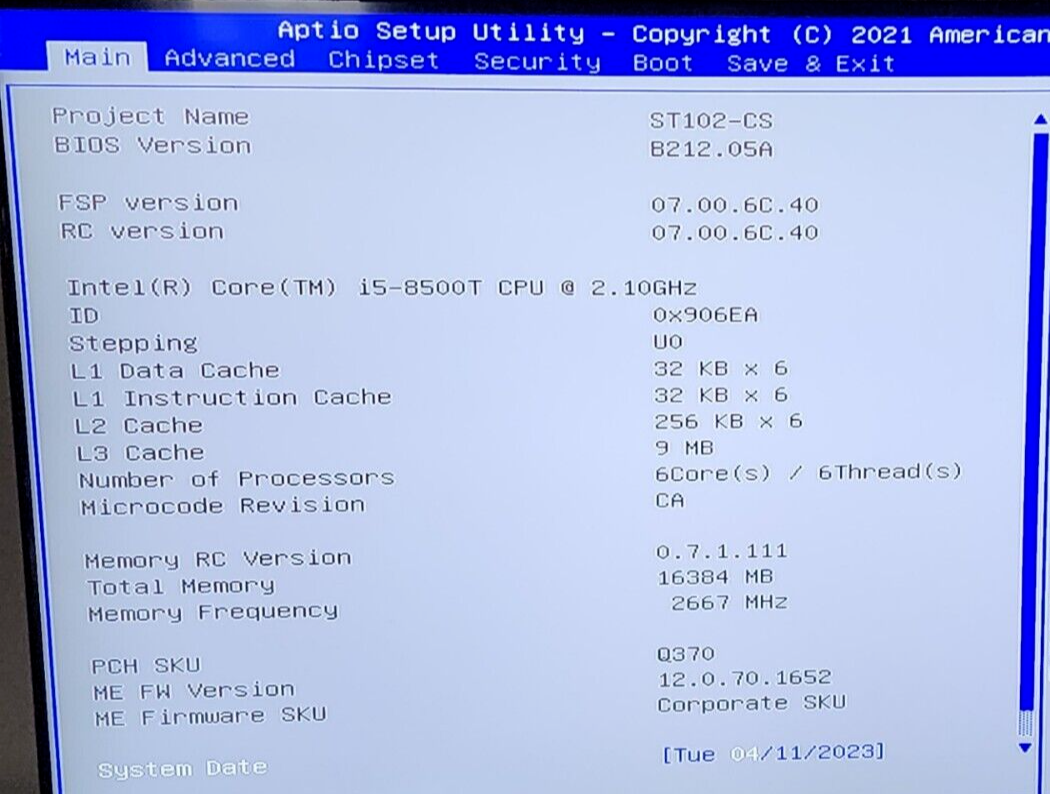
Intel says their i5-8500t has a max of
41.6 GB/s.Memtest86+ reports
14.2 GB/s. Meanwhile I'm also running a test on my i5-3210M Mac Mini that reports15.7 GB/sfor DDR3-1600. What gives?What should you do when a benchmark disagrees with your expectations? Run another benchmark.
I needed a Linux one, because Linux. A search found
sysbench, and this article on how to do it. In this article a curious thing was said:Make sure to run
sysbenchwith only 1 thread, when testing ram speed. If more than 1 thread is used, the reported speed will be higher. So if you use the–threadsoption it should always be set to 1.Why wouldn't I want the speed to be higher? But performance was worse than even Memtest86+ reported, only
13 GB/s. So naturally I ran it with 6 threads on my 6-core CPU. Now I get41 GB/s.The mystery numbers Memtest86+ reports seem to be single threaded.
I found a similarly concerned issue, and that person was nice enough to link to the relevant code which is indeed just some single threaded assembly.
Mystery solved, right? Probably, I'm no expert.
Partial drive solution
Due to the limited space I needed some creative solutions for adding storage.
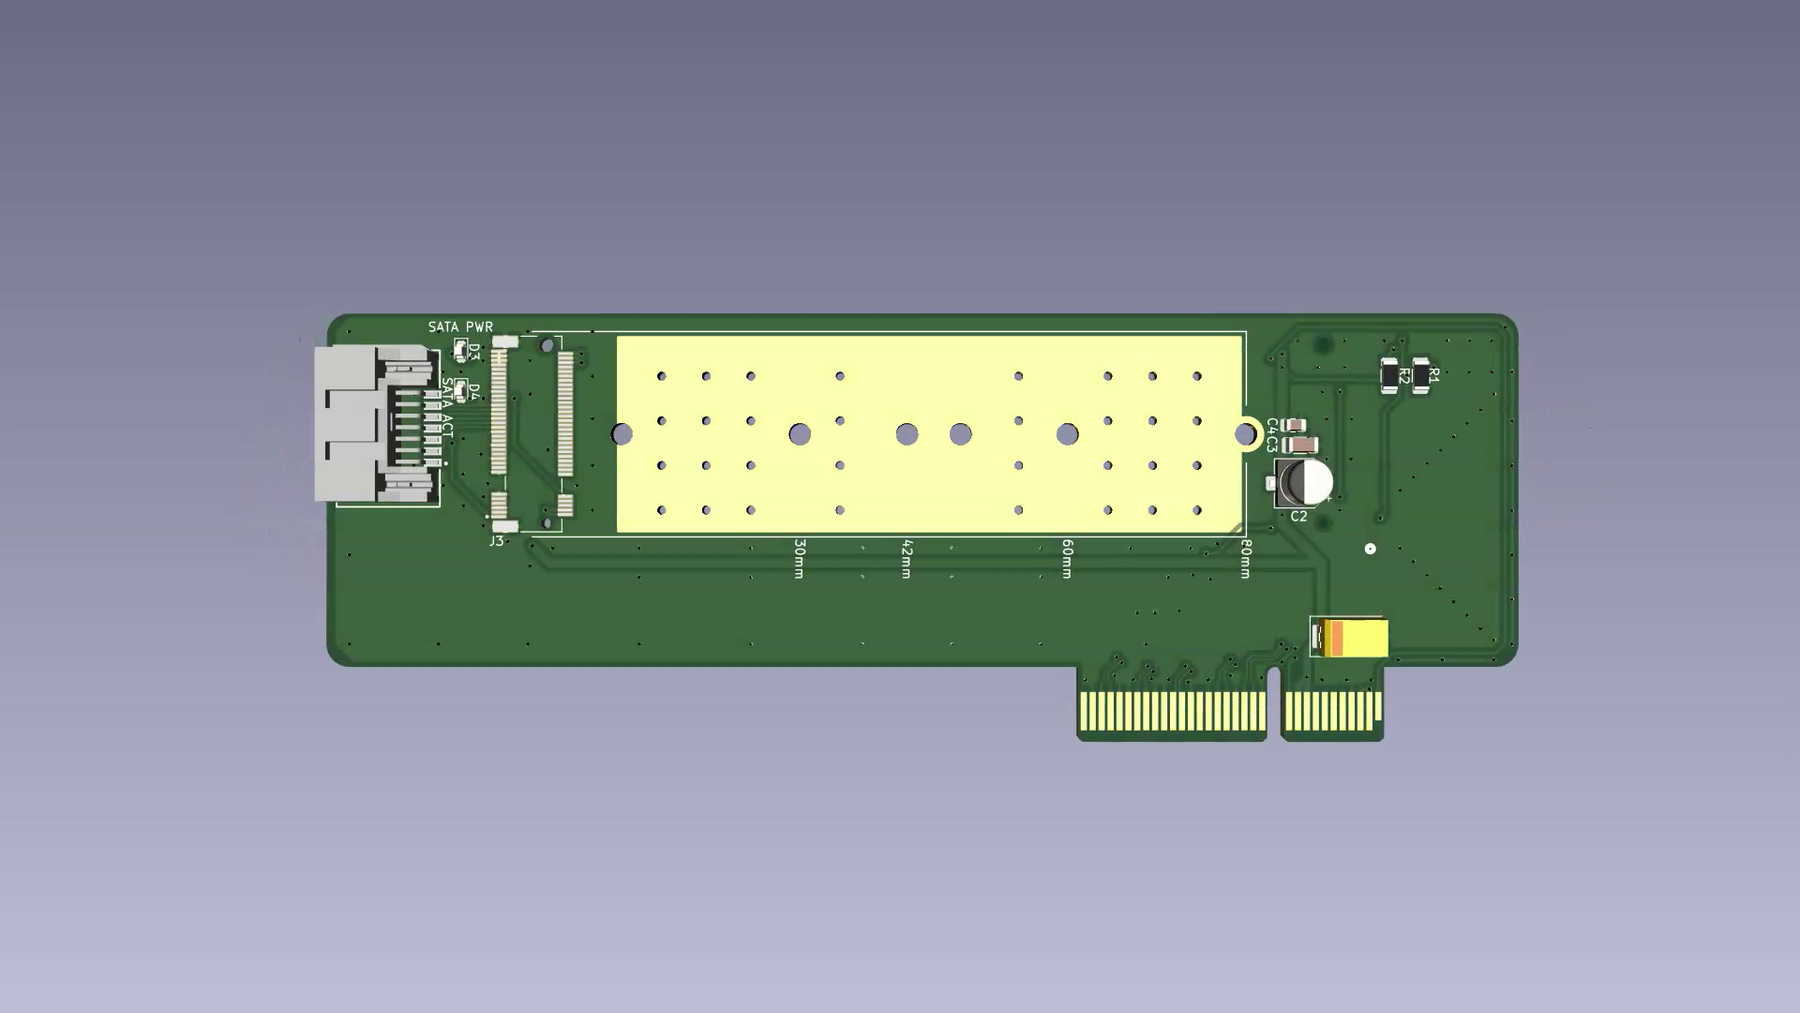
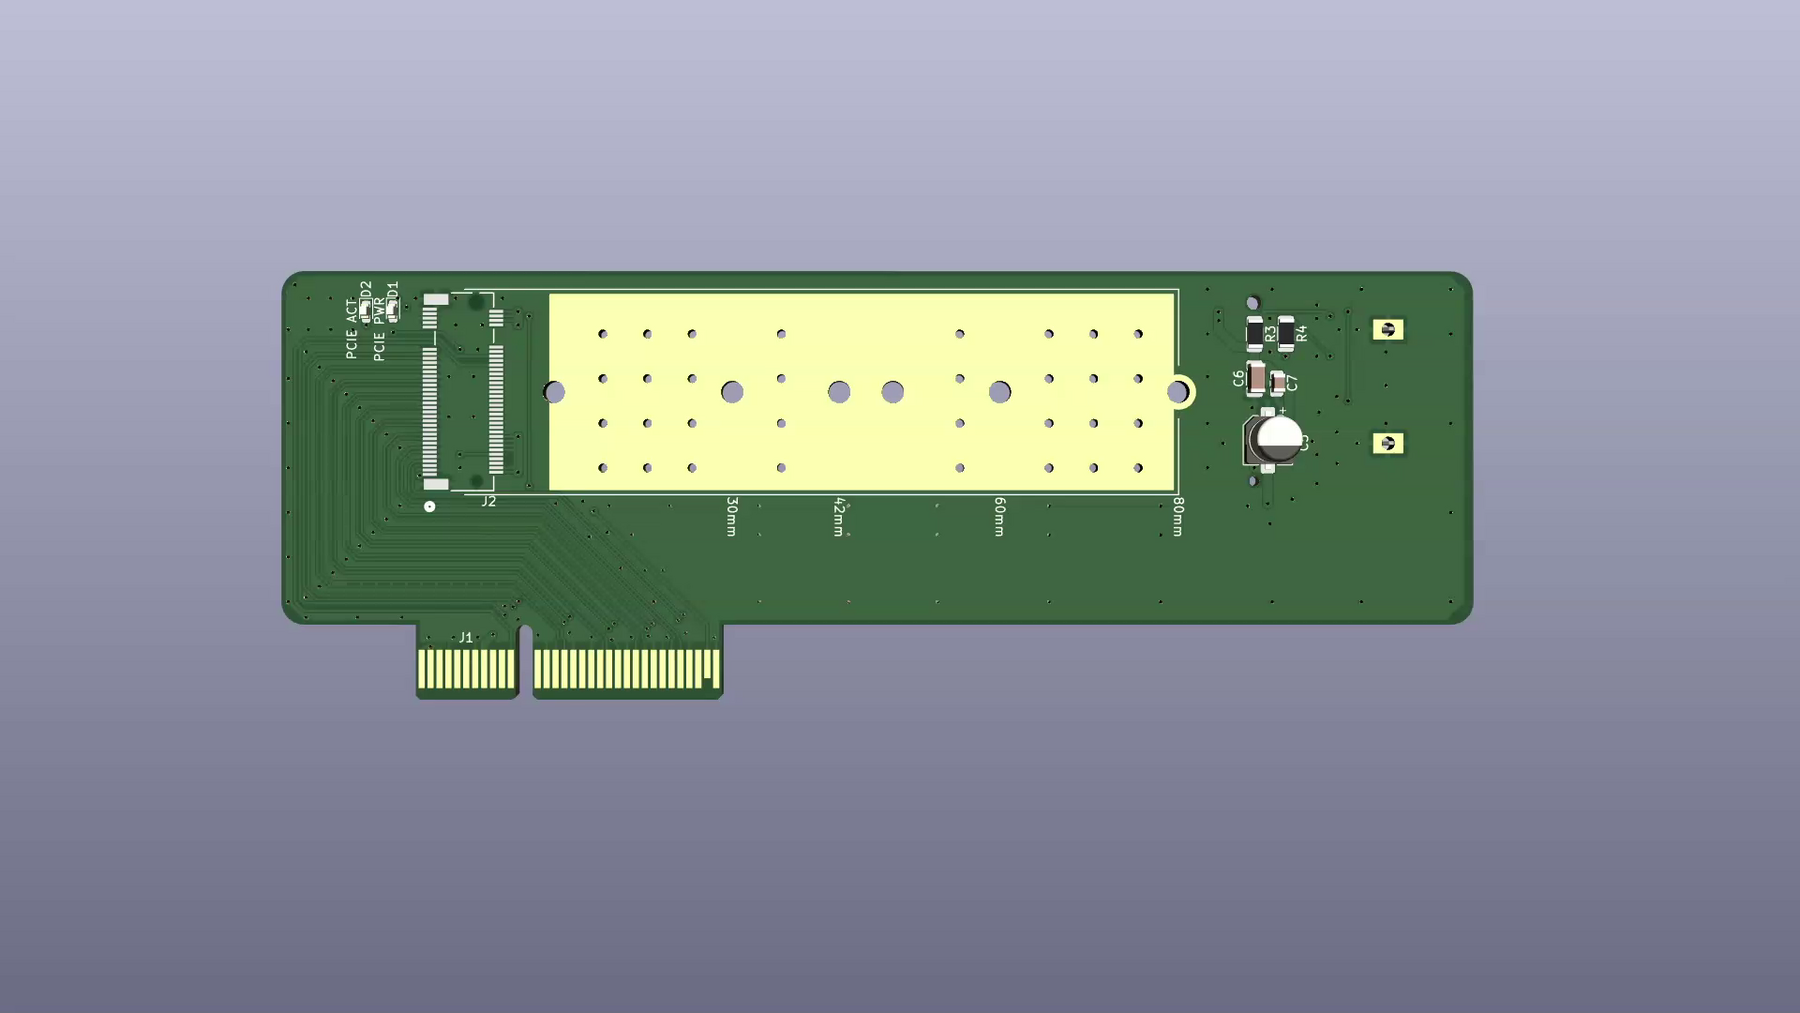
Initially I failed to find a low-profile NVMe + SATA combo PCIe adapter so I designed my own. I ordered some PCBs, but then I realized I forgot to adjust trace lengths. When I got the PCBs the prep by JLCPCB was a little disappointing. I made the PCB taller because it was a requirement for V-cut on the edge connector, but it looks like the cutter barely touched it.
It would have looked something like (missing M.2 connectors):
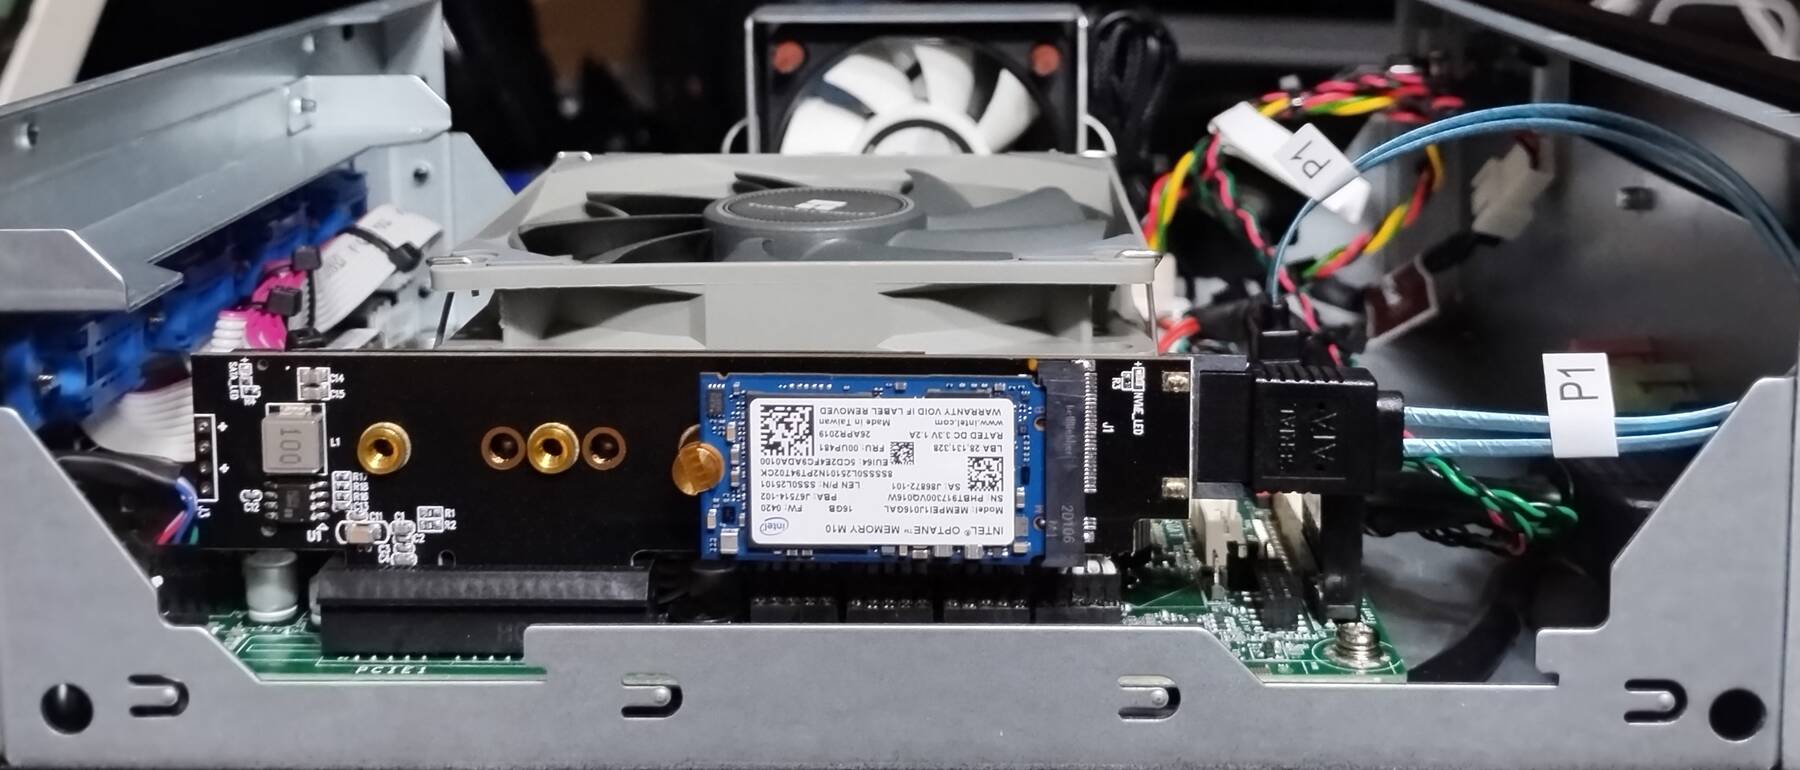
Before I got around to ordering components I stumbled on Silverstone's SST-ECM28. It's a little pricy at $27, but I guess you can do that when you're the only one making such a thing. The components to complete my boards probably would have cost as much, and I might have needed to redo the board anyway. This seemed like a good compromise for now.
I stuck in a 1TB SATA SSD, and a 16GB Optane (mostly to verify functionality).
It looks like:
I still need to find a suitable 2-4TB drive, which might end up being spinning rust.
This still leaves a free SATA port. If I want there to be a 2.5" drive I can cut a hole in the old drive mounting tray (for CPU fan clearance), and add it back.
This also leaves the Mini-PCIe, and M.2 E Key sockets to fill. They might get a Coral TPU, and 2.5GbE interface respectively.
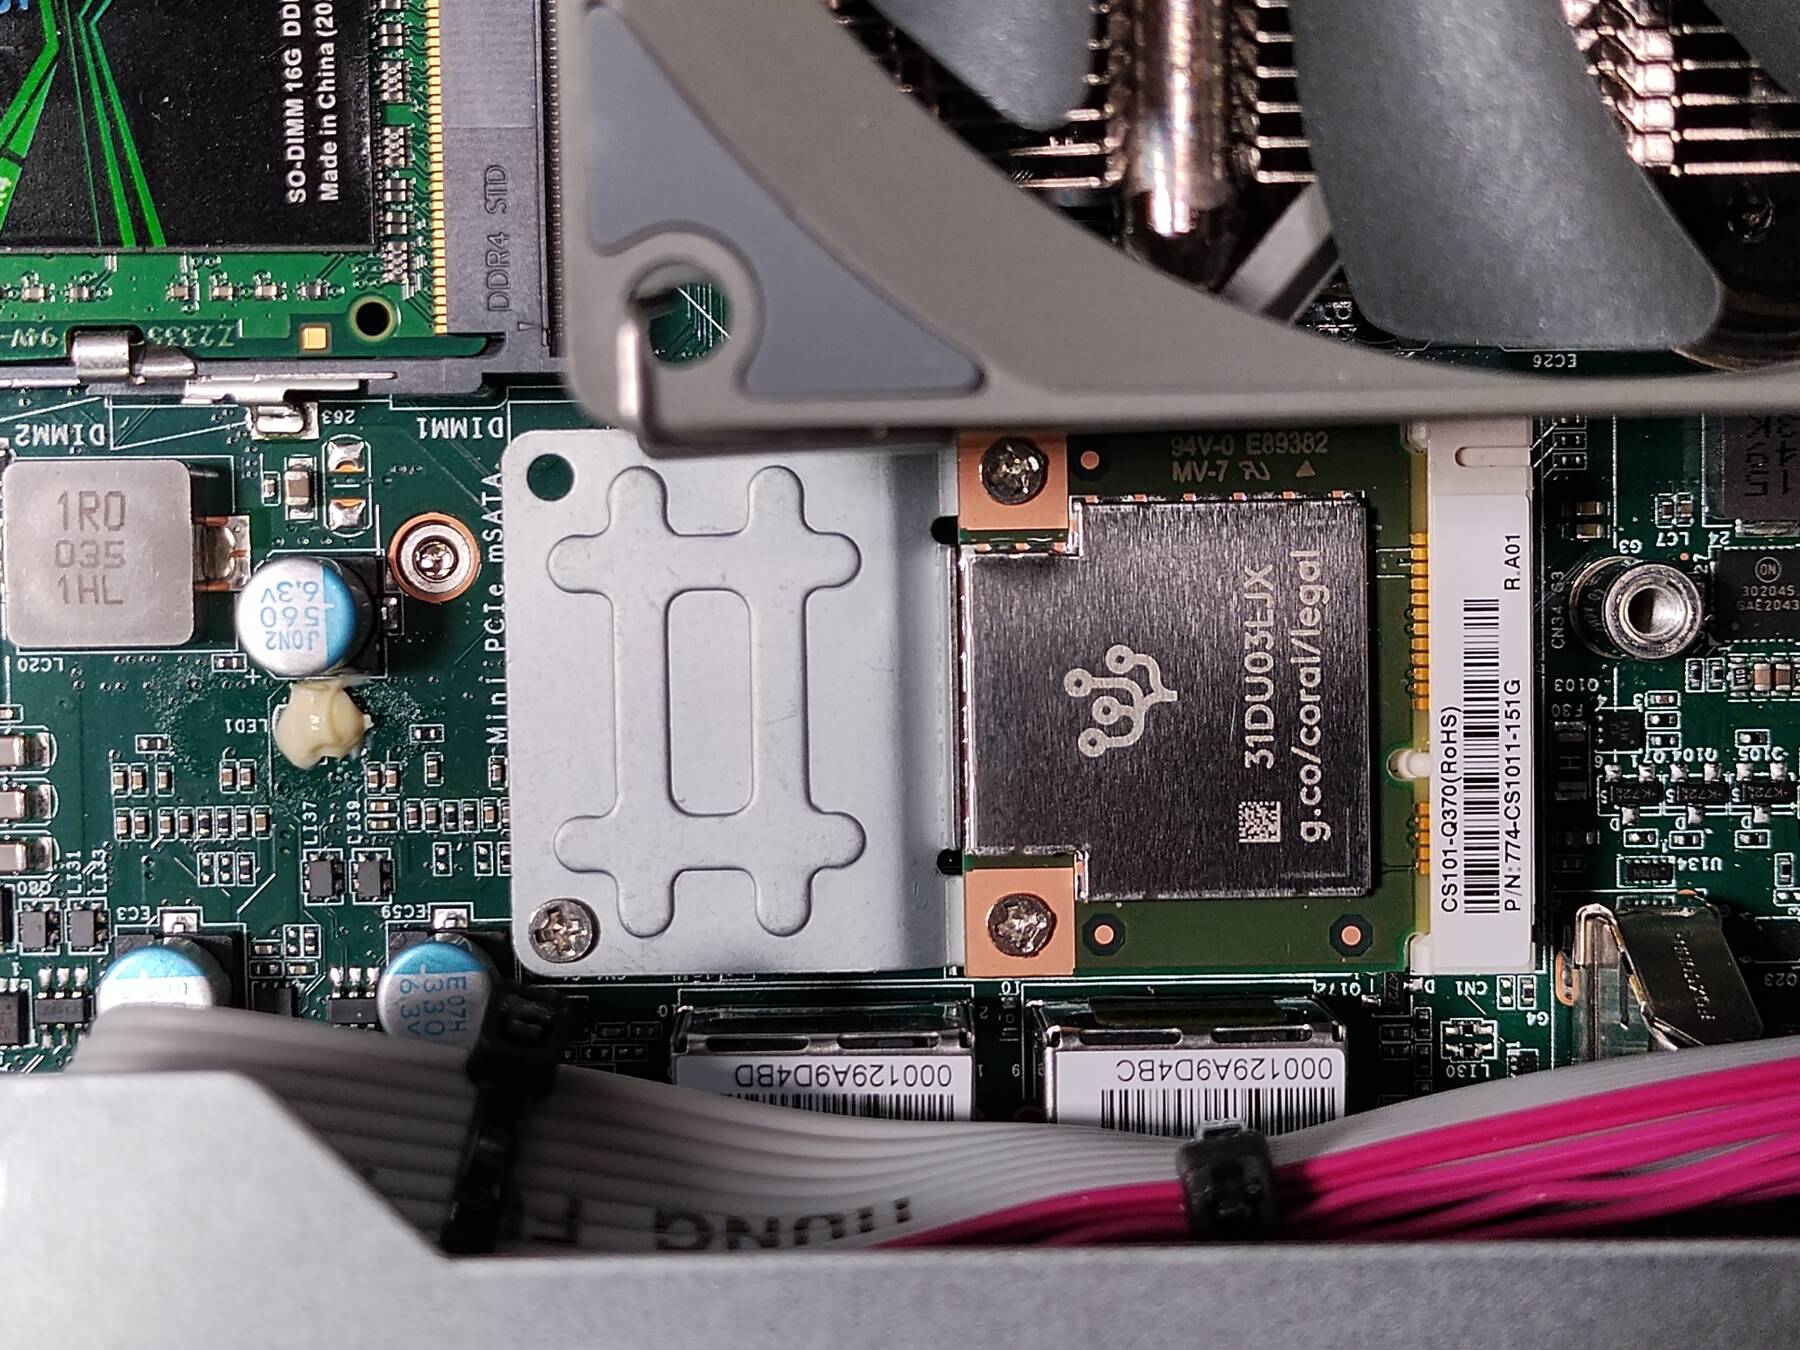
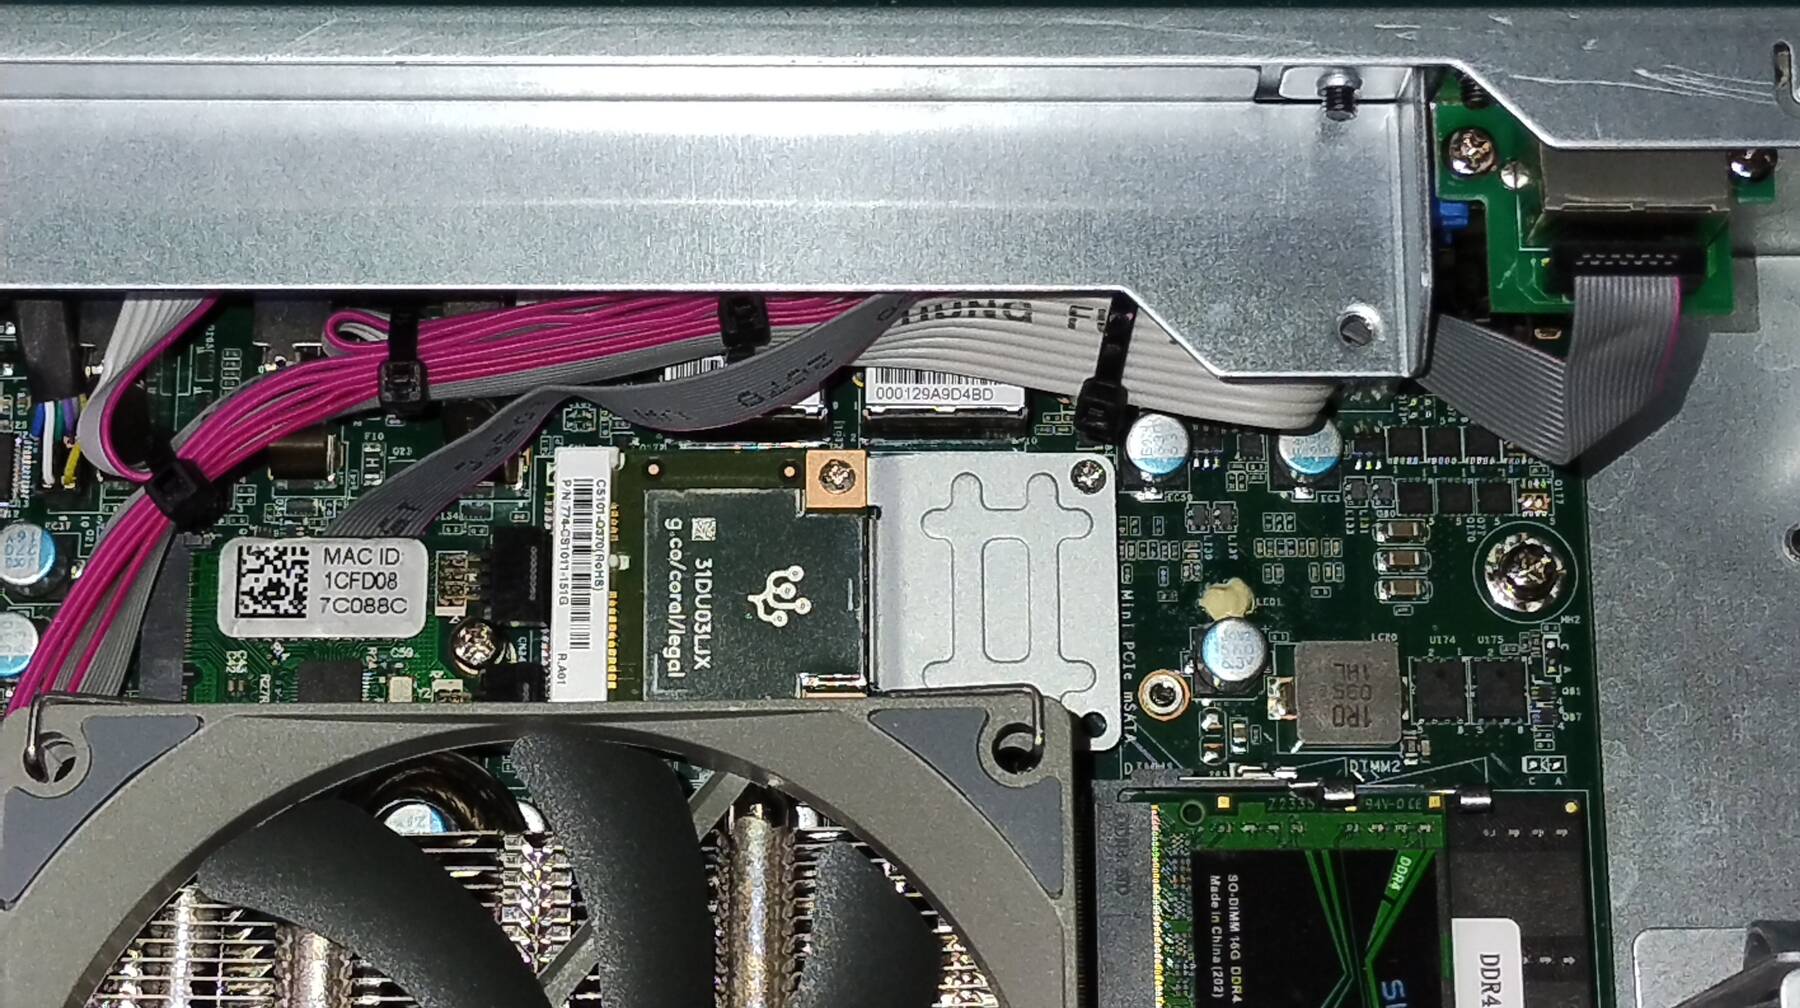
Added a Coral Mini PCIe TPU
I put the Coral TPU in. There's a software install and configuration guide at Coral.ai docs. Naturally things are out of date. The docs still reference the deprecated method for adding apt keys. The pycoral in the repository is incompatible with the newer python in Debian bookworm. There has been some movement through the past year, and even past week, on getting things updated: https://github.com/google-coral/pycoral/issues/137
Since I can't do the pycoral demo I guess I'll just test it when I get around to migrating frigate.
A 2.5GbE card
With the last spare slot I added a M.2 RTL8125 based 2.5GbE adapter. This gives the machine 3 NICs. They are for regular net, camera network, and storage network.
This is just to enable fast bulk transfers when it comes to updating my video library.
I cut a little hole, and drilled a couple screw holes. Ended up having to clip the cover as well.
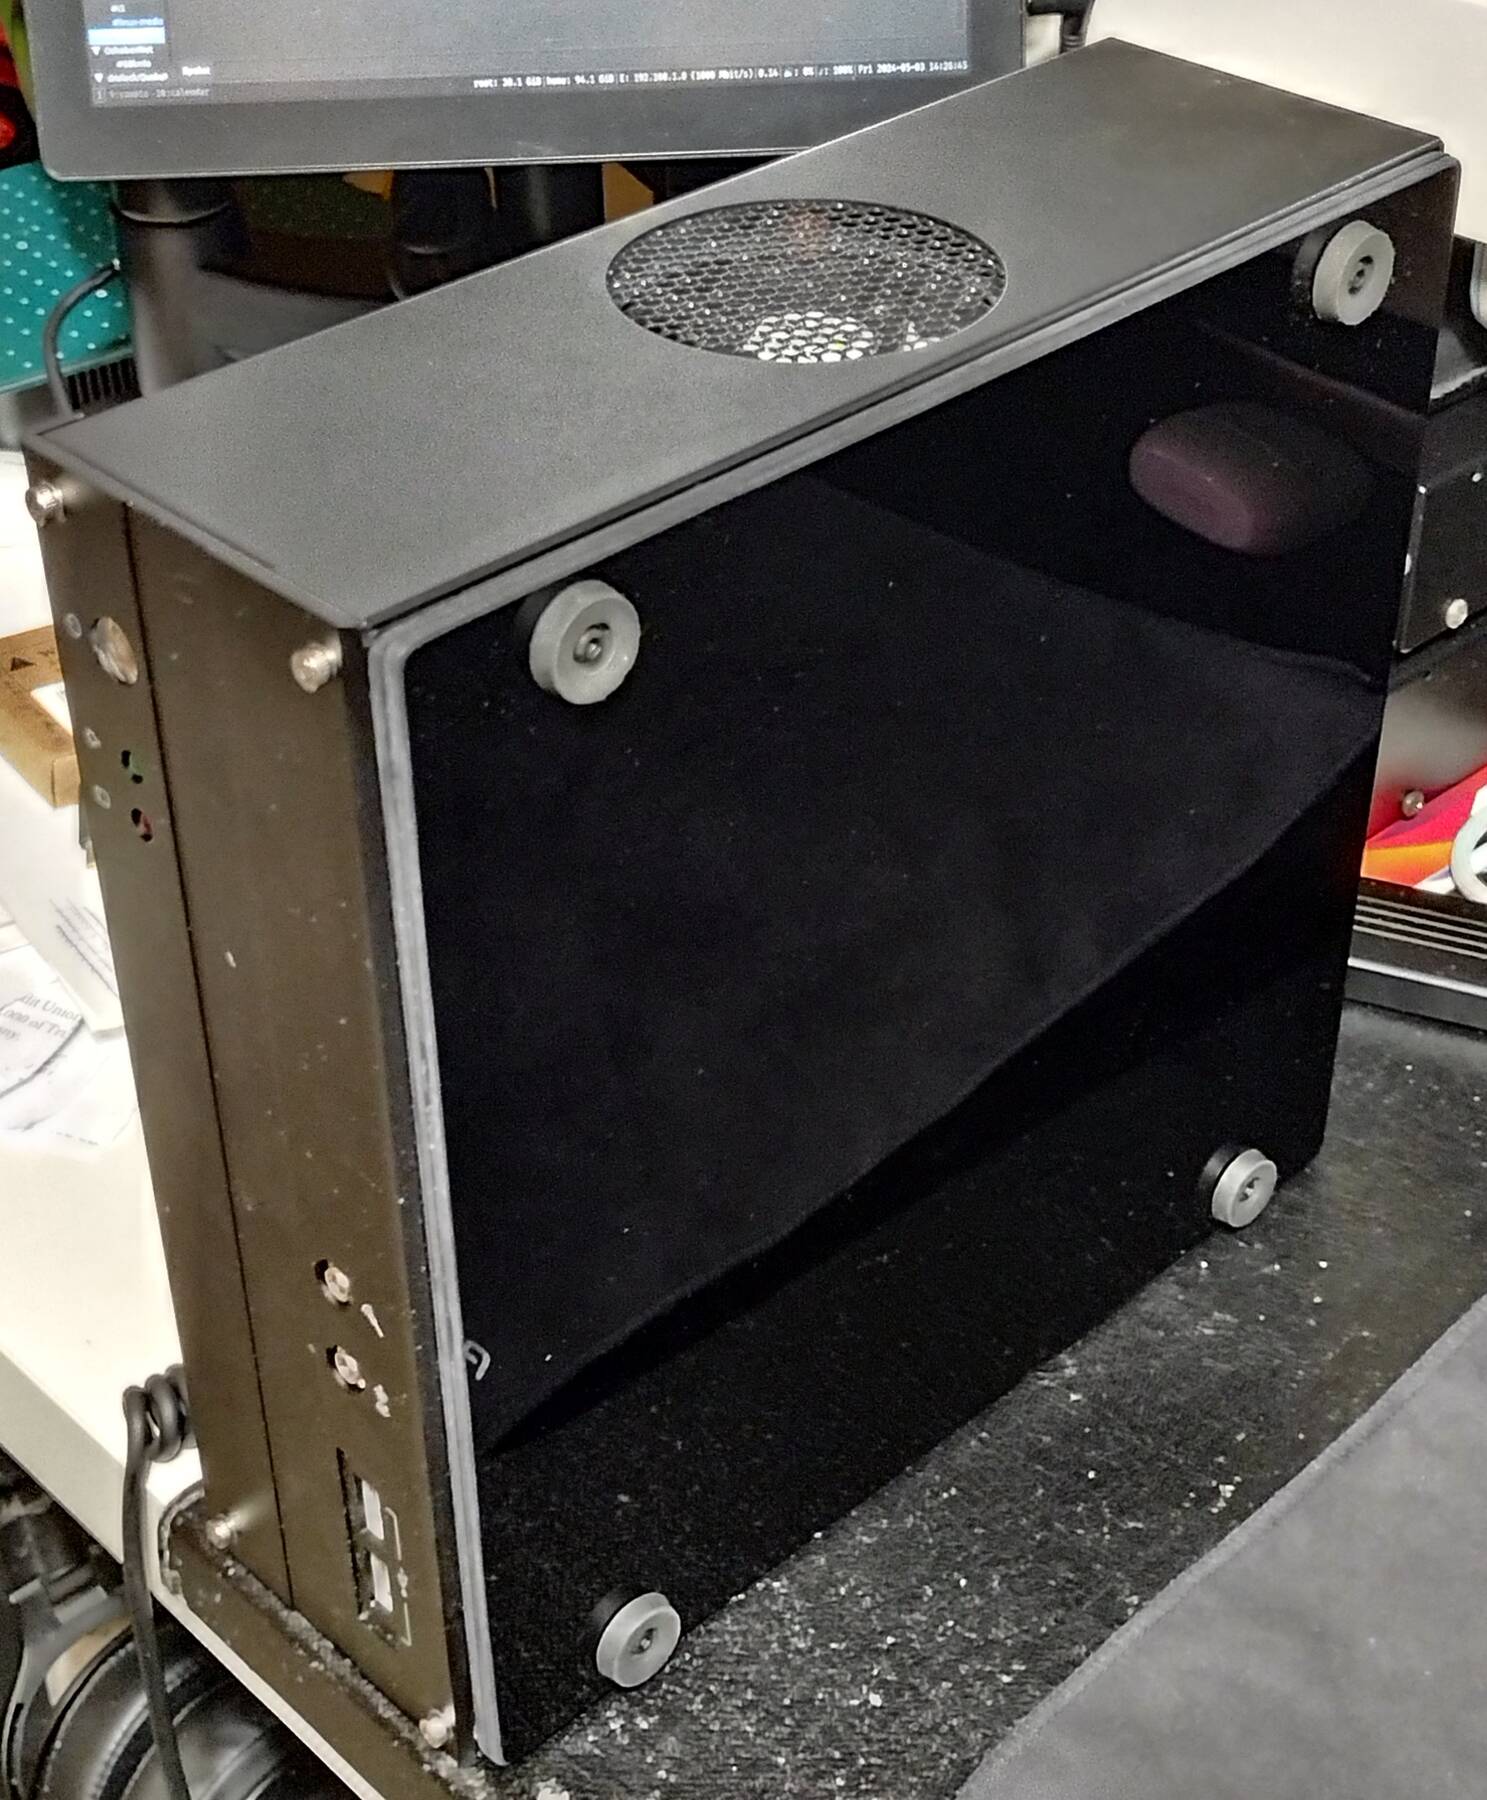
Docker migration
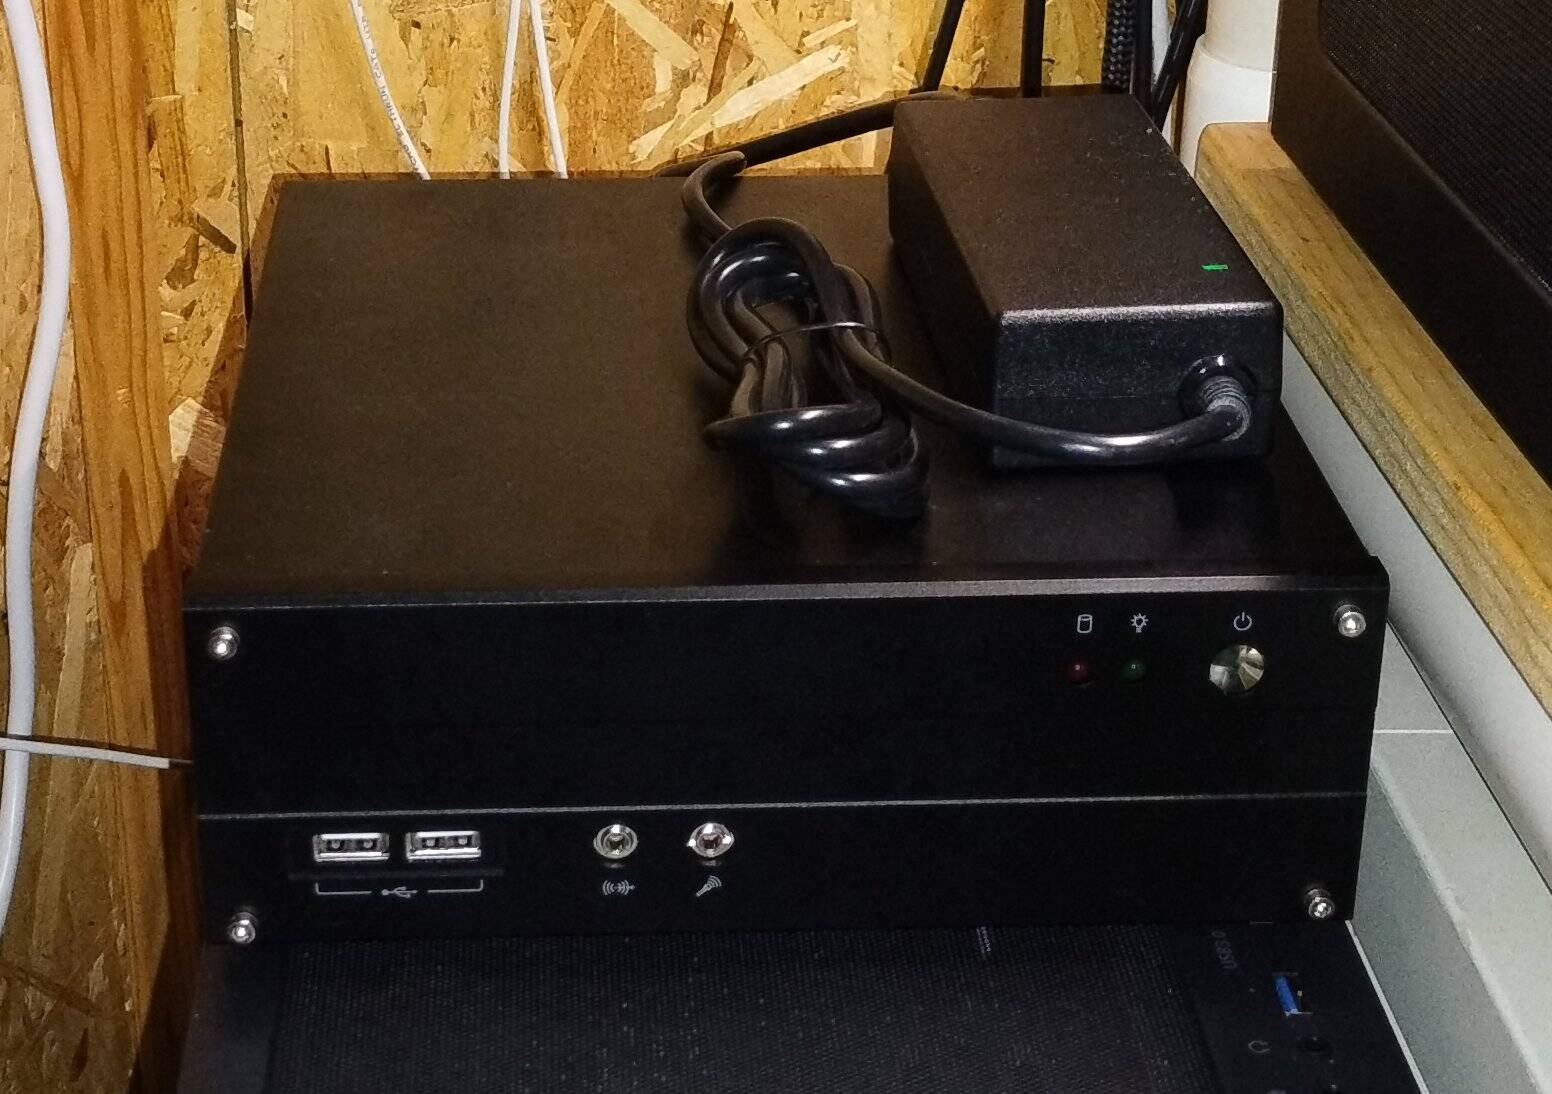
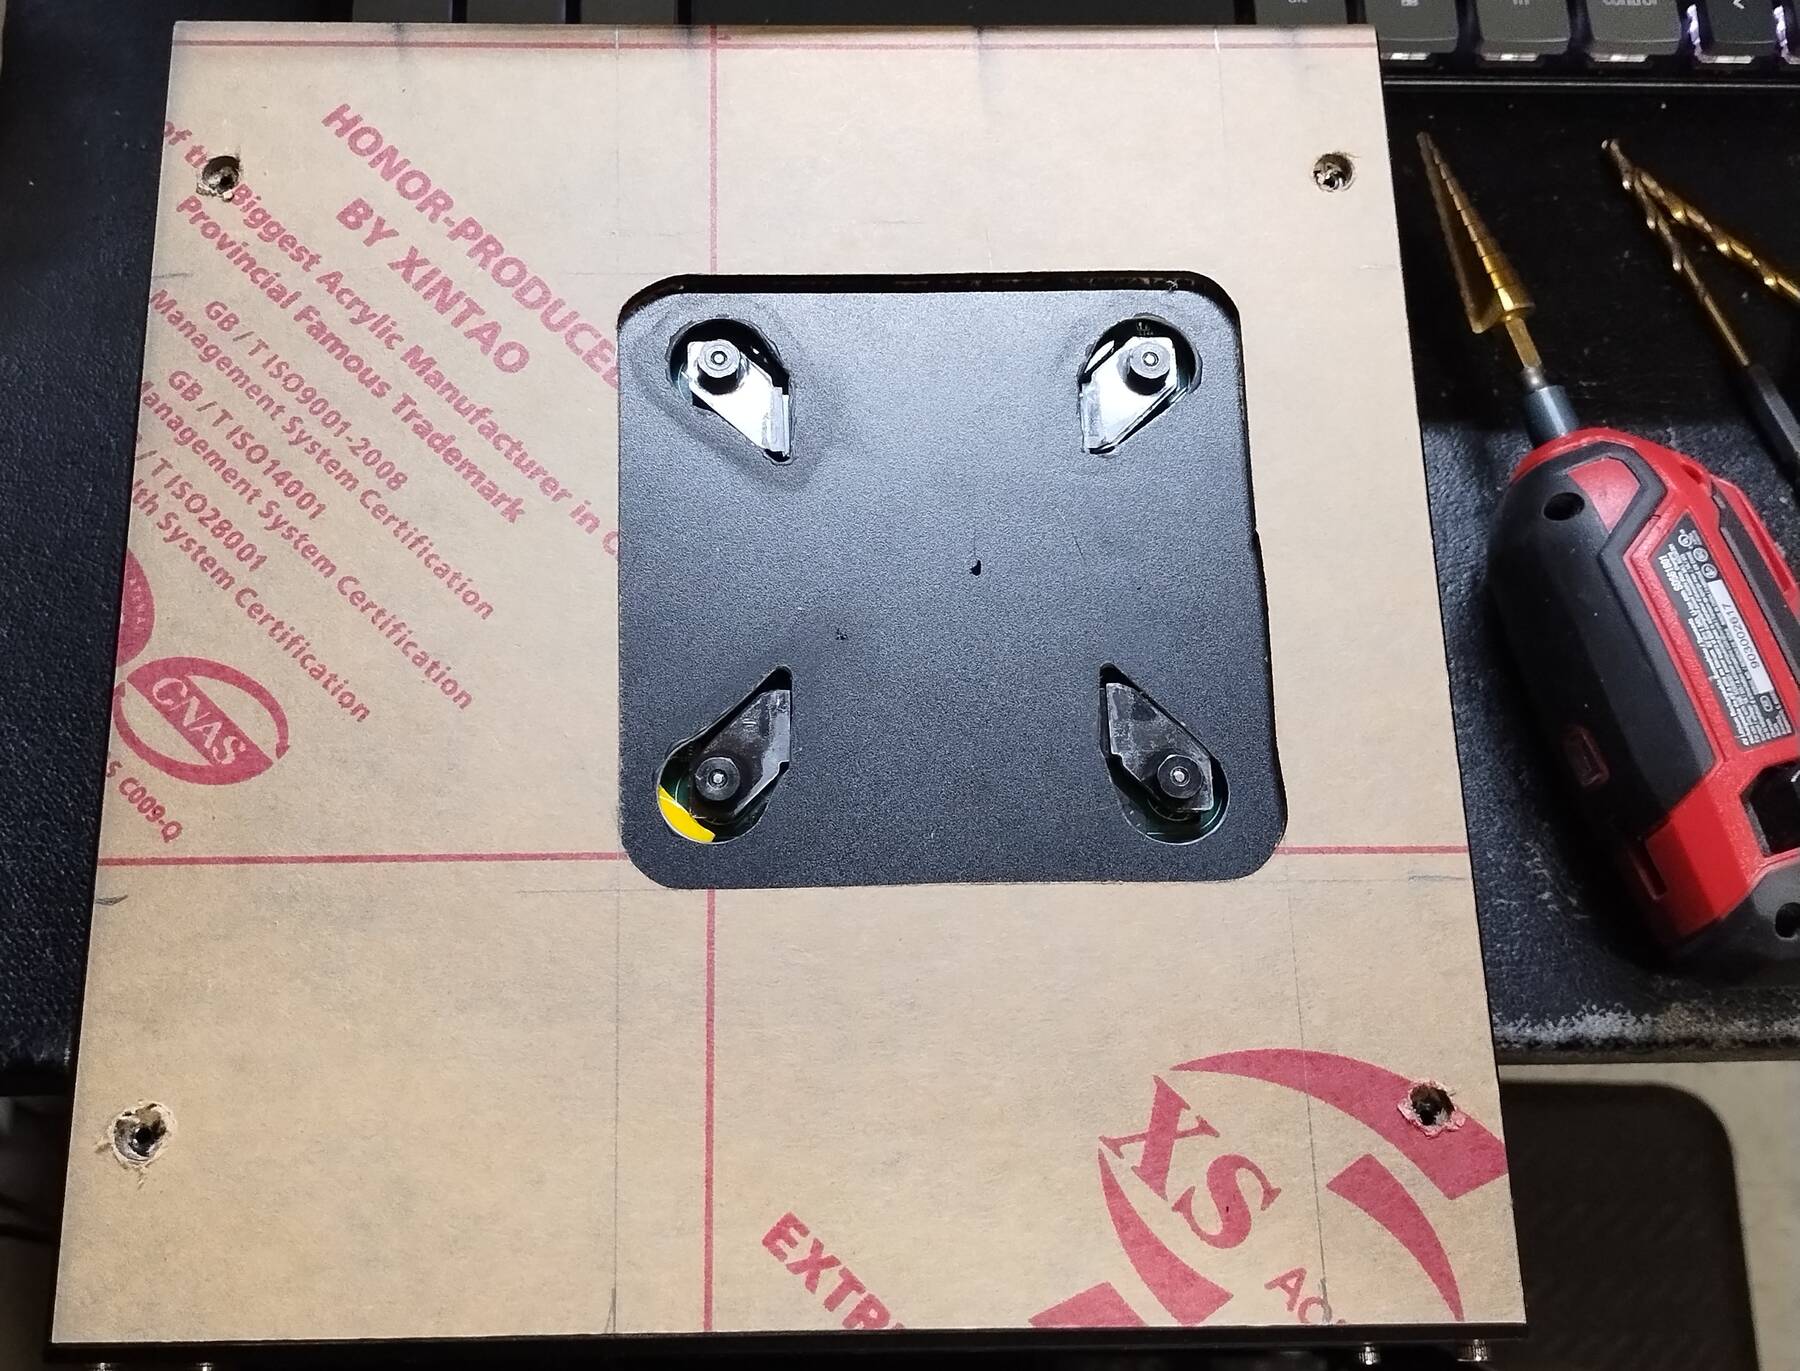
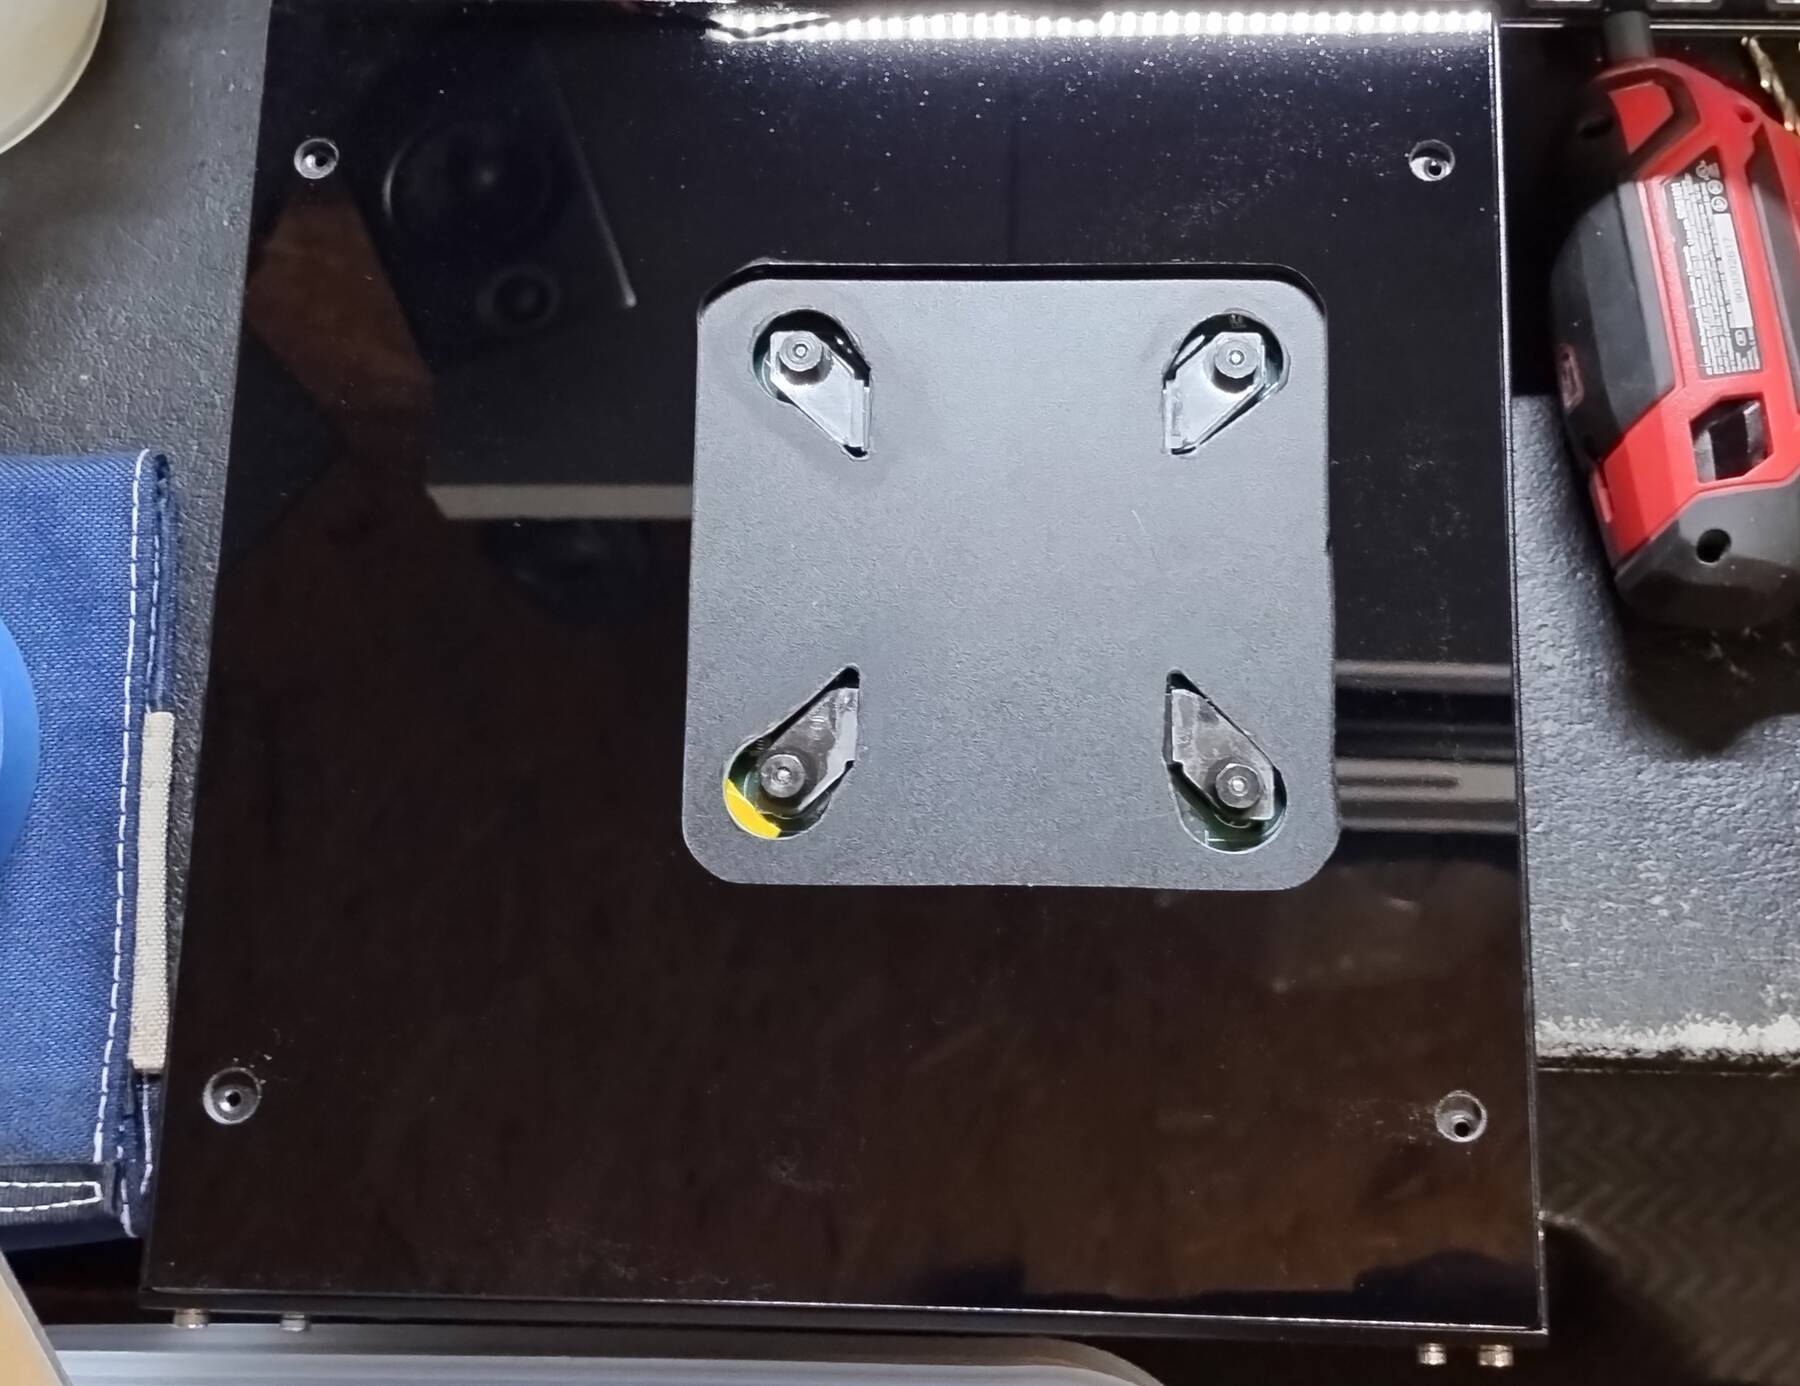
I wall mounted pixy, and set up the ethernet connections in anticipation of adding some extra frigate cameras.
I was able to use the side foot mounts and a couple L brackets for a nice upside down wall mount. This keeps the fan intake at the bottom, and vent at the top for natural convection cooling. There is even enough space to sit the AC adapter on top without blocking the vents.


Theoretically the migration should be kind of straightforward. I need to:
- migrate the docker containers and volumes
- export the zfs pool (external USB drive)
- shut down the old system
- import the zfs pool
- try to run the containers
- fix breakage
- migrate frigate storage to SSD
- add coral accelerator to frigate
Here is how it actually went:
- Fail to migrate the docker images
My docker containers are run by docker compose, and some are probably on old images. I didn't want to upgrade during the transfer. I read that I could use
docker saveon the tags, then copy the archive over and import them. First, I did:sudo docker save -o yamato.tar ghcr.io/blakeblackshear/frigate plexinc/pms-docker homeassistant/home-assistant jellyfin/jellyfin
Then on the new host:
sudo docker import hostname.tar
Unfortunately this created a massive combined image with no associated information. Completely useless.
- Migrate the docker images (kind of worked)
My second try was to create one archive per image:
sudo docker save -o yamato-frigate.tar ghcr.io/blakeblackshear/frigate
sudo docker save -o yamato-plex.tar plexinc/pms-docker
sudo docker save -o yamato-ha.tar homeassistant/home-assistant
sudo docker save -o yamato-jellyfin.tar jellyfin/jellyfin
Now when importing the docker image, you also need to specify the repository.
sudo docker import yamato-frigate.tar ghcr.io/blakeblackshear/frigate
sudo docker import yamato-plex.tar plexinc/pms-docker
sudo docker import yamato-ha.tar homeassistant/home-assistant
sudo docker import yamato-jellyfin.tar jellyfin/jellyfin
The result isn't quite as expected. The image on the new machine is slightly larger, and it has a different image id hash.
sudo docker image ls (old machine)REPOSITORY TAG IMAGE ID CREATED SIZE ghcr.io/blakeblackshear/frigate stable 79c58d895643 4 months ago 2.71GB plexinc/pms-docker latest b38775eb69f9 4 months ago 353MB homeassistant/home-assistant latest c50a3dd3f13c 9 months ago 1.79GB jellyfin/jellyfin latest 49572434ce4c 13 months ago 1.04GB
sudo docker image ls (new machine)REPOSITORY TAG IMAGE ID CREATED SIZE ghcr.io/blakeblackshear/frigate latest d75574ec77dc 4 minutes ago 2.75GB plexinc/pms-docker latest a98c75f9b6fa 26 seconds ago 359MB homeassistant/home-assistant latest 60684c70a59e 3 seconds ago 1.93GB jellyfin/jellyfin latest b34dd069e9b3 38 seconds ago 1.04GB
We're going to ignore that and move on to copying the volumes.
- Migrate the docker volumes
First we recreate the empty volumes. Do a
docker volume lson the old host. Thendocker volume create <volume name>, once per volume, on the new host.Then I tarred up the whole volumes directory, copied it over, and moved each directory on top of the new empty ones.
Filesystem resizing side questAt this point I ran out of space. There was a side quest of resizing some LVM volume groups and their filesystems. Unfortunately I also needed to change the root partition. So I loaded up the Debian rescue. I learned the easy path was broken because
lvreduce's--resizefsdepends onfsadmwhich isn't included. I tried copying it over, but it is a bash script, and rescue has no bash. Lots ofresize2fs,lvreduce, andlvexpandhappened. Onward.The volumes I created disappeared during the reboot (probably because I deleted their directories), so I created them again. I emptied the resulting directories and copied the old files over them.
- Copy the docker compose files
Just then I remembered to transfer the docker compose files over, and I read through them for any missed items. Jellyfin's had a reference to the old hostname which I updated.
- Export the ZFS pool, bring down the old system, import the ZFS pool
Now it was time for the ZFS transfer. A simple zfs export, and import (after installing ZFS).
I also had a bind mount, and NFS export, but these were done traditionally rather than through ZFS features so I copied them into the new
fstabandexportsfile. I did a quick reboot, and everything seemed to be correct. Kerberos config can come later. - Try running the containers
Now we launch the containers and expect a little breakage.
My plex container failed immediately. It errored like:
sudo docker-compose -f docker-plex.ymlCreating plex ... error ERROR: for plex Cannot create container for service plex: No command specified ERROR: for plex Cannot create container for service plex: No command specified ERROR: Encountered errors while bringing up the project.
I tried manually pulling an updated plex image, and it began working
I had the same issue with jellyfin.
The frigate container redownloaded itself, and started up normally. Cameras were running, and old content was accessible. Woohoo! There is some weirdness with two frigate images showing, and neither is getting pruned.
- Coral accelerator configuration
I added the Coral device to the docker compose file. Then changed the frigate config over to the Coral PCIe TPU. The old model stanza (for OpenVINO in my case) is just deleted, no need to specify one.
I have been getting some PCIe errors from dmesg. Haven't taken time to look into it yet.
Coral TPU (apex) PCIe errorpcieport 0000:00:1d.4: AER: Multiple Corrected error message received from 0000:05:00.0 apex 0000:05:00.0: PCIe Bus Error: severity=Corrected, type=Physical Layer, (Receiver ID) apex 0000:05:00.0: device [1ac1:089a] error status/mask=00000041/00006000 apex 0000:05:00.0: [ 0] RxErr (First) apex 0000:05:00.0: [ 6] BadTLP
- Frigate data to SSD migration
I moved the frigate media over to an SSD. It involved stopping the container, copying the files (200GB at 50 MB/s), updating the docker compose file, and restarting.
- NTP setup
I nearly forgot that yamato was an NTP server for the cameras. I set up OpenBSD NTP daemon again. Cameras were addressing it by IP so I went ahead and gave this the old IP. It won't be a problem since yamato is disconnected from the camera net now.
fbdev output and system-wide pulseaudio
Eventually I want this machine to output video on an HDMI port for feeding a Blonder Tongue HDE-CSV-QAM RF modulator.
- Some playback testing
- ffmpeg
The first direction I found was to use ffmpeg, and output to the fbdev device.
ffmpeg -i Akira\ \(1988\)\ -\ 1080p.mkv -pix_fmt bgra -f fbdev /dev/fb0
This got video on the output, but there were some issues:
- playback is very fast
- no audio
- video is played at native resolution
I don't think ffmpeg can do this job. It just pipes video, and the fbdev seems to accept all frames as fast as possible, and then display what it can.
- mplayer
- mplayer's fbdev2 output.
mplayer -vo fbdev2 Akira\ \(1988\)\ -\ 1080p.mkv
This started off looking reasonable. Playback is a little choppy, but it has other problems.
- part of the console login prompt is visible
- console text isn't cleared unless in the video display area
- the cursor blinks through the video (probably have to disable video console)
- no audio (fixed with system-wide pulesaudio below)
- not fullscreen
To fix the fullscreen issue I ran
fbset, and noticed the mode was 1024x768. Then I ranfbset -fb /dev/fb0 -g 1920 1080 1920 1080 32.I don't know if 32-bit color is reasonable, but
/sys/class/graphics/fb0/device/modesat least indicates there is a 1920x1080 mode.Next mplayer has to scale the output. You can pass
-vf scale=1920:-3(use original aspect, scale to width). Other methods such as zoom, and switching with key shortcuts doesn't seem to work. Unfortunately the playback is prone to tearing. - mplayer also has SDL output with the fbcon device.
sudo SDL_VIDEODRIVER=fbcon SDL_FBDEV=/dev/fb0 mplayer -vo sdl -framedrop Akira\ \(1988\)\ -\ 1080p.mkv
- needs to be run as root
- delayed start-up, about 5 seconds
- no audio (fixed with system-wide pulesaudio below)
- no fullscreen without scaling like above, suffers the same issues
- mplayer's fbdev2 output.
- mpv (mpv.io)
I had an unexpected problem with mpv. It appears it was outputting to my dummy plug that I put on the DisplayPort output. Once I removed it, playback works great.
mpv --vo=drm Akira\ \(1988\)\ -\ 1080p.mkv
You can also specify the output manually like:
mpv --vo=drm --drm-connector=HDMI-A-2 Akira\ \(1988\)\ -\ 1080p.mkv
Run
mpv --drm-connector=helpfor a list of outputs. - vlc
There were some mentions of a DRM/KMS backend that could be specified while using the
cvlcfrontend. It looks like this is unofficial.
- ffmpeg
- Fixing audio
We're going to run the pulseaudio daemon system-wide. I installed pulseaudio, and followed Running PulseAudio as System-Wide Daemon.
The general steps are:
- disable the systemd service and socket globally
- disable autospawn in
/etc/pulse/client.conf - add users to pulse-access group (including root if needed)
- make a new service to run pulseaudio with
--systemas rootsystemctl edit --force --full pulseaudio.service- Copied from https://wiki.archlinux.org/title/PulseAudio#Starting_system-wide_on_boot
I did a relogin, and audio was working for the mplayer methods without any command changes.
- Trying to fix other things
mpv's drm output seems best so far, with mplayer's SDL output coming in second. I'd like to run mplayer as a normal user.
I tried:
- adding my user to
ttygroup - giving the
ttygroup write access to/dev/console - giving the
ttygroup write access to/dev/tty0
Noting that my user was already in the
videogroup for/dev/fb0access, this still did not work. VO_SDL reports that it is unable to open the console terminal.I checked with strace, but I wasn't finding any access that seemed like a problem.
- adding my user to
- Multiple outputs
It is sort of possible to run multiple outputs on a single card using mplayer's fbdev, and mpv's drm. I found out from h1x's stackexchange answer.
mplayer's SDL mode stopped working while I was trying this. After a reboot it seems to work the same way, and isn't as prone to tearing. It appear what broke it was pressing 'f' during playback. It crashed and then SDL mode would no longer display anything.
While you can do multiple video outputs, you will need a second sound card if you want the audio separate. You could use a HDMI audio embedder to recombine the audio, or some devices, like my modulator, have an analog input.
Debian trixie upgrade and coral gasket breakage
I upgraded a bunch of machines to Debian 13 (trixie). This was probably the simplest one since it has fewer packages, and less configuration changes.
It broke the frigate container because the TPU driver wouldn't load.
The fix is to modify gasket-driver, but there's a caveat. The recommended modifications seem to be for kernel >= 6.13, however I've got 6.12.48.
I only needed to do the first sed:
sed -i -e 's/no_llseek/noop_llseek/g' gasket_core.c
The clue I got for this was from this commit by sethyx which was mentioned at Building gasket-dkms broken on linux kernel 6.5.0 (Ubuntu 23.10) #808.
Machine freezing. Try the hardware watchdog
This machine just dies sometimes. Nothing logged. Stays powered on.
According to the manual this has a NCT6116D hardware watchdog. It seems to be supported by the w83627hf_wdt watchdog timer module. I loaded the module, and in my dmesg output I got:
w83627hf_wdt: WDT driver for NCT6116 Super I/O chip initialising
w83627hf_wdt: initialized. timeout=60 sec (nowayout=0)
I added it to /etc/modules-load.d/modules.conf.
Then I installed the watchdog package, and modified /etc/watchdog.conf.
I uncommented the watchdog-device, and watchdog-timeout settings (left at default 60). Then rebooted, and set the BIOS timeout to 80 (just a little headroom).
To verify the watchdog was active, I sat on the GRUB screen for 80 seconds. It rebooted after a bit. Unfortunately it also rebooted once the kernel had loaded. I had enough time to check the dmesg output, and watchdog service. They showed:
NMI watchdog: Enabled. Permanently consumes one hw-PMU counter.
w83627hf_wdt: Watchdog already running. Resetting timeout to 60 sec
pixy watchdog[2023]: watchdog now set to 60 seconds
pixy watchdog[2023]: hardware watchdog identity: iTCO_wdt
pixy systemd[1]: Started watchdog.service - watchdog daemon.
I see that it is using the wrong watchdog (iTCO_wdt). I decided to blacklist that module since I'm not sure if ordering is guaranteed, and the service only seems to take the device name. I wasn't aware of this Intel TCO device until now. Not sure if there's a good reason to use one or the other, but I went ahead with my first choice.
Try again. Fail again. The module was still loaded. I needed to run depmod -ae, and update-initramfs -u to ensure the module does not get loaded.
Now watchdog service reports:
pixy watchdog[2100]: watchdog now set to 60 seconds
pixy watchdog[2100]: hardware watchdog identity: W83627HF Watchdog
The machine is alive and not rebooting. Now we trigger a kernel panic:
echo c > /proc/sysrq-trigger
The machine freezes, and after a while it reboots. Seems like everything is working.
Potential replacement board
Goal: Reduce heat output (and power usage). Spend as little as possible on the fewest new parts.
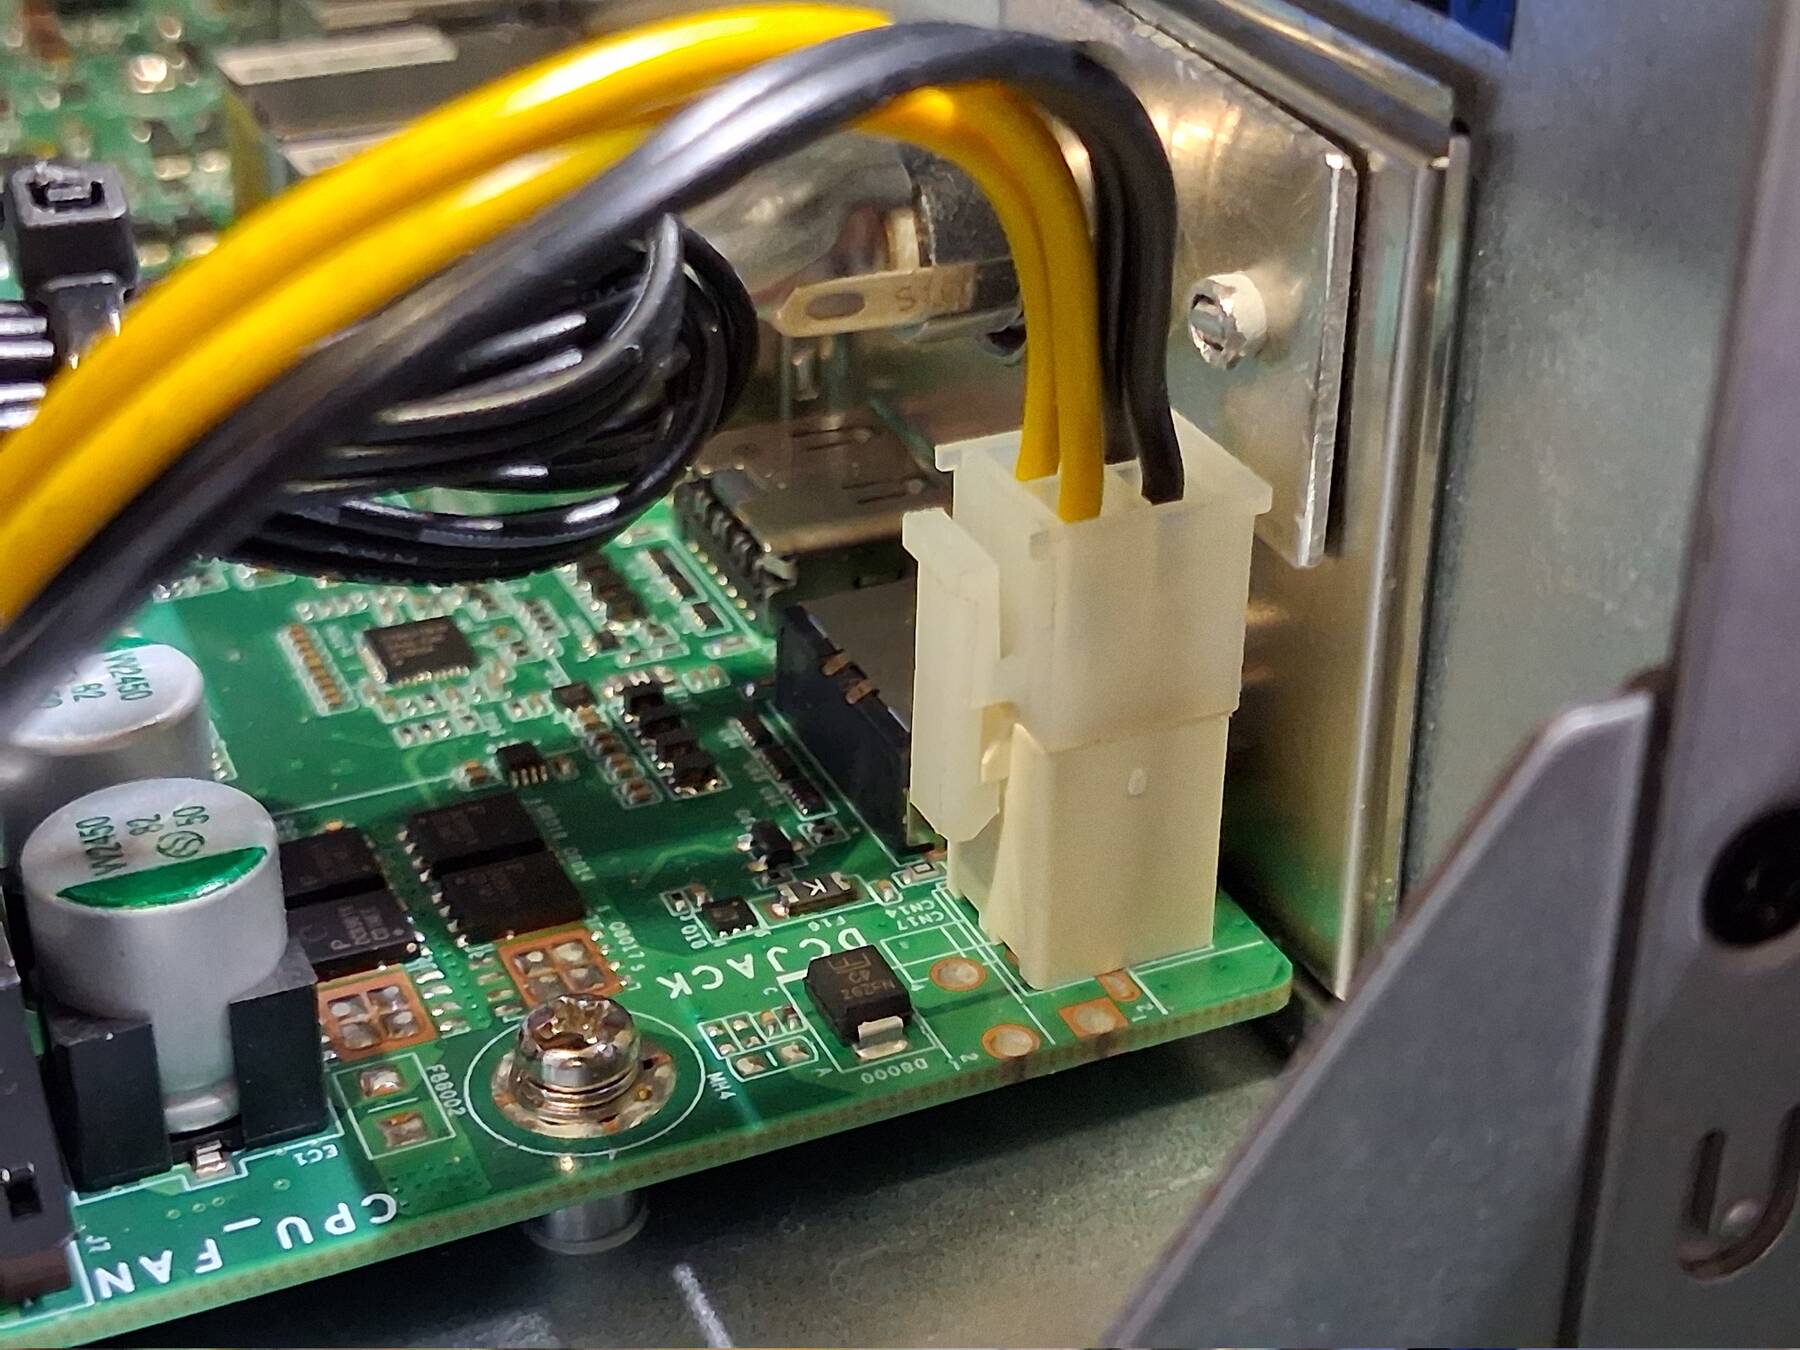
I came across some interesting DFI boards. These are TGU173-IB-1115GRE. A seller has a few listed for quite cheap. They are as-is, have no I/O plate, and only have a 4-pin power connector rather than the barrel jack.
They have 3 NICs, including one 2.5GbE. For expansion they have one 2280 M.2 PCIe, and one 2242 M.2 PCIe/SATA, plus a normal x4 PCIe slot. They use DDR4 SO-DIMMs, same as current.
I would have to get a M.2 2242 to Mini-PCIe adapter for the Coral TPU, but otherwise everything should tansfer over.
| i3-1115GRE | i5-8500T | |
|---|---|---|
| Cores | 2 | 6 |
| Threads | 4 | 6 |
| TDP | 15W | 35W |
| 1-thread rating | 2108 | 1996 |
| CPU Mark | 4588 | 7727 |
If money was no object I'd be considering an N305. Roughly the same single core, but more cores, and the same TDP. Lower power options like the N100 are nice, but they have a 16GB limit that isn't ideal.
Other interesting options are the 8-bay NAS boards with i5-8265U. They have a pair of 2.5GbE NICs, and a couple M.2 2280 slots. I would need one more gigabit NIC. Power is via 24-pin ATX connector so I would need a PicoPSU or other solution.
The day after I wrote this up, the seller dropped the price on two of the i3-1115GRE boards to $40, so I ordered one. Originally they had 1 of 3 Celeron 6305E versions at that price so I'm not sure what motivated the drop on the better CPU.
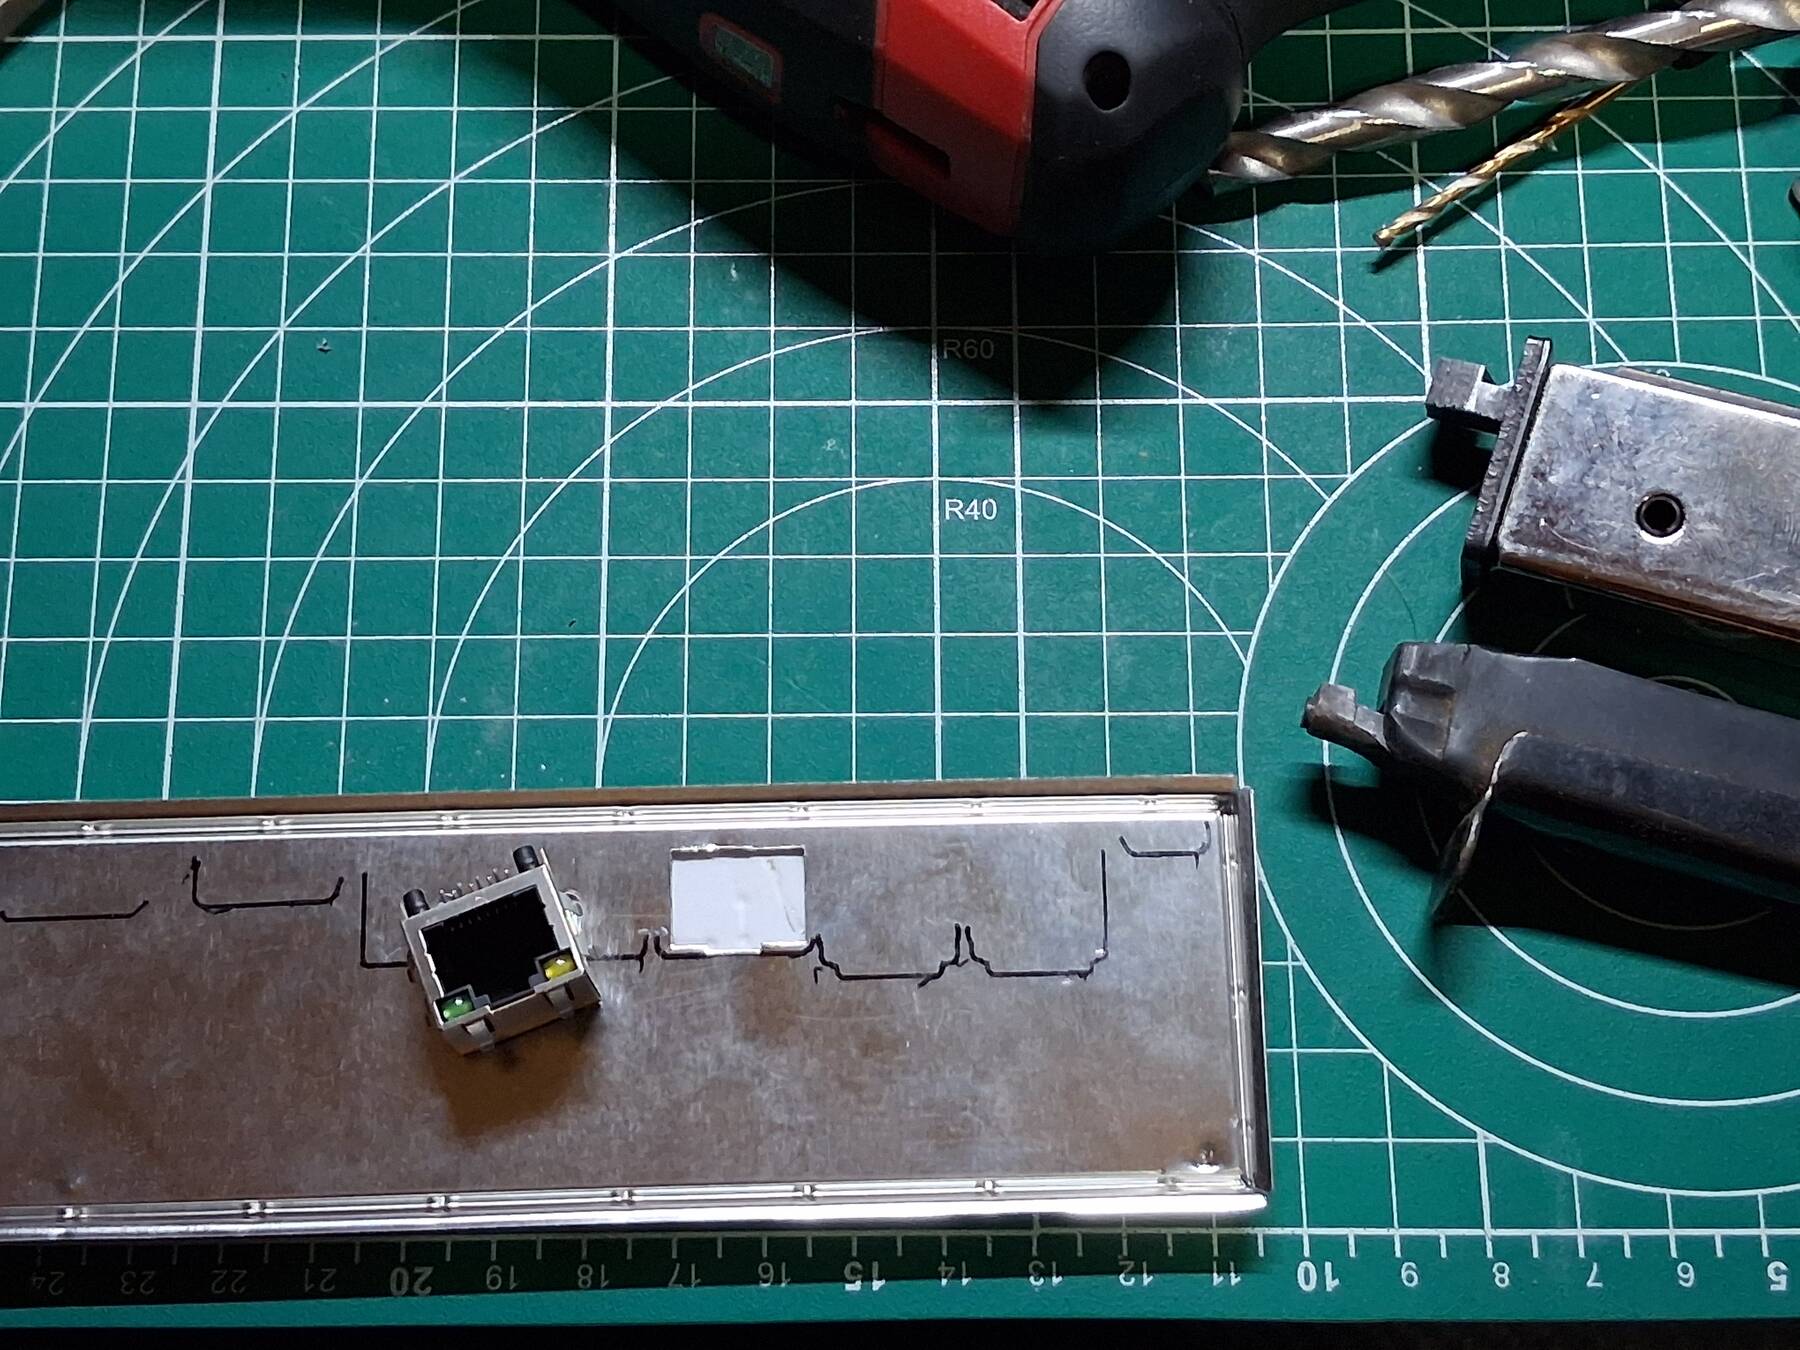
I ordered a blank I/O shield to cut up, and I'll have to see if I can cobble a barrel jack adapter together.
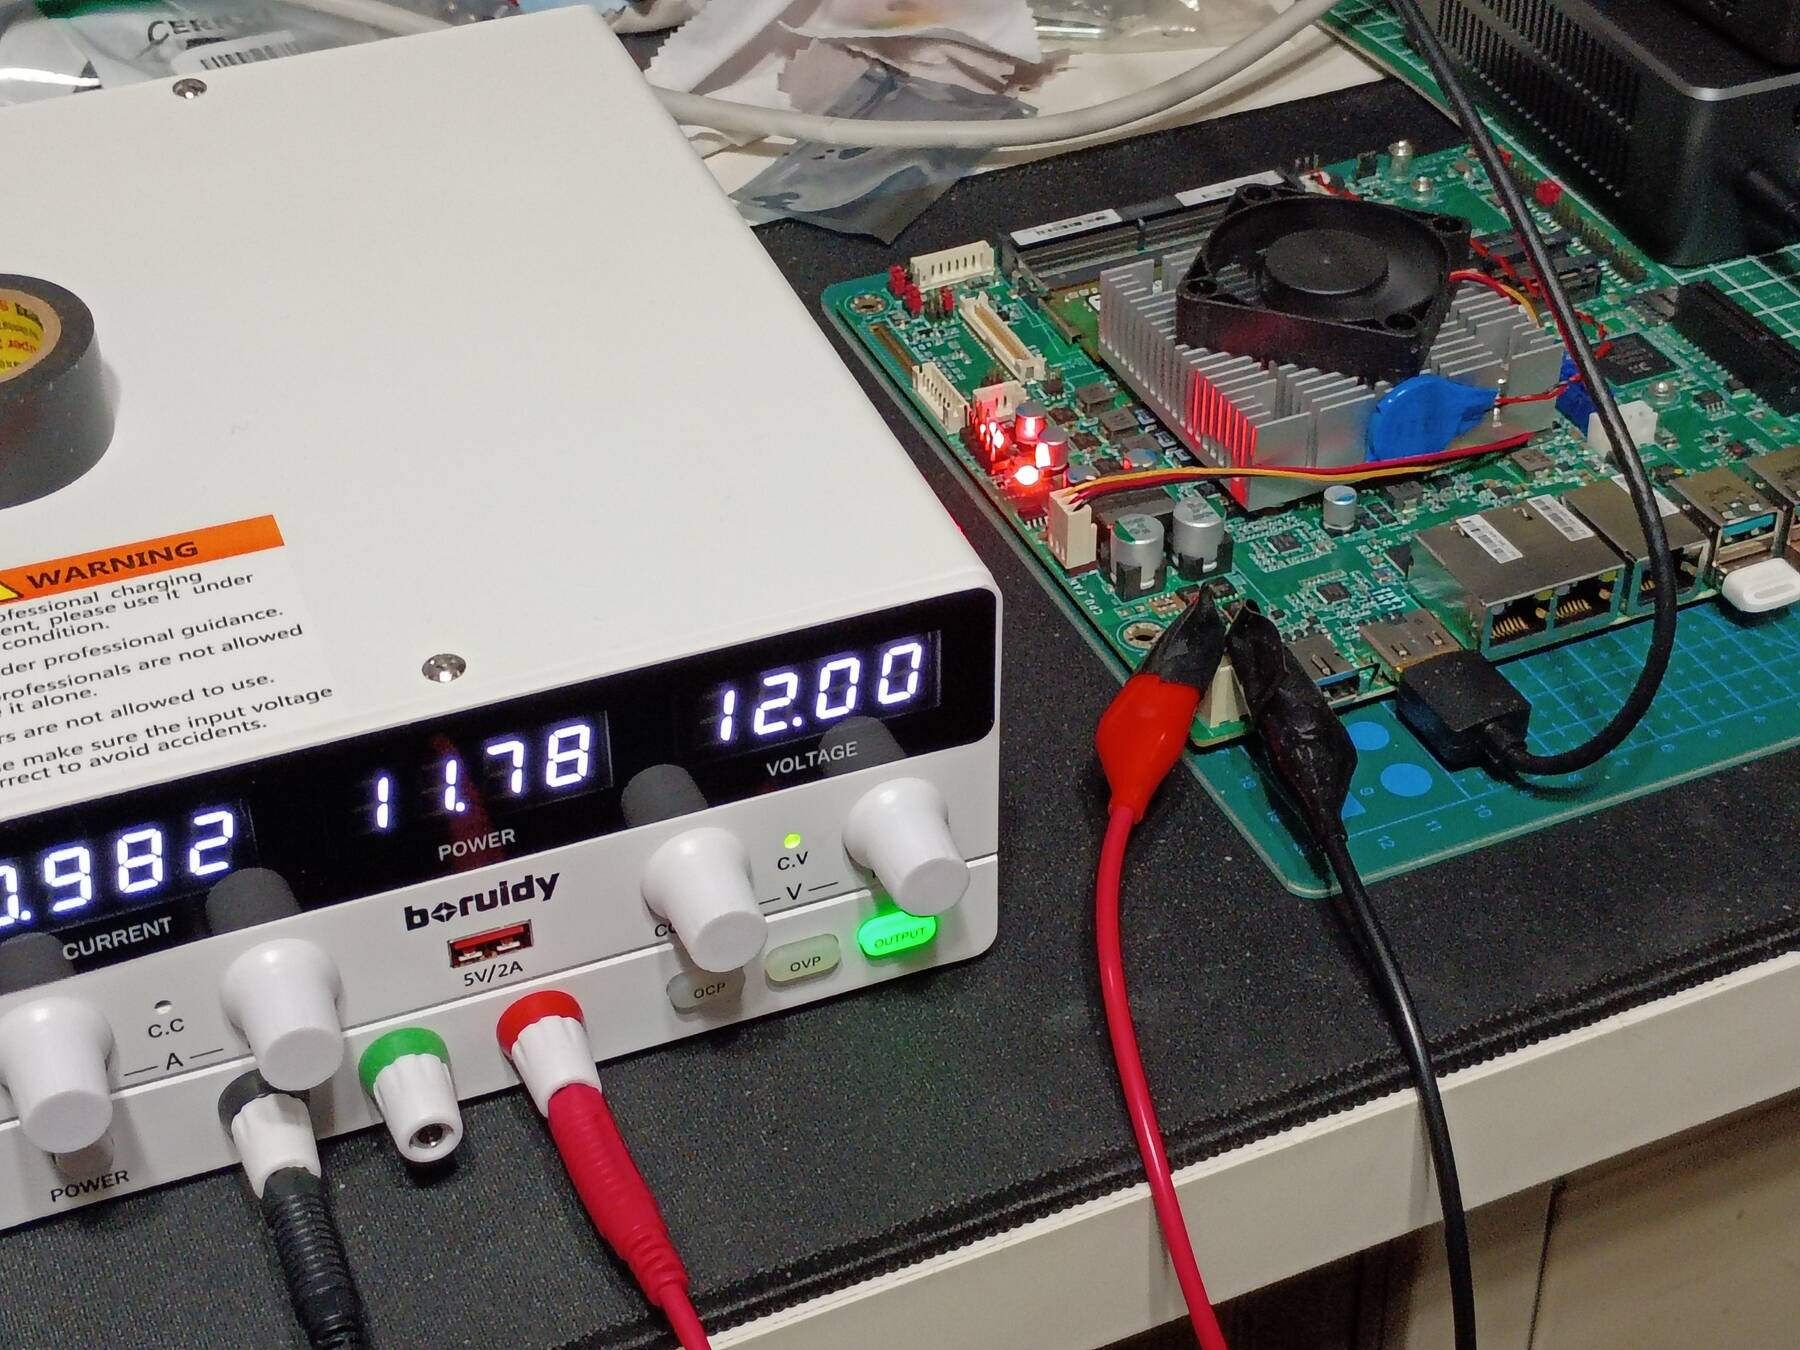
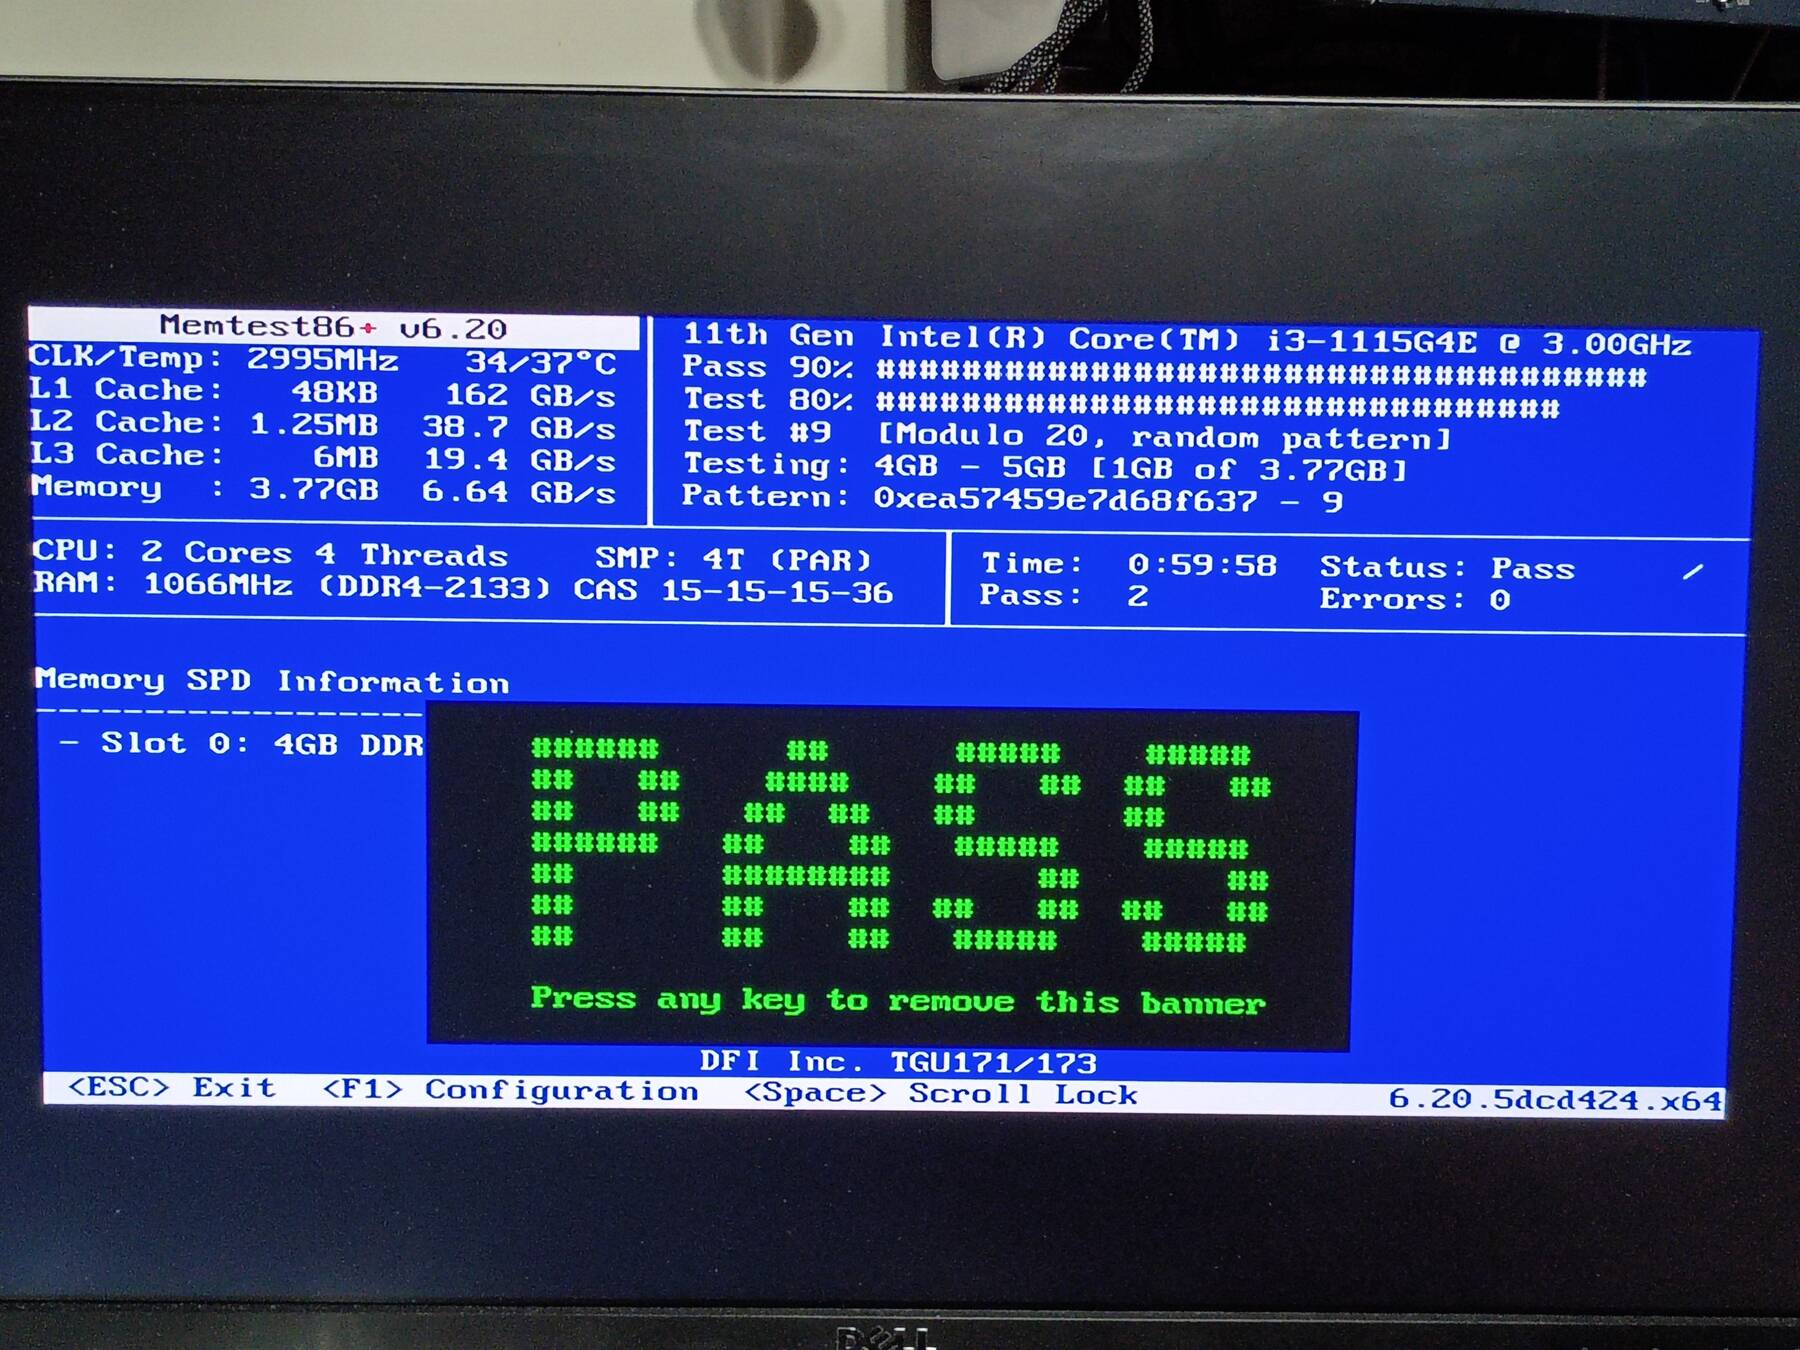
New board testing
I got the new board. Managed to scrounge up a 4GB stick for testing. I stuck some loose pins on alligator clips and used my bench supply for now. First attempt it didn't POST, but I cleared CMOS and it came right up. I just ran Memtest86+ to verify basic functionality. It got through a couple passes.
This board seems to be a slightly custom order, or DFI made some updates. Along with the 4-pin connector (normal option), the CPU differs from the original spec. This has an i3-1115G4E. According to Intel, it lacks ECC support, and picks up an 'image processing unit' (compared to the GRE). Neither matter for my current purpose, but I would have liked ECC support.
The only concerning parts of the board are some bent pins underneath the DisplayPort connector (no shorts), and some of the COM port headers and configuration jumpers got bent up.
I ordered another EDAC power supply that came with a new threaded jack socket. This one is the 60W model, EA10523C-120. Threads look different, but this at least leaves me with a supply for the original board.
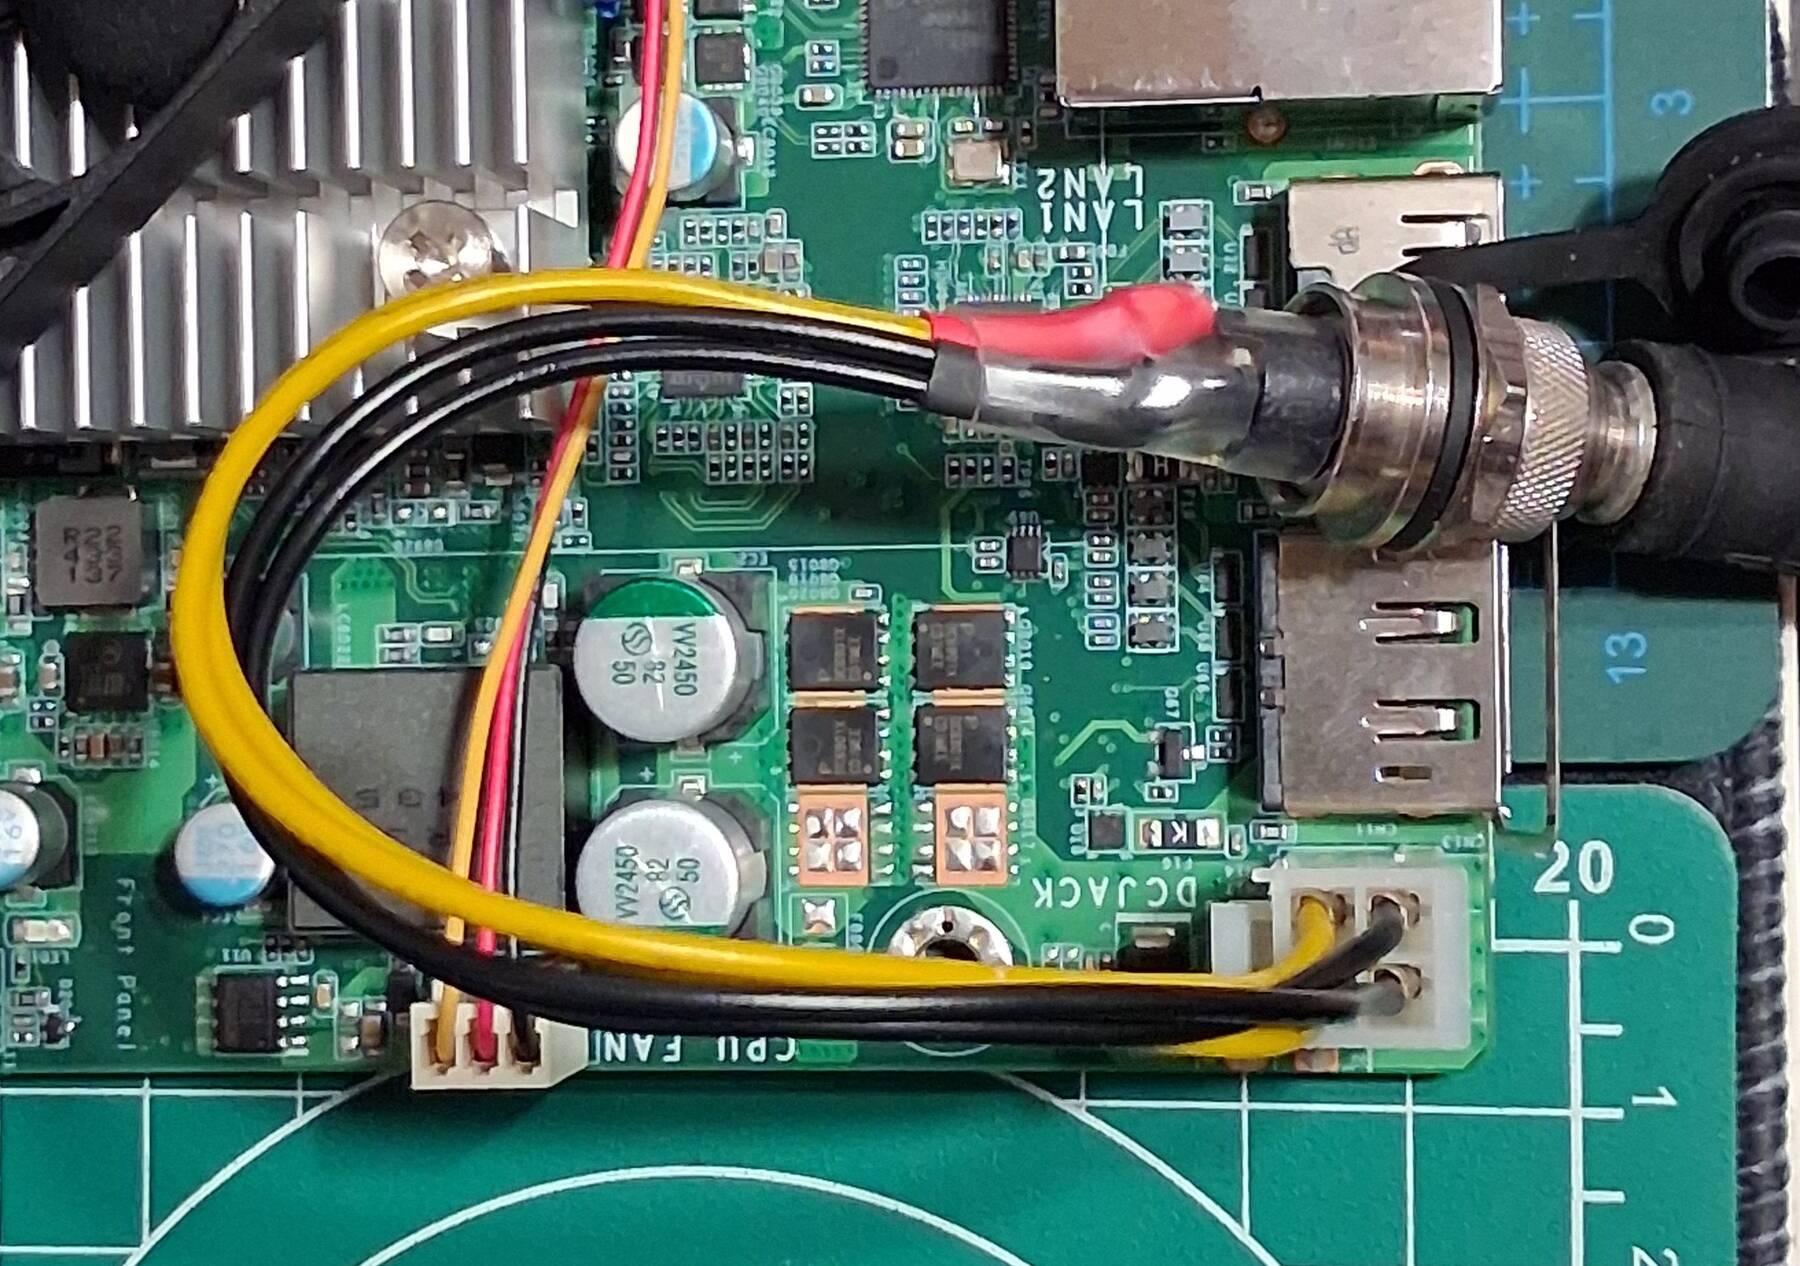
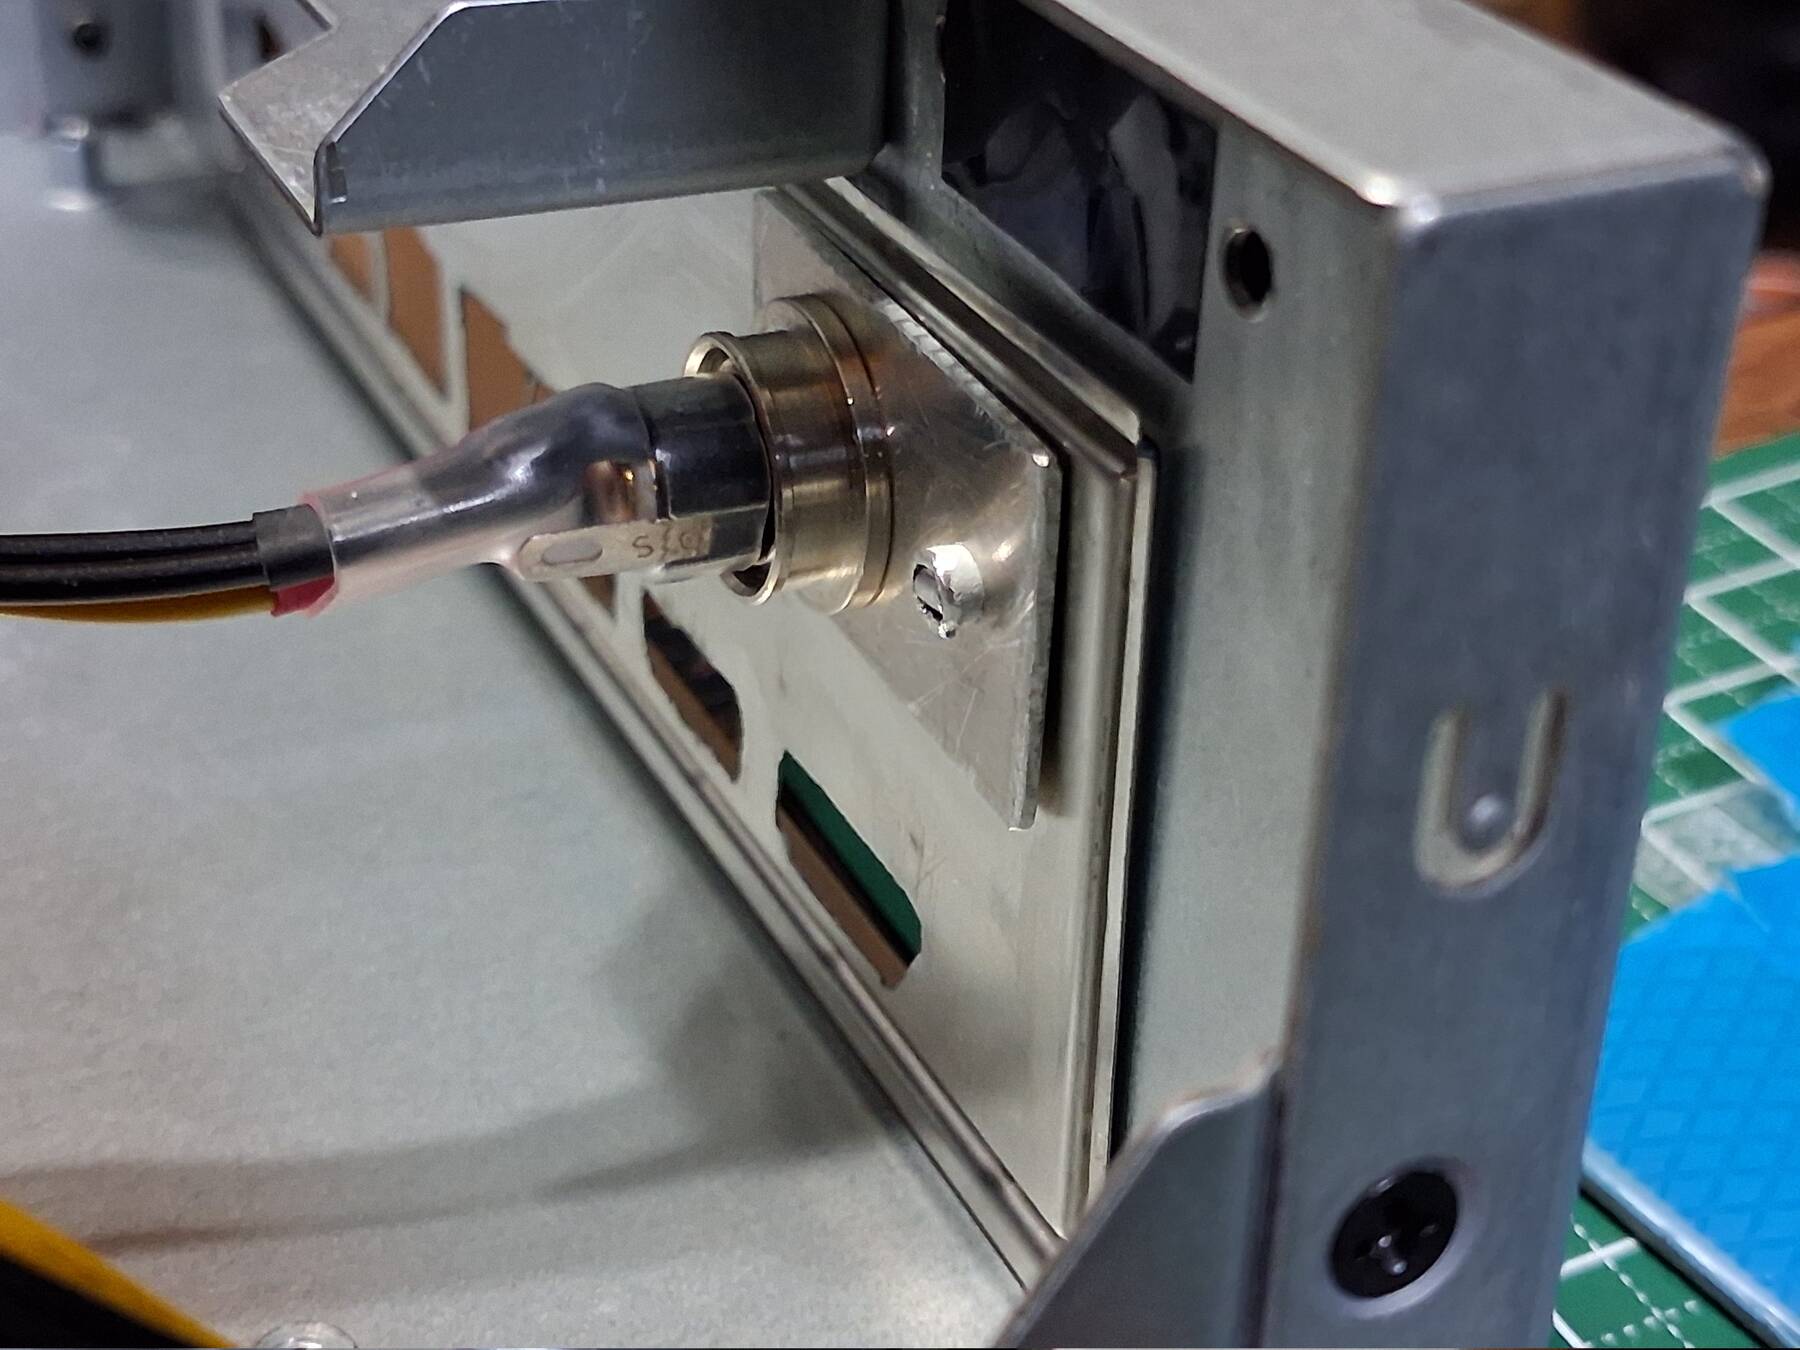
Power connector and I/O shield
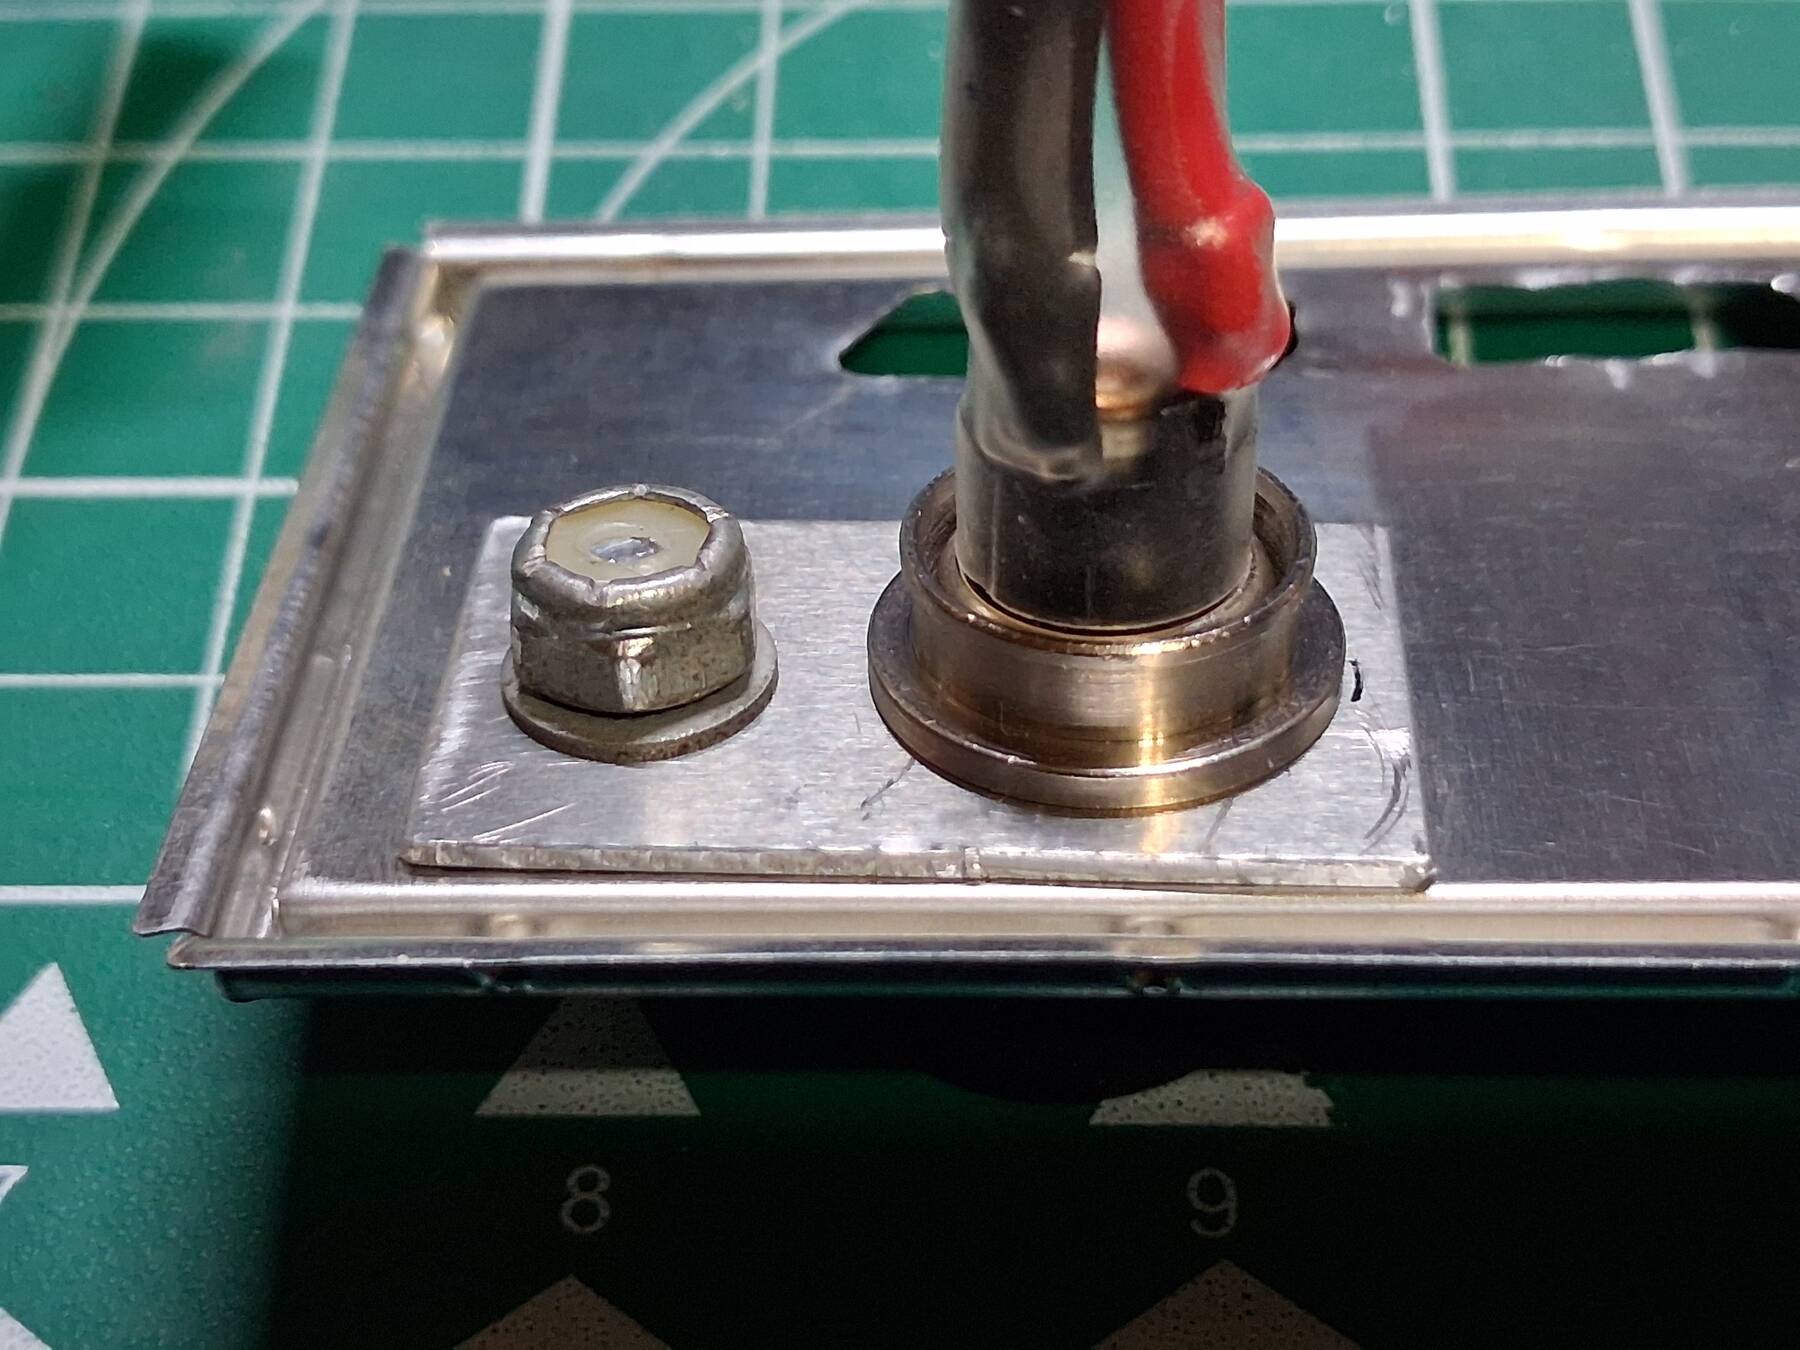
I got the EDAC supply, and the plug and barrel jack are switchcraft. They are a water resistant variety with a o-ring seal, but it also has an unusually long barrel. My barrel jack power meter wouldn't work with the adapter because it barely reaches the internal switch.
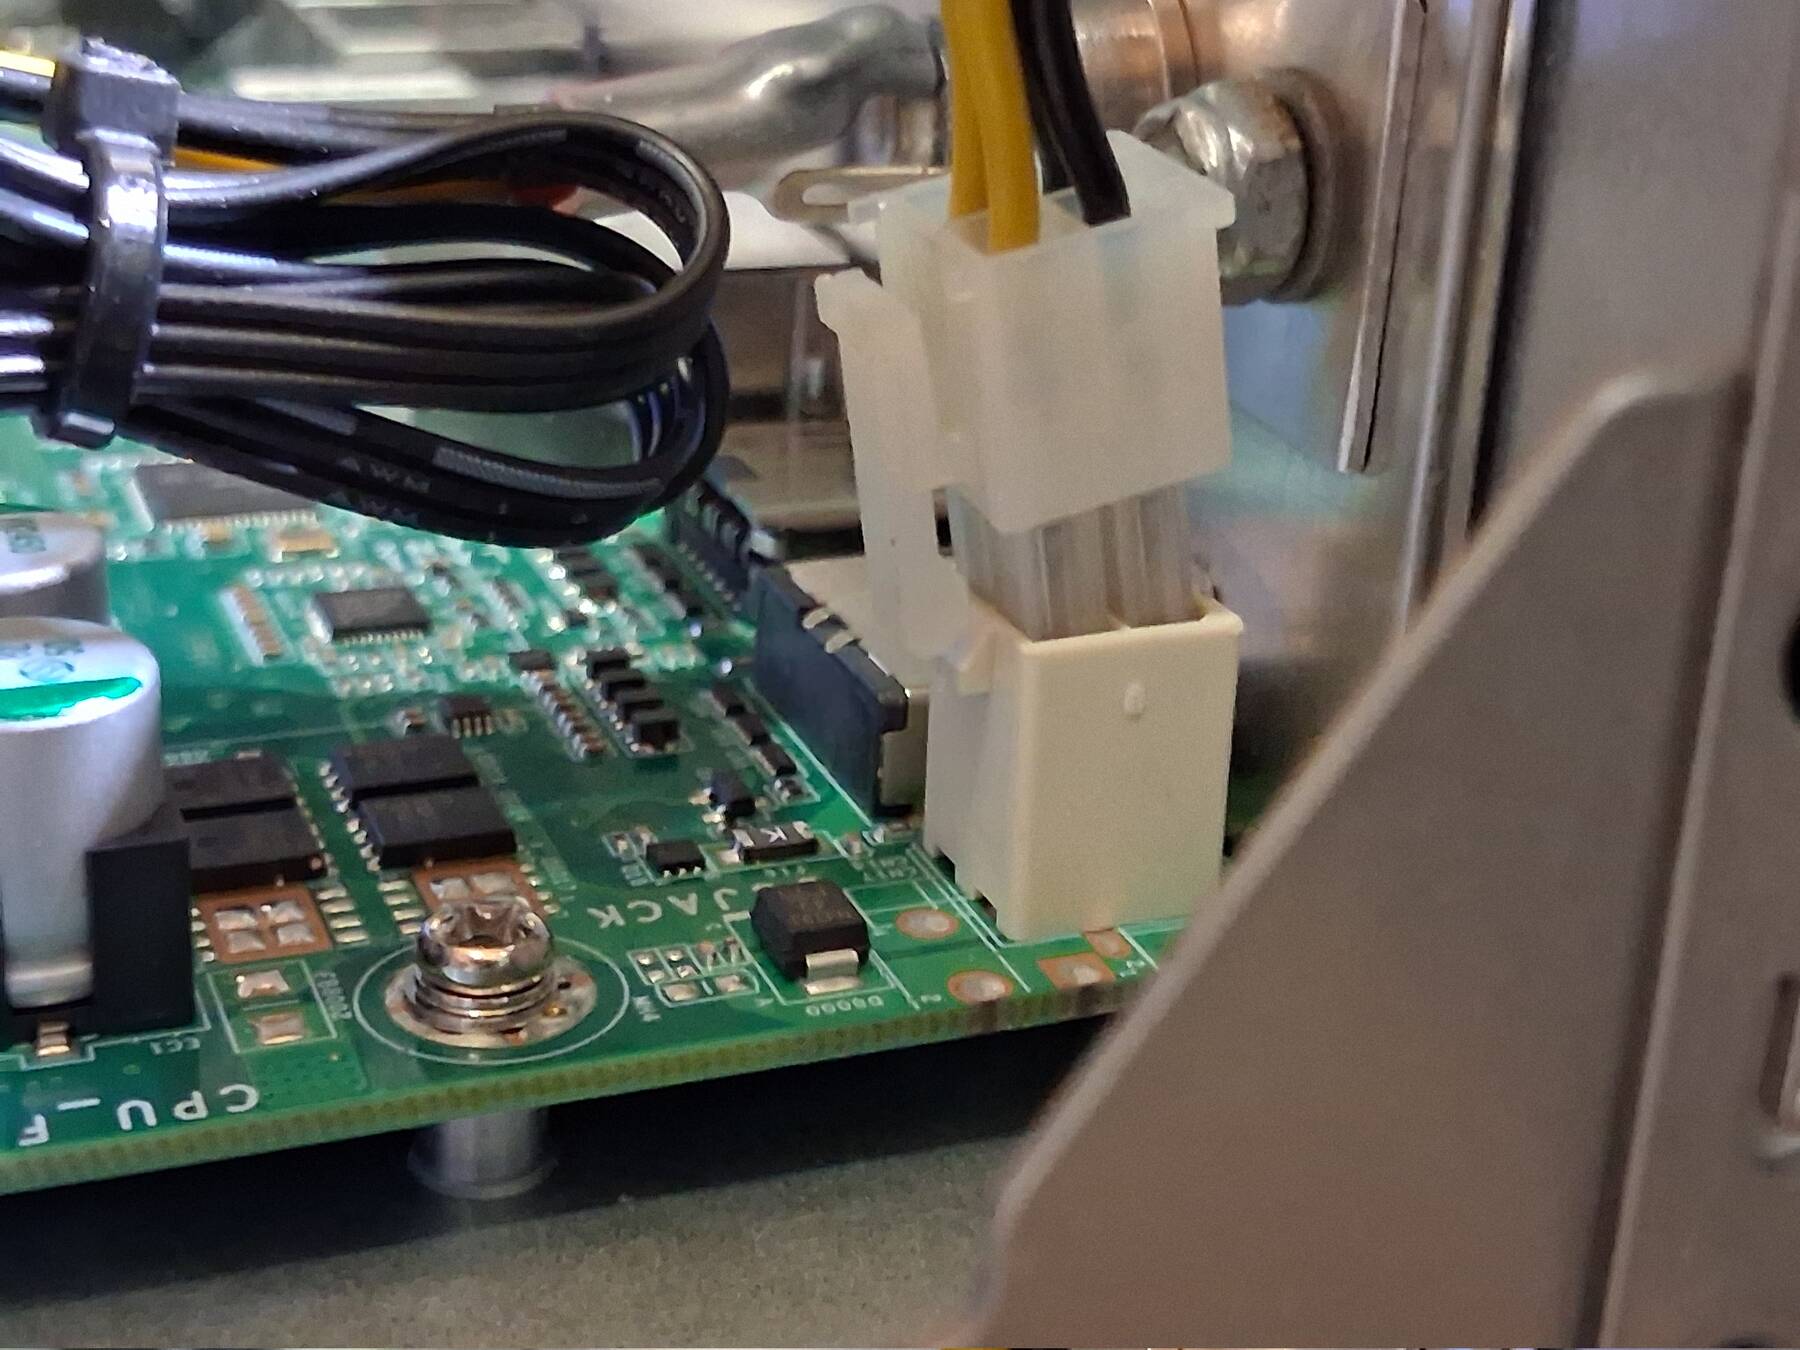
I used a 4-pin ATX power extension for the motherboard connector. It uses the same key and pin out.
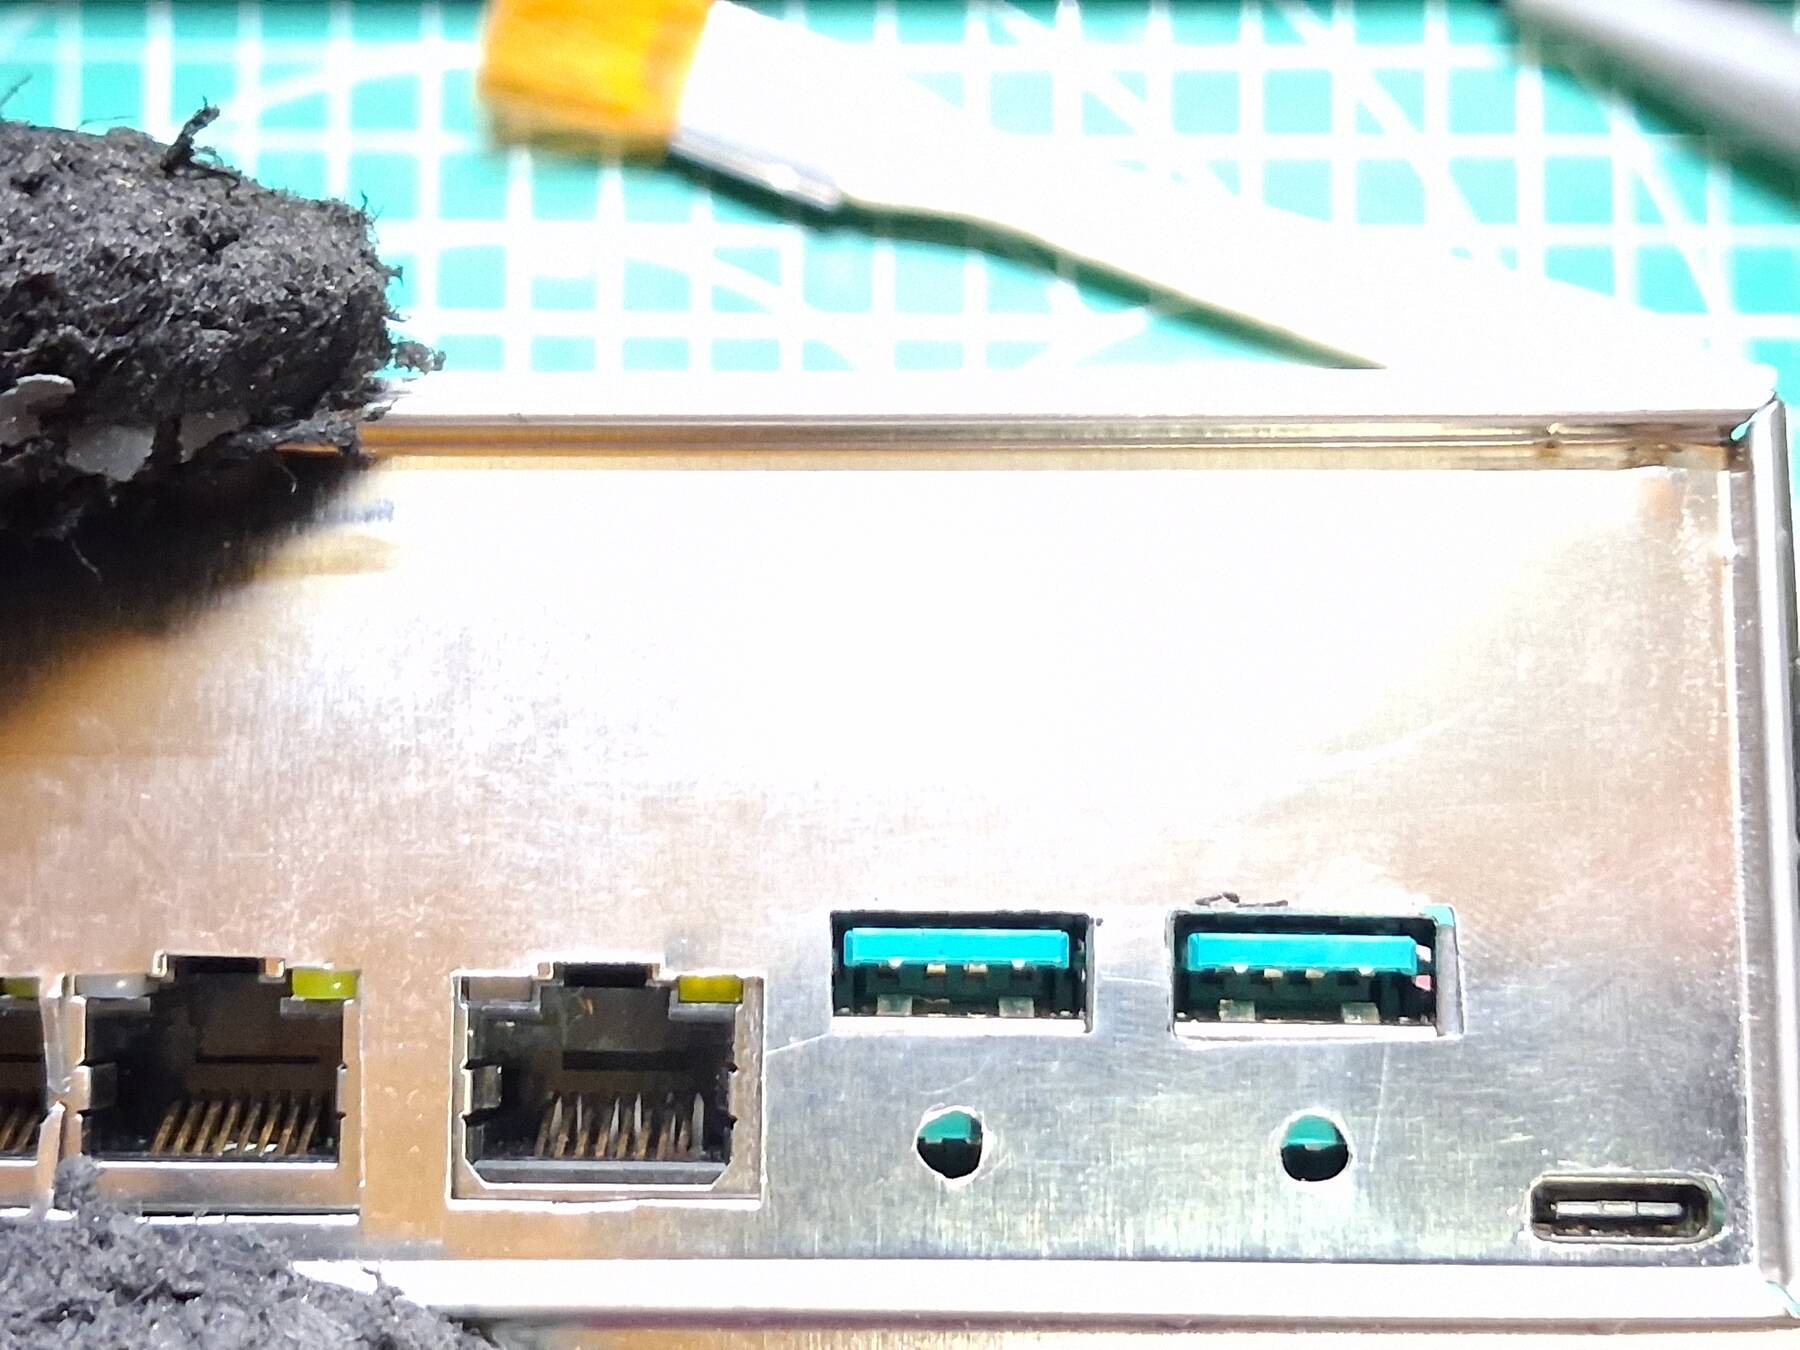
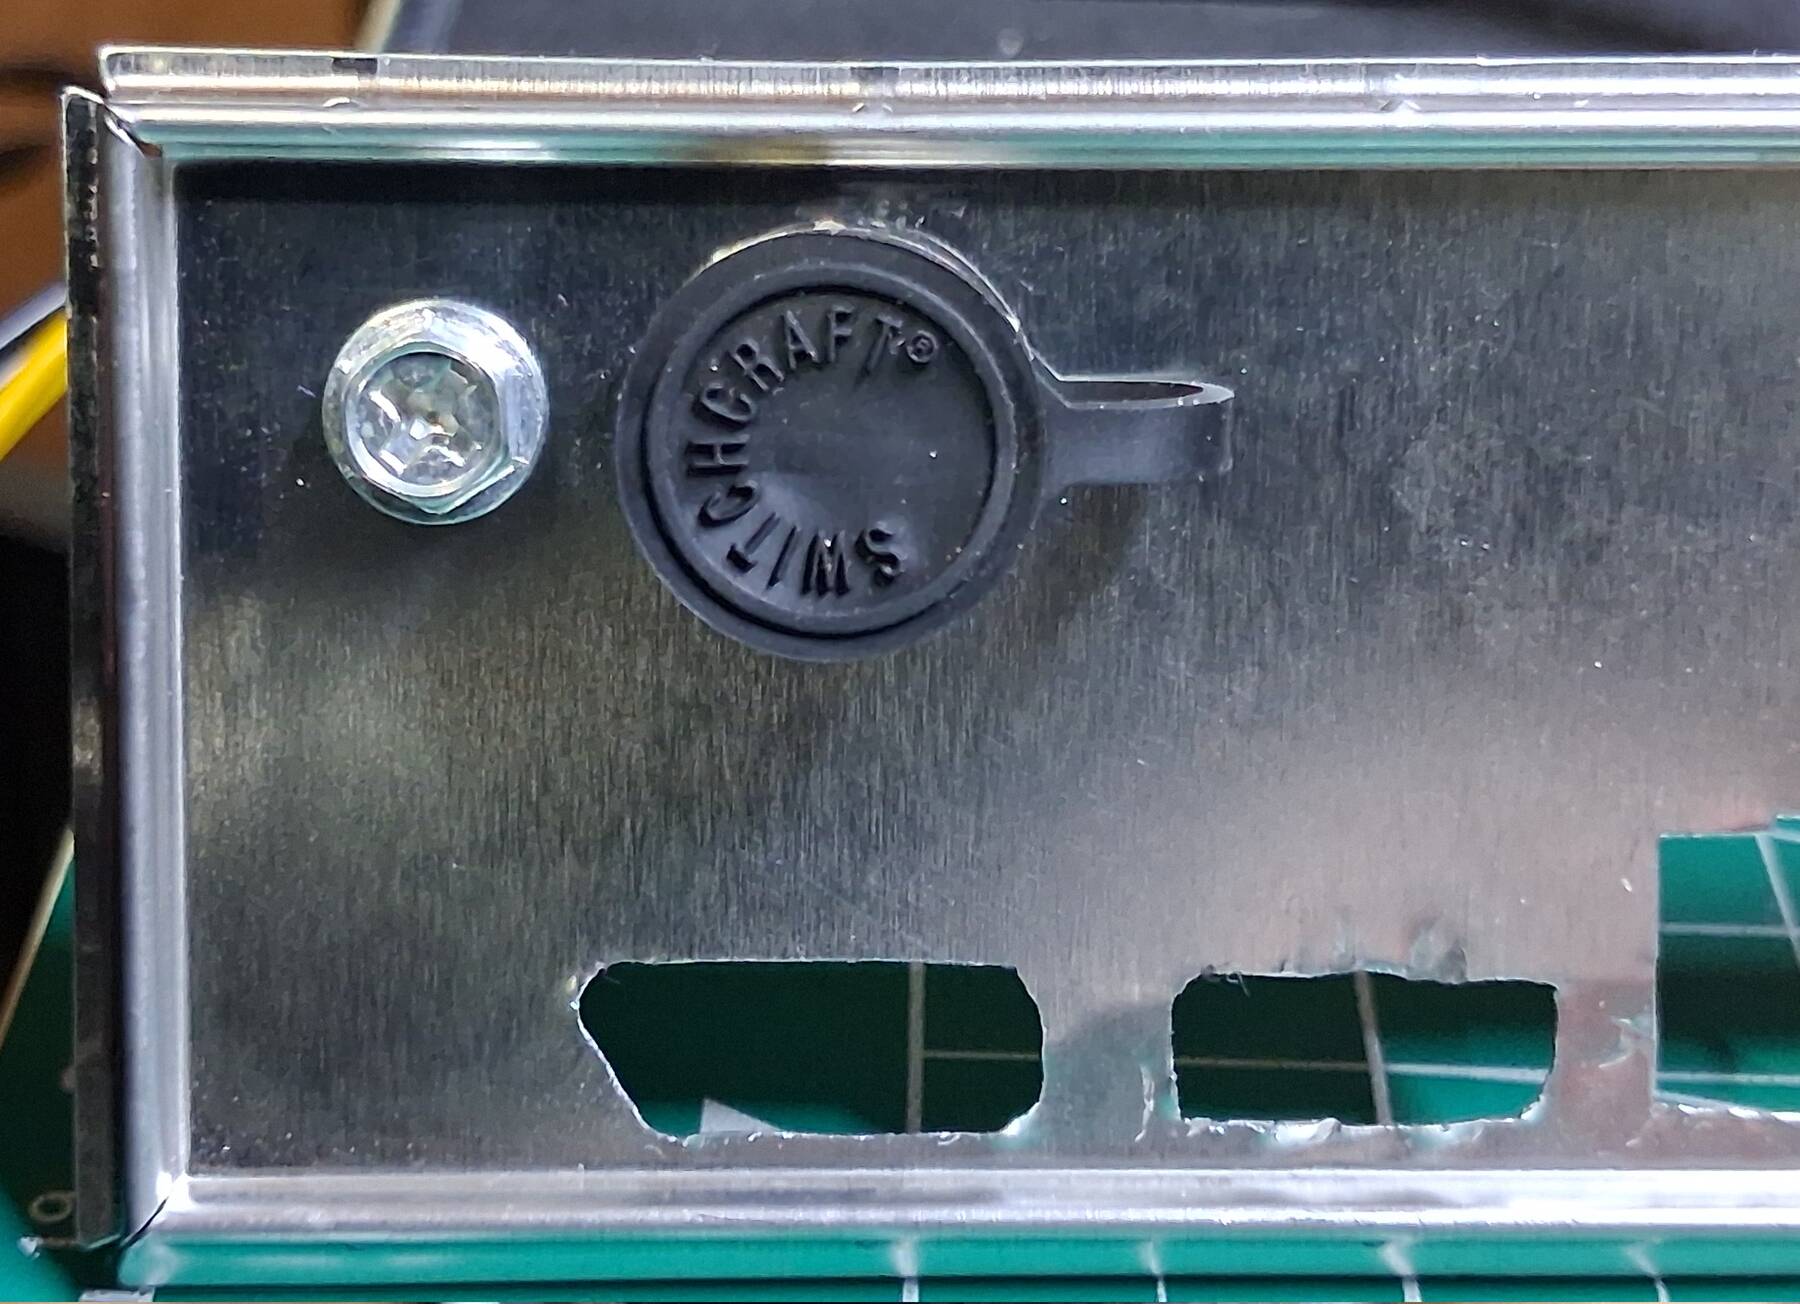
The I/O shield has been a bit of an effort. I started by putting the blank shield in a case, and the motherboard in (no protruding connectors), then tracing around each port with a fine marker.
For the ethernets I picked a rough center point, drilled it big enough to fit my hand nibbler, and used a spare ethernet jack to quickly check my work. It turned out ok, but the double ethernet jack's center is slightly offset.
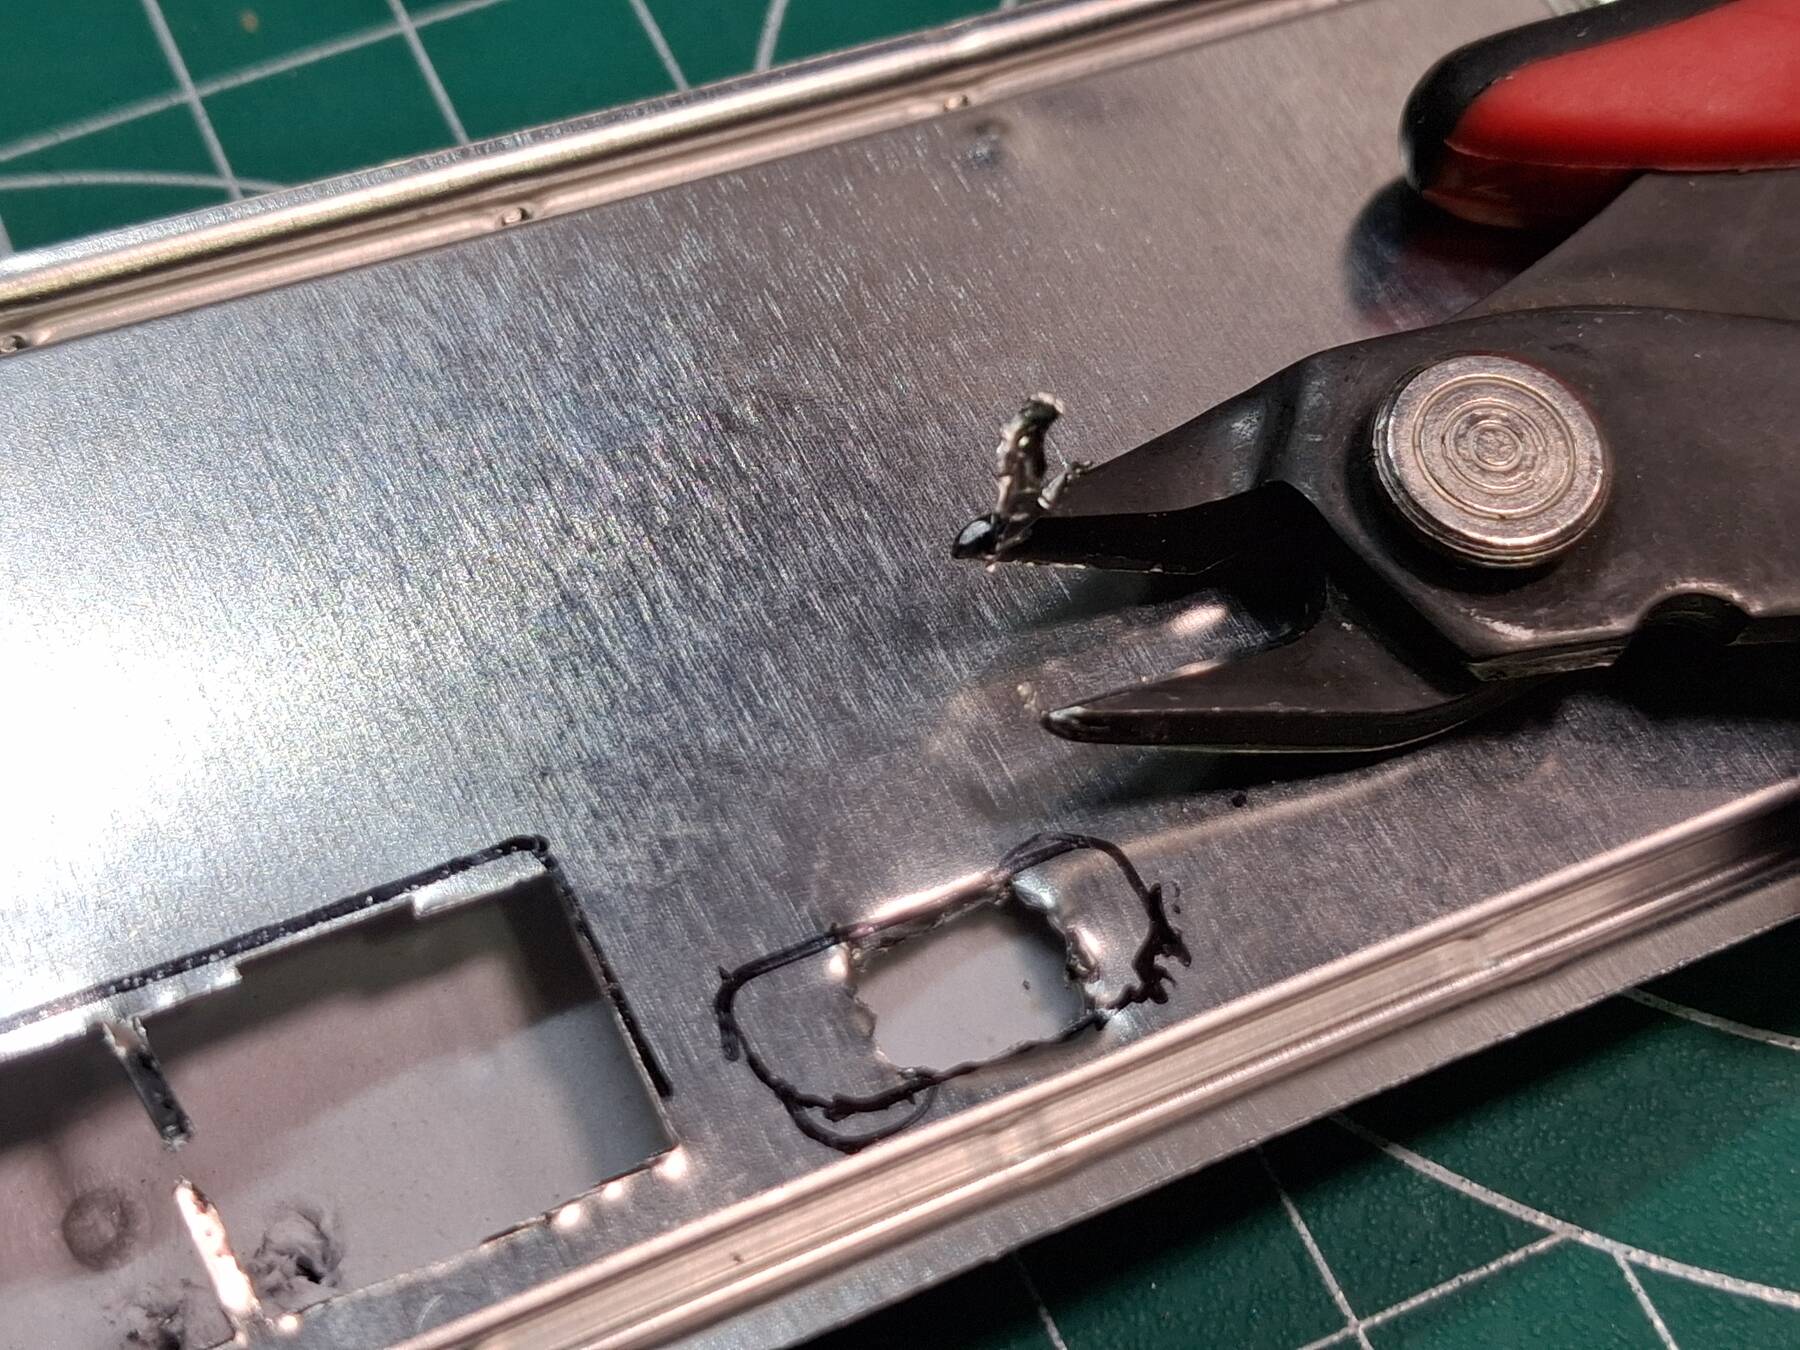
The HDMI didn't go well. I traced the full outline with a loose HDMI port. Next I drilled a starting hole, then tried scribing and flexing a section off. Finally I used my snips to wrench bits off. There just wasn't room for the nibbler at all. Eventually I looked at some other ideas, and came on a recommendation for a jeweler's saw. I've got one, but didn't think of it until now. I finished the HDMI with that, but it is still a bit rough.
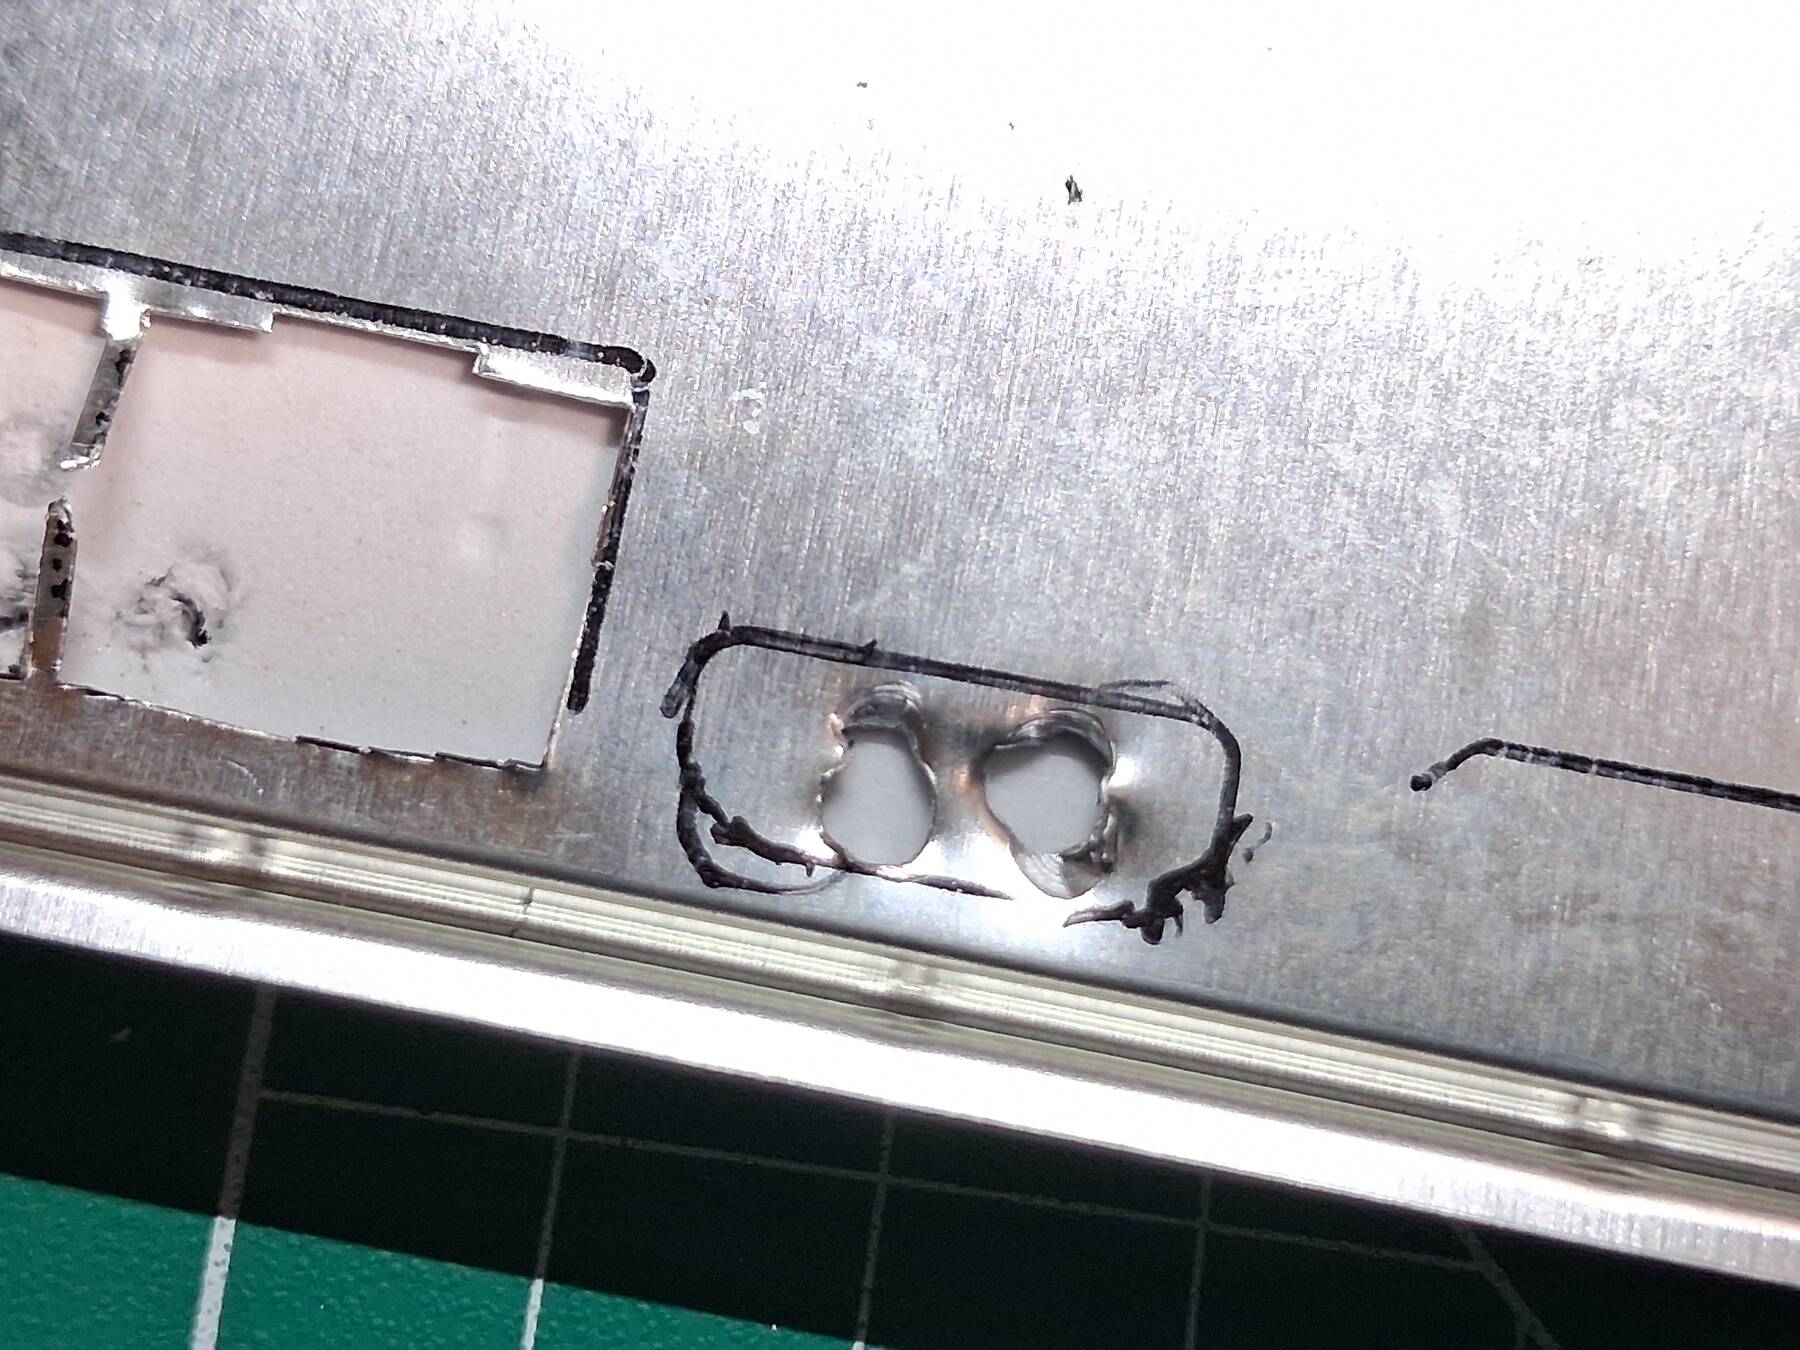
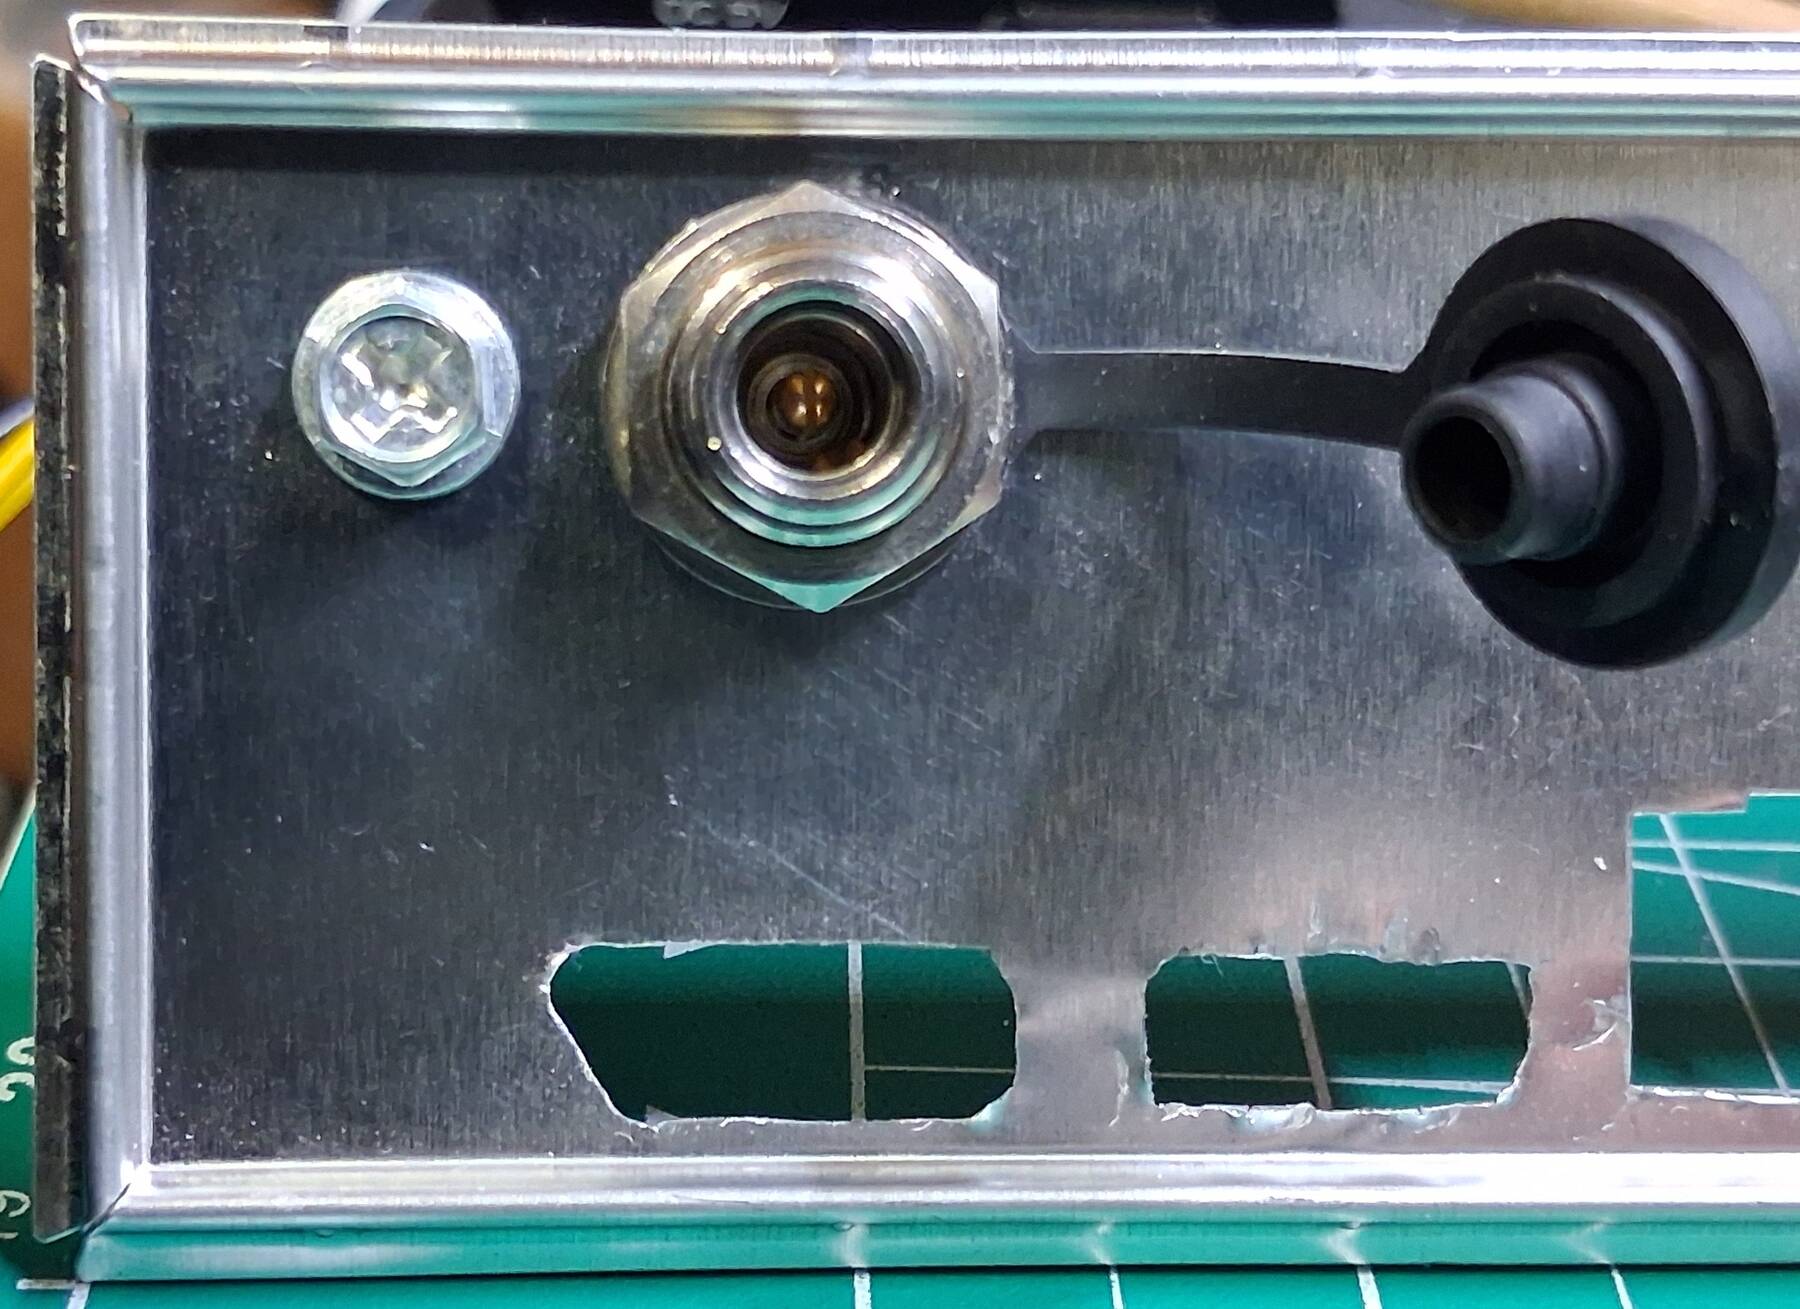
The barrel jack was just a drilled hole. Step drill works great for those as long as you go slow on the last size, and go in from the back to clean up the edge.
USB C was just a pair of drilled holes, and two cuts with the jeweler's saw. Then filing to get a nice fit.

On the USB A ports I started to get a better feel for using the saw. It helps a lot to lay out the lines before hand. The saw needs to be held at an angle rather than perpendicular or else it just binds. The biggest frustration is frequently having to flip the blade to cut in a different direction, detaching a blade end to move to the next hole, then threading a new hole, re-tensioning, repeat. Final sizing is done with a fit check, a few sharpie marks, and steel jeweler's files.
It might be possible to do on the scroll saw, but I haven't really tried the fine blades there.
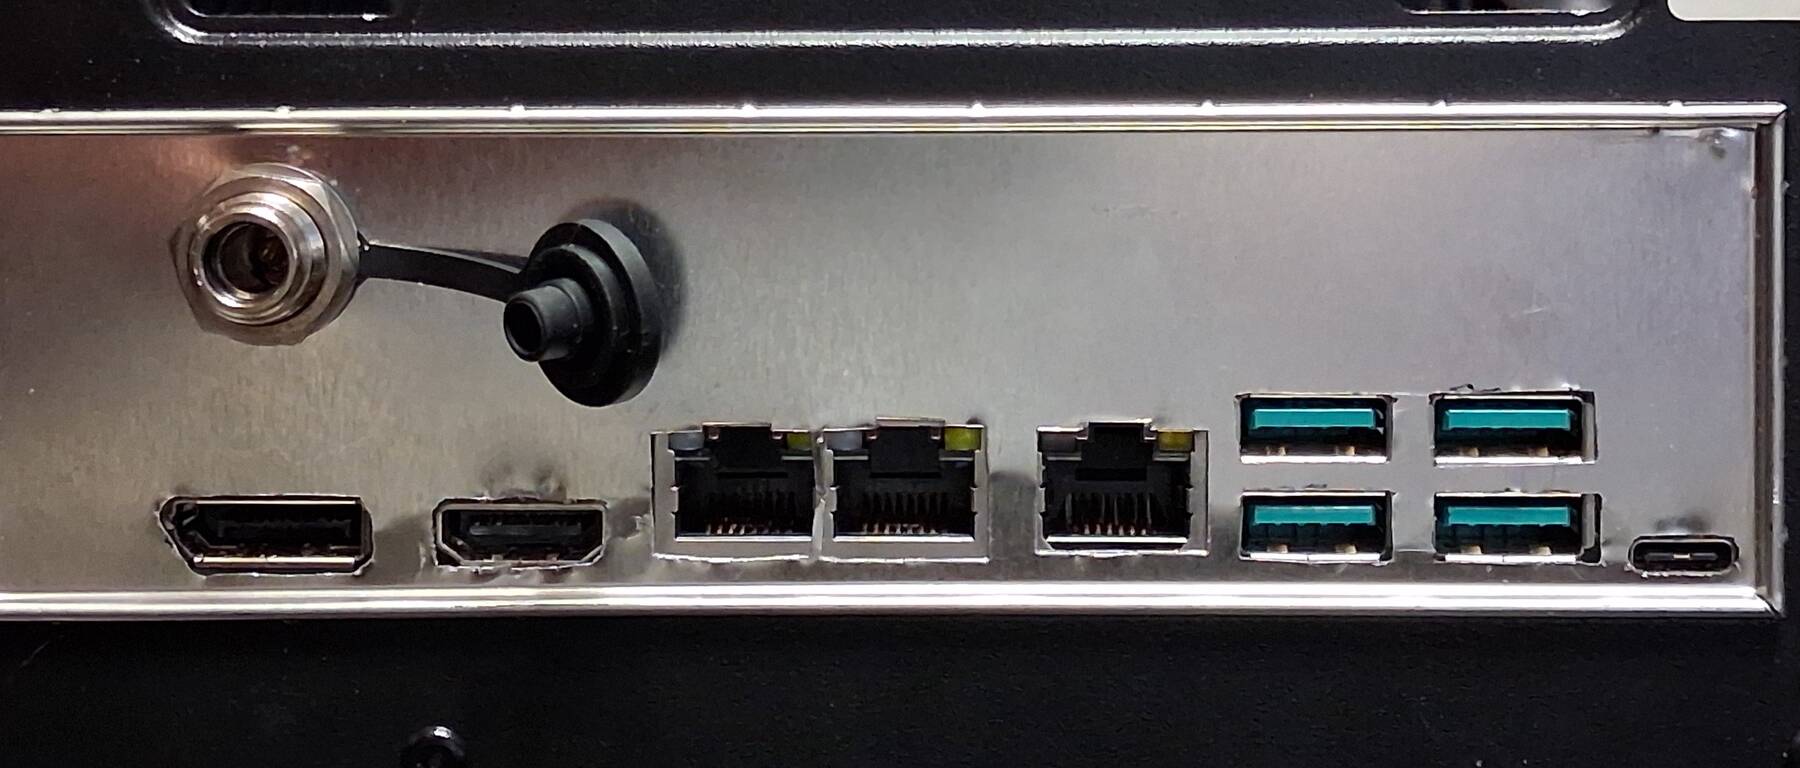

The I/O shield was a bit wobbly to support the barrel jack. I went back after, and reinforced the barrel jack a bit. Just a bit of aluminum, and an extra screw, nut, and washer to fix it in place.
I still have plans to put in some serial ports, but I decided they aren't necessary at the moment. I don't want to take the special 2mm header ports off the other board. I'll wait until I can source a couple new ones.
Serial port attempt
I got hold of some 2.0mm ribbon cables with IDC connectors thinking I could assemble the ports myself. I tried fitting them on the board, but the header spacing is so tight that there is only room for the crimp style connectors side-by-side.
The other issue is I don't have any male solder serial ports suitable for panel mounting. I scoped out some potential bits, but it is still on hold.
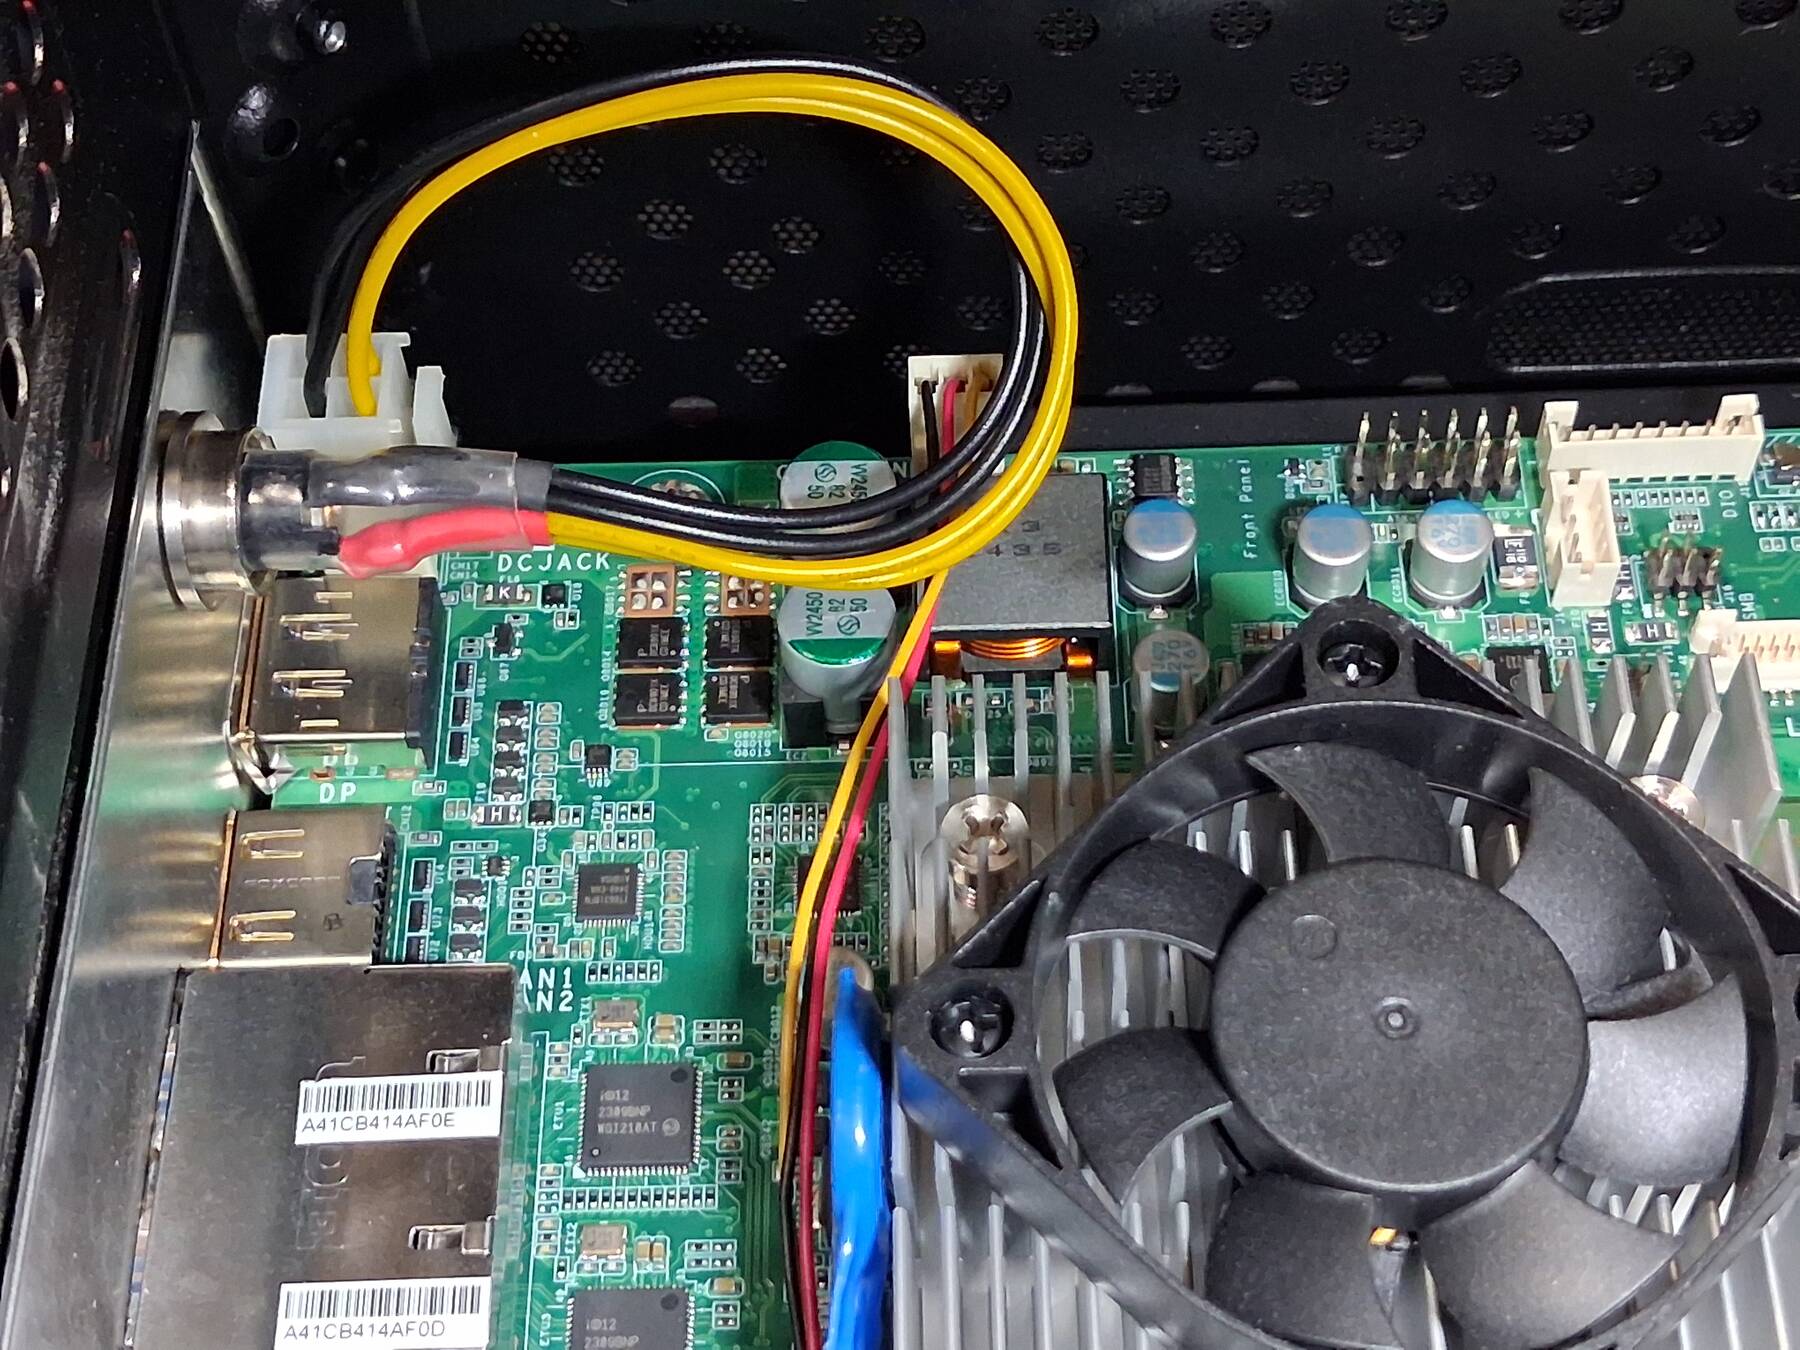
Rebuild with new motherboard
I took down pixy, and debuilt it.
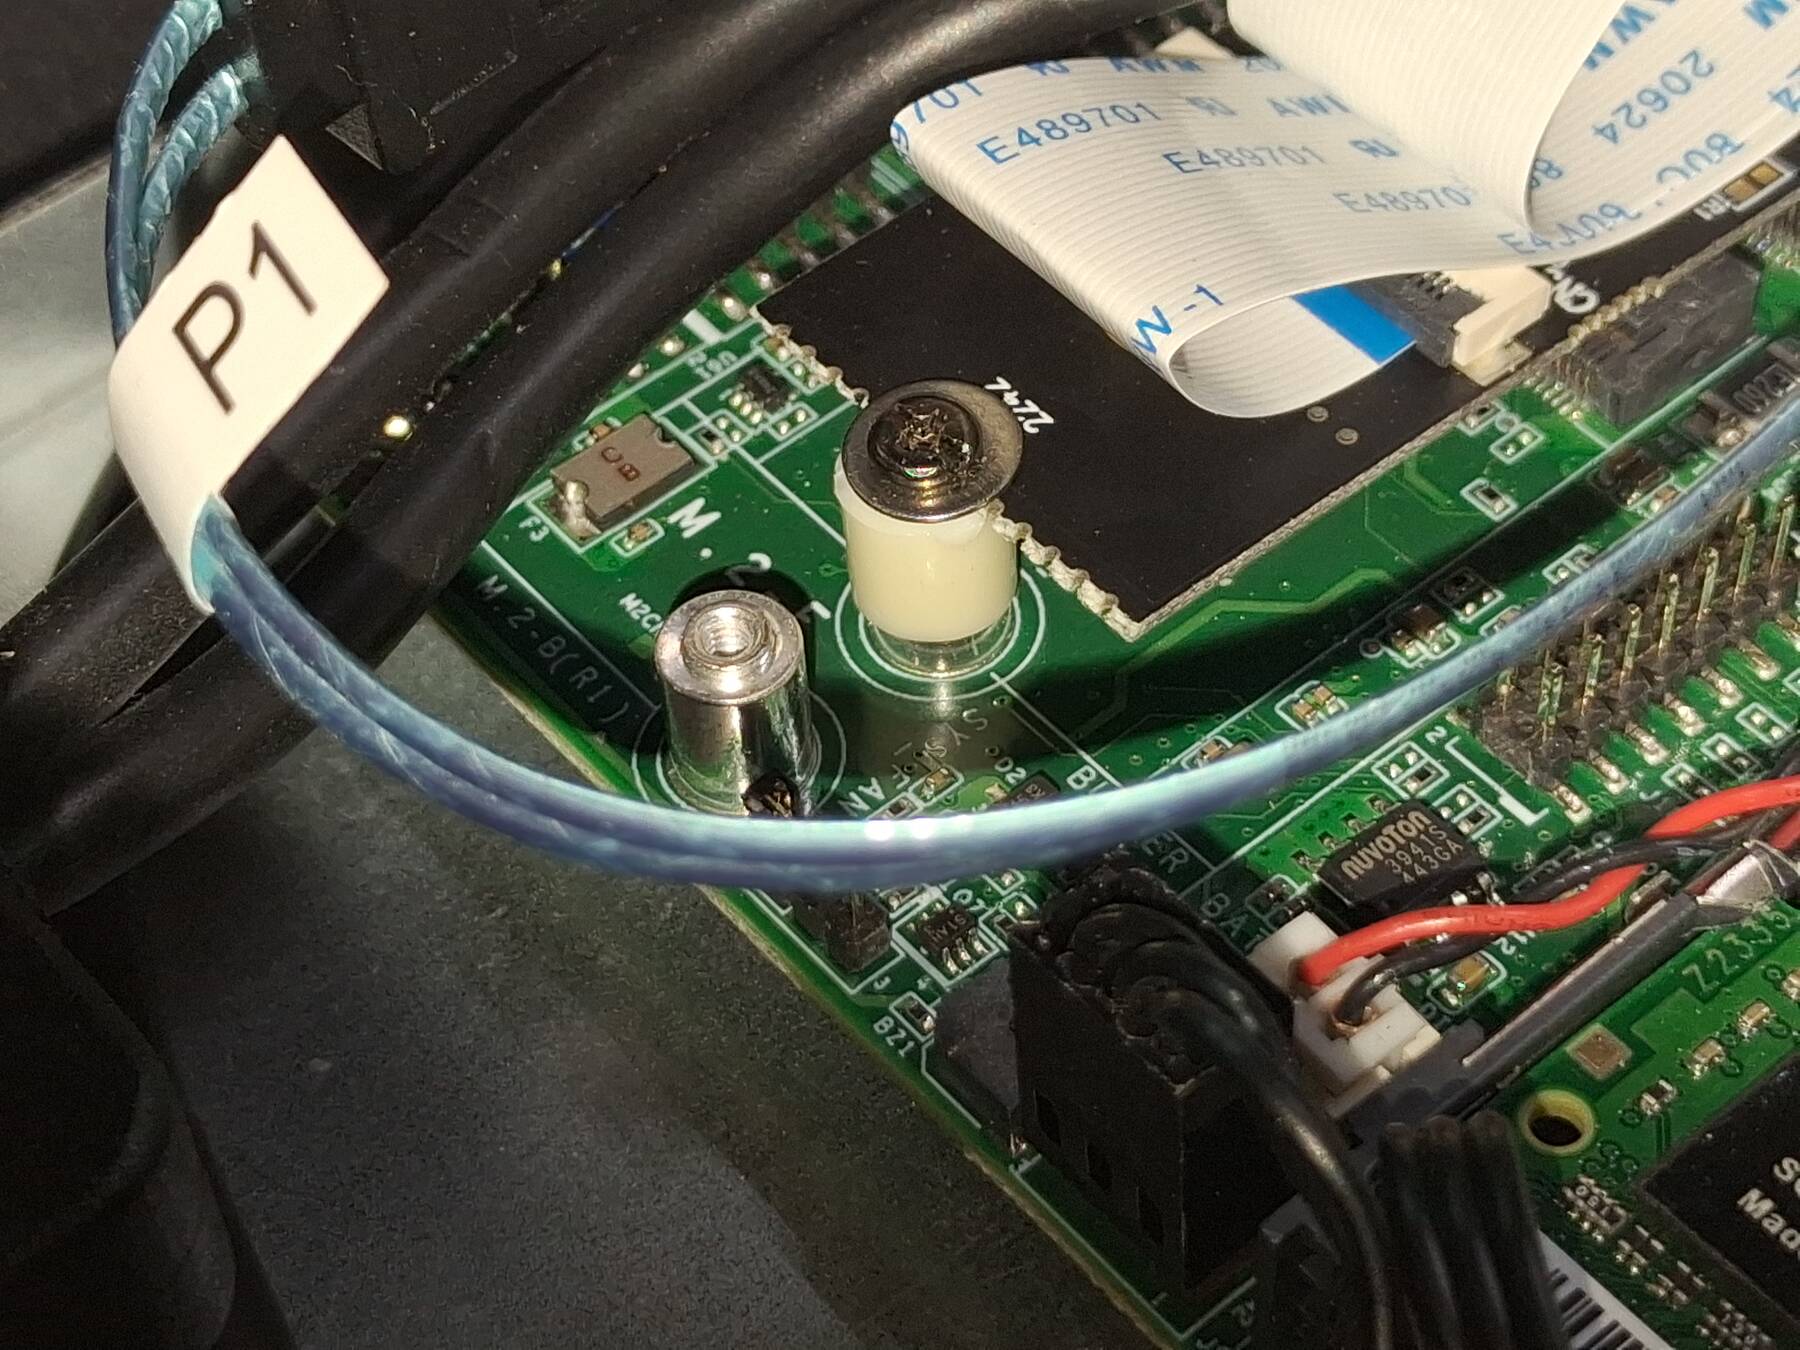
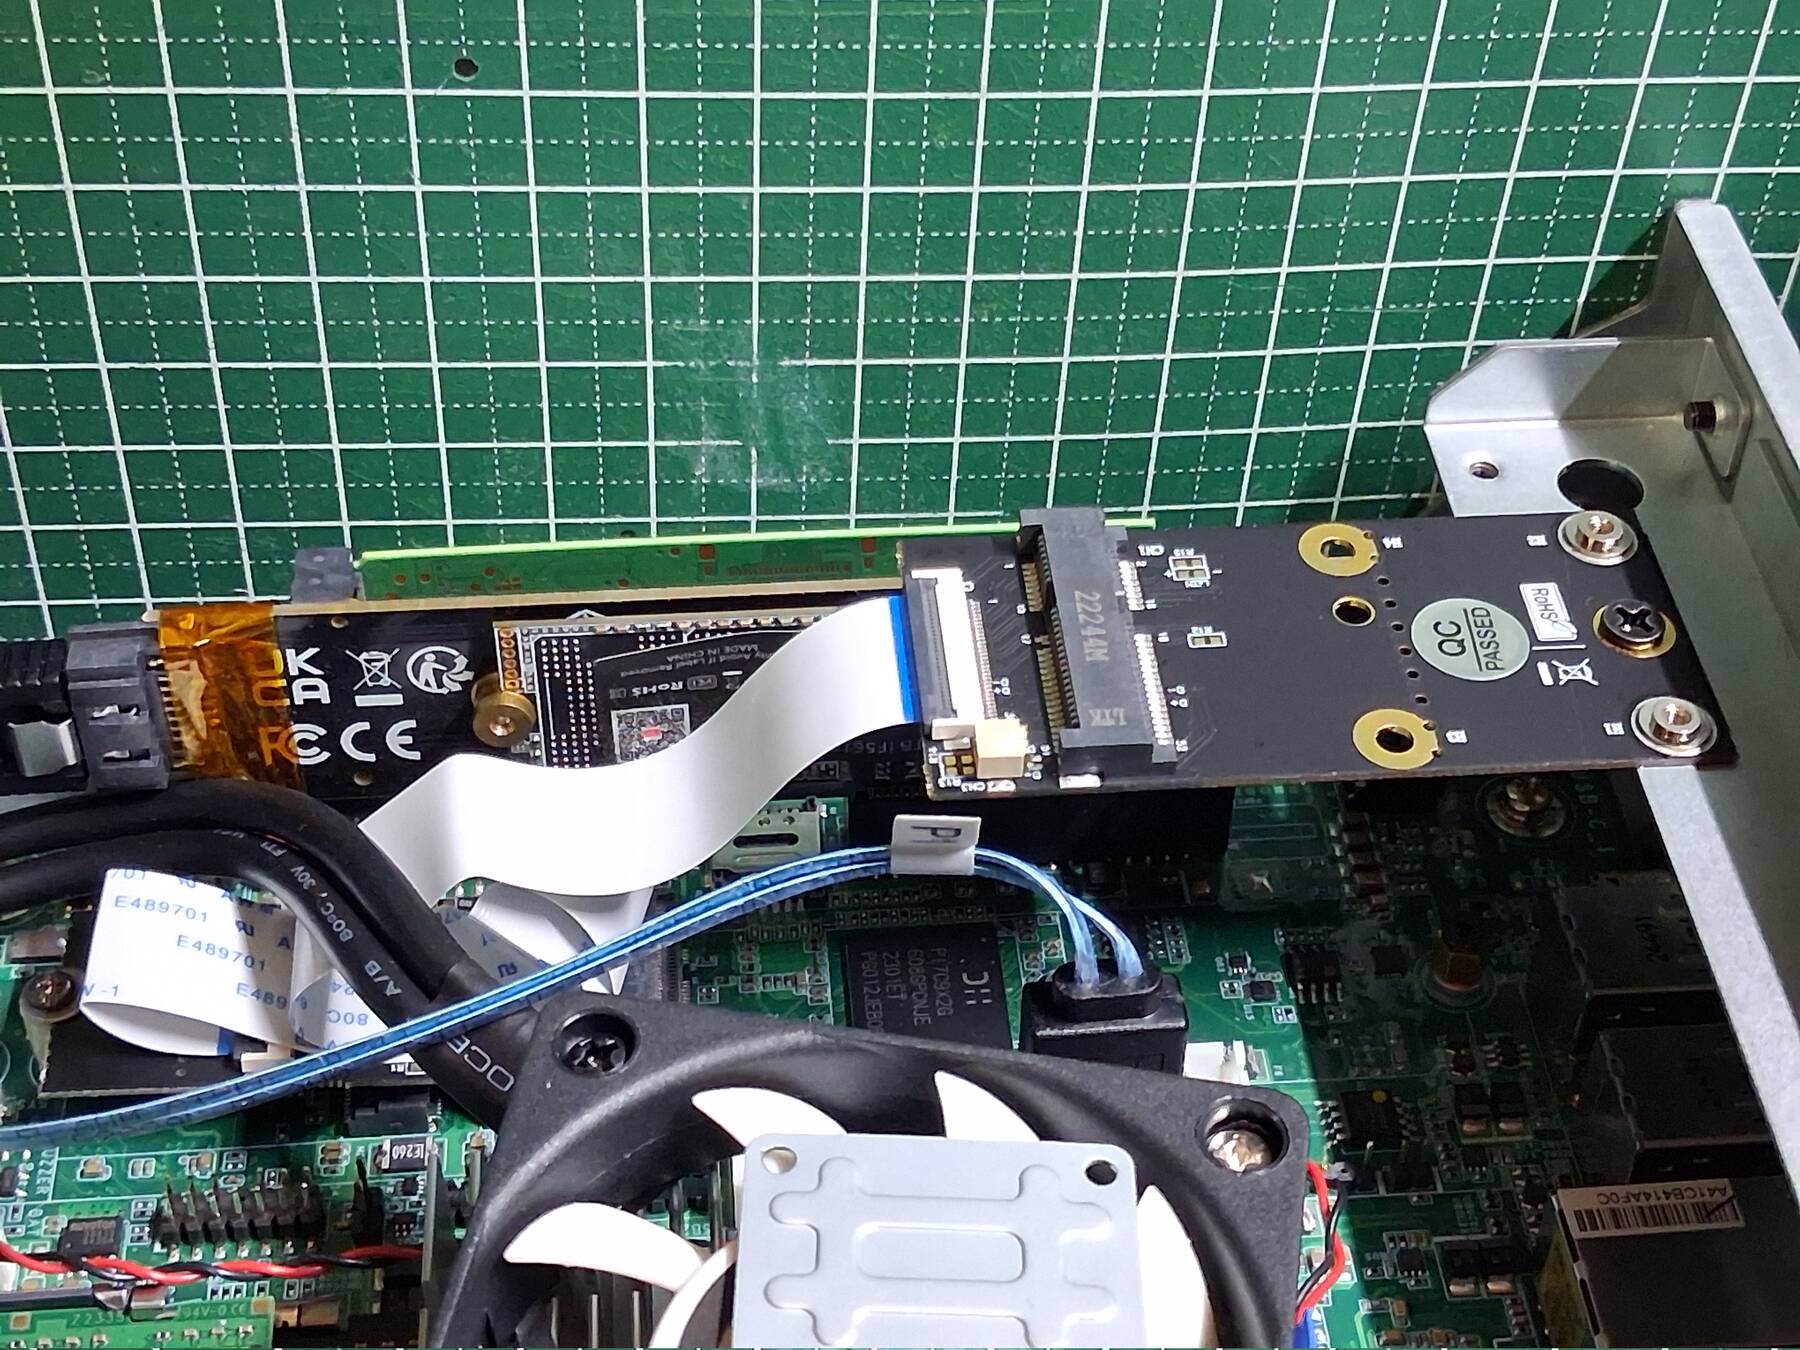
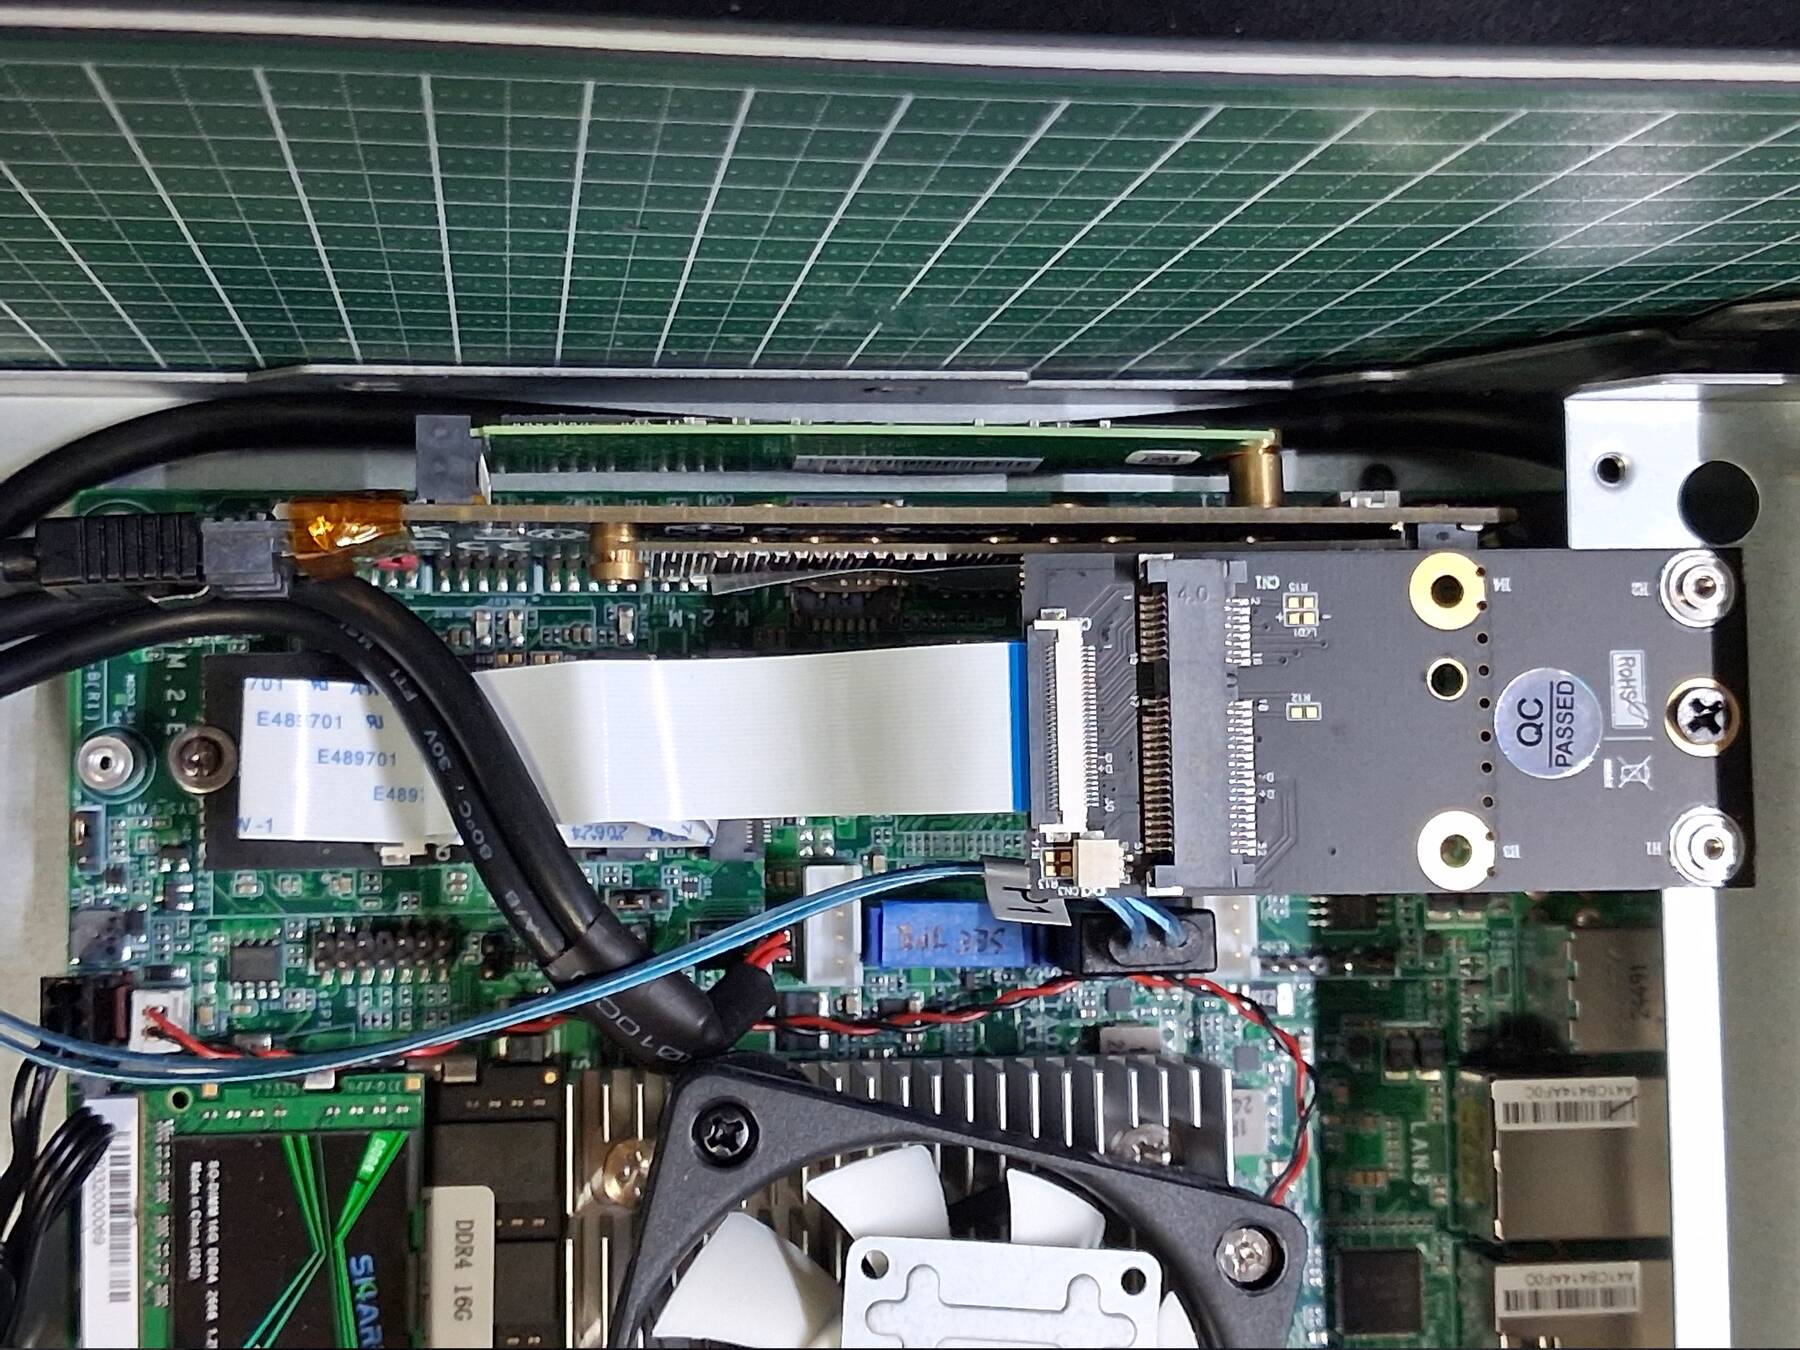
I went to fit the M.2 to Mini-PCIe adapter, and realized the matching height screw post is actually at 52mm, not 42mm. For 42mm it shares the short post below with the E key slot. I didn't have the right spacer and screw to bring it up. I ended up putting the adapter in the fancy Gen4 slot for now.
I was going to mount the Mini-PCIe part of the adapter on the drive cage, but my new CPU fan was too tall to install that without modification. My next plan was to drill and tap a hole in the bracket the cage mounts to, but it is too late for drilling. I taped it above the I/O area for now.
My idea to support the barrel jack with a screw and nut bit me. The nut blocks installation and removal of the 4-pin connector. Minor, but annoying.
The case fan wasn't oriented correctly for how I had the case wall mounted. Fortunately the cage is is reversible so that was an easy fix compared to fighting the soft fan mounts.
- Table of changes
Part Old New Power Supply EDAC EA11011D-1200 12V 8.33A EDAC EA10523C-120 12V 5.0A Motherboard DFI CS101-Q370 DFI TGU173 Processor Intel Core i5-8500T Intel Core i3-1115G4E Graphics Intel UHD Graphics 630 Intel UHD Graphics G4 Ethernet Intel I219-LM Gigabit Ethernet Intel I210 Gigabit Ethernet Intel I211 Gigabit Ethernet Intel I210 Gigabit Ethernet M.2 Realtek RTL8125 2.5 Gigabit Ethernet Intel I225-LM 2.5 Gigabit Ethernet - First boot
POST took a long time, probably due to the different memory. I went through UEFI, enabled the watchdog, and set it to 80 seconds like the previous board.
When I booted I grepped dmesg for watchdog and noticed it was unsupported. While I was editing the config, the machine rebooted…
I ended up removing the modprobe for the old NCT6116 (w83627df_wdt), and removing the blacklist for iTCO_wdt. Oddly the iTCO_wdt module wasn't used. The kernel seems to have settled on wdat_wdt. I tested it as before, and it seems to work. Hopefully I won't need it with the new system.
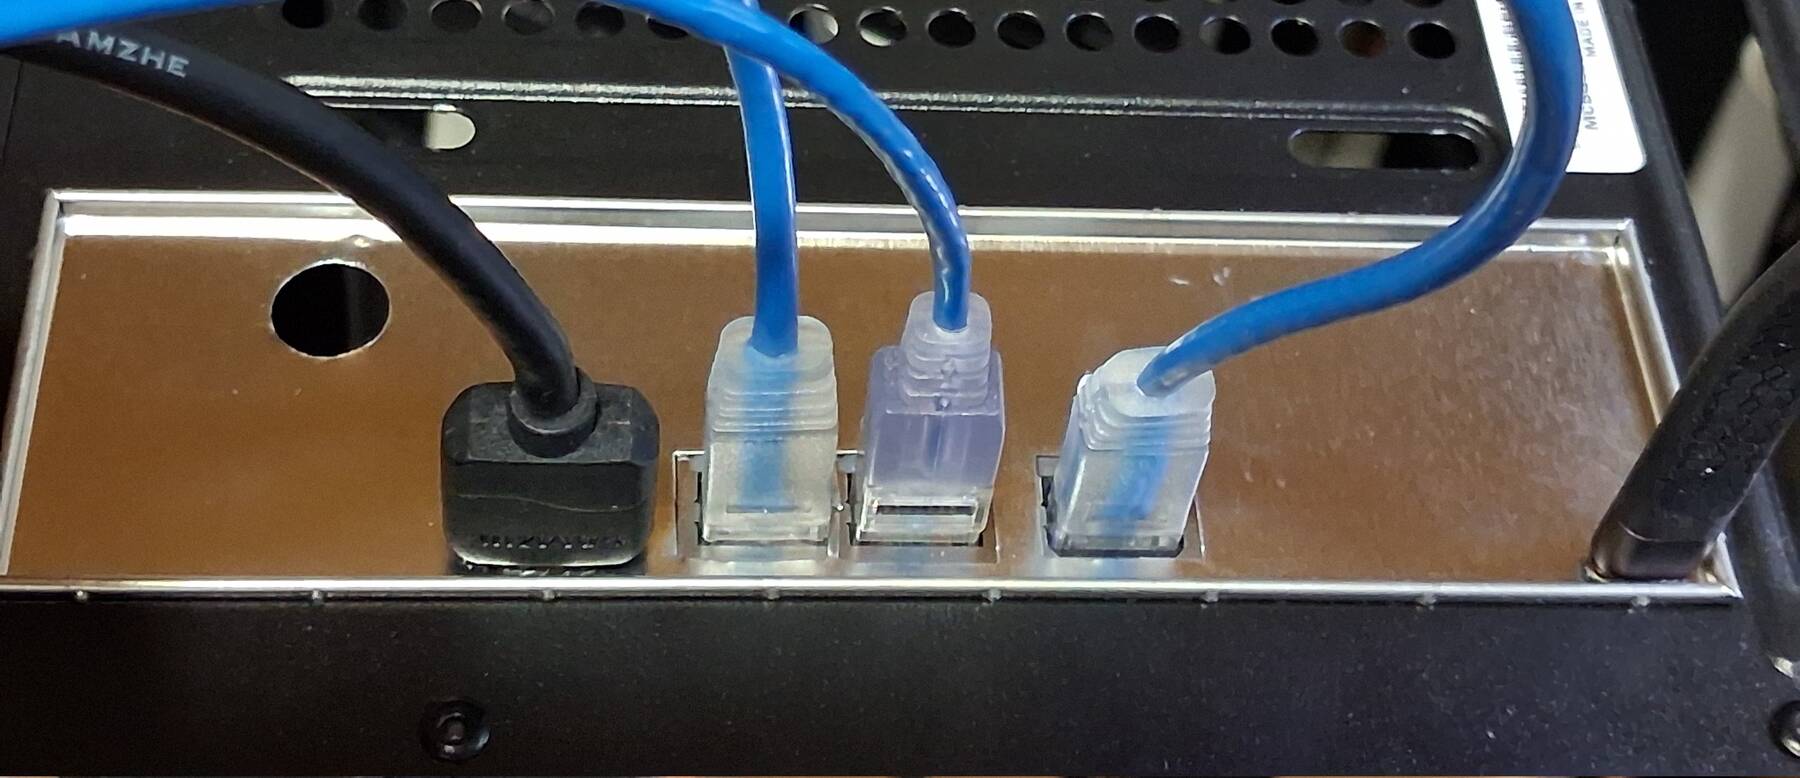
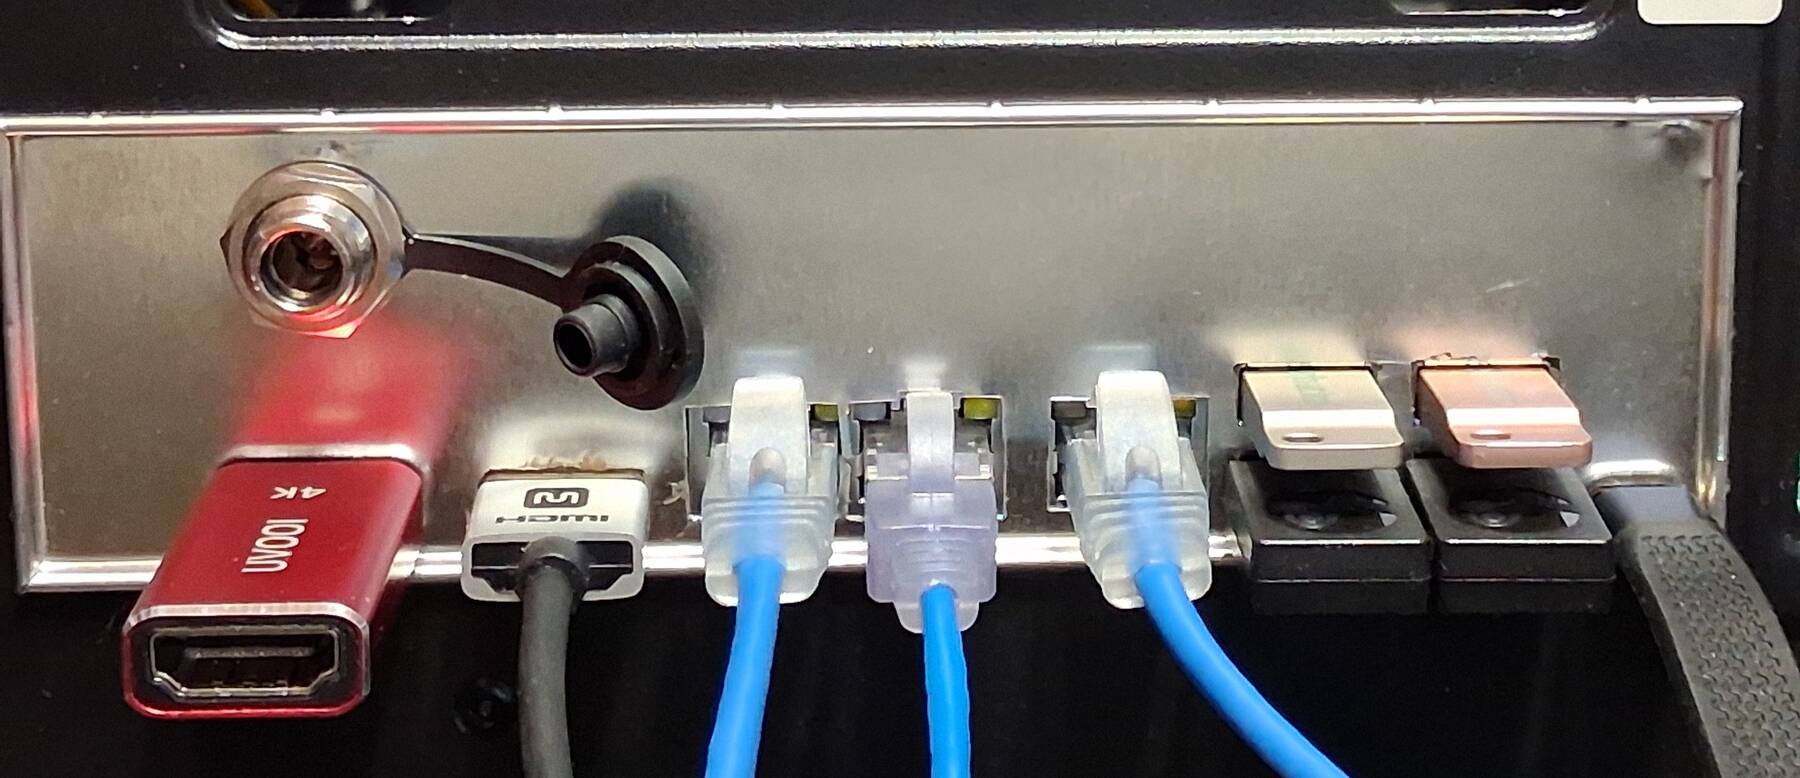
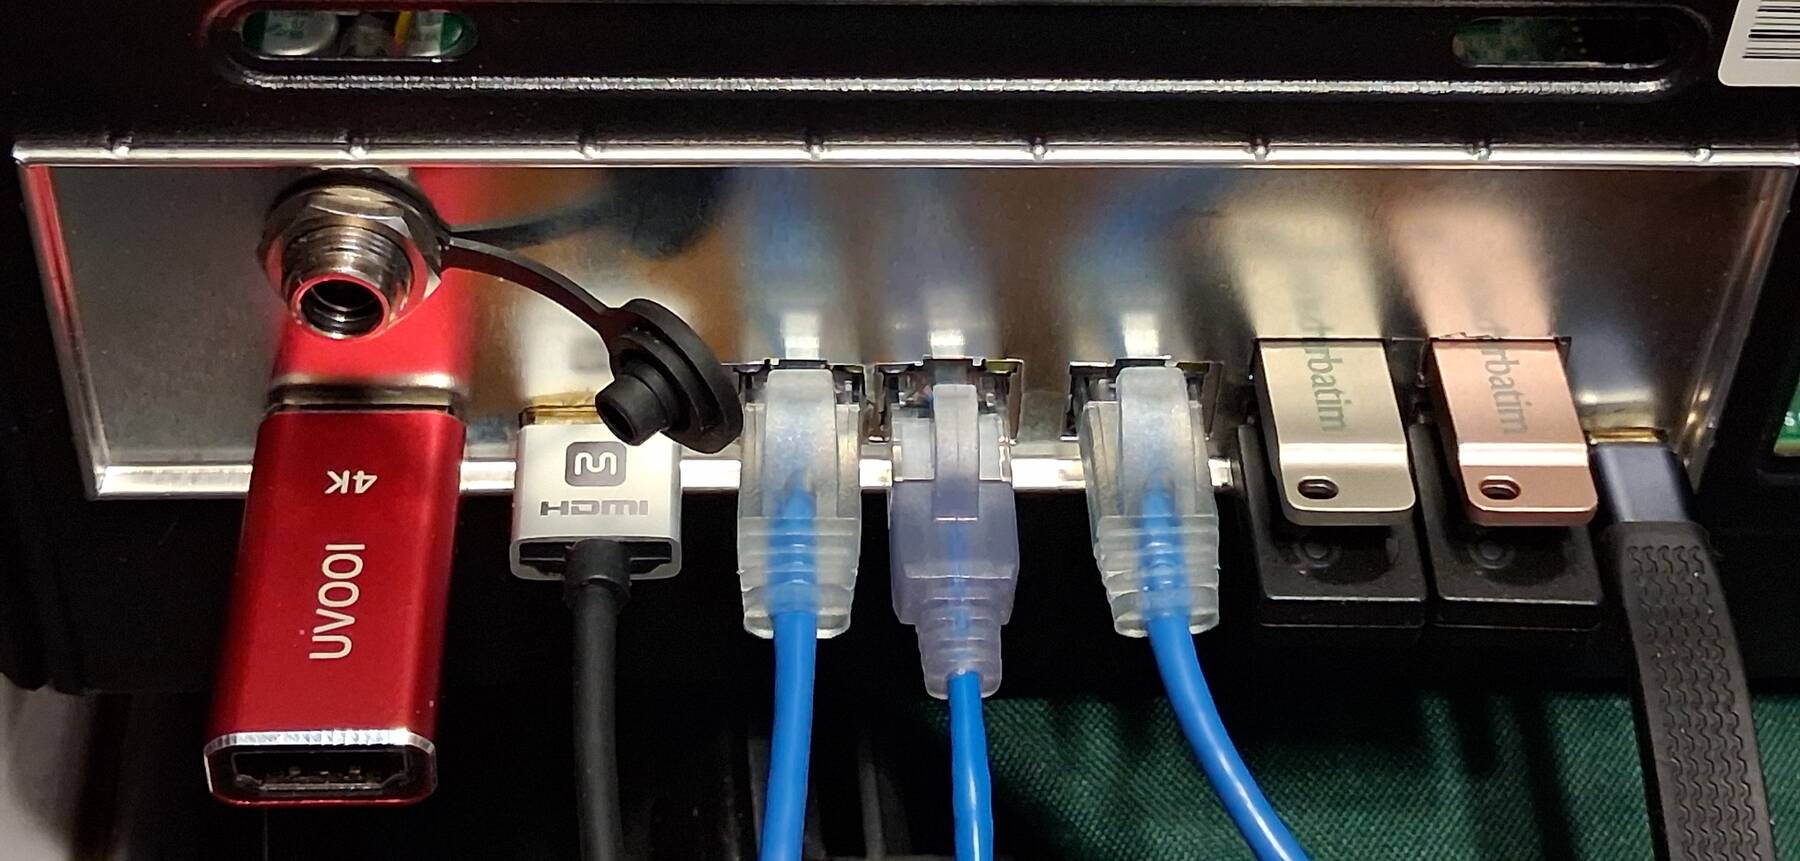
Network configuration was pretty easy to update. I labeled the ports beforehand, and took a reference picture with their MAC address stickers. I managed to update the config device names correctly on the first try.
The date was incorrect which caused some weirdness with frigate, and openntpd failed to make such a large correction (couple months out).
- Issues
With the NVMe SSD mounted in the silverstone adapter, a blue LED blinks out the side of the case. Makes a nice dot pattern, but I'm going to have to cover it up.
The cooling isn't as quiet as I hoped. It does have some smart fan control that I can tweak. With my normal frigate load the case fan is around 2200 RPM (76% PWM), and CPU is at 2700 RPM (84% PWM). The CPU is reporting 41°C, and SYSTIN is 40°C.
With a load the fan goes up to 3600 RPM (120% PWM). The CPU package hit 64°C, and the case is getting a little warm.
Those aren't real PWM values. The fans are 3-pin only.
Wall power draw is around 23W with my frigate load. Not terrible, but I had less in mind.
While I had the case open I noticed a screeching noise I've been hearing corresponds to M.2 SATA SSD activity. Not sure if that is the cheap SSD, or the Silverstone adapter. No good alternative at the moment.
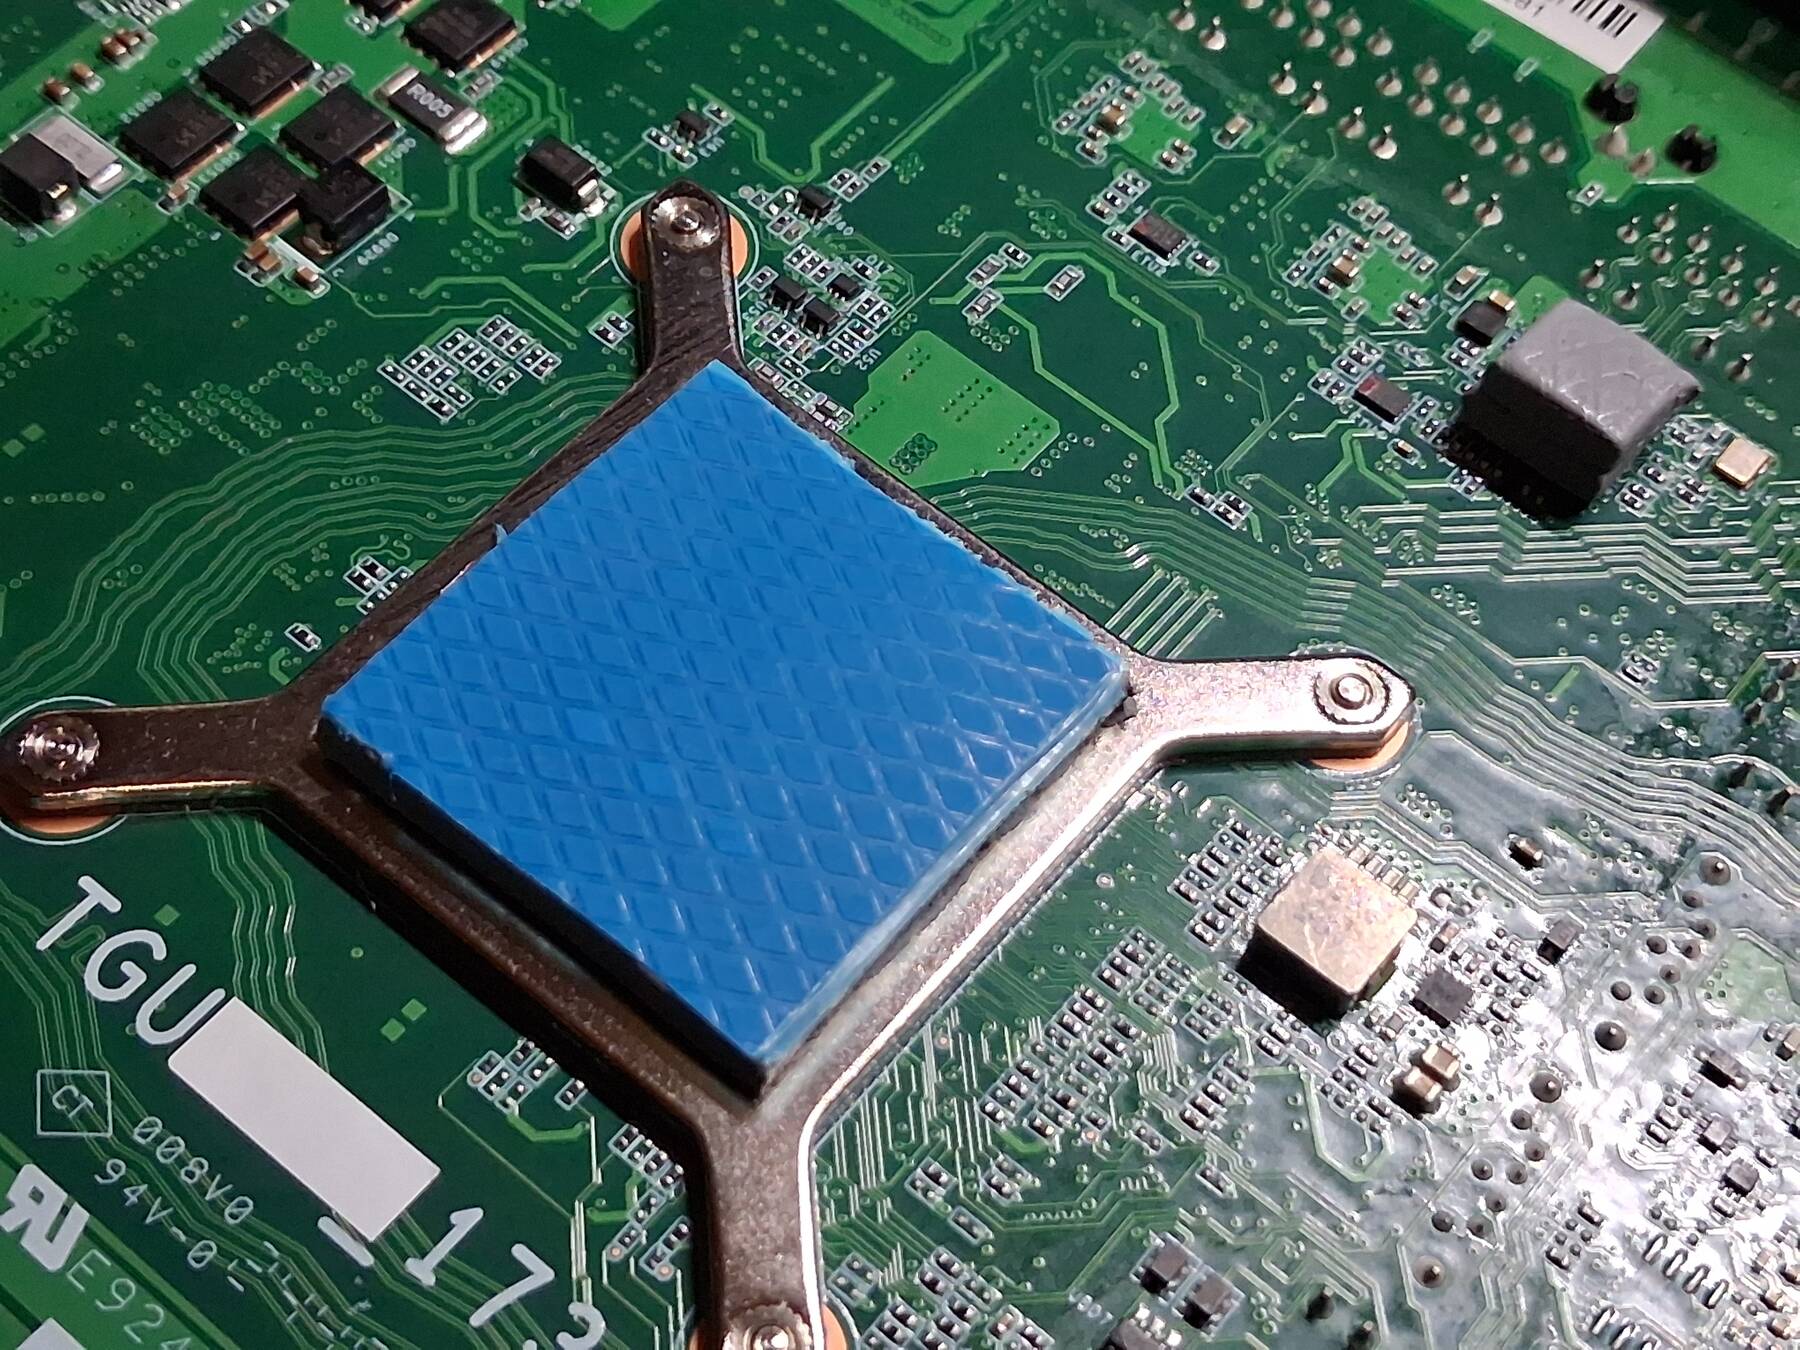
- Future changes
- stick a fat thermal pad under the CPU area?
- mod the drive cage for fan clearance
- swap the case fan for a 60x25mm fan, probably a noctua
- replace the power jack reinforcement screw with a pop rivet
- cover blue LED
- double check clock battery
- experiment with GPU models, remove coral TPU (record inference speed, cpu load, power usage)
- weigh the final build
- hdd activity LED might be wrong position/polarity
Changes and new thermals
I fixed up some of the things mentioned before:
- The CPU area now has a 32x32x6mm stack of thermal pad/putty under it. I also put some under the 2.5GbE chip.
- Pop rivet replaces the power jack screw. Power connector clearance is good
- I'm out of white silicone so I used kapton tape and some red filter tape to dim the Silverstone adapter's NVMe LED.
- The clock battery is fine. 3.01V
- The HDD activity LED is fine. Guess I just wasn't noticing it before.
Other changes:
- Moved the M.2 to Mini-PCIe adapter to the B key slot, and mounted the other part to the chassis.
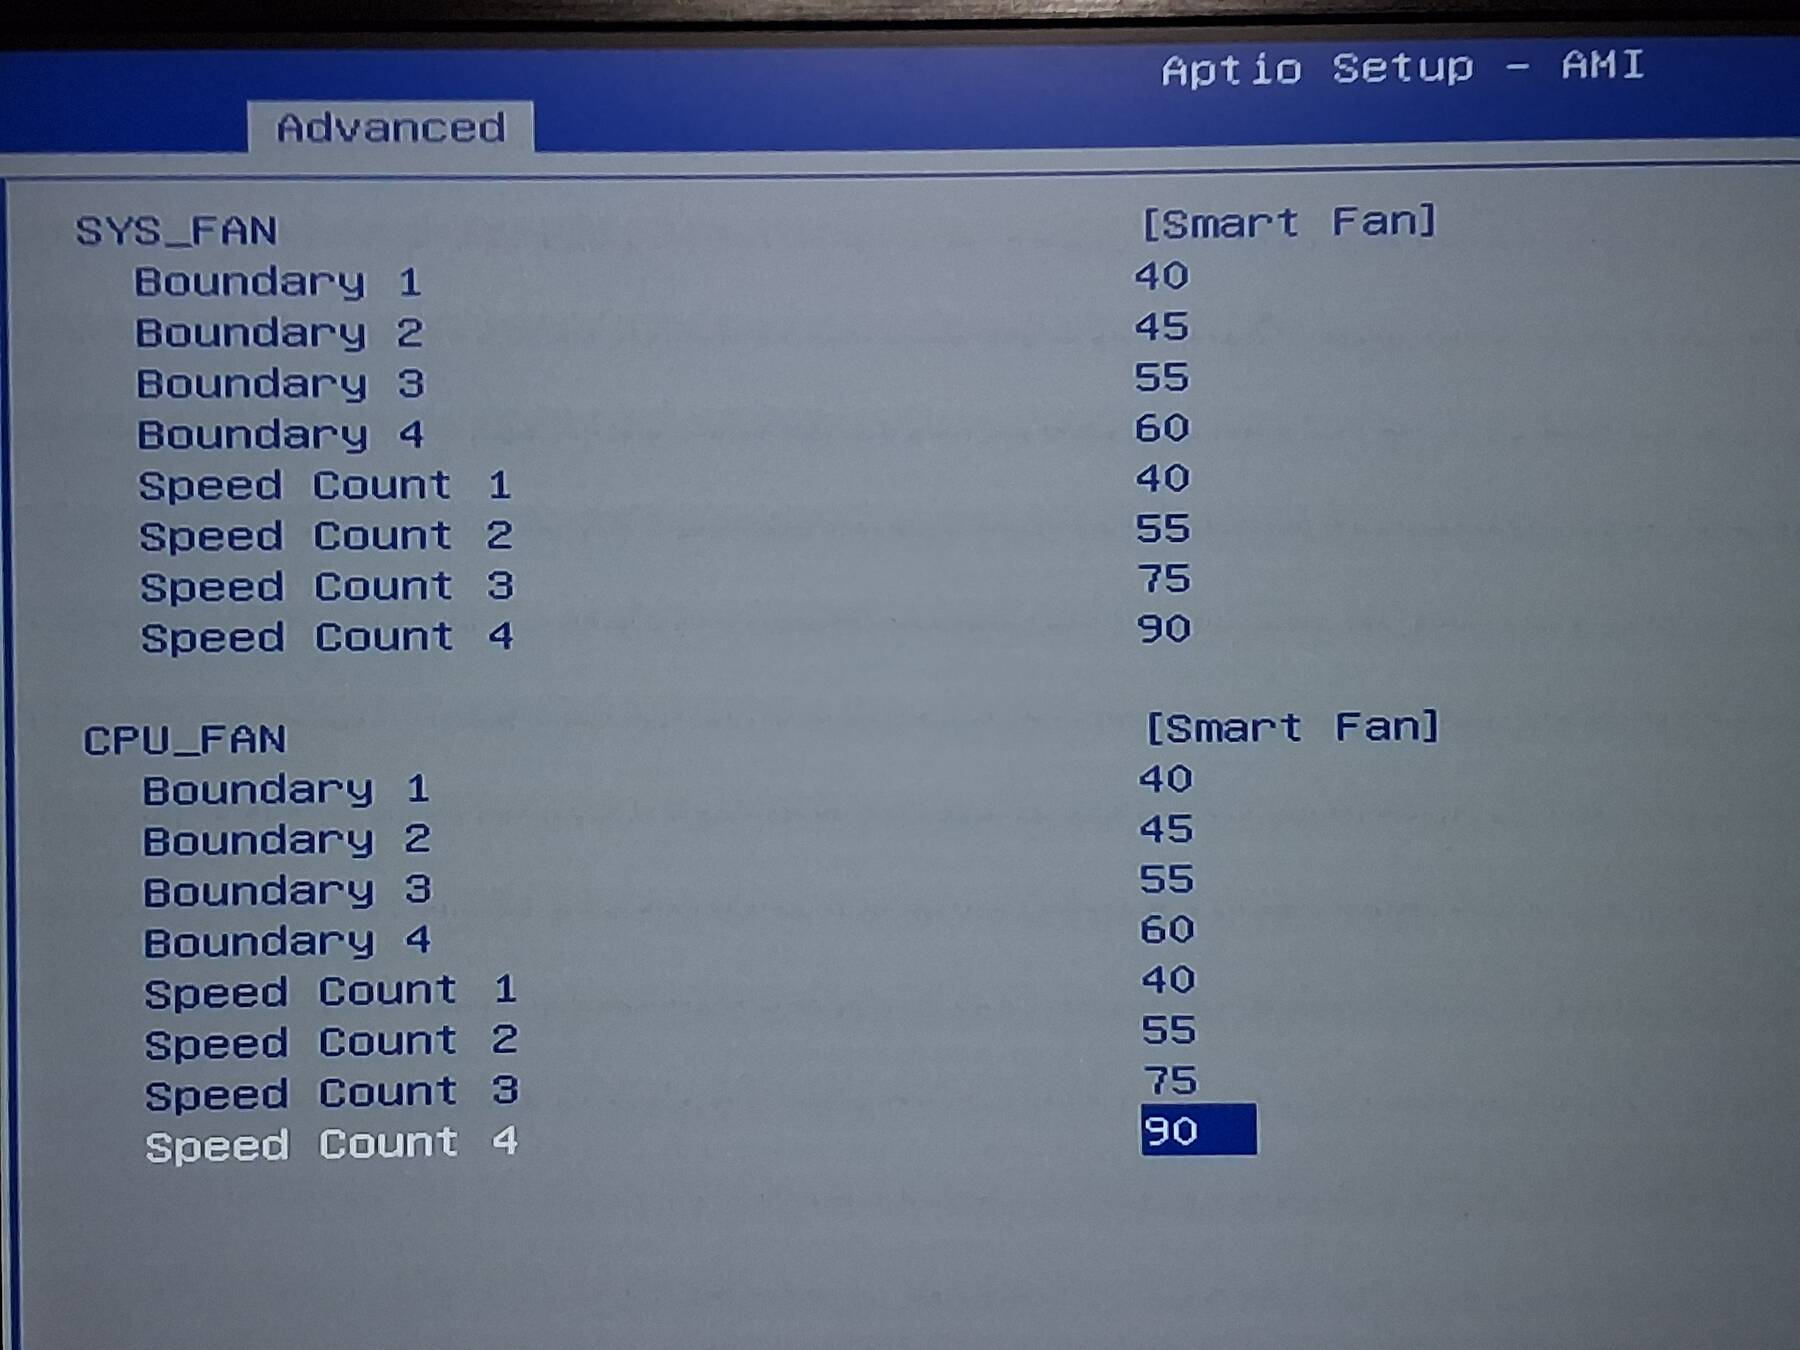
- Fan speed changes
- TDP power limit changes
The fan speed control is basic. It just has 4 temperature boundaries, and 4 speed percentages. I set the boundaries to 40,45,55,60 (°C), and the speeds to 40,55,75,90 (%). Along with the thermal pads, and TDP changes I'm seeing base load temps of 40°C so that is keeping things much quieter. The fans stay around 1500 (51% fake PWM out of 120%) and 1800 RPM (58%).
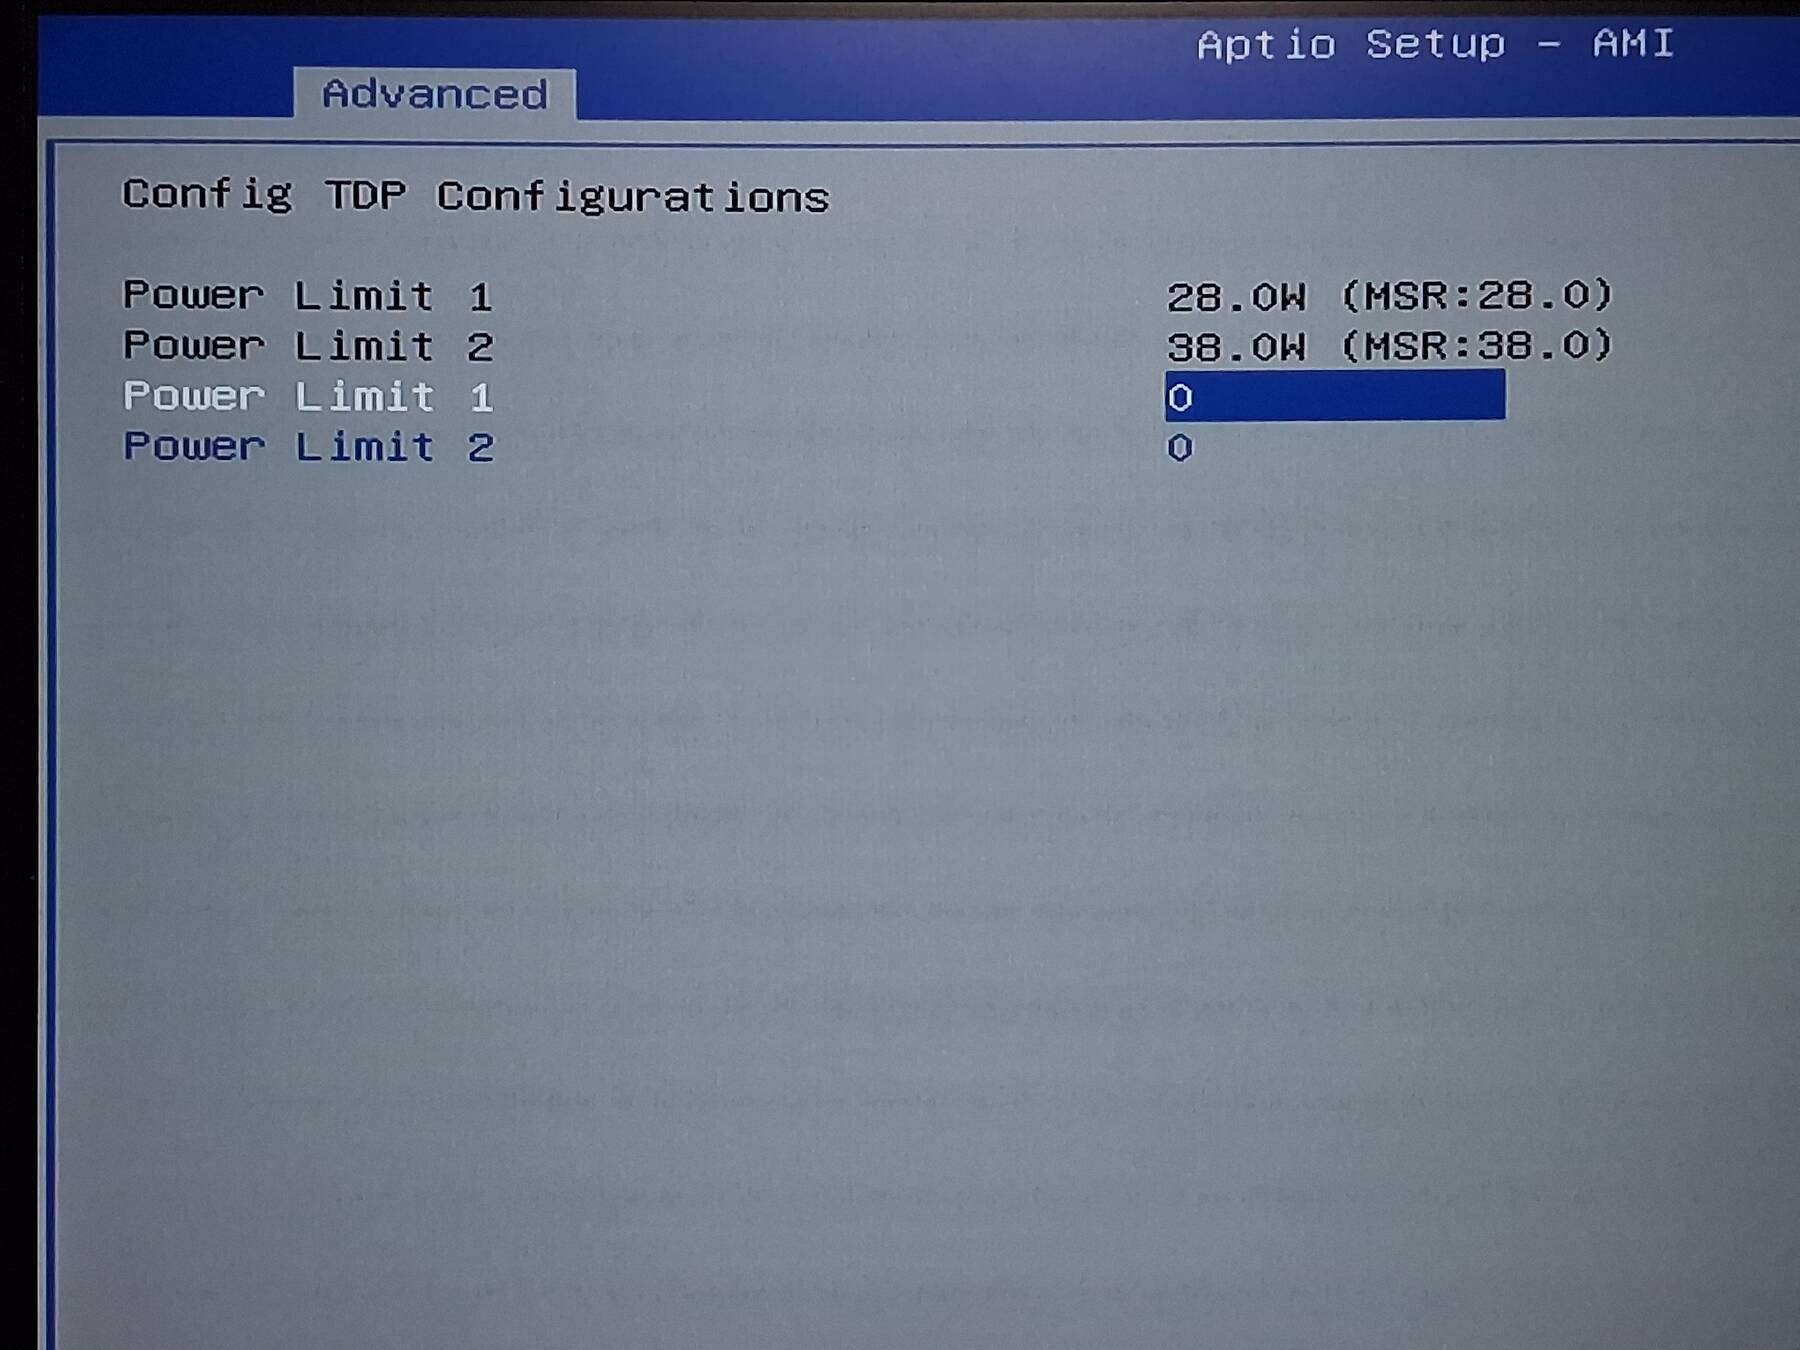
In UEFI there are two options for TDP power limits. The first controls 'normal' operation, and the second controls turbo limitation for some period (Intel says it is configurable, but I guess DFI thought different). DFI had them set to 28W and 38W. I lowered them to 18W and 28W initially.
Unfortunately this hasn't made a big difference to wall power draw. I'm still seeing 22-24W with the base frigate load, and even up to 34W when Plex was busy.
Under load the CPU package seems to get just as hot, albeit more slowly, and can pull 38W from the wall. The CPU fan PWM tops out around 114% rather than 120%, but the tachometer reading is still 3600 RPM.
A bit dissatisfied with that, so I decided to try the 12W (TDP down). I couldn't find information about what the second power limit should be (DFI had it at 38W, and Techpowerup's 1115G4E page suggests it can be as high as 52W!). I decided to go with 18W.
Again, no difference to wall power draw, CPU temps or anything that I can see. Peak wall draw is 35W.
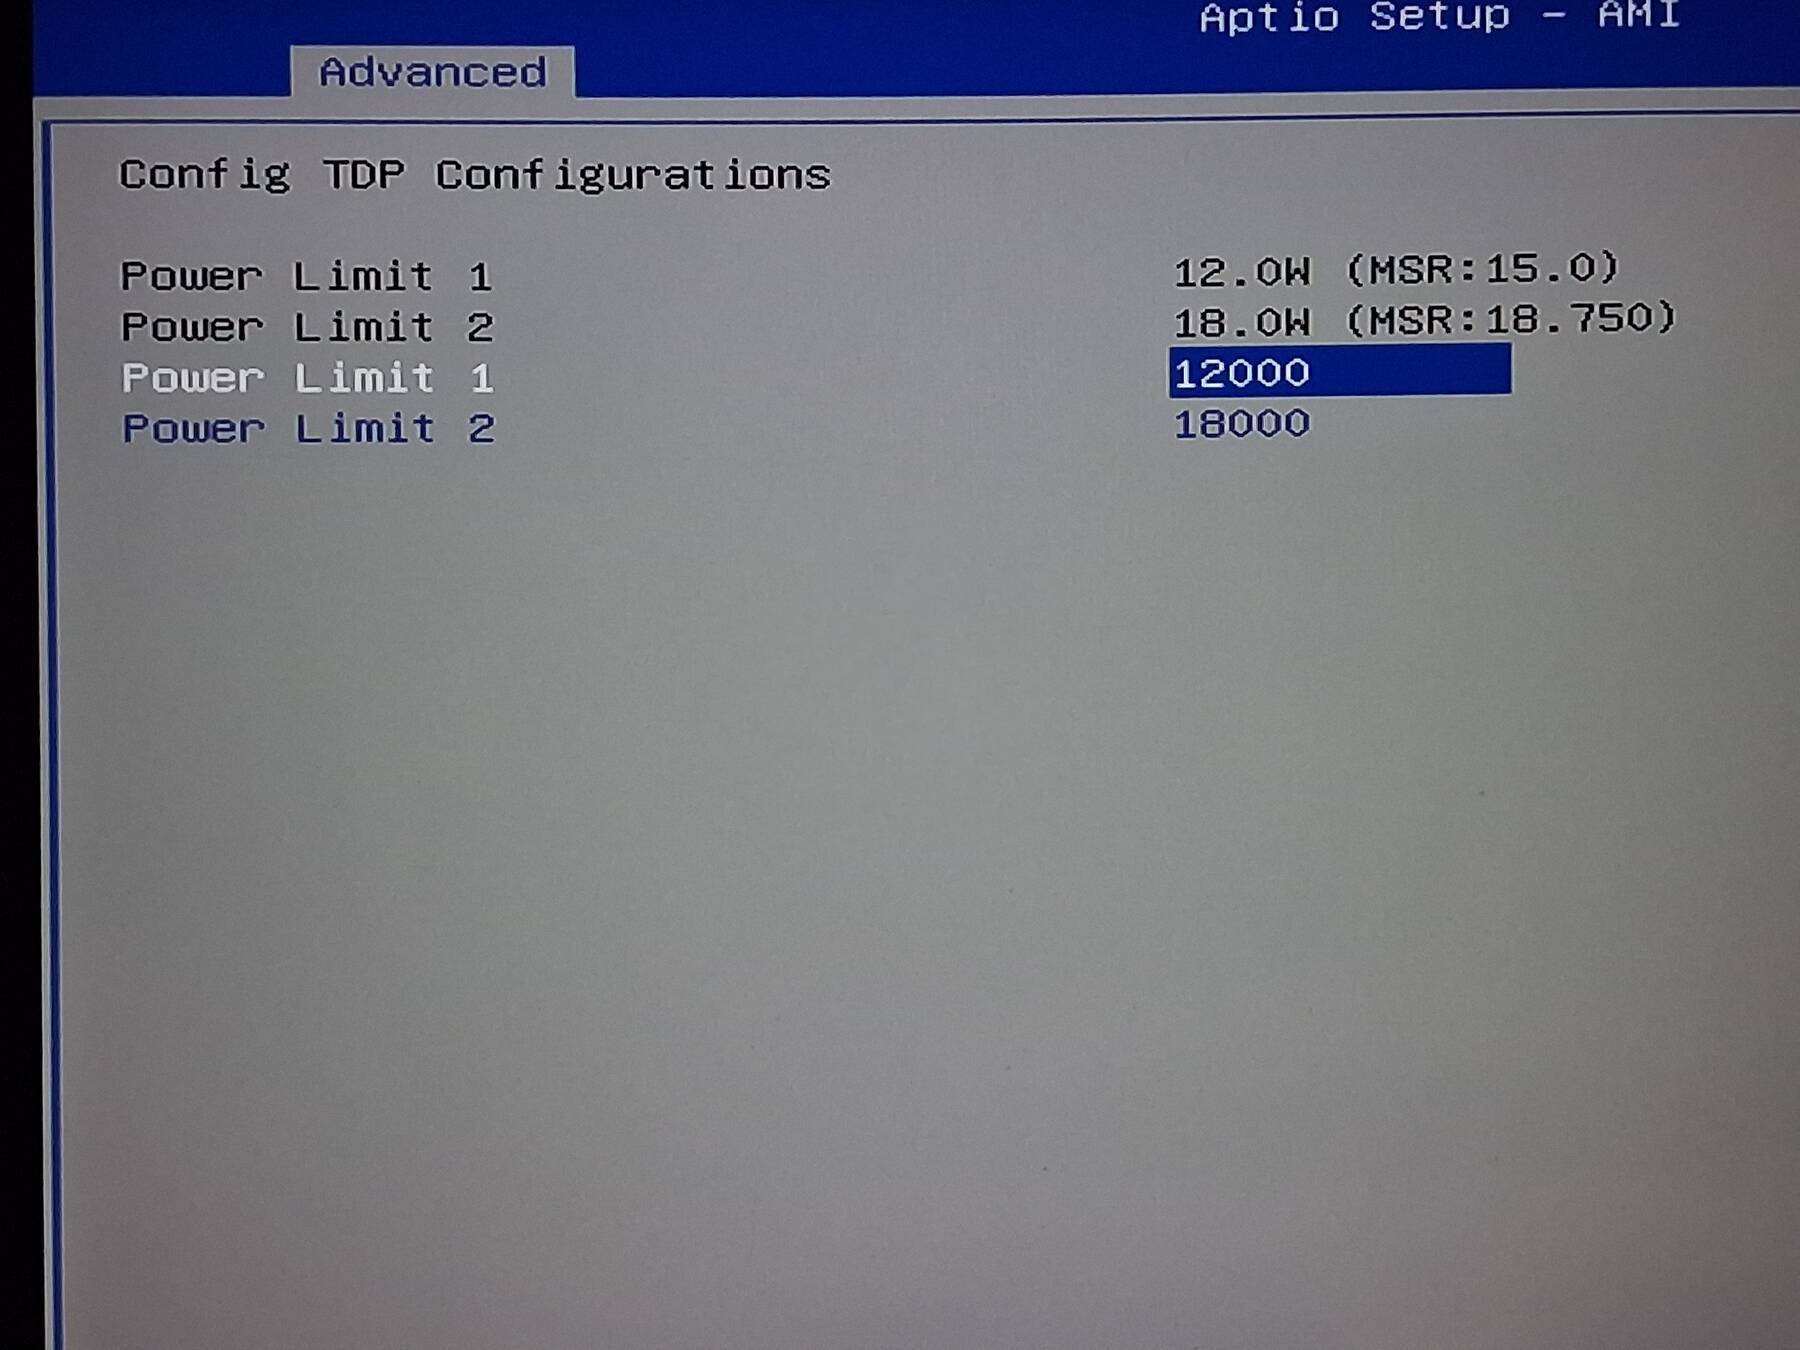
I played around with powercap-utils which seemed to report different values than I had set. Setting all the limits to 12W (except peak_power seems unable to go lower than 18W). Normal power draw seems unchanged, under full CPU load it seems to top out at 28W now.
Feels like I'm still missing something, or maybe my peripherals just need more power than I expected.
Mods and cooling
I made my cut-outs in the drive tray bracket (it has been out since I modded the case originally).
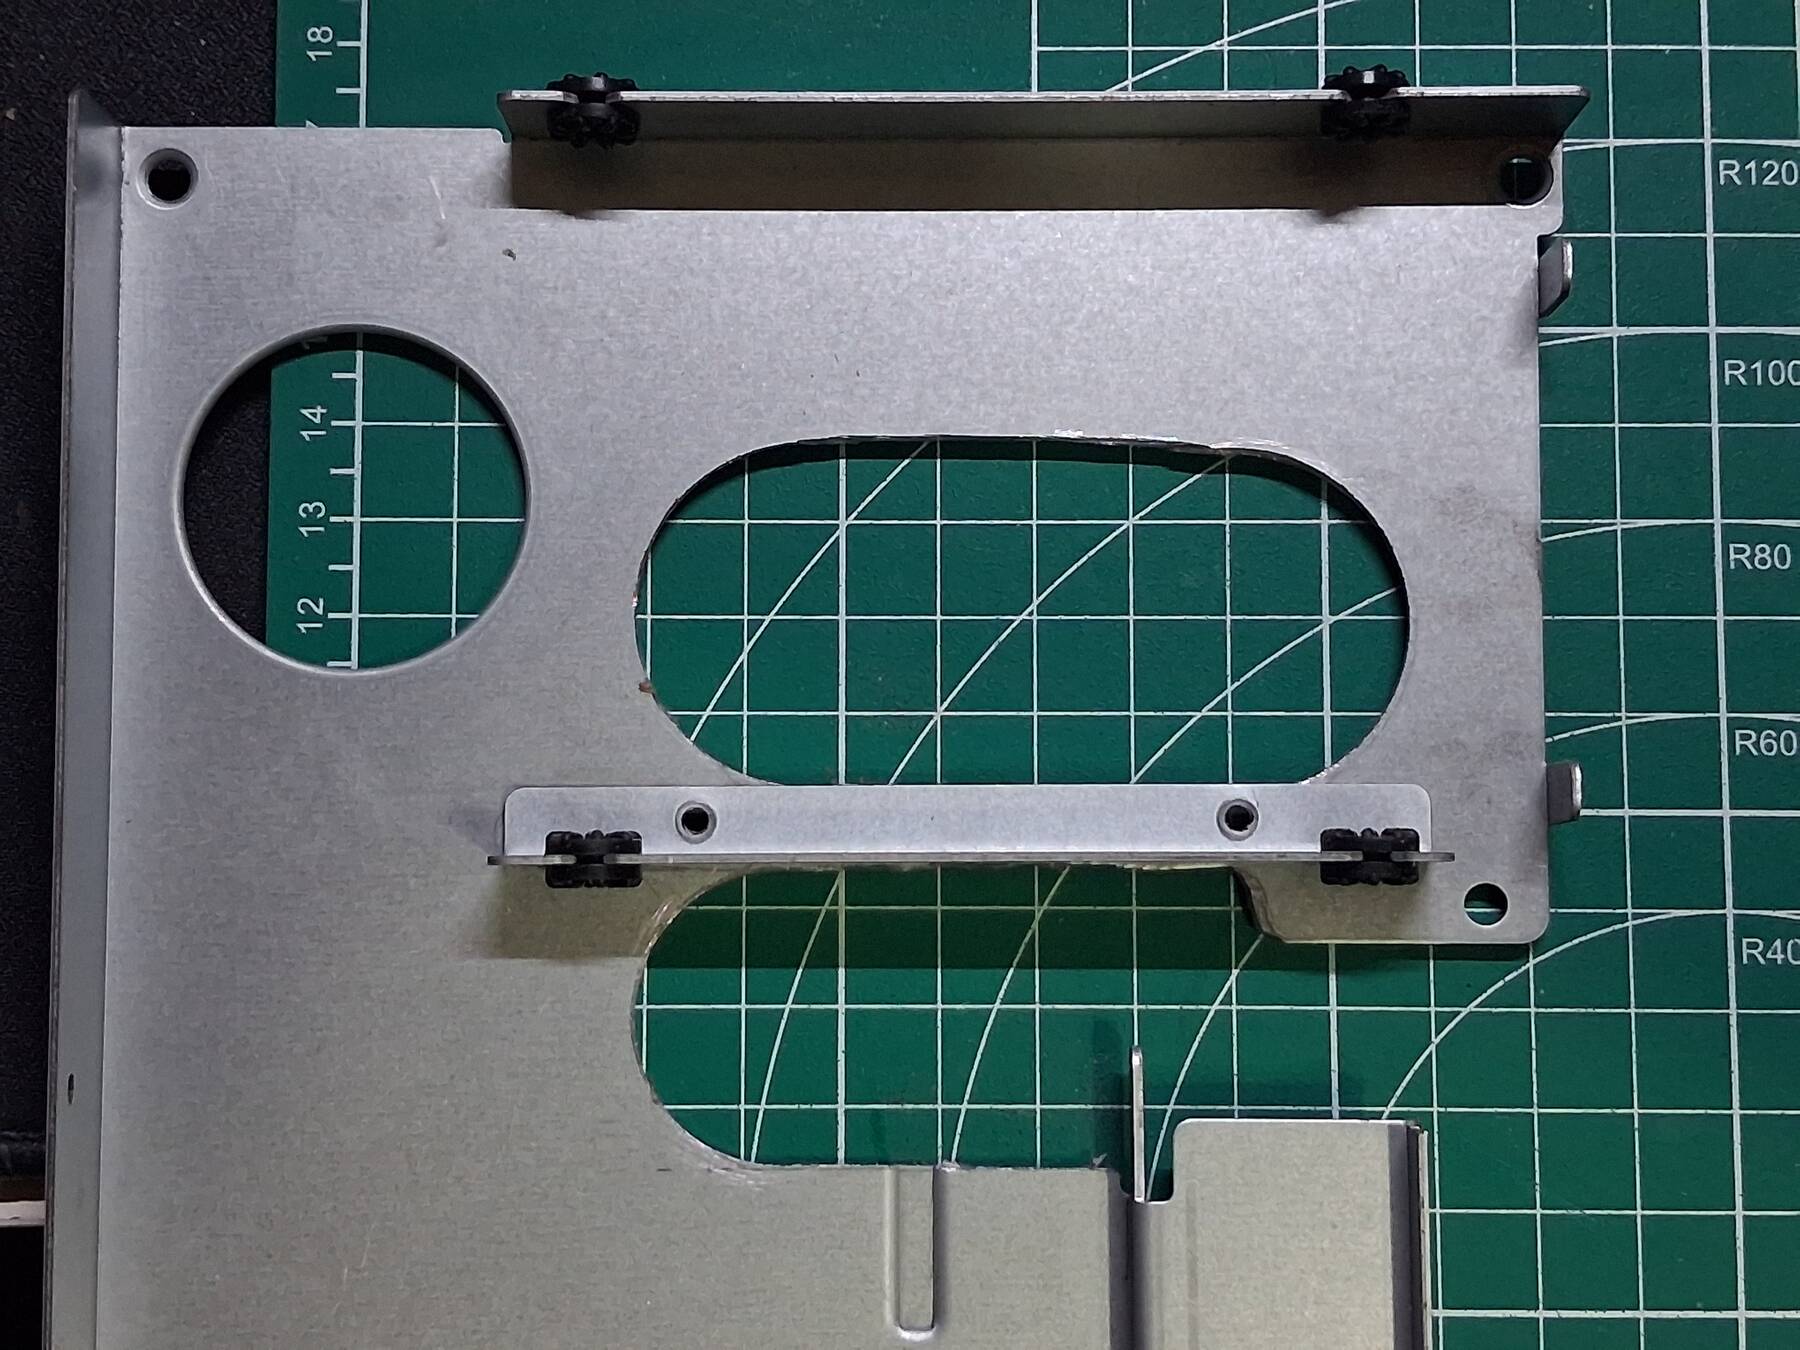
After reading the motherboard manual more thoroughly it sounds like there is even less reason to have the bracket in place. It appears that enabling the second SATA port, disables both SATA and PCIe on the M.2 B key connector. To use the bracket now, I would have to ditch my M.2 SATA drive, or ditch the coral TPU.
I'd still like to have the bracket in place because it is one less thing to keep track of.
I forgot to come up with a design for the flat flex pass-through and Mini-PCIe mounting. Next day, I decided to just make another 35mm hole saw cut-out and line it with silicone edge protector. The Mini-PCIe bit just mounts to a new screw hole on the drive bracket, same general position.
Since that area stays warm, I put a couple tiny heatsinks on the gigabit ethernet chips. I'm not sure if the thermal pad on the 2.5G chip (under the board) is helping much.
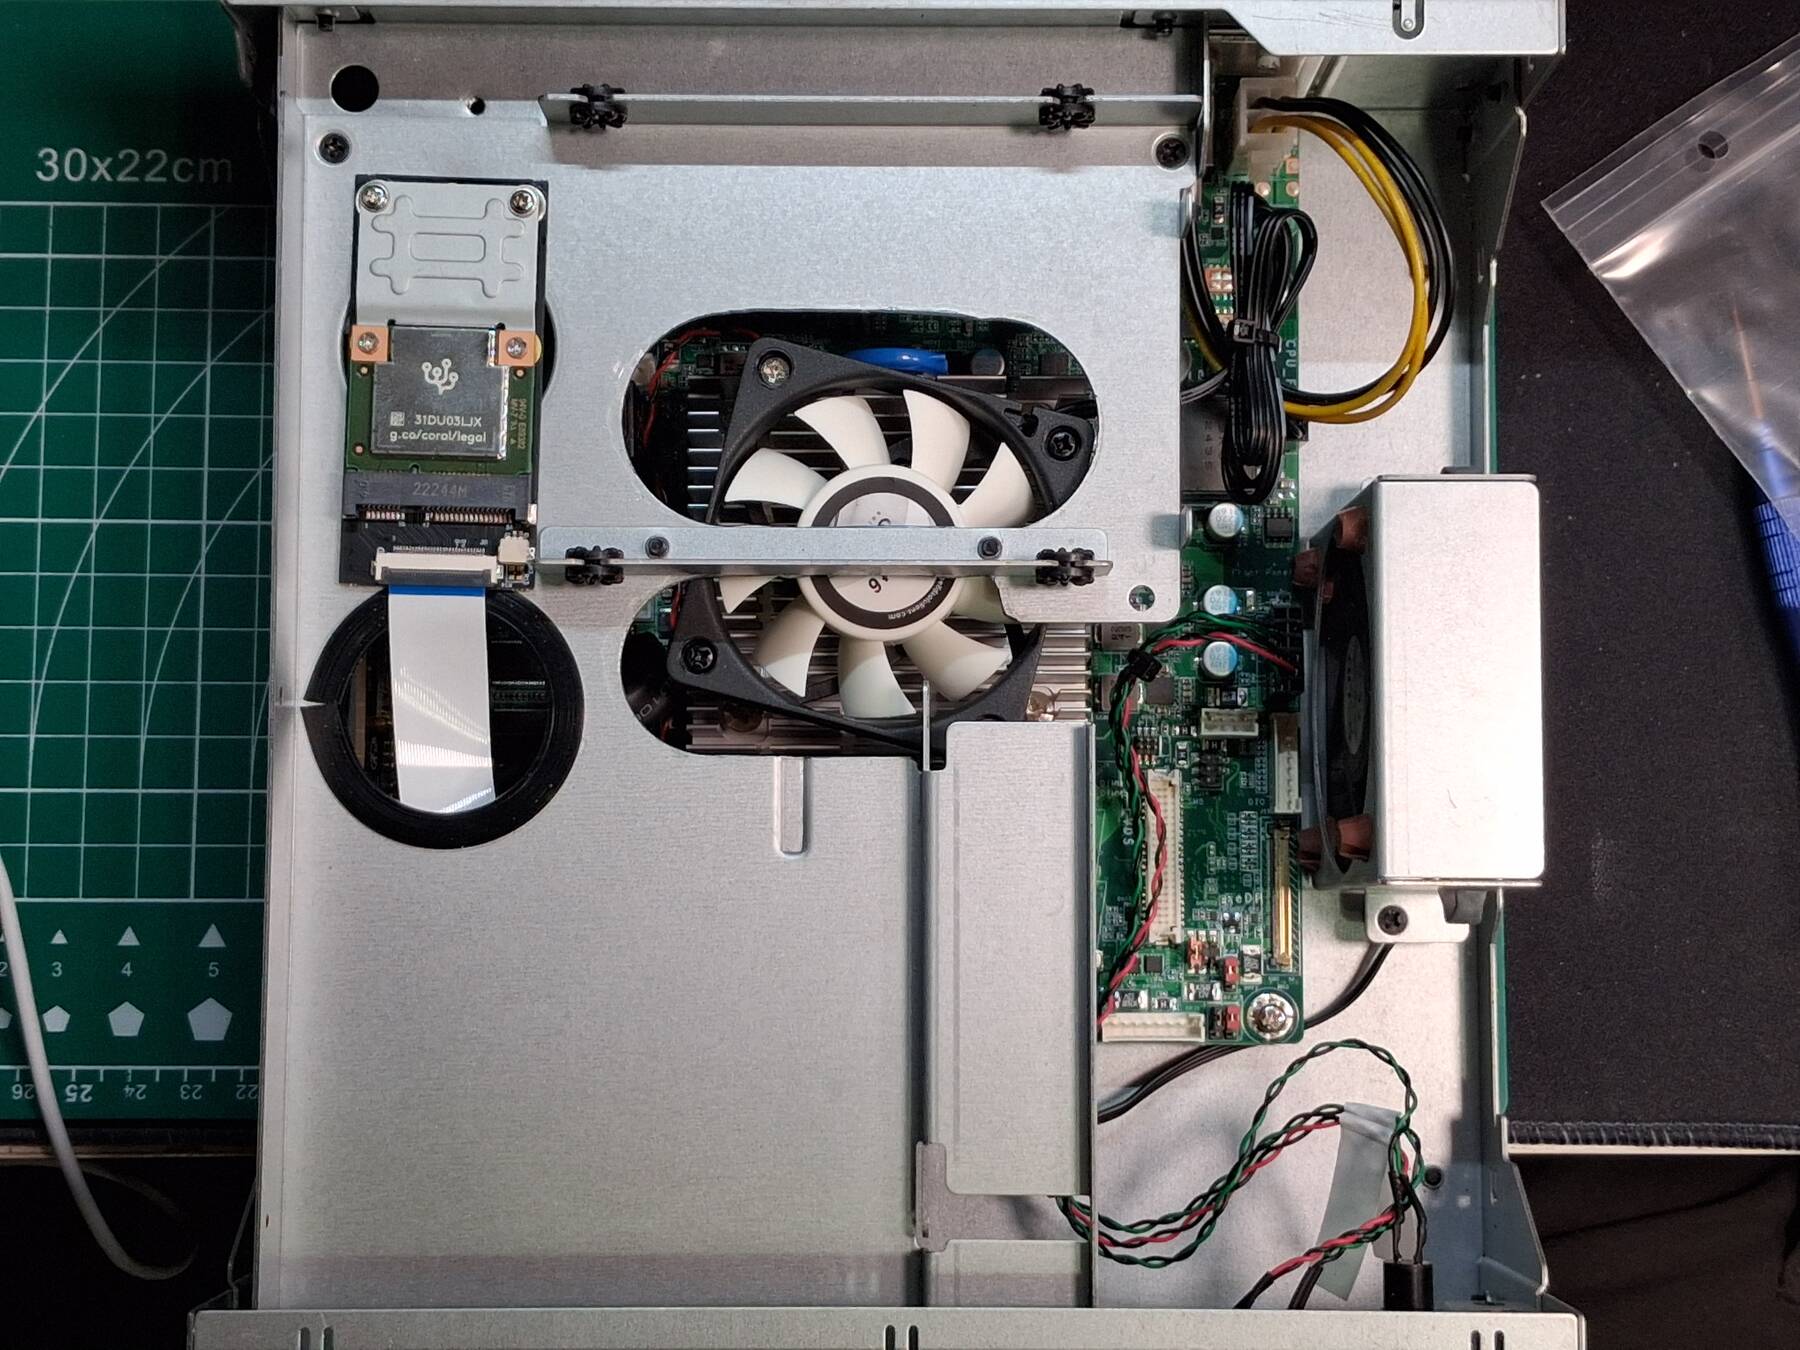
I put it back on the wall mount. Hoping I can mostly ignore it now.
Notes on new hardware
So far I haven't seen any PCIe errors with the Coral TPU like the previous system had. I was worried they would get worse because of the adapter and long flat flex cable.
The only issue seems to be sound related, but it hasn't caused any issues (not using the sound card at the moment), just some unusual dmesg output.
snd_hda_intel 0000:00:1f.3: bound 0000:00:02.0 (ops i915_audio_component_bind_ops [i915])
snd_hda_intel 0000:00:1f.3: azx_get_response timeout, switching to polling mode: last cmd=0x20f70740
snd_hda_intel 0000:00:1f.3: No response from codec, disabling MSI: last cmd=0x20f70740
snd_hda_intel 0000:00:1f.3: azx_get_response timeout, switching to single_cmd mode: last cmd=0x20f70740
azx_single_send_cmd: 384 callbacks suppressed
azx_single_send_cmd: 267 callbacks suppressed
This might be power saving related. Could have started when I ran powertop to enable power saving features.