dreadnought (Main workstation)


Summary
TODO
Notes
- SuperMicro SAS controller is a backwards PCIe card (components mounted on wrong side). I bought it already flashed with LSI firmware, and a proper bracket for standard cases.
Hardware
| Make | Custom |
| Year | 2021 |
| Model | Asus Prime X470-PRO |
| Chassis | Fractal Design Define R4 |
| Power Supply | Seasonic Focus+ 750W 80+ |
| Processor | AMD Ryzen 5 5600X |
| Memory | 32GB DDR4 3200 ECC OWC OWC3E2D41R816GB |
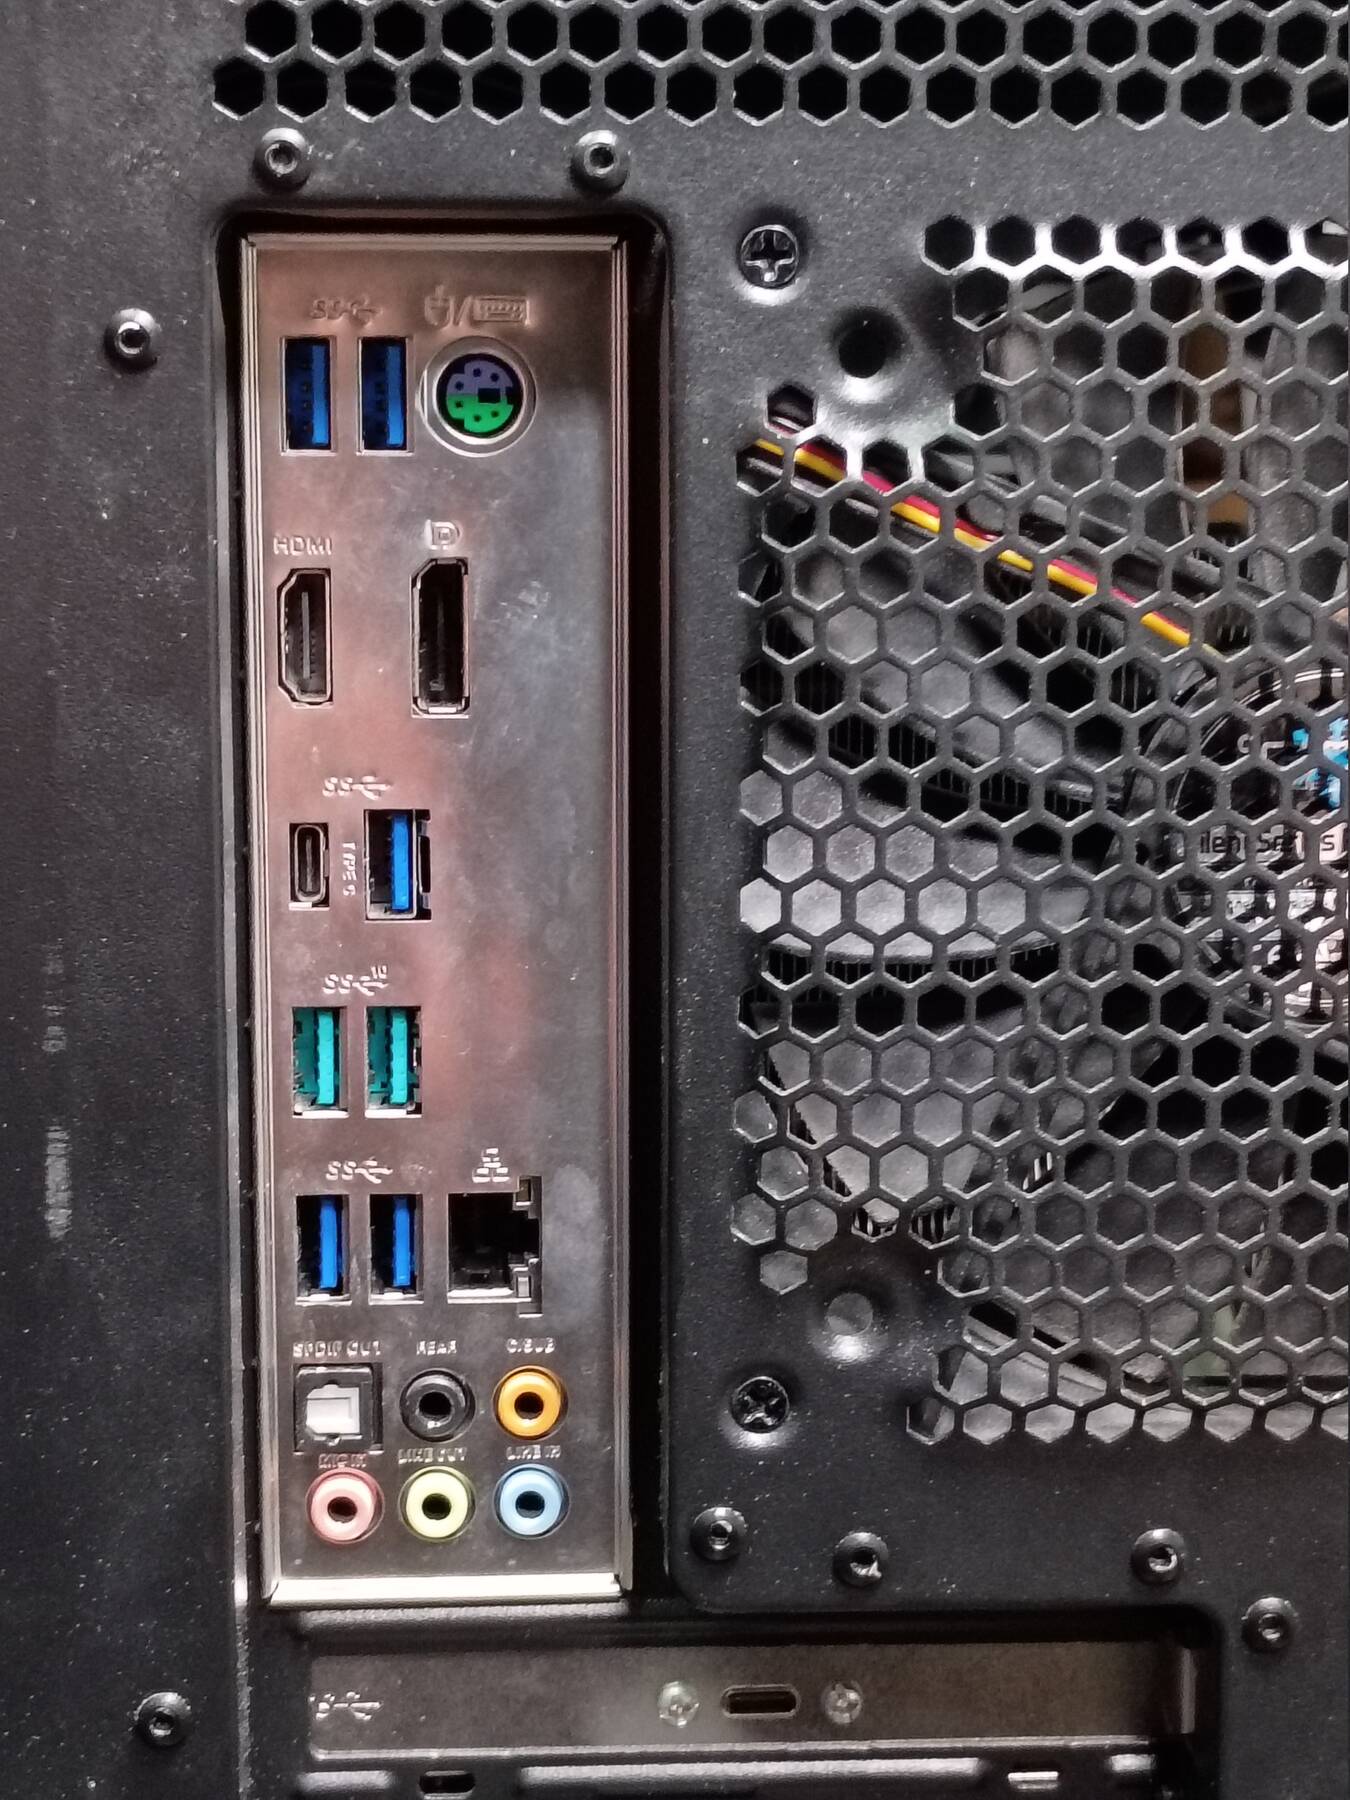
| Ports | PS/2 Keyboard/Mouse Combo |
| DisplayPort 1.2 | |
| HDMI 1.4b | |
| 7x USB A 3.1 gen 1 | |
| 2x USB A 3.1 gen 2 | |
| 3x USB C 3.1 gen 1 right | |
| 2x RJ-45 LAN | |
| 5x Audio Jacks | |
| Optical S/PDIF out | |
| 2x USB A 3.0 (Front) | |
| USB A 2.0 (Front) | |
| 2x Audio Jacks (Front) | |
| 4x DisplayPort 1.4 | |
| USB C 3.1 gen 2 | |
| USB C 3.1 gen 2 (DP Alt Mode) | |
| DisplayPort 1.2 Input (Alt Mode) | |
| 4x Firewire 800 | |
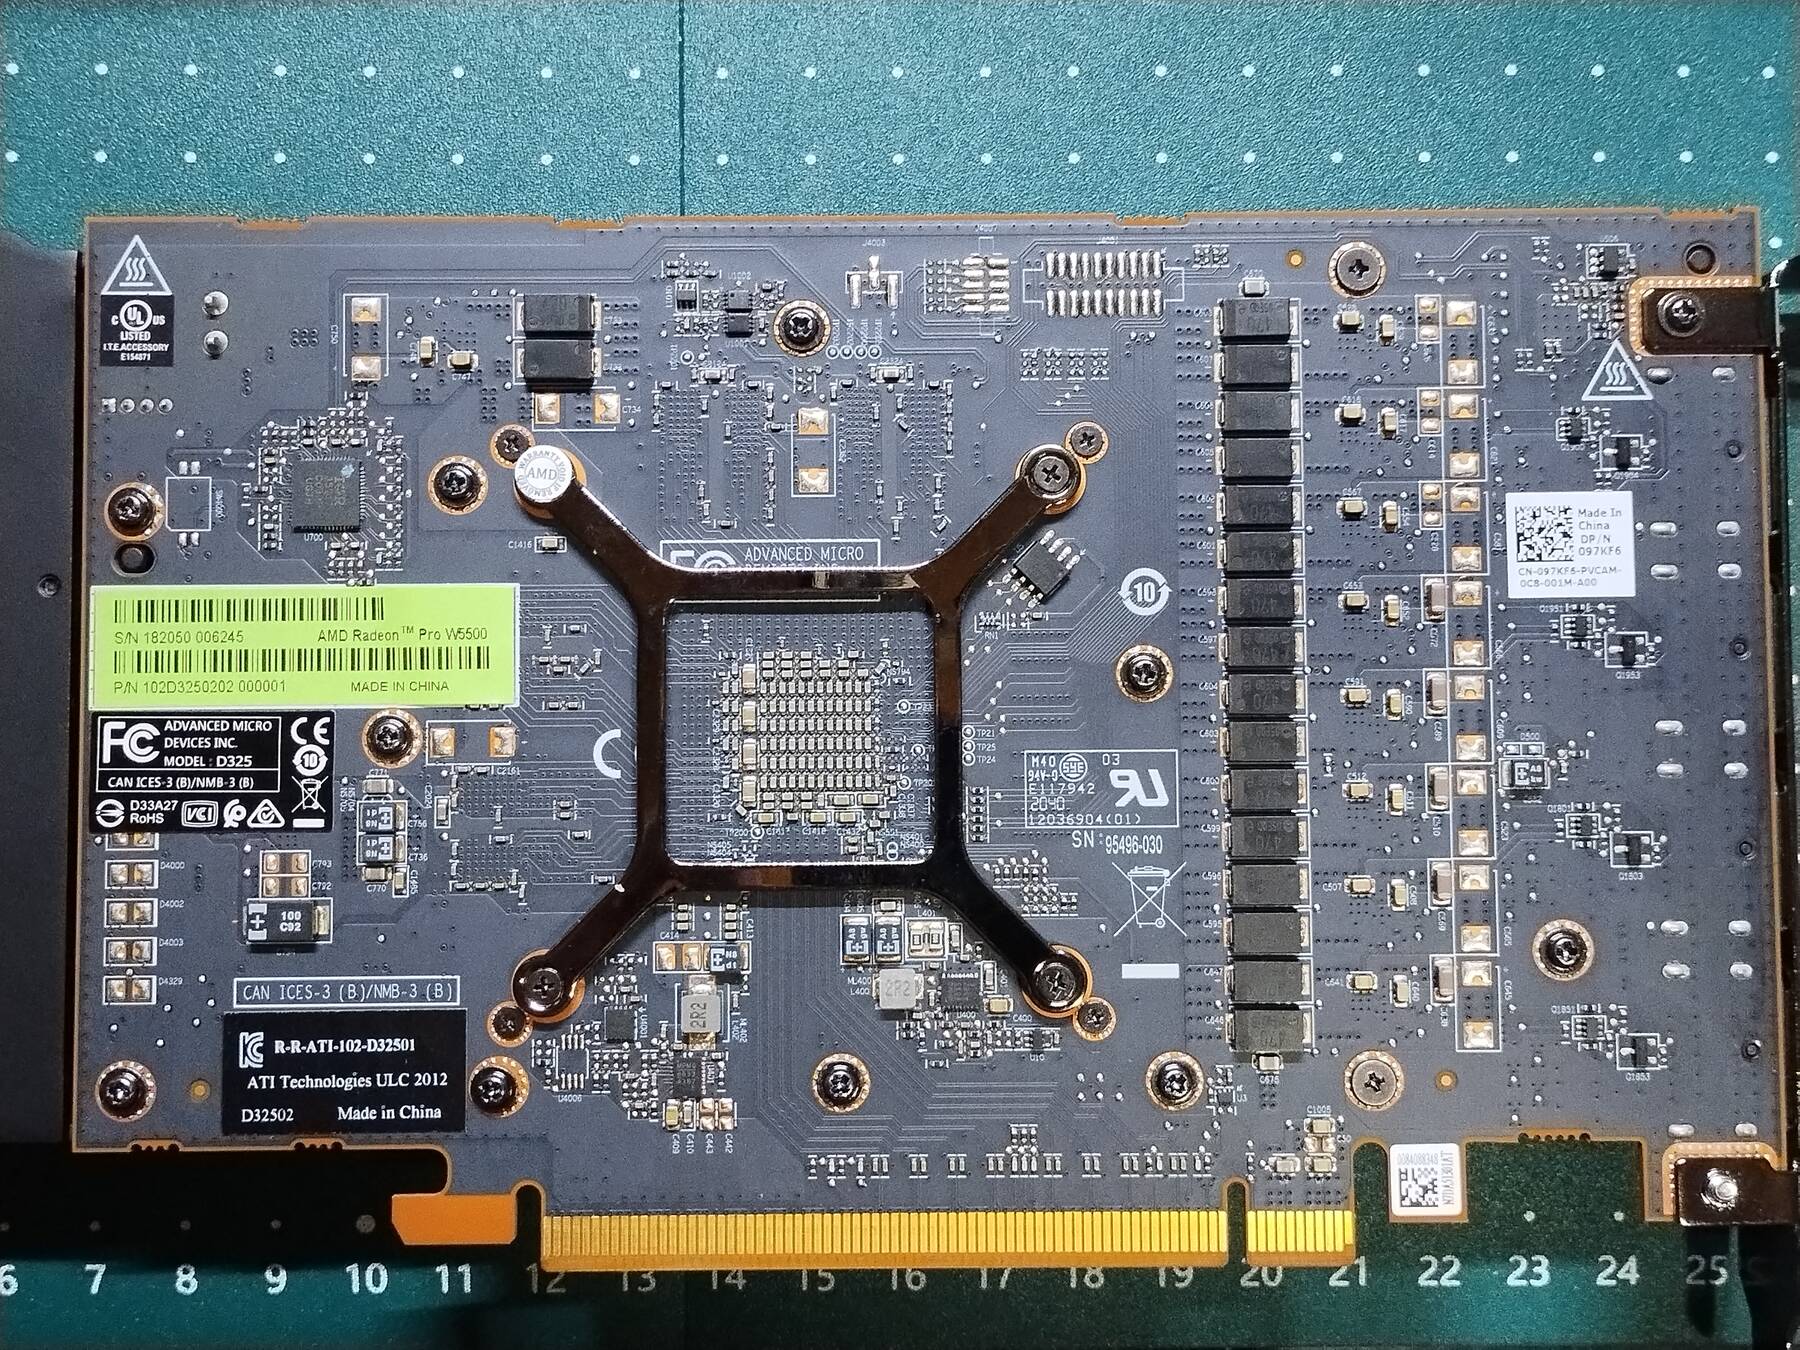
| Graphics | AMD Radeon Pro W5500 |
| Storage | 250GB Samsung 970 EVO NVMe SSD |
| 256GB Inland Professional SATA SSD | |
| 256GB LiteOn CV3-SD256 2242 M.2 SATA SSD | |
| 2x 8TB WD WD80EMAZ-00M9AA0 | |
| 8TB HGST HUH728080ALE604 | |
| 2x 12TB WD WD120EDBZ-11B1HA0 | |
| LG WH14NS40 Blu-Ray Drive | |
| Display | 32" Samsung M7 M70F 3840x2160 |
| 25" Dell U2515H 2560x1440 | |
| 8.9" Magedok T089A 1920x1200 | |
| Int. Peripherals | Realtek RT8111H Gigabit Ethernet |
| Realtek ALC887-VD Audio | |
| IOI FWBX2-PCIE1xE220 4-port Firewire 800 | |
| LR-Link RTL8125 2.5G Ethernet | |
| SUNIX UPD2018 USB 3.1 w/DisplayPort Alt | |
| SUNIX UPD2018 USB 3.1 w/DisplayPort Alt | |
| Ext. Peripherals | |
| Dimensions | |
| Length/Depth | 39.6 cm |
| Width | 22.5 cm |
| Height/Thickness | 48.4 cm |
| Weight | 12.37 kg ( 27 lbs 4.4 oz) |
Software
| Operating System | Debian Bullseye (testing) |
| Unique applications |
Log
Wrong motherboard
Motherboard didn't work out for mirage because AMD dropped support for older CPU in their A520 chipset. Ended up holding on to the board for what became dreadnought.
Collecting parts
Started collecting parts with the intention of building a video capture machine. Something with reasonable power and relatively compact. Case size became compromised a bit to fit a full size BD drive I had for use with UHD discs.
Settled on a Ryzen 3 Pro 4350G because it is cheap, it has enough cores, and limited compatibility of the A520 with 2nd/3rd gen iGPU Ryzens. GPU prices were sky high from market conditions, and even finding the WX 2100 I wanted was prohibitive. It could be a bit more powerful machine, but this also frees up the PCIe slot for firewire or internal capture devices.
Build went off without a hitch. The case is a little cramped for cable routing, but I only had to sacrifice the drive area intake airflow path.
Firewire and OBS Midi
Attempts at running four iSight cameras over firewire ran out of isochronous resources. I can get away with reduced resolution or framerate, but they're already pretty limited so I went for the dual FW643 firewire card from Point Grey (FWB-PCIE-02) that should handle 3 per port.
I had trouble with obs midi segfaulting. It seemed to be in the libremidi library, but I didn't look into the backtrace much. I grabbed their alpha release, and a different repo of libremidi. Aside from following the instructions in build.md under ## Linux; I manually cloned libremidi into src/libremidi, and I changed CMakeLists.txt as below.
@@ -88,6 +88,7 @@ add_library(obs-midi MODULE
        src/forms/settings-dialog.ui)
 include_directories(
        "${LIBOBS_INCLUDE_DIR}/../UI/obs-frontend-api"
+       ${LIBOBS_INCLUDE_DIR}
        ${obs_midi_UI_HEADERS}
        ${Qt5Core_INCLUDES}
        ${Qt5Widgets_INCLUDES}
I also had to modify libremidi's CMakeLists.txt as follows.
@@ -49,6 +49,7 @@ endif()

 target_compile_features(libremidi ${_public} cxx_std_17)

+find_package(Qt5 COMPONENTS Widgets)
 find_package(Threads)
 target_link_libraries(libremidi ${_public} ${CMAKE_THREAD_LIBS_INIT})
Fresh install, Xfce
I did a fresh install of Debian 11 with manual partitioning, and encrypted root. The installer is frustrating in that if you set up an encrypted partition there is no way to delete it without restarting the installer.
I also installed gnome because I forgot gnome defaults to Wayland which isn't suitable for my use (barrier, possibly local obs screen capture). Gnome is also annoying because despite it's ability to rotate the screen it doesn't handle input device (touchscreen, stylus) rotation so you're left with broken inputs. If I'm going to have to manually configure everything anyway I decided I'm better off in Xfce with fully configurable panels and other things that aren't built to hide every conceivable power user feature away.
Xfce is disappointing after using i3 for a long time. I gave up.
- Display rotation
For boot messages add
fb=false fbcon=rotate:1toGRUB_CMDLINE_LINUX_DEFAULTin/etc/default/grub. The grub menu will still remain rotated, but this gets the boot messages and console correct.While I was there I also added splash for the plymouth graphical splash boot screen, but this didn't rotate because despite its whole purpose being to make things pretty nobody ever thought of screens being rotated. So you can forget having a nice splash on boot.
Add a display setup script to
/etc/lightdm/lightdm.conf#!/bin/sh xrandr -o right exit 0
- Touchscreen and pen input rotation
I ran into some weirdness when trying to get the N-trig stylus to map to an output. For some reason the stylus is a keyboard, and libinput doesn't create the mousing sub-device until the stylus is first used. Seems like this will have to be handled in xorg config or a udev rule, but you don't get the convenient
--map-to-outputthen so you'll have to use transformation matrices.Even more weirdness. After lots of playing around, and thinking the devices were independent I found modifying the transformation matrix of "N-trig DuoSense" affects both the pen device and touchscreen. If you try to modify those sub-devices as well then the transformations stack and you'll get incorrect behavior.
I tried using
xinput's--map-to-outputonly on the "N-trig DuoSense" device, but the outcome was still incorrect (probably due to Stylus sub-device not existing yet). Finally I settled on just using this xorg.conf snippet to get the desired input rotation:Listing 3: /etc/X11/xorg.conf.d/10-duosense.confSection "InputClass" Identifier "N-trig DuoSense" MatchProduct "N-trig DuoSense" Option "CalibrationMatrix" "0 1 0 -1 0 1 0 0 1" EndSection
- Touchscreen and pen input rotation
- Fixing display size (Bad EDID)
Listing 4: /etc/X11/xorg.conf.d/10-monitor.confSection "Device" Identifier "radeon" Driver "amdgpu" Option "Monitor-DisplayPort-0" "Magedok" EndSection Section "Monitor" Identifier "Magedok" DisplaySize 144 255 EndSection
- Barrier with lightdm
Add a greeter setup script to
/etc/lightdm/lightdm.conf(note this will run as root, like Xorg) like:greeter-setup-script=barrierc --enable-crypto server.name
Encryption key on USB stick
dreadnought has a semi-remote usb hub, and I want it to boot without interaction unless but still be encrypted root. I figured putting a key on a usb stick in the remote hub is effective enough to prevent easy access if the dreadnought is removed from the premises.
Based on https://www.howtoforge.com/tutorial/passwordless-encryption-of-linux-root-partition/ and https://gist.github.com/da-n/4c77d09720f3e5989dd0f6de5fe3cbfb
Put random data on the usb stick It's not clear where these tutorials are producing the random data that is used as a key. Probably something they did during install that I skipped. I just overwrote my whole usb stick with
/dev/randomto start with. It is slow (~1-2 MB/s).dd if=/dev/random of=/dev/disk/by-id/usb-General_USB_Flash_Disk_0000000000000000-0\:0 status=progress
Save a copy of the key
dd if=/dev/disk/by-id/usb-General_USB_Flash_Disk_0000000000000000-0\:0 of=/root/cryptsetup.key bs=512 skip=4 count=16
Add the key to a key slot (keep slot 0 for password). You need to enter the existing passphrase to add the new key.
cryptsetup luksAddKey /dev/nvme0n1p2 /root/cryptsetup.key --key-slot 1
Add a udev rule to symlink and enumerate usb devices
Listing 5: /etc/udev/rules.d/99-custom-usb.rulesSUBSYSTEMS=="usb", DRIVERS=="usb",SYMLINK+="usbdevice%n"
udevadm control --reload-rules
Replug the device and check for those symlinks in /dev/usb
Add a script to read the key from the usb device
Listing 6: /usr/local/sbin/openluksdevices.sh#!/bin/sh ############taken from following link######### ###http://www.oxygenimpaired.com/debian-lenny-luks-encrypted-root-hidden-usb-keyfile TRUE=0 FALSE=1 # flag tracking key-file availability OPENED=$FALSE if [ -b /dev/usbdevice ]; then # if device exists then output the keyfile from the usb key dd if=/dev/usbdevice bs=512 skip=4 count=16 | cat OPENED=$TRUE fi if [ $OPENED -ne $TRUE ]; then echo "FAILED to get USB key file ..." >&2 /lib/cryptsetup/askpass "Try LUKS password: " else echo "Success loading key file for Root. Moving on." >&2 fi sleep 2
Make it executable:chmod a+x /usr/local/sbin/openluksdevices.sh
Add the keyscript to crypttab
Get device namelsblk|grep crypt
Get UUIDblkid|grep crypto_LUKS|cut -d \" -f 2
Listing 7: /etc/crypttab (excerpt)nvme0n1p2_crypt UUID=11111111-1111-1111-1111-111111111111 none luks,discard,keyscript=/usr/local/sbin/openluksdevices.shAdd cryptroot info to your initramfs config
Listing 8: /etc/initramfs-tools/conf.d/cryptrootCRYPTROOT=target=nvme0n1p2_crypt,source=/dev/disk/by-uuid/11111111-1111-1111-1111-111111111111Add
usb_storagemodule to initramfsListing 9: /etc/initramffs-tools/modules (excerpt)usb_storage
Add a script to add a udev rule to the initrd
Listing 10: /etc/initramfs-tools/hooks/udevusbkey.sh#!/bin/sh # udev-usbkey script ###taken from ###http://www.oxygenimpaired.com/ubuntu-with-grub2-luks-encrypted-lvm-root-hidden-usb-keyfile PREREQ="udev" prereqs() { echo "$PREREQ" } case $1 in prereqs) prereqs exit 0 ;; esac . /usr/share/initramfs-tools/hook-functions # Copy across relevant rules cp /etc/udev/rules.d/99-custom-usb.rules ${DESTDIR}/lib/udev/rules.d/ exit 0
Make it executable:chmod a+x /etc/initramfs-tools/hooks/udevusbkey.sh
Modify grub config (ignore fb/fbcon if you don't want those)
Listing 11: /etc/default/grub (excerpt)GRUB_CMDLINE_LINUX_DEFAULT="quiet fb=false fbcon=rotate:1 rootdelay=20 cryptopts=target=nvme0n1p2_crypt,source=/dev/disk/by-uuid/11111111-1111-1111-1111-111111111111,keyscript=/usr/local/sbin/openluksdevices.sh"
Update initramfs and grub
update-initramfs -u
update-grub
Follow the linked guide if you want to unpack the initramfs and verify contents, or just try it. You can also use
lsinitramfsfor a quick look. What could go wrong?
- Fixing it when it goes wrong
My keyscript was bad, and I landed on a
(initramfs)prompt. Decrypt the luks device manually. Scan for the lvm volume groups. Exit the shell to continue booting.cryptsetup luksOpen /dev/nvme0n1p2 nvme0n1p2_crypt vgchange -ay exit
The guide references
openluksdevices.shin/lib/cryptsetup/scriptsin grub config, but it is not copied there. This is what the guide wants you to check when inspecting your initrd. However they never tell you what to do if it hasn't been copied. I just changed it to refer to the/usr/local/sbinlocation (that is included in the initrd) and that works.Seems like something is supposed to handle moving the keyscript files around. I'm not interested in searching it out when this solution is effective.
Dreadnought is now my desktop
Dreadnought has replaced chaos as my desktop. This mostly entailed adding a DisplayPort MST hub to allow four displays, and rearranging my desk.
It is a spec boost in single core CPU speed, and GPU speed. It has fewer CPU cores, and half the RAM though.
Some notable things that happened since then:
- My eSATA 4TB drive went bad, and the storage mirror became a single disk that I'm using ZFS snapshots/send to maintain copies of.
- Swapped the WiFi card for a 2.5gbit ethernet adapter (M.2 A+E key format)
- Linux MST crashes which have hopefully been resolved by building a kernel with patch from the thread linked here:Redhat bug
That's all I can recall at the moment. Overall it's doing a good job as a desktop, but the smaller fans can get a bit whiny under load compared to the 120mm fans that just whoosh a bit louder.
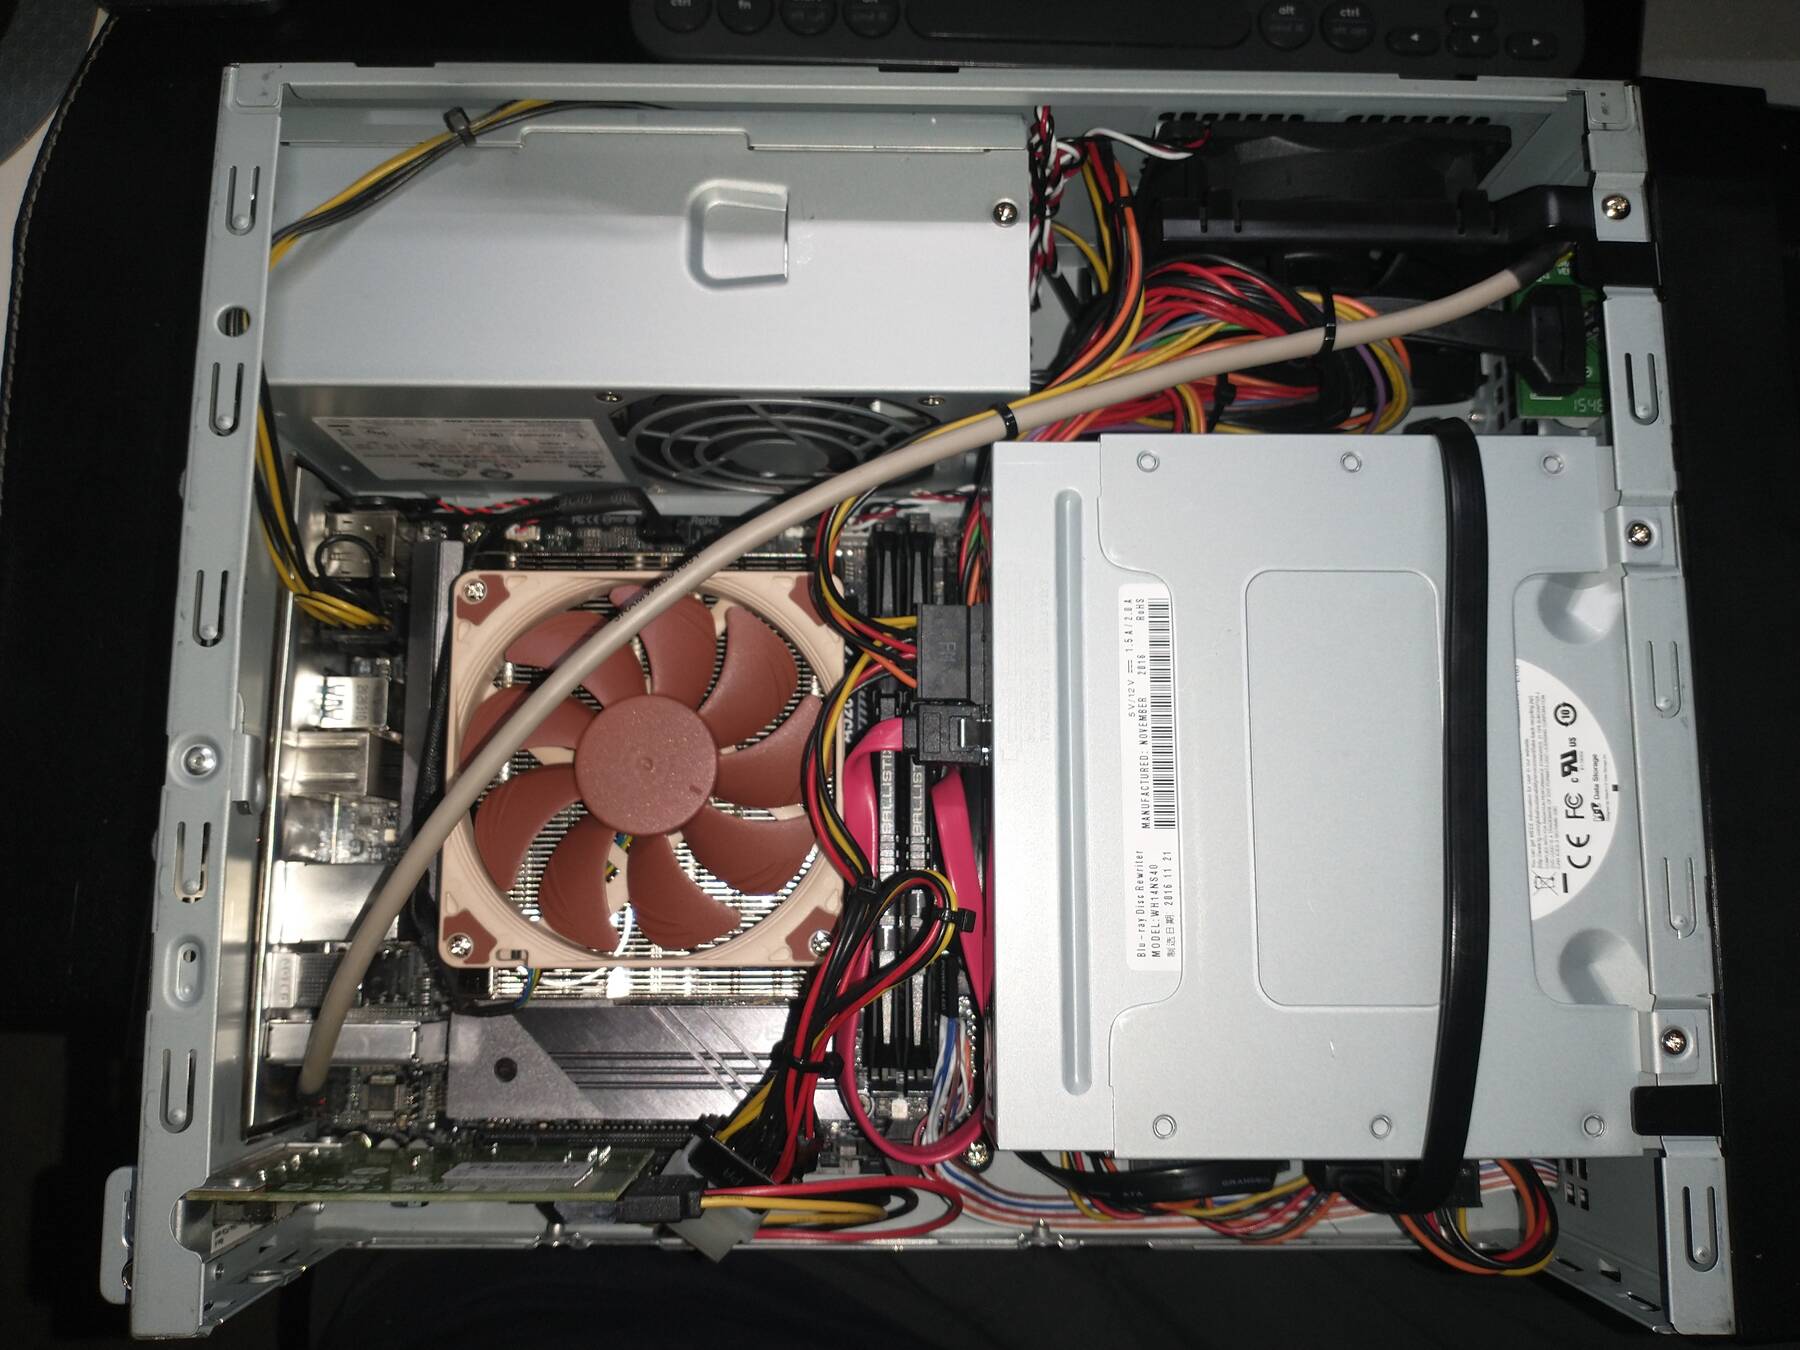
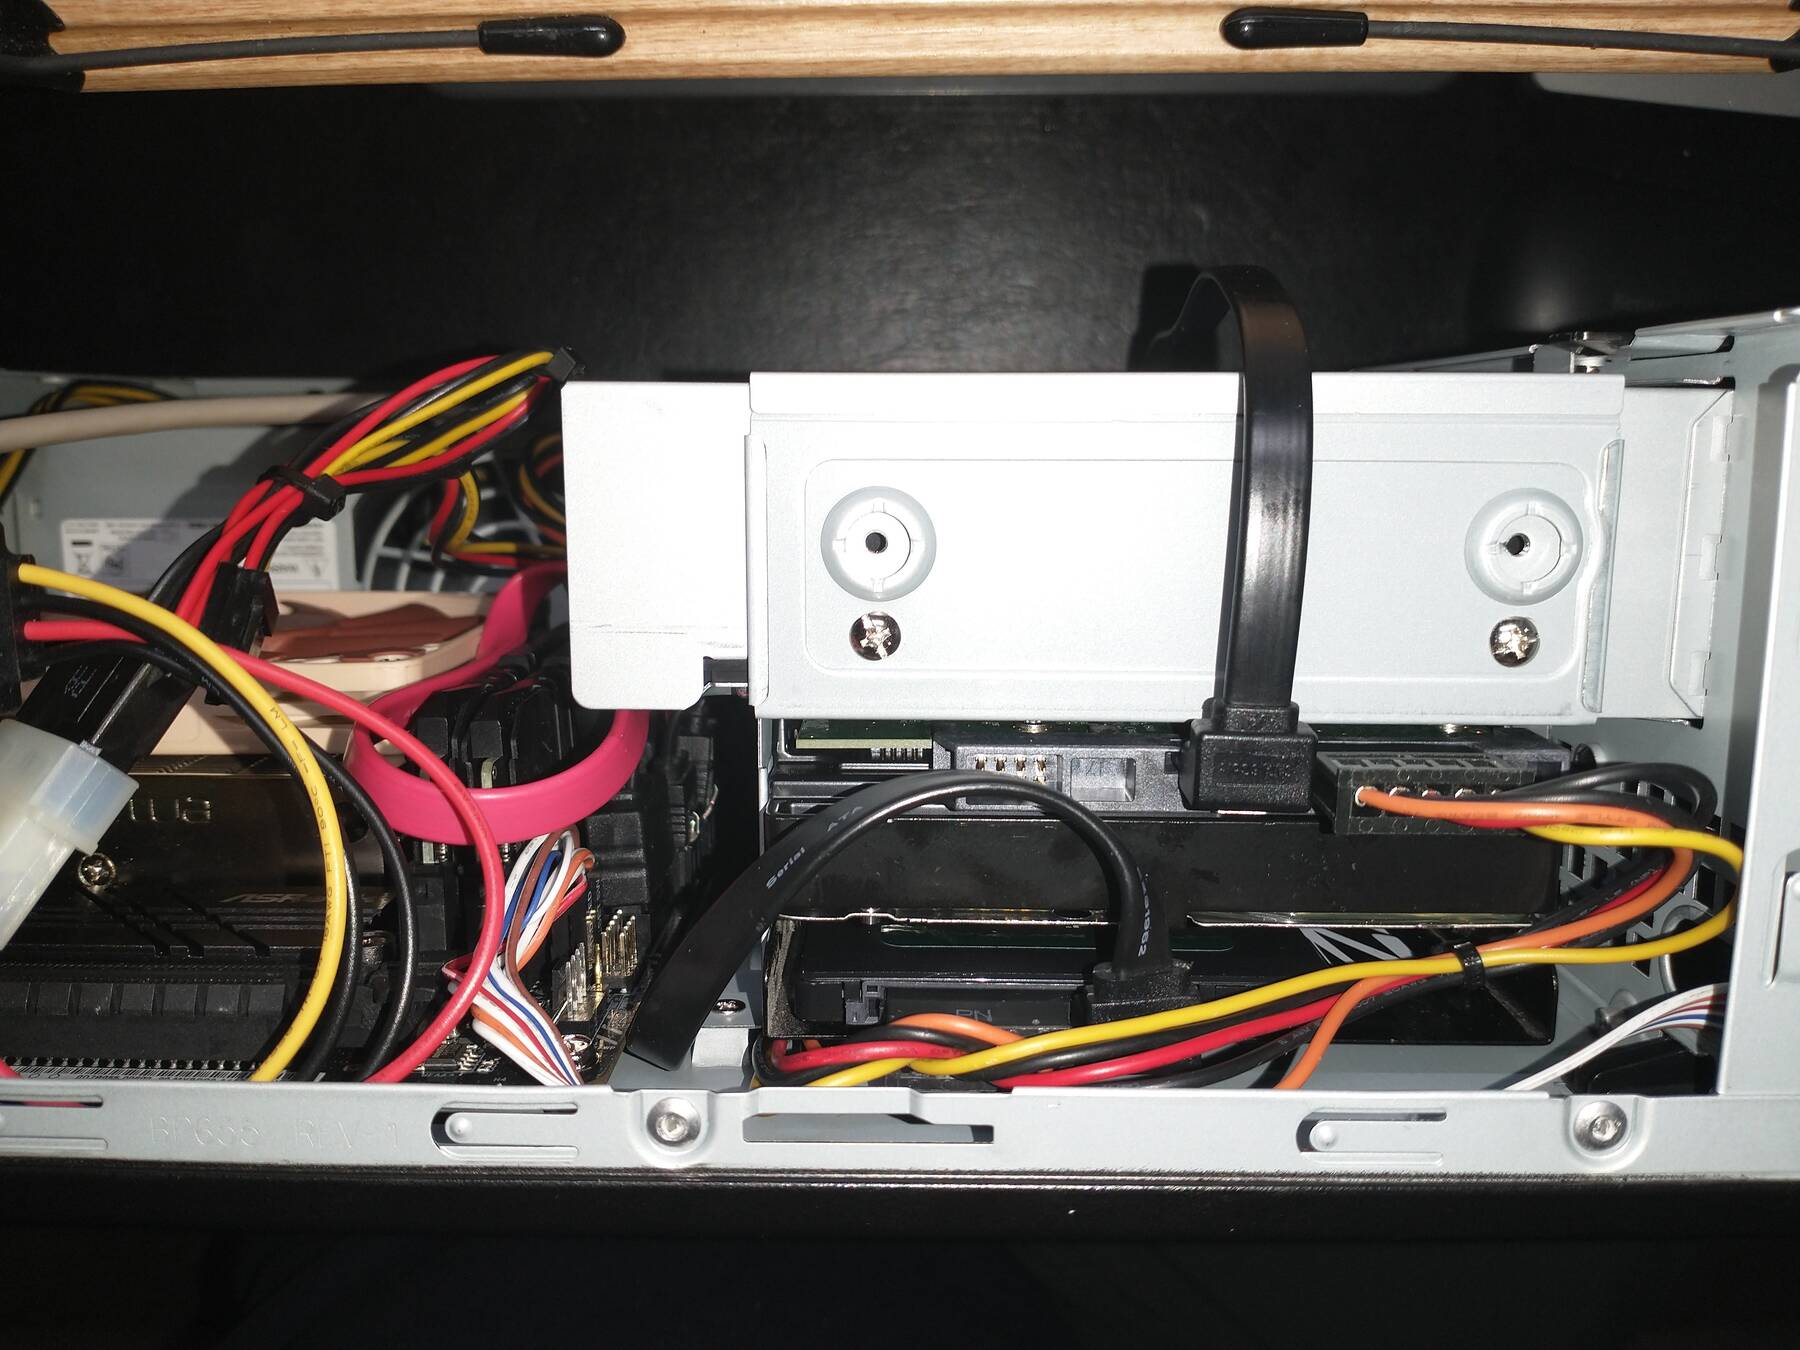
A 'big' upgrade
Dreadnought got moved into a Full ATX case, the 'Zalman i4'. Before it was in a 'Inwin BP691' ITX case with 'ASRock A520M-ITX/ac' motherboard. Initially I intended to use a 'Asus B350-F Gaming' motherboard that I had spare, but decided to swap with chaos' 'Asus Prime X470-PRO' since it has better PCI-E expansion.
Cable routing in these segregated bottom cases is a pain. Constant flipping the case back and forth. Poke the cable through, plug it in, manage any excess. The end result looks alright.
In this upgrade I gained:
- 32GB memory (from spare 16GB set I had)
- External ZFS mirror became internal
- 4-port Firewire 800 card (dual controller)
- Extra graphics card (Radeon WX Pro 2100). With the onboard it gives theoretical 9 displays.
- PCIE DisplayPort to USB C (DisplayPort Alternate) adapter
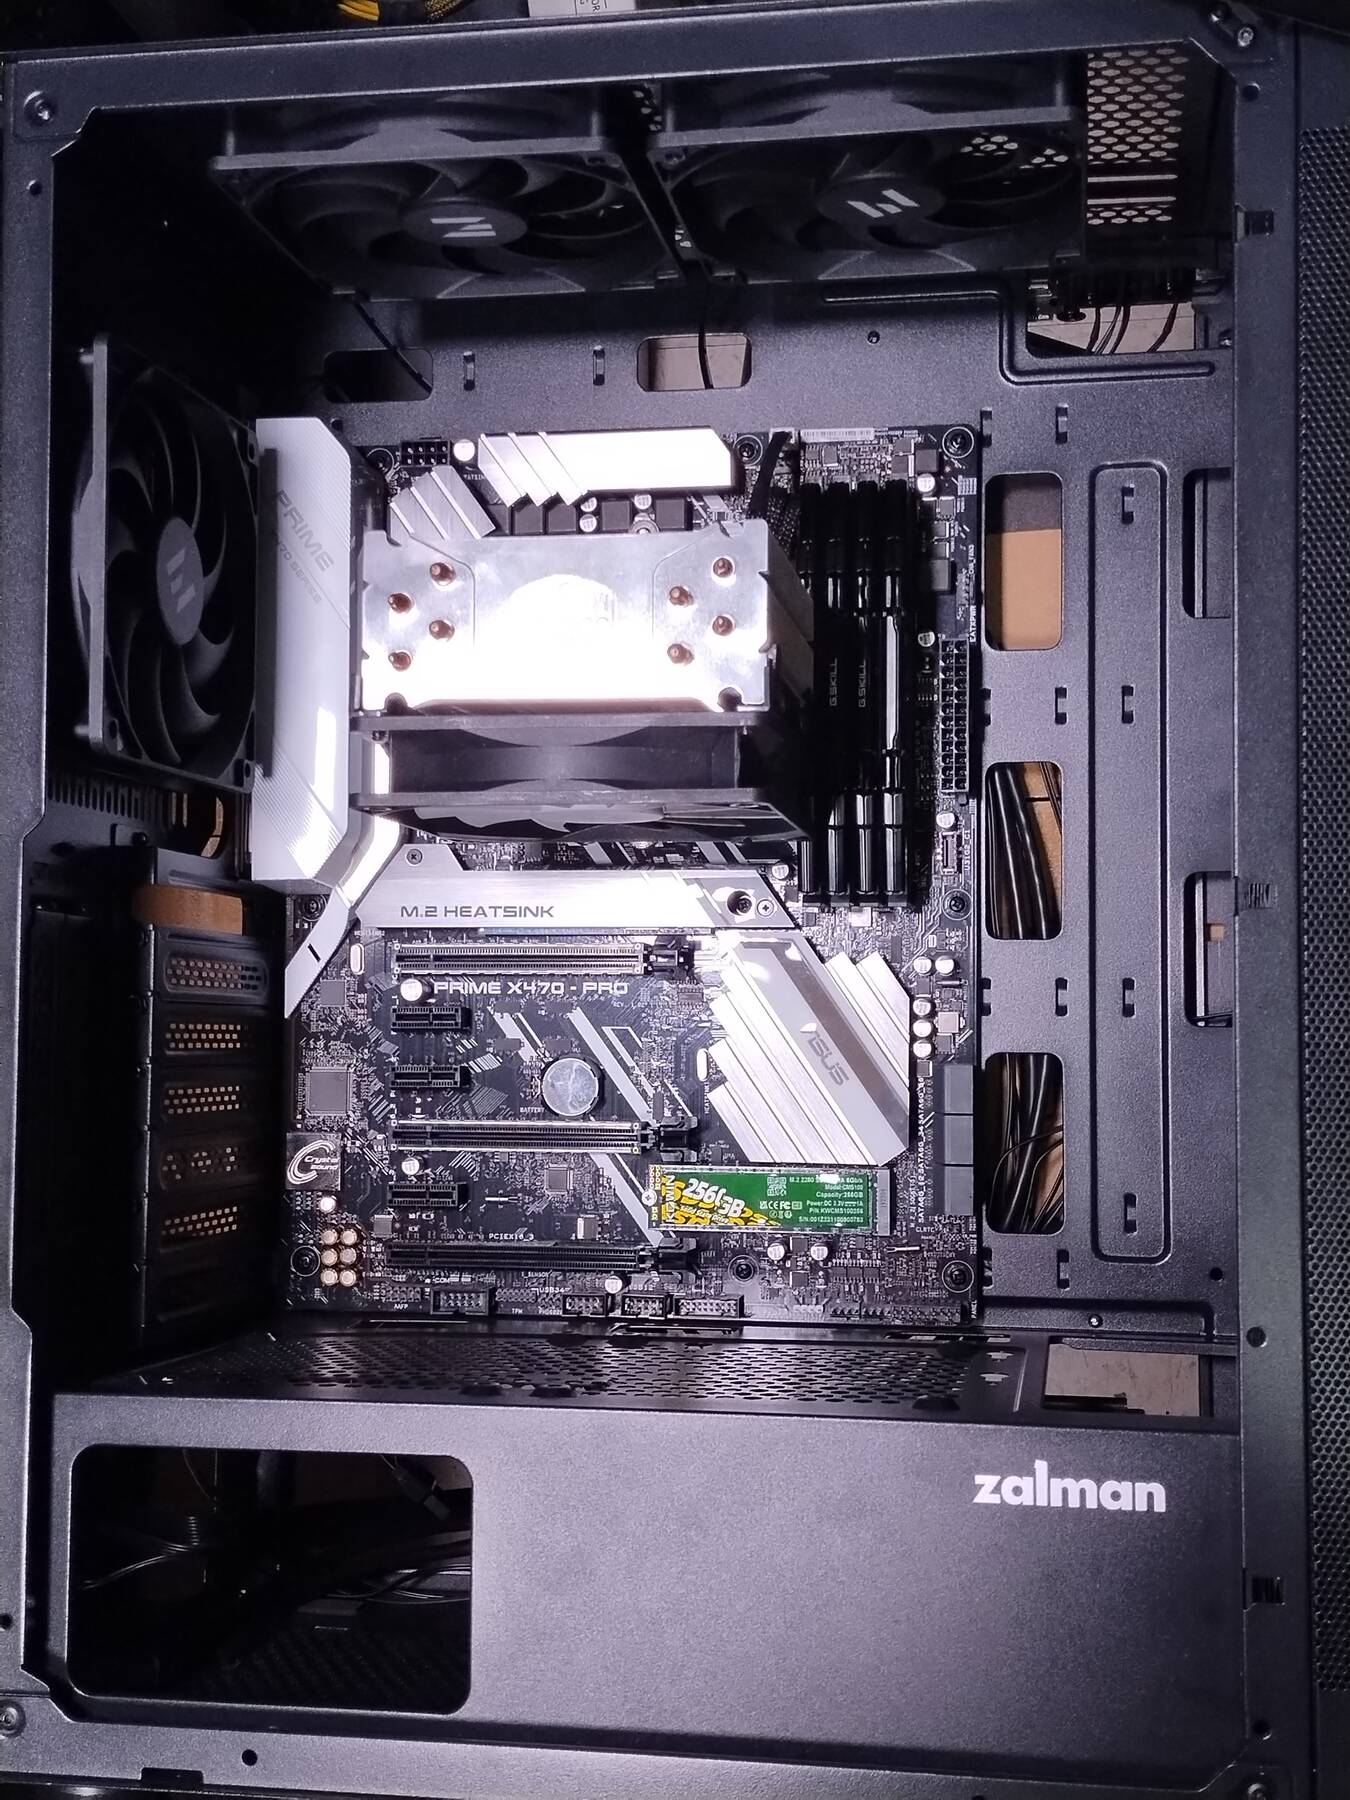
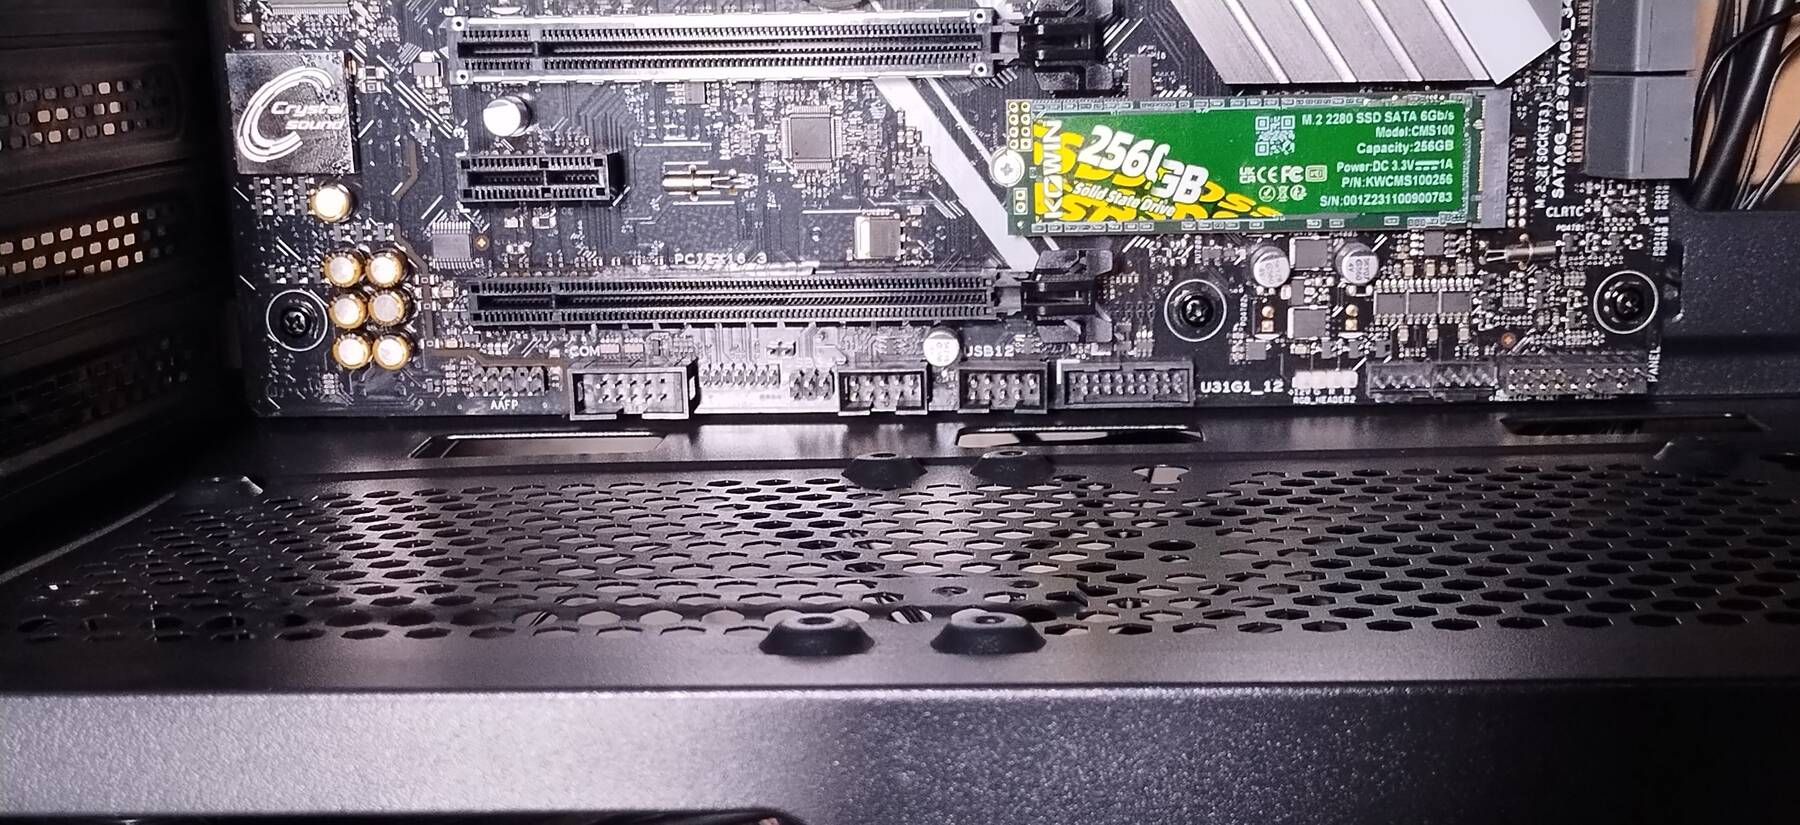
- Extra M.2 slot. I stuck an SSD in there, and might move my 2.5" drive contents to it.
- A bigger heatsink. I had space, so I installed CM Hyper 212 tower heatsink. Before it was Noctua NH-L9a.
I lost:
- DDR4-3600 speed memory (down to 3200), memory went to justice (gaming pc)
- 2.5GbE adapter, I was using the M.2 Wifi slot for this. Substituted a 1G adapter for now.
- Internal Blu-ray drive

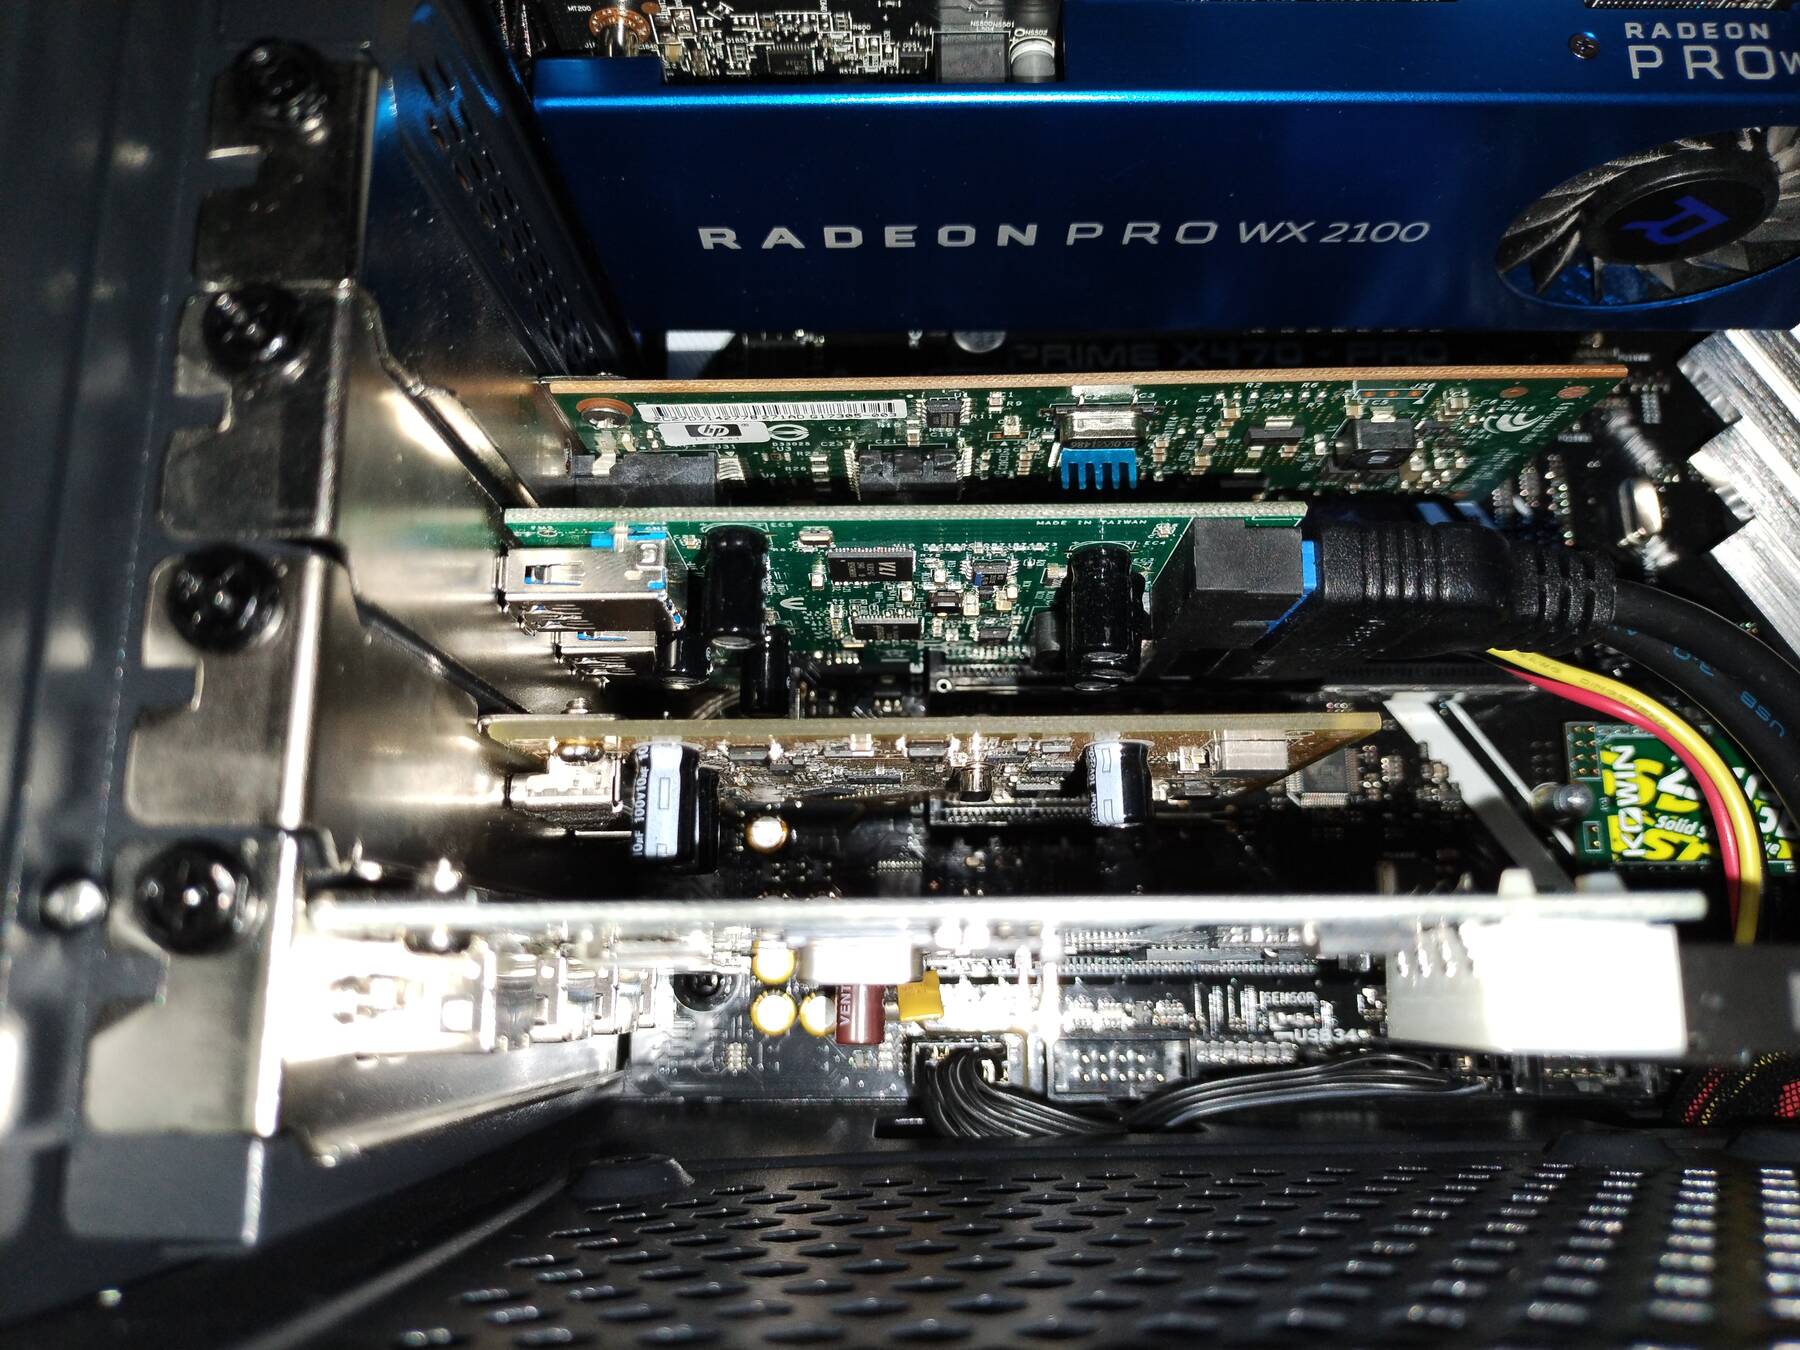
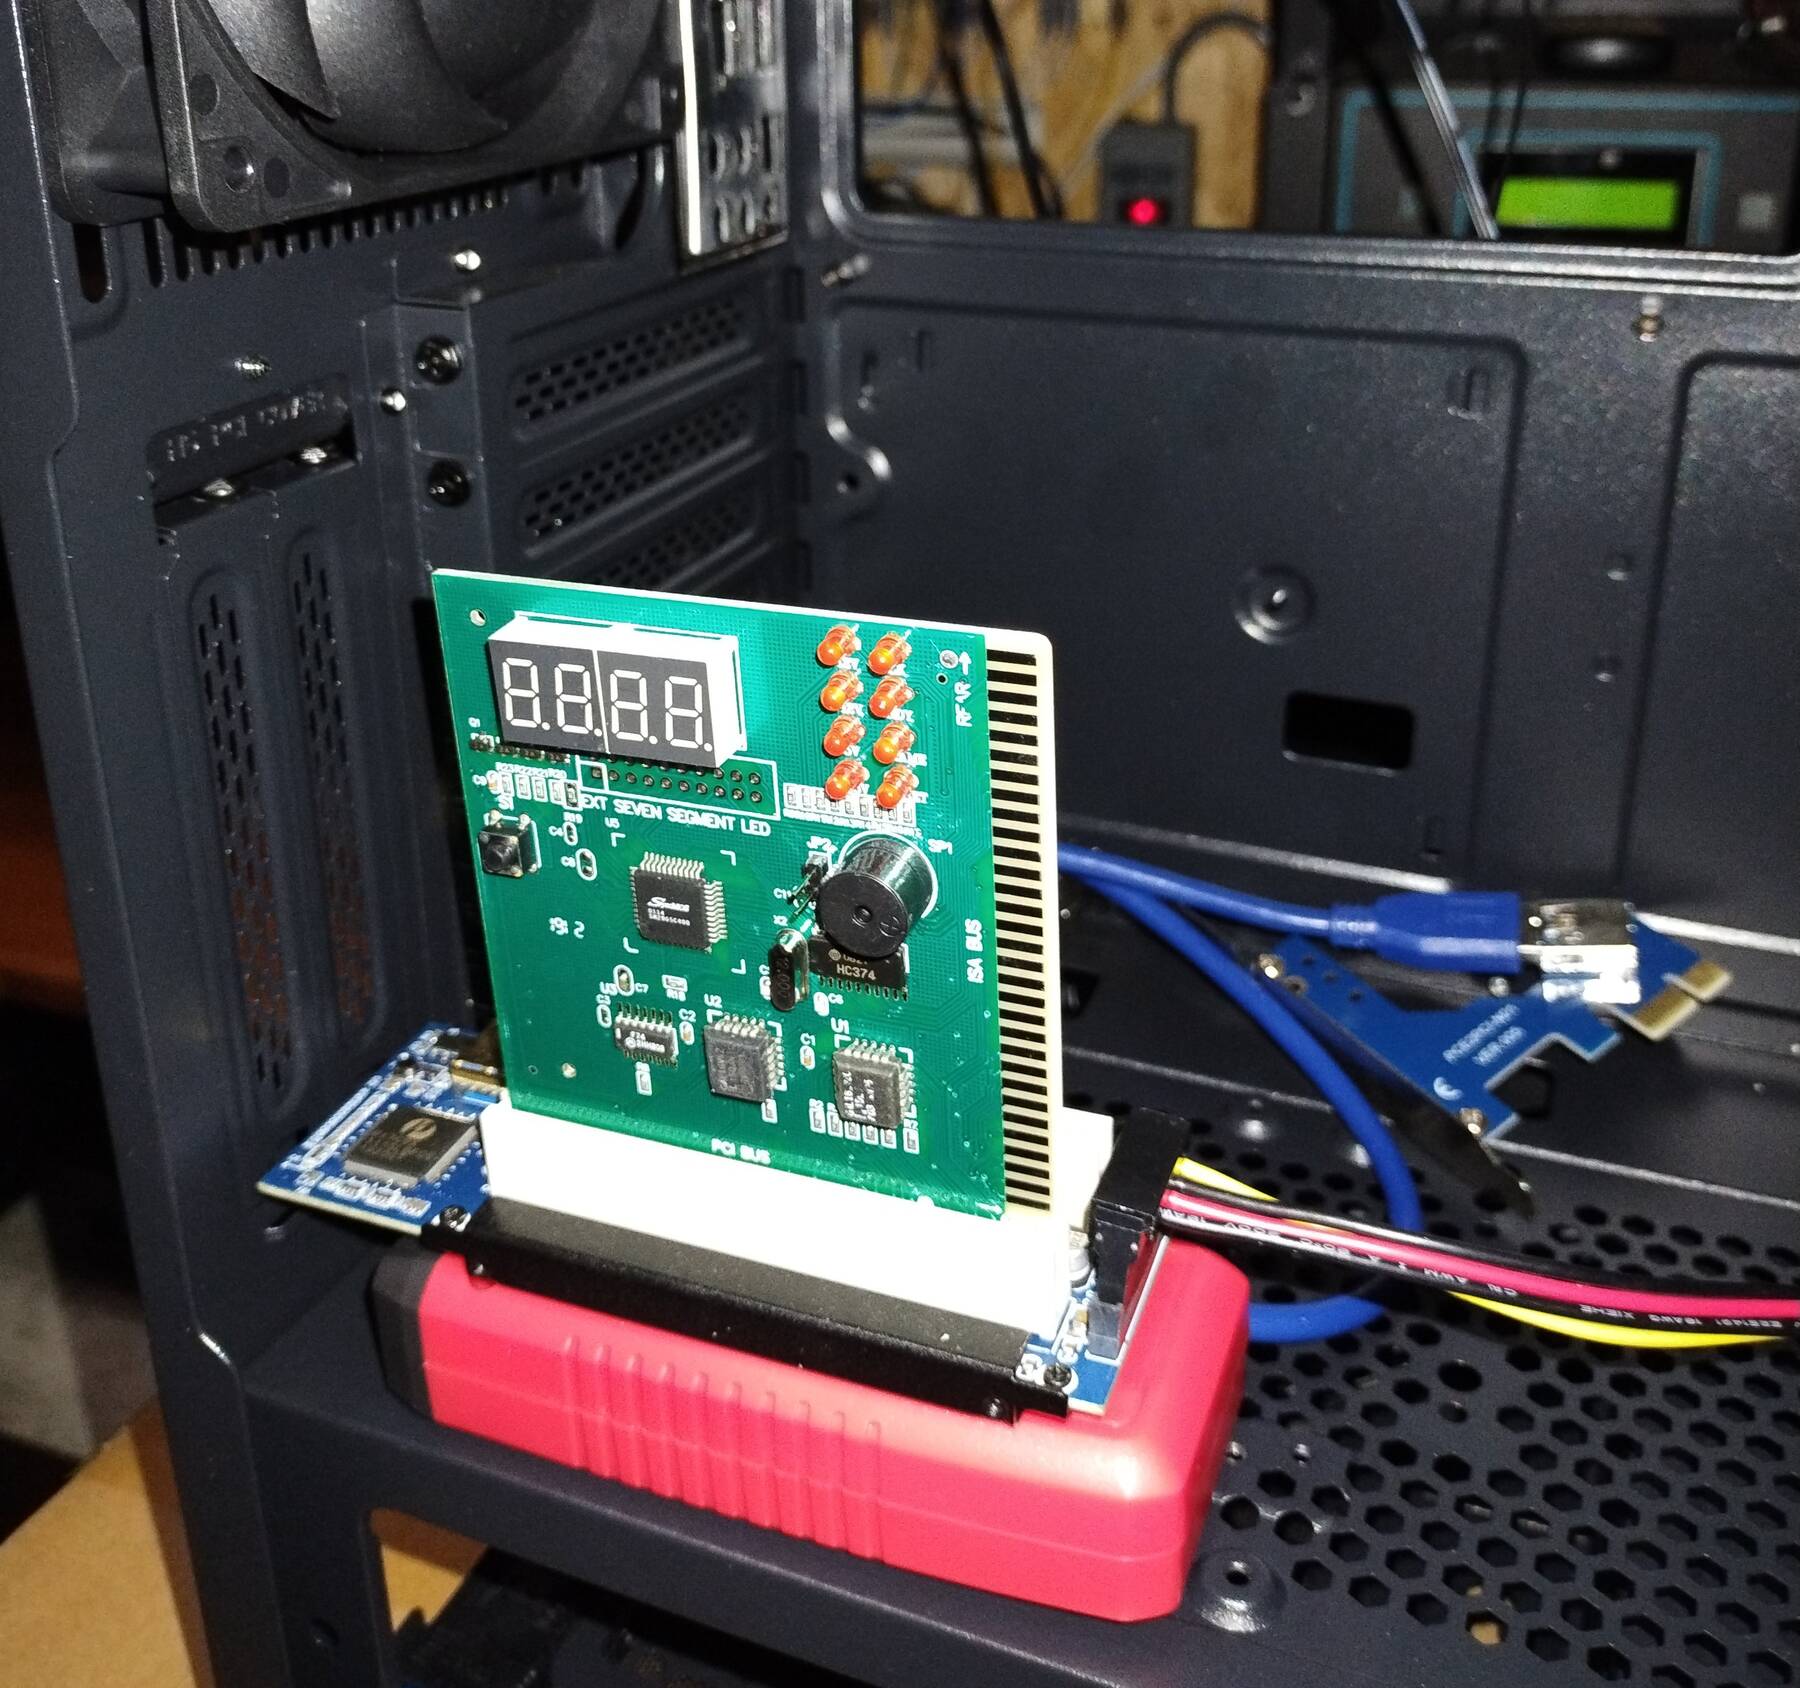
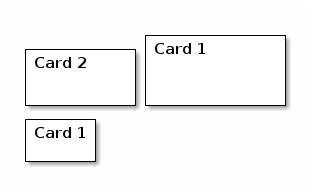
Another neat thing for later is the case's vertical GPU mount. I happen to have a PCIE to PCI bridge with two PCI slots that could be mounted there to provide legacy expansion. Couldn't think of a use for now, but I mocked it up a little bit for fun.
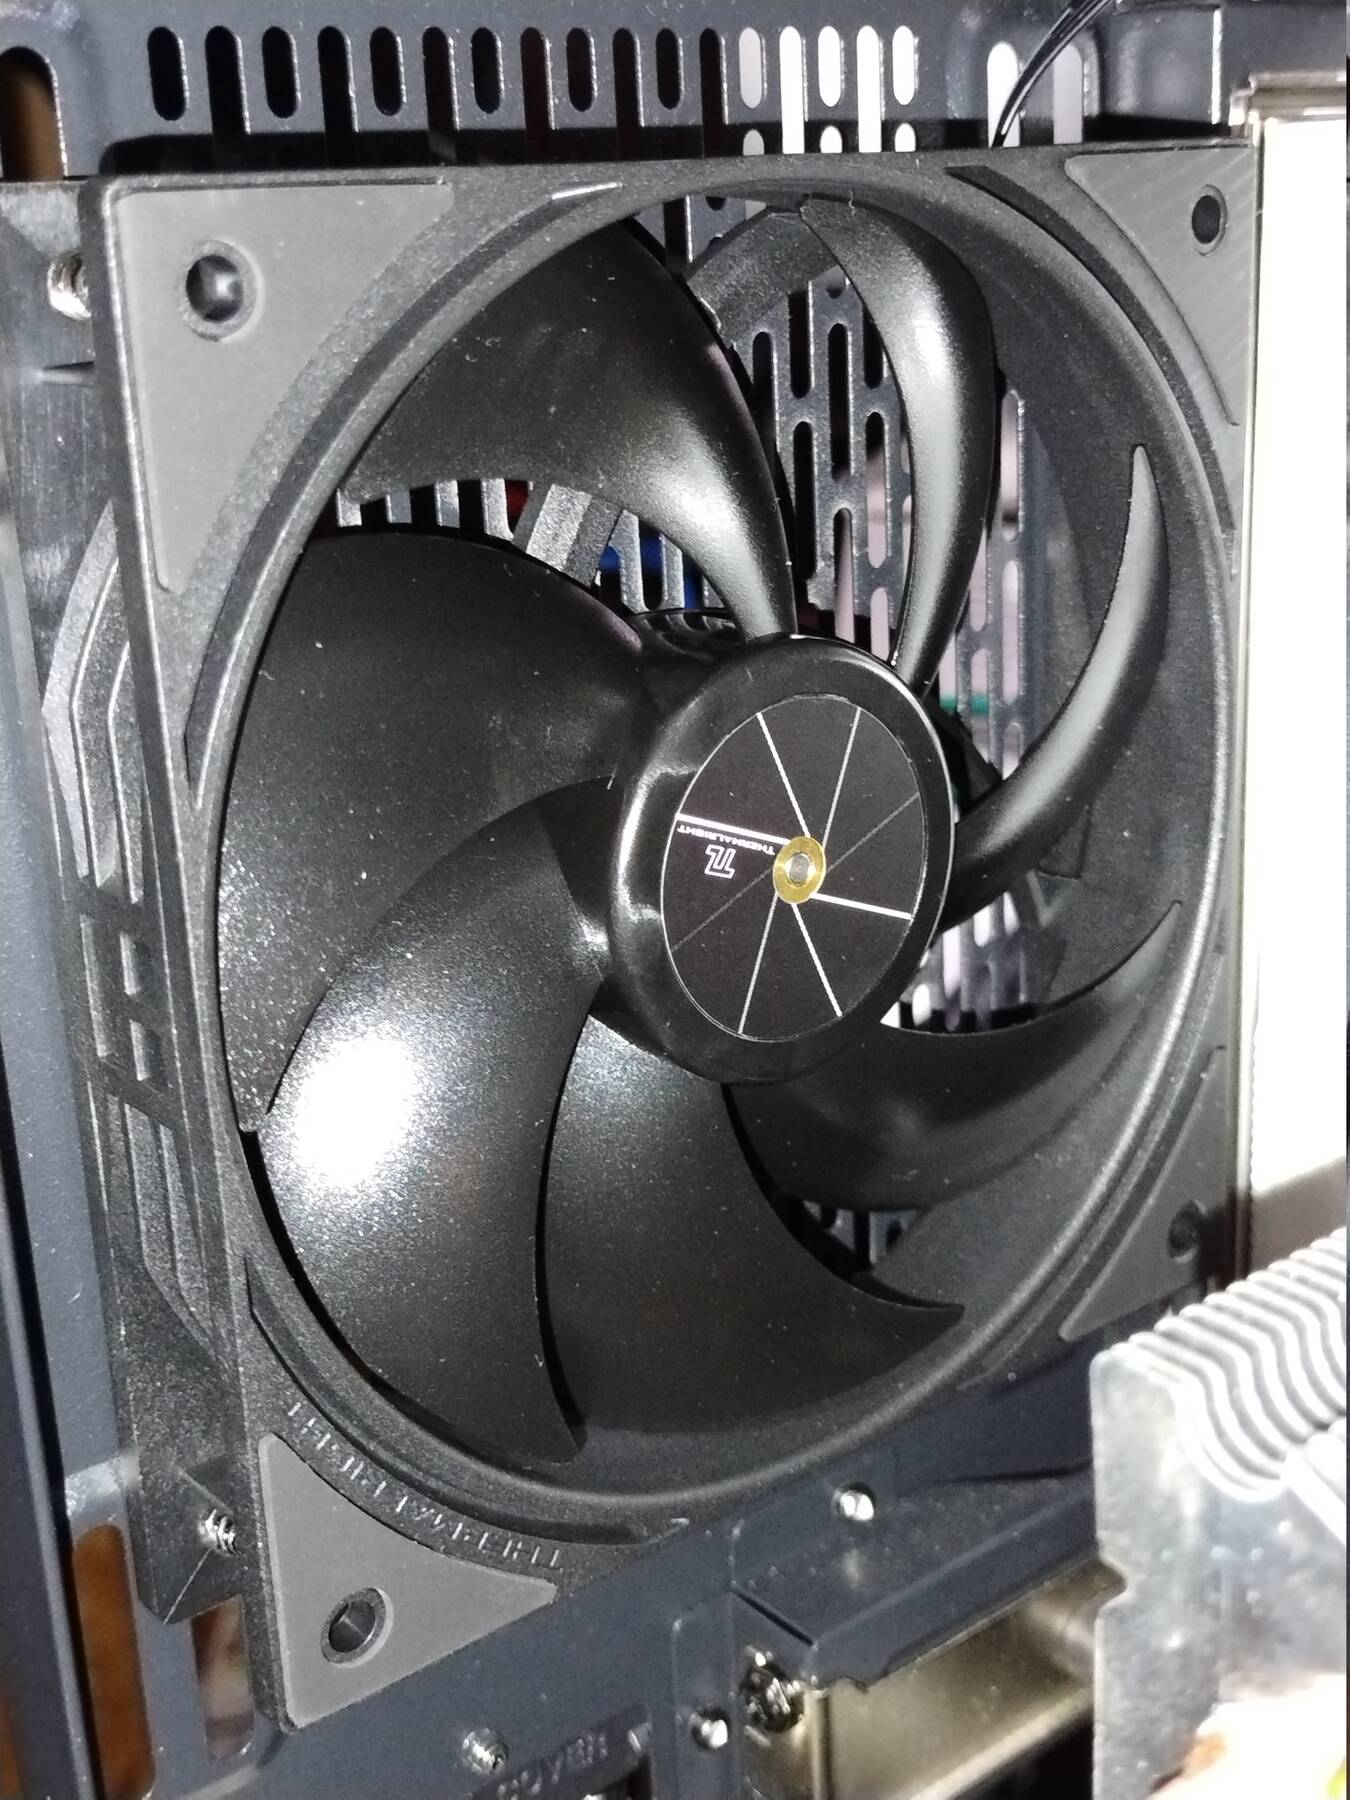
Fan fix
The Fractal Silent R2 fan I had on the tower heatsink began ticking. It's older and I had it facing downward. I replaced it with a PCCooler F5 R120 which is surprising heavy (190g vs 100g for the previous), and claims to have fluid dynamic bearings.
There is a slight issue when mixing this PWM CPU fan with a DC fan on CPU_OPT on this Asus board. Now the CPU_OPT fan always runs at full speed, so I guess I need to get another PWM controlled fan.
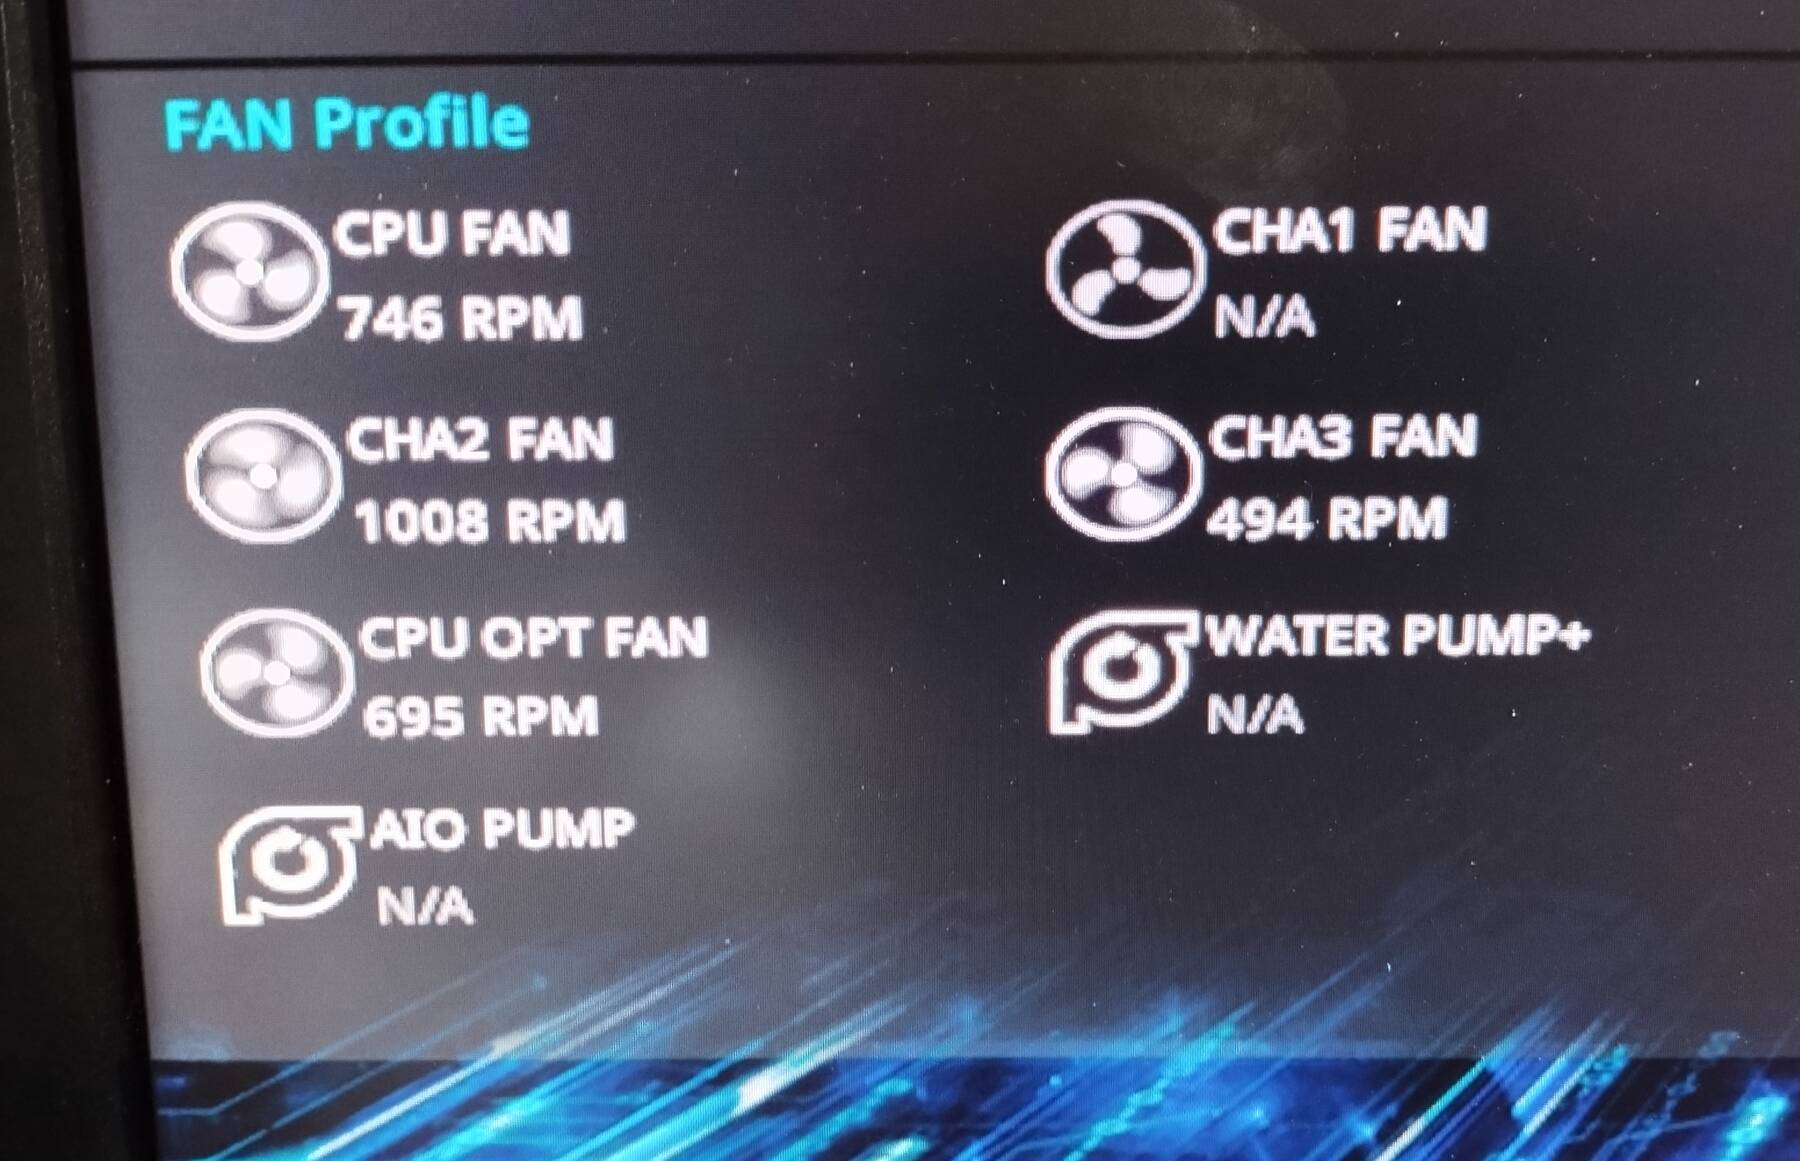
I also modded the other daisy-chained fans to disconnect the tachometer line after the first fan. I thought this would fix the sensor reading jumping up randomly. It probably improved it a bit, but now I notice asus_wmi sensor just randomly jumps up even on ports with just a single fan.
Fan connections for reference:
| Fan Header | Fans | Fan Control |
|---|---|---|
| CPU | CPU | PWM |
| CPU_OPT | Rear Fan | DC |
| CHA1 | Upper front fans | DC |
| CHA2 | Lower front fan (hard drives) | DC |
| CHA3 | Top fans | DC |
xrandr is angry
Since I moved to using two cards I found I could crash X if I enabled a monitor behind a DisplayPort MST hub on the second card.
I was able to verify that it didn't crash if I put the MST hub on the primary card so I've gone with that solution.
Looking back it may have been an issue with autorandr setting the incorrect CRTC, but I will need to test that another time.
This seems to have created a new issue. With my sideways L-shaped monitor config Xorg seems to think my monitors are in a non-contiguous configuration. Now it lets my cursor go into the non-visible areas which is really annoying.
It turns out Xorg fails to properly test for continuous monitors when multiple cards are involved. If the connector between two monitors is a monitor on a different card Xorg will assume there is no continuity, and let your cursor go into the non-visible space.
Weird boot issues from installing a serial header
This machine has been running fine, but I decided to install a serial port on the motherboard header. During the install I:
- Removed the firewire card
- Plugged in the serial port header
- Reinstalled the firewire card
- Attached a null modem cable to a second PC
- Swapped some Displayport cables around
Then the machine refused to post. It also seemed to refuse to reset the BIOS, as normally that would turn the RGB back on. I started pulling cards, unplugging everything, and said lots of curses. No POST, no beeps, nothing.
Finally I got the machine out, pulled the heatsink (because it blocks a memory slot), and removed a pair of RAM sticks. It's back alive. Put the sticks back, and dead. Disable DOCP (memory back at 2133), rearrange the pairs so they're opposite the previous config. Boot and enable DOCP again, and everything works normally. All the devices go back in, and it is working like normal.
I attached the serial cable to the other PC, and it died again. I determined I could at least pull the other pair of RAM sticks to resolve it (saves removing the heatsink). I decided it was some weird voltage or ground loop issue so I made some changes to the setup. They were:
- Swapped my USB switch for another one I had been meaning to try
- Added an internal USB 2.0 hub that gets power from the power supply
- Attached most of my USB 2.0 stuff to that hub
This is way too many hubs, but it seems to have resolved the issue for now. I booted with the serial cable attached to my second PC without issue.
lsusb -tv|grep "Class=.*[Hh]ub"|wc -l
21
Fan fix fix
I got some new fans (received in exchange for reviews).
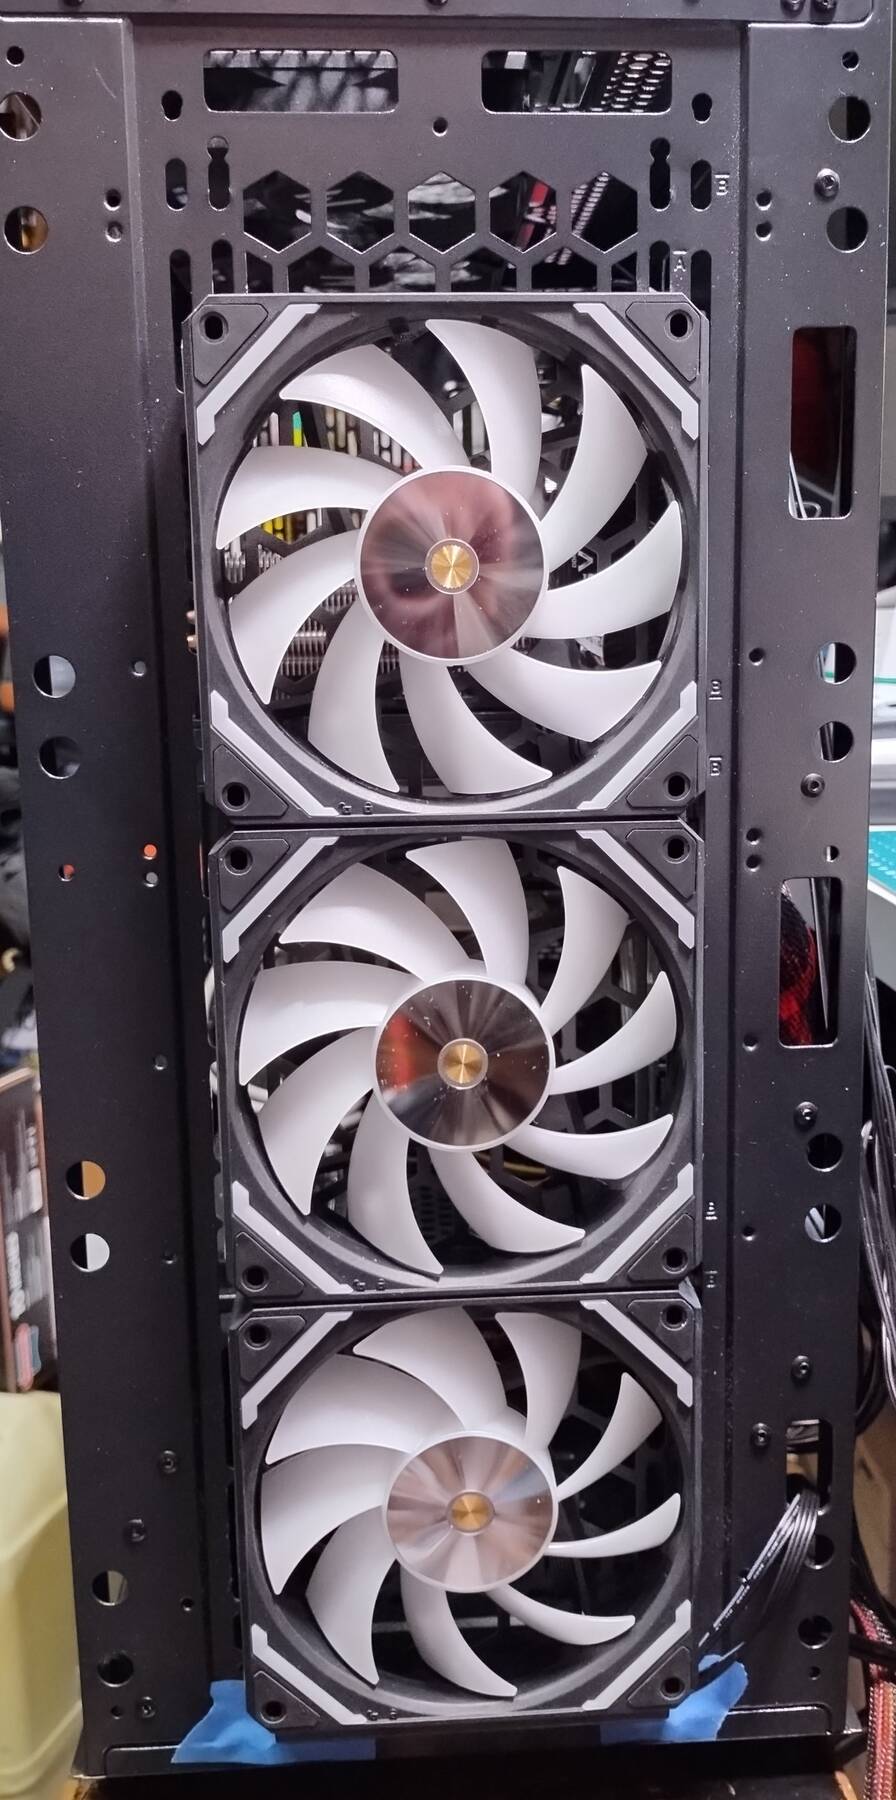
First there is this weird triple stacker LTC CF-121D. It's 3 RGB fans, but they only connect together in a line, and have a single cable. I replaced my 3 front fans with them. They PWM reasonably low (800 rpm, I've got them around 980), and are pretty quiet at low speeds. I was going to try the RGB, but it's the ARGB 3-pin 5V variety, and my board only has the 4-pin 12V RGB.
I also swapped the rear stock Zalman fan for a PWM Thermalright TL-P12. Now I can keep it on the CPU OPT header without it running full speed.
The new connection reference:
| Fan Header | Fans | Fan Control |
|---|---|---|
| CPU | CPU | PWM |
| CPU_OPT | Rear Fan | PWM |
| CHA1 | - | - |
| CHA2 | Front Fans | PWM |
| CHA3 | Top Fans | DC |
Things look like this now:
Hardware accelerated (VAAPI) video playback stopped working
Not sure the cause, or if I even made an actual fix. My machine was running Debian 12, Linux 6.1.27, and amdgpu on Ryzen 3 PRO 4350G (Vega 6 iGPU). It got rebooted. Accelerated video playback would play a couple seconds then stop. Nothing obvious in the software stack had changed.
I rebooted. No change. I poked around my dpkg logs, nothing obvious.
I tried another machine with Intel GPU, same Debian setup, updated everything, and rebooted. No issues there.
I grabbed the linux-firmware.git repo, and copied amdgpu/renoir files into my firmware directory. Previous firmware files date from March 2024, so those haven't changed, but it is still worth a try. Reboot, and things are working again.
More poking in the dpkg logs, but I am not seeing any relevant packages. Did I just hit a fluke, or did something change? Dunno.
Upgraded CPU, Ryzen 5 5500
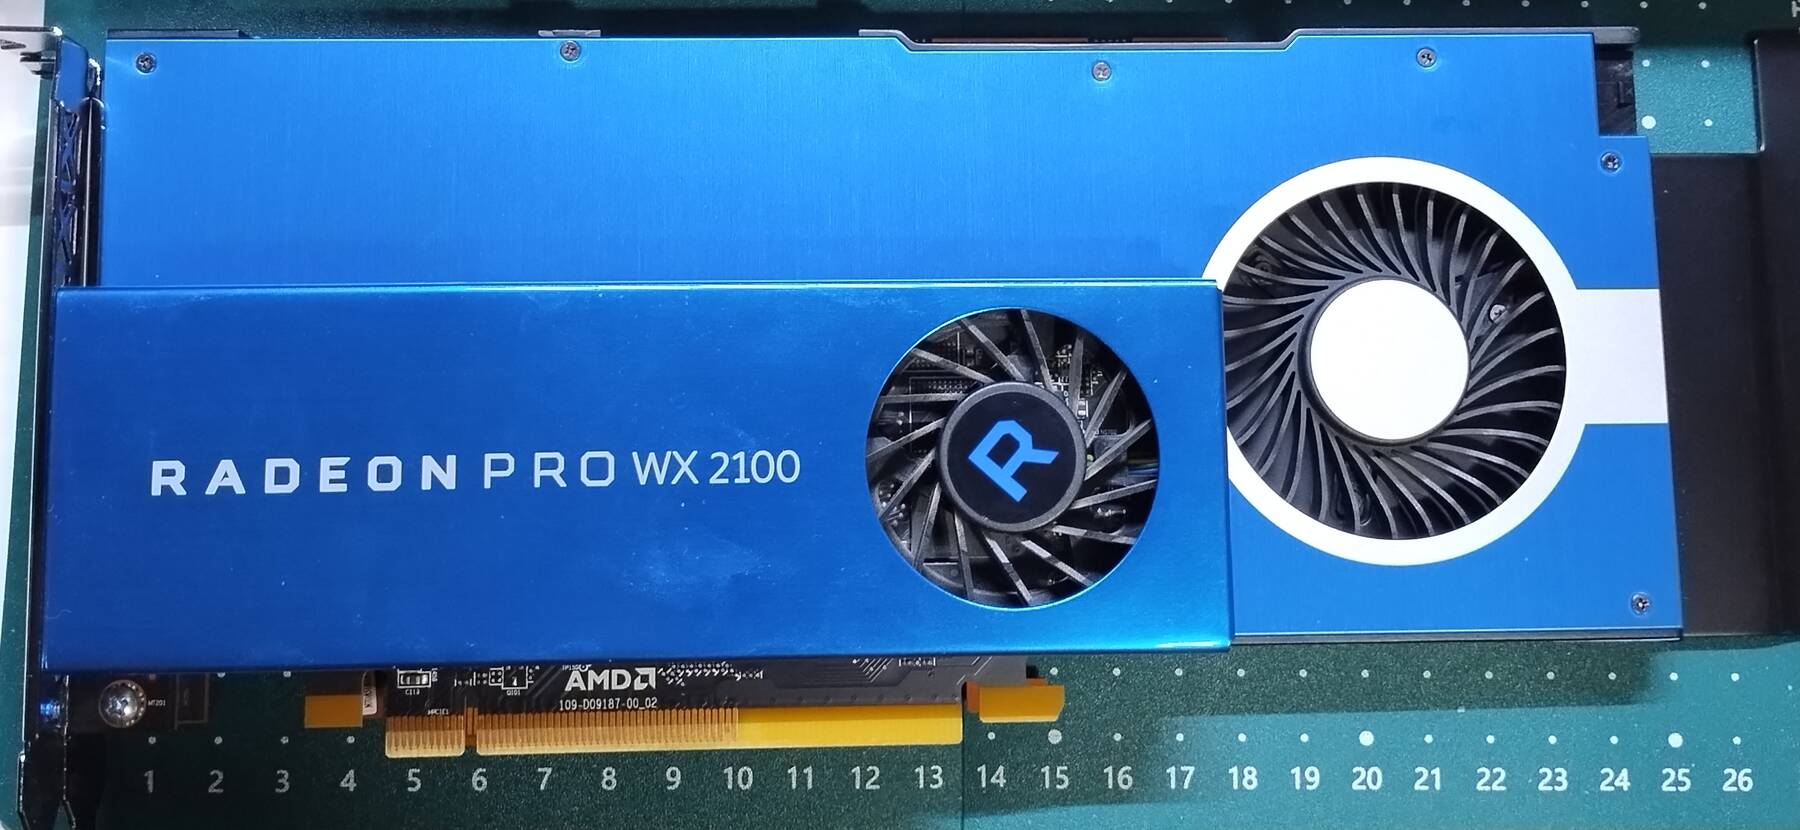
I traded my Ryzen 3 Pro 4350G for a Ryzen 5 5500. More cores, and faster. I put in a Radeon Pro WX 2100 for now, but I have something better on the way.
I was going to put the 4350G in mirage since it can't fit a GPU, and it would be a little upgrade. However, when I went to upgrade stargazer, and realized I needed at least a 3rd gen CPU to work with the A520 chipset board.
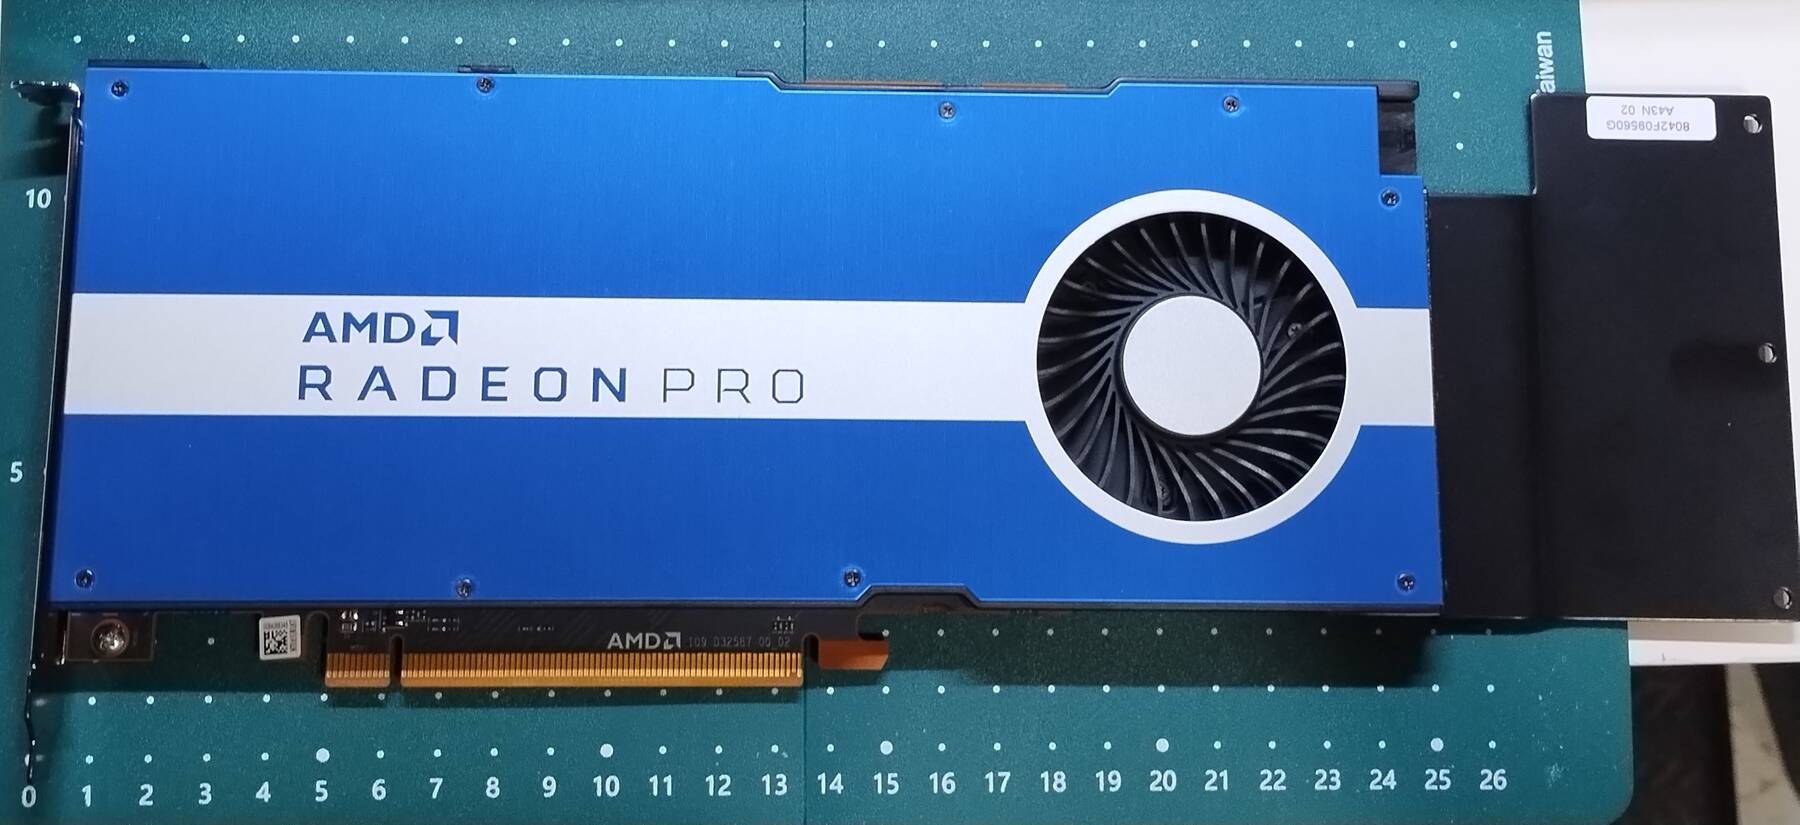
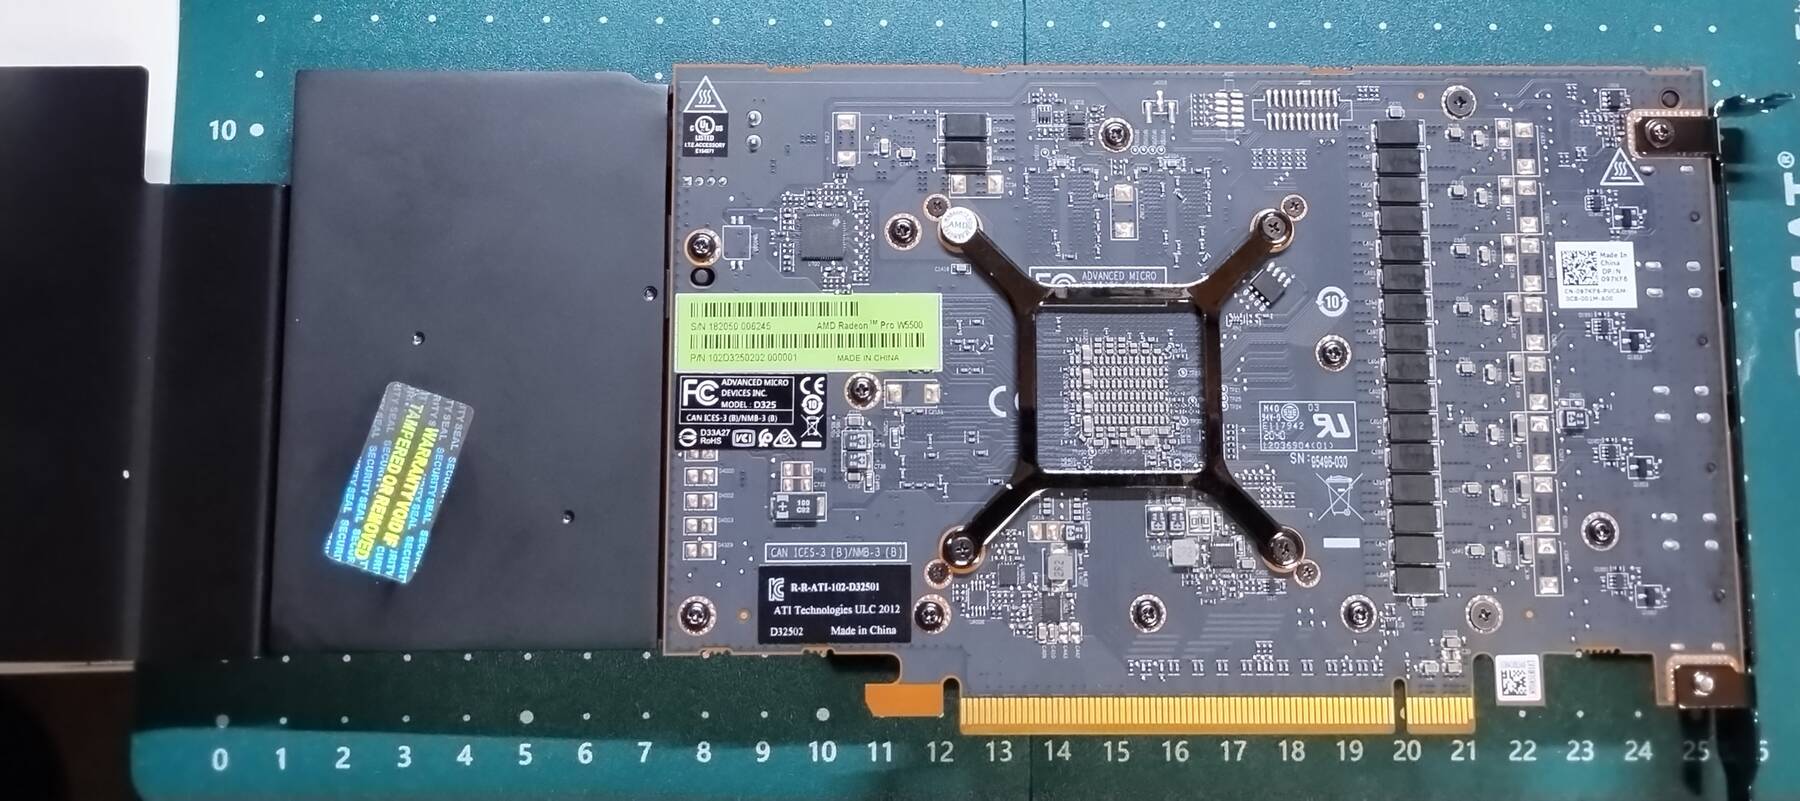
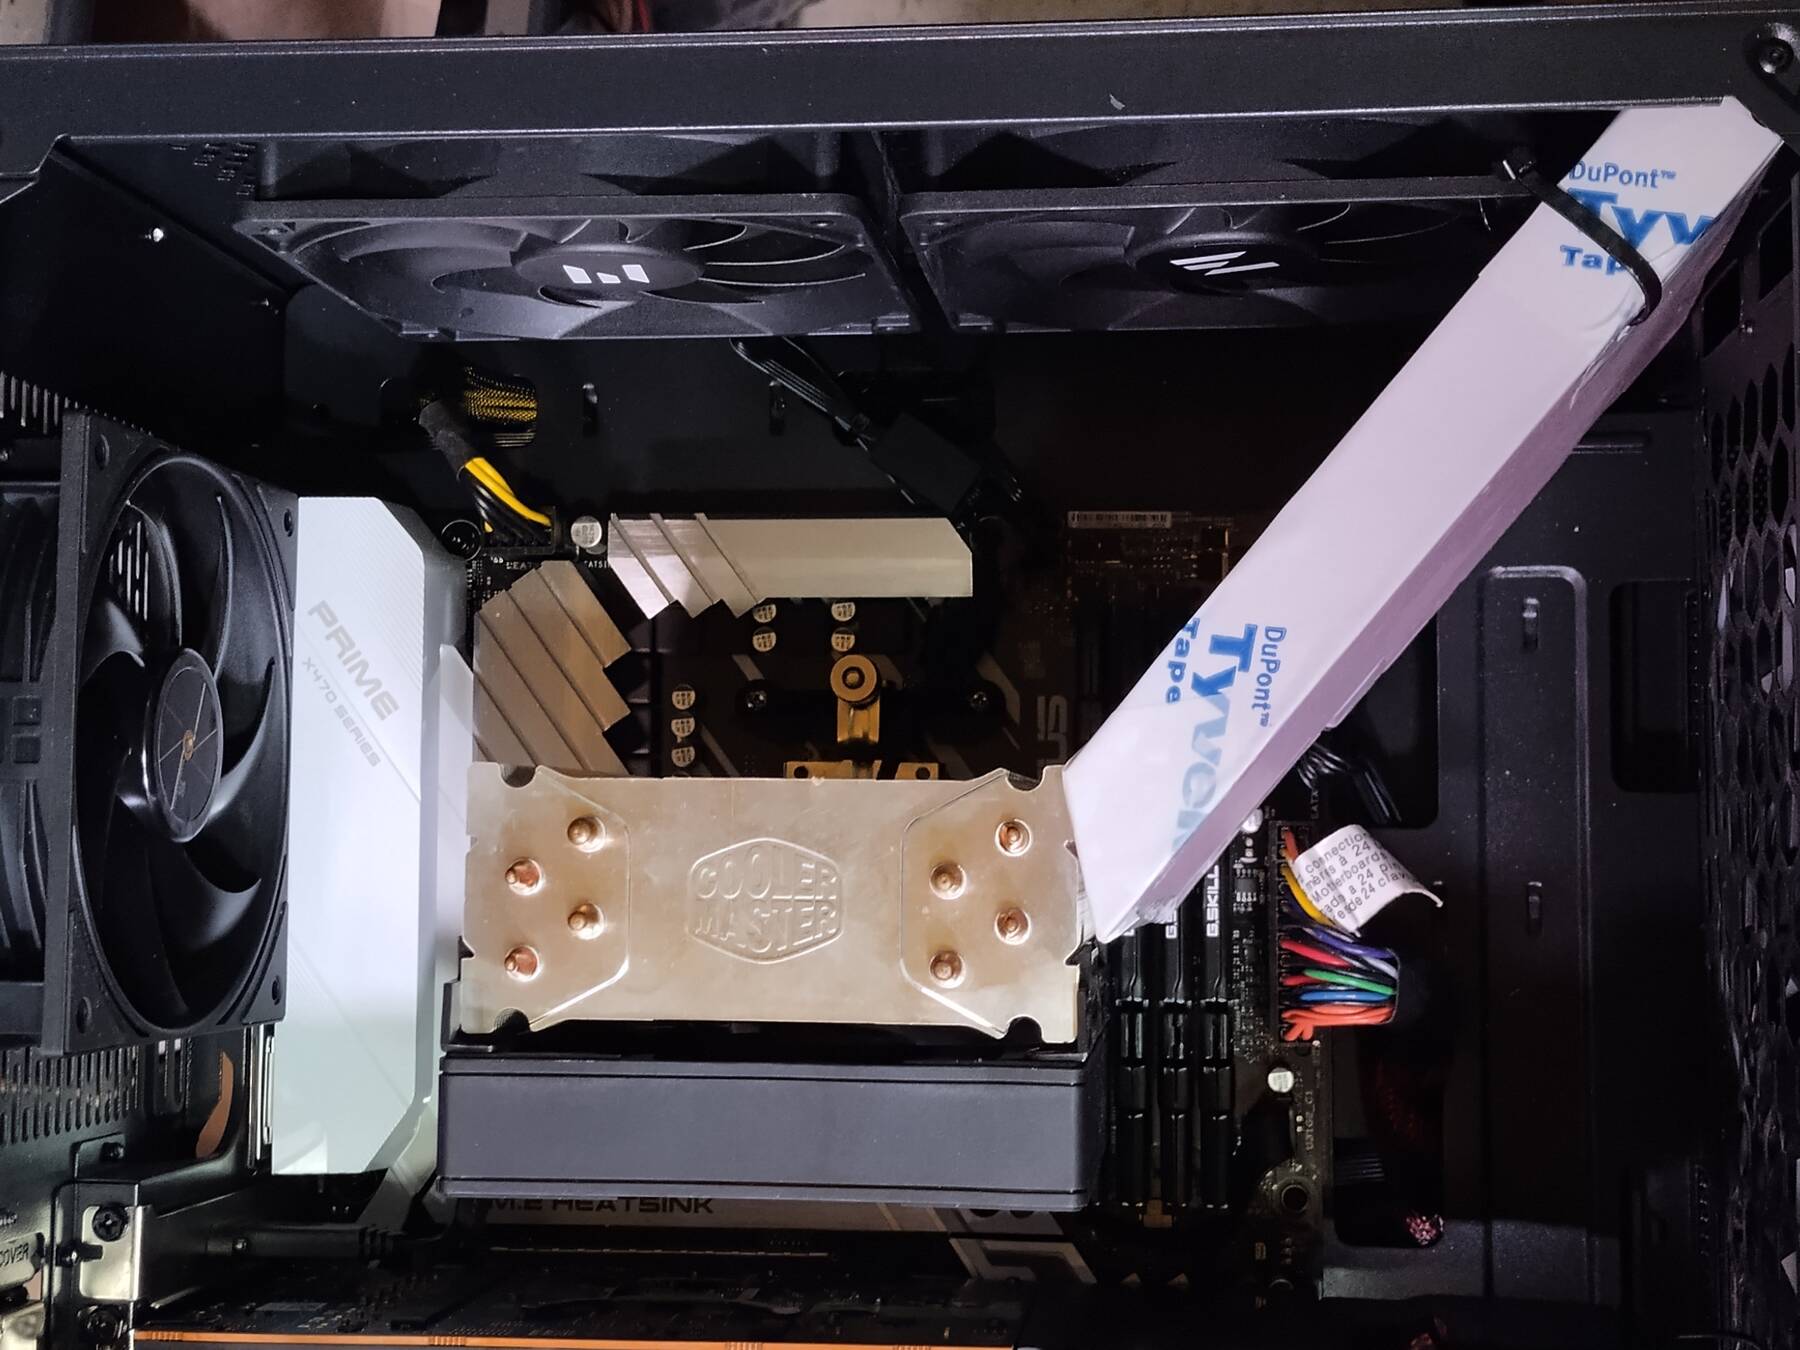
Upgraded GPU (Radeon Pro W5500) and Gaming on Linux
The Radeon Pro W5500 I got was used. It feels very solid. Lots of metal. It came with an extension bracket that I did not need. I ended up zip tieing it to the case, and it was useful for managing the PCIe power cable I forgot to install.
Swapping out the temporary Pro WX 2100 for the W5500 almost went flawlessly. I forgot to run the PCIe power cable, and it took a couple tries before I realized why the boot was failing with GPU error beep codes.

While I was in the case, I added a baffle to force intake air through the CPU/GPU area. Before it had a direct route from the front fans to the top fans. I carved up a sheet of 1-inch foam board insulation. I taped the cut edges to keep it clean, and used a zip tie to secure it.
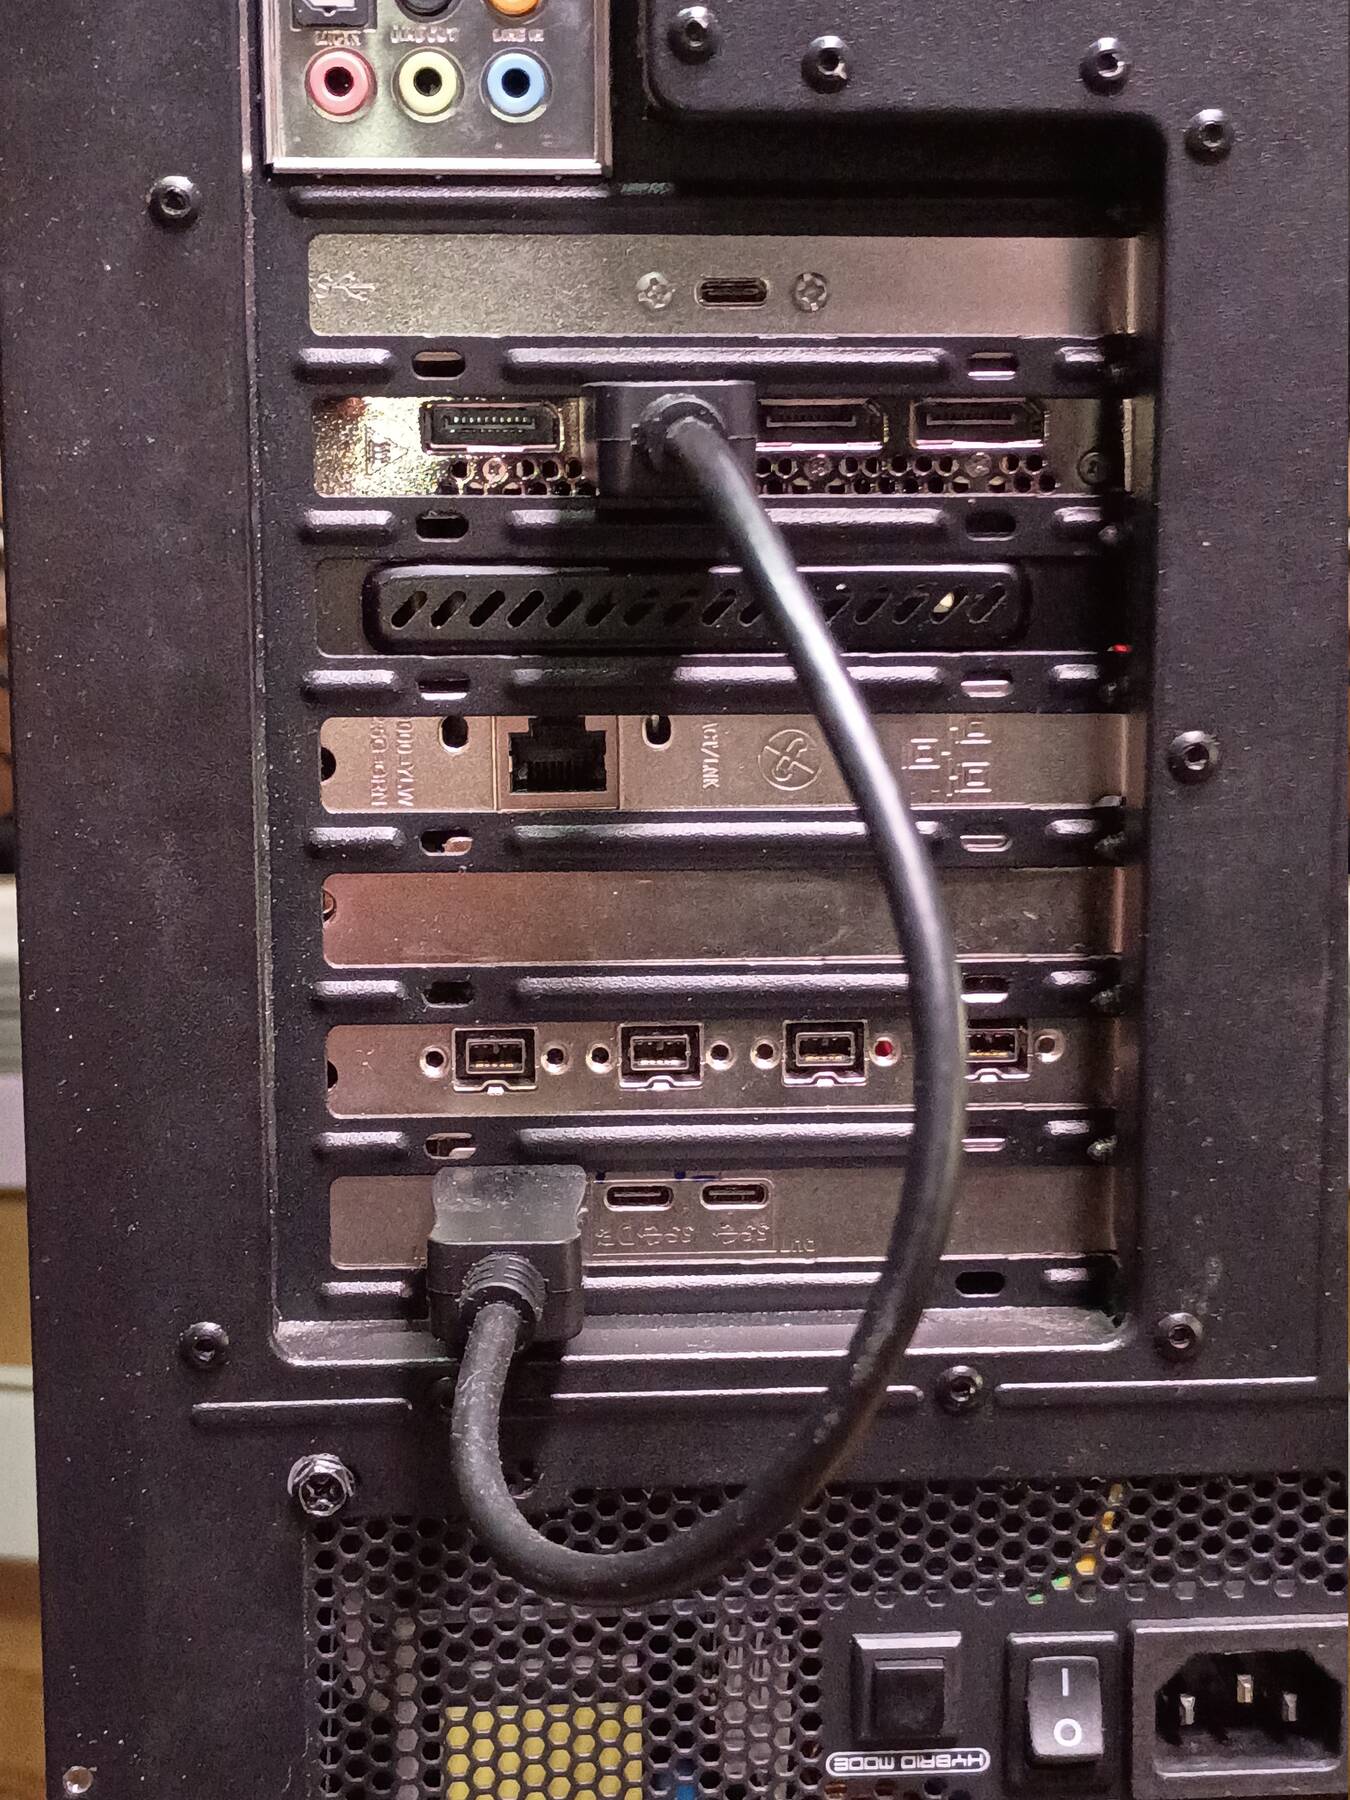
The 4 full size DisplayPorts make my setup a lot simpler. Currently running my little touchscreen USB-C monitor through the SUNIX UPD2018 PCIe card. Then the two Dells get their own ports.
This makes my workstation a step up from my Windows gaming rig. For comparison:
| Workstation (dreadnought) | Gaming (justice) | |
|---|---|---|
| CPU | Ryzen 5500 | Ryzen 2600X |
| Clock/Turbo | 3.6/4.2 GHz | 3.6/4.2 GHz |
| Cache | 384KB 3.0MB 16MB | 576KB 3.0MB 16MB |
| TDP | 65W | 95W |
| Passmark Single | 3058 | 2382 |
| Passmark Multi | 19373 | 13896 |
| GPU | Pro W5500 | RX 580 |
| Bus | PCIe 4.0 x8 | PCIe 3.0 x16 |
| Memory | 8GB GDDR6 | 8GB GDDR5 |
| Core/Mem Clock | 1187/1750 | 1257/2000 |
| TDP | 125W | 185W |
| DirectX/OpenGL | 12.0/4.6 | 12.0/4.5 |
| Passmark G3D | 9126 | 8851 |
- Ranting about Linux gaming
I want to give some Linux gaming a try, and so far it is all the things I hate about Windows gaming, plus being unfamiliar with good solutions. Game launch scripts break, wine/proton games need special command invocations to fix annoyances. The other big thing is that games just don't cooperate well with multiple screens. I know a few potential solutions (gamescope), but need to familiarize myself with their use.
Here was a Proton example: I ran Fallout 4. I couldn't put it on my preferred display without setting the display as Primary (xrandr). It had issues redrawing the menu when I ran it windowed so I didn't mess with that mode too much. In game there were a couple graphical glitches, but nothing I would attribute directly to proton. I thought I was having audio issues, but it turns out this whole time my stereo cable has had the wrong indicators on the left/right channels. Would have never noticed if not for positional audio in games.
I installed GoG's Pillars of Eternity Linux version. The desktop launcher segfaults. I played with their start.sh script, and eventually some invocation got the game running. I don't know what the fix is though, and I'll have to play around again next time. Otherwise this was a much better experience. The game works well in multi-monitor. I can even move it between monitors (using i3), and it works as long as the resolution is suitable. What didn't work was moving a 2560x1440 output to my 1080p monitor. The image extended off the screen, but input positions were scaled to the display resolution.
After some more play the segfaults just seems random. I can run the start.sh script 5 times, then have it work on the 6th. A bit more poking about, and I found this thread: https://www.gog.com/forum/pillars_of_eternity_series/linux_game_fails_to_load_segmentation_fault. Then I looked at my own strace's of successful and failed launches. The mmap with MAP_32BIT failing stood out. There is this Linux kernel regression: mm: mmap with MAP_32BIT randomly fails since 6.1. So I probably just need a newer/older kernel.
After updating a few dkms packages from backports and sid, I finally had a combination that would build against 6.9.x kernels. So I rebooted the new kernel, and ran into another bug affecting apparmor parser. The
game-data-packagerships a apparmor profile for quake4 that seems to break apparmor in >6.1 kernels. So I replaced that. Pillar of Eternity launches consistently now.The bug seems to be in the
quake4package, not the packages that are user-generated by game-data-packager (quake4-bin,quake4-data). That package is generated fromgame-data-packagersource though. Not sure how to replace the problematic package.
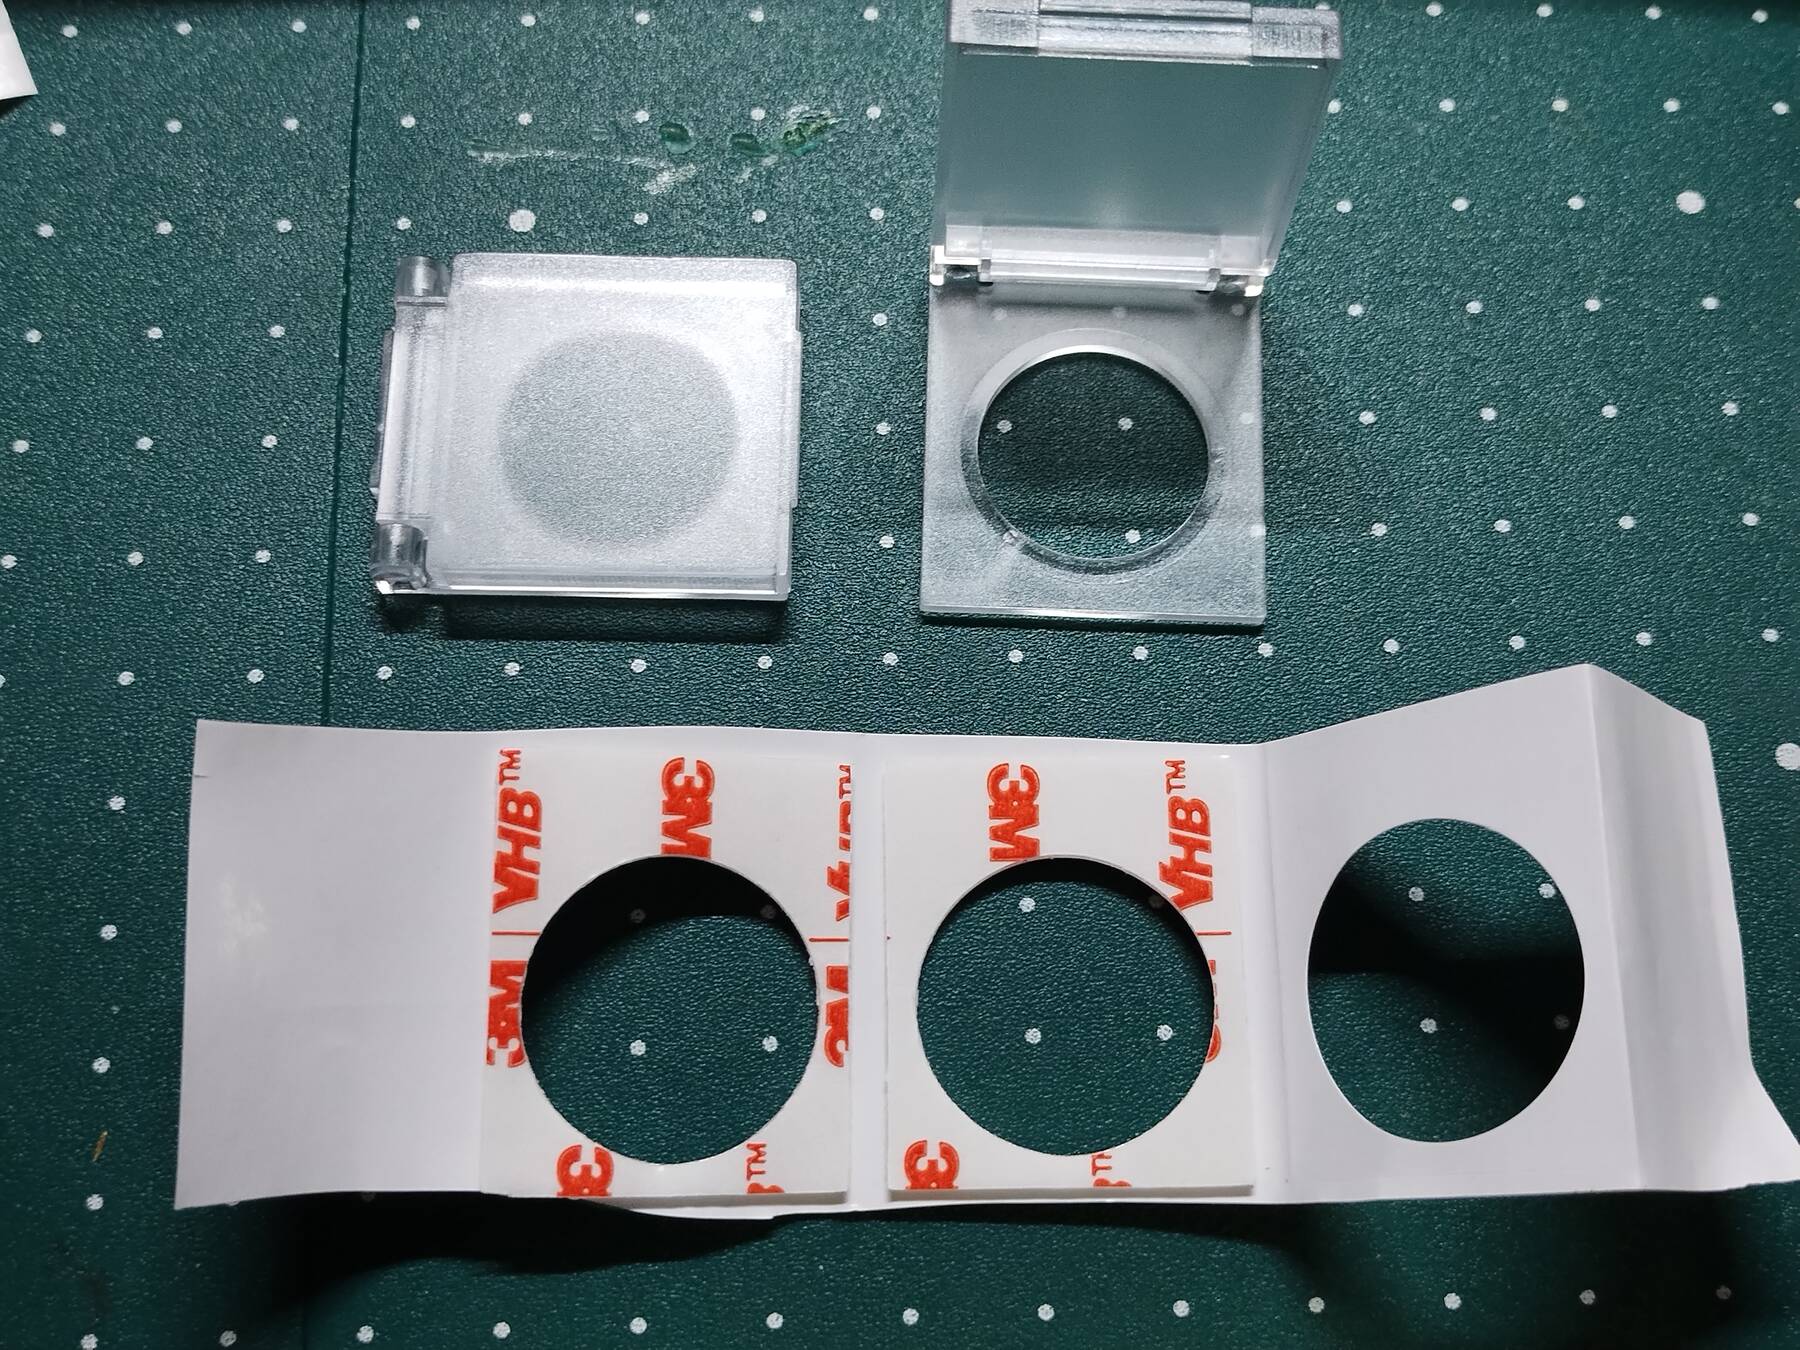
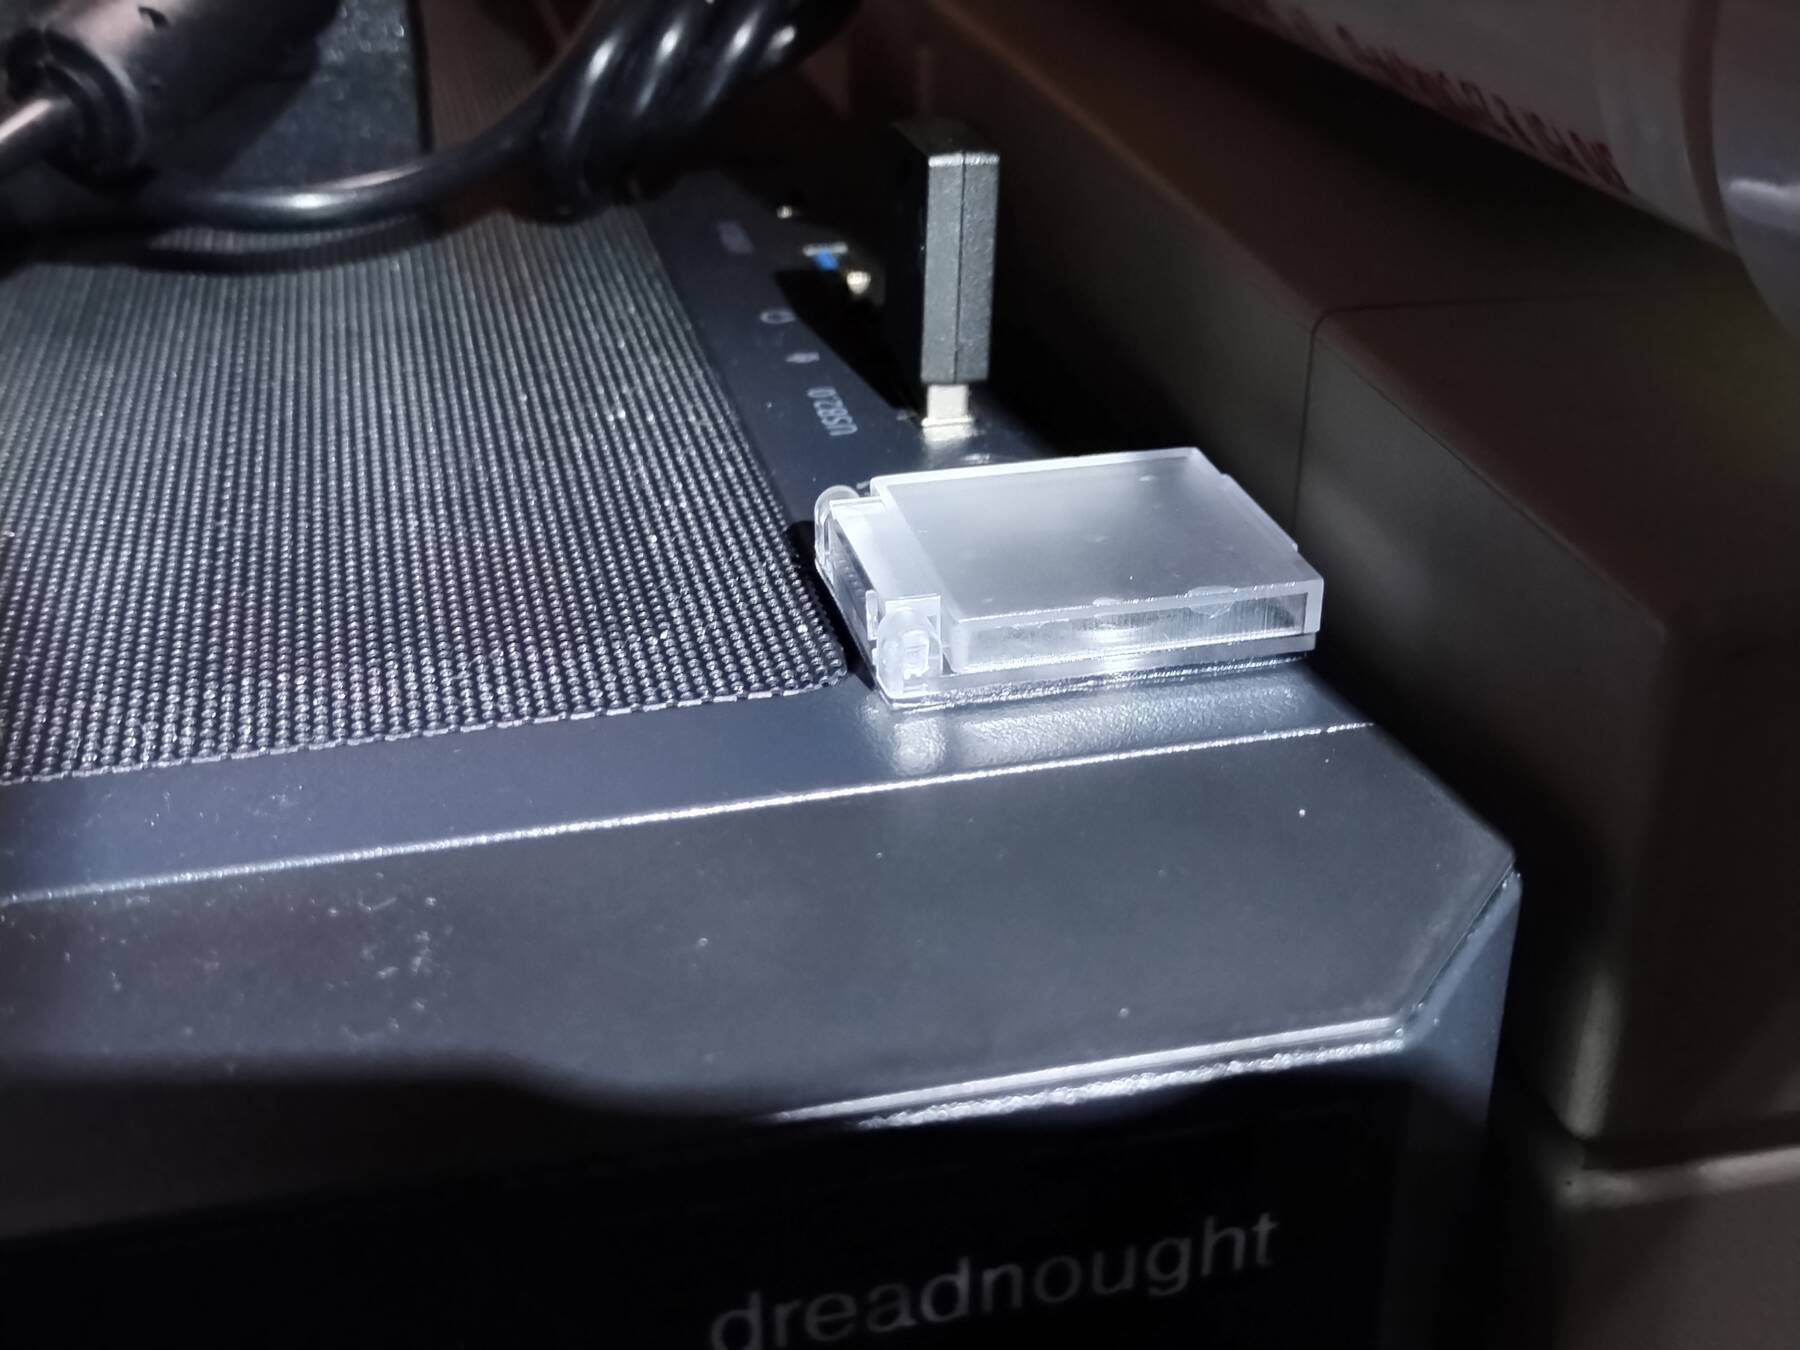
Power button cover
This case (Zalman i4) has an easy to press power button. I often press it when working behind the machine. It is also near the USB ports so I have to be careful there. I got a plastic cover for it.

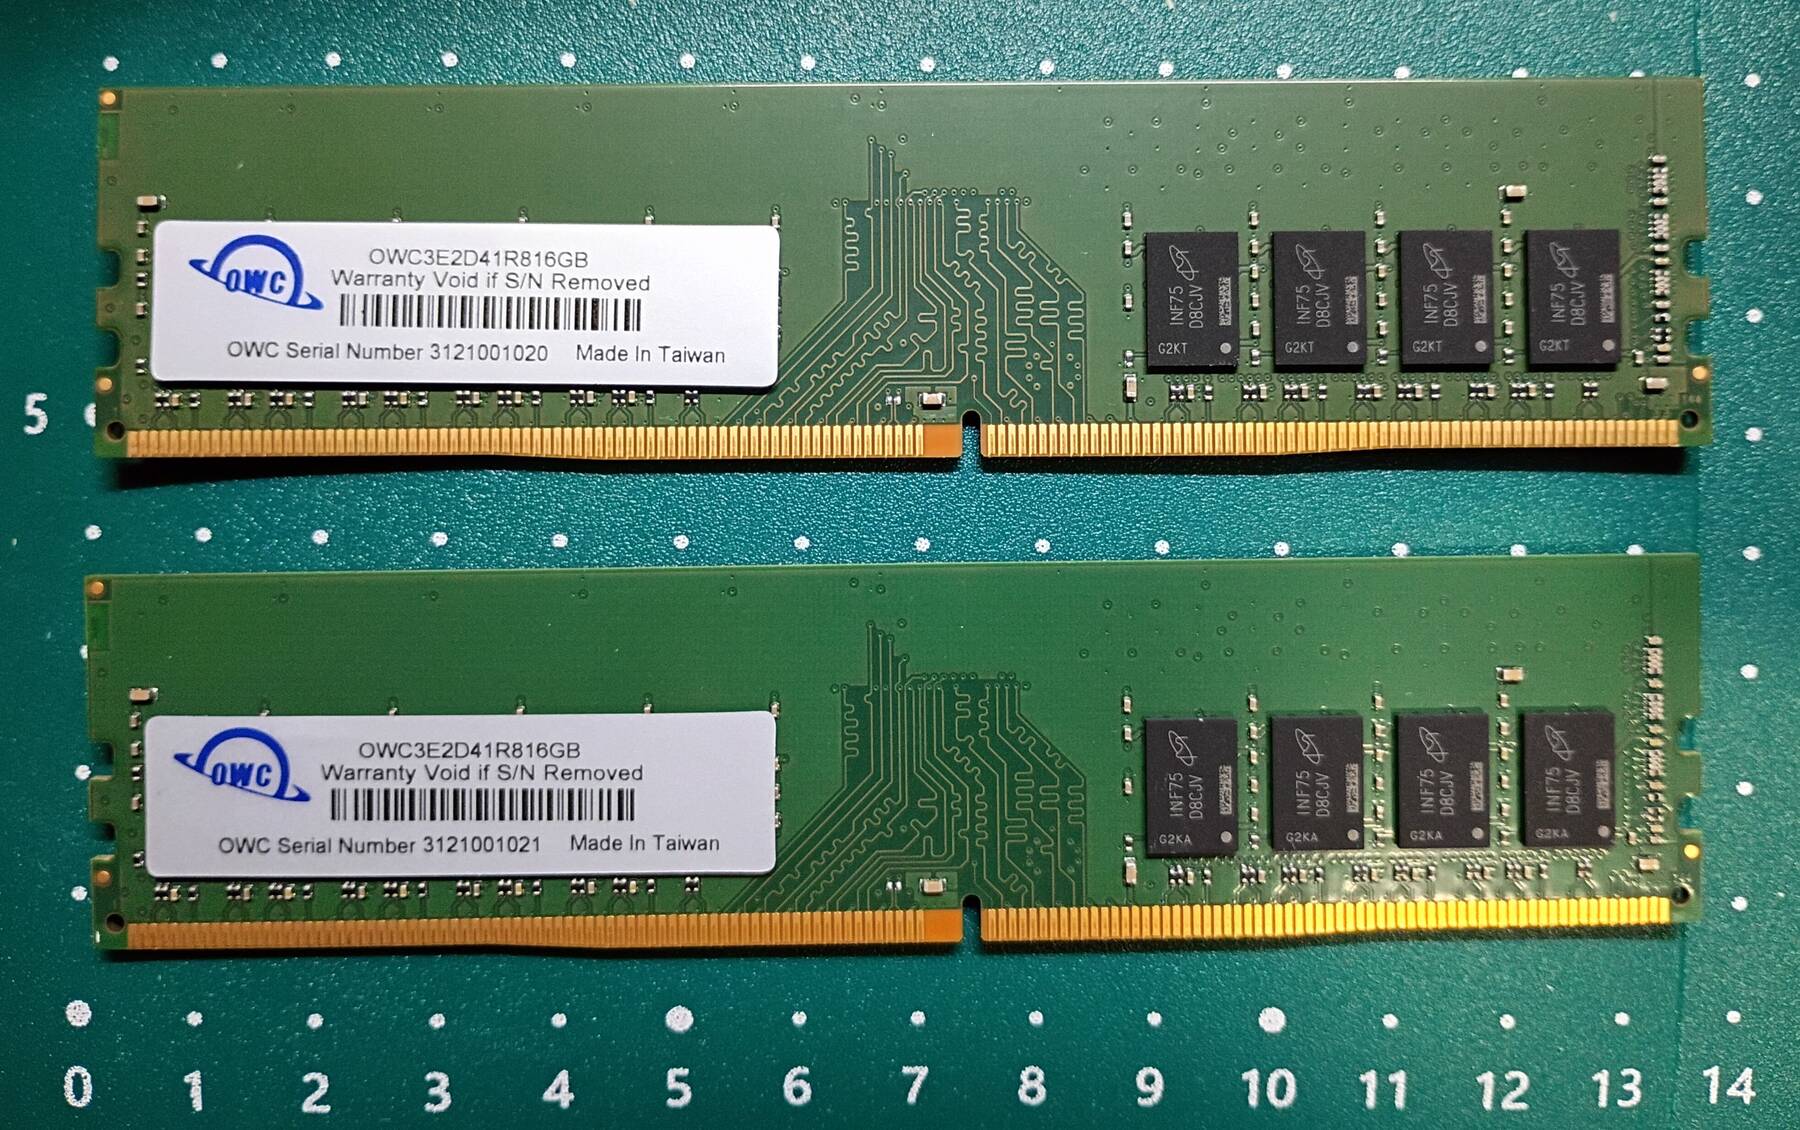
ECC attempt (CPU Fail) and extra mirror drive
I was running into a few crashes with my quad DIMM 32GB setup. I downgraded to 2 sticks, but still had to play with swapping them to get a set that would pass Memtest86+.
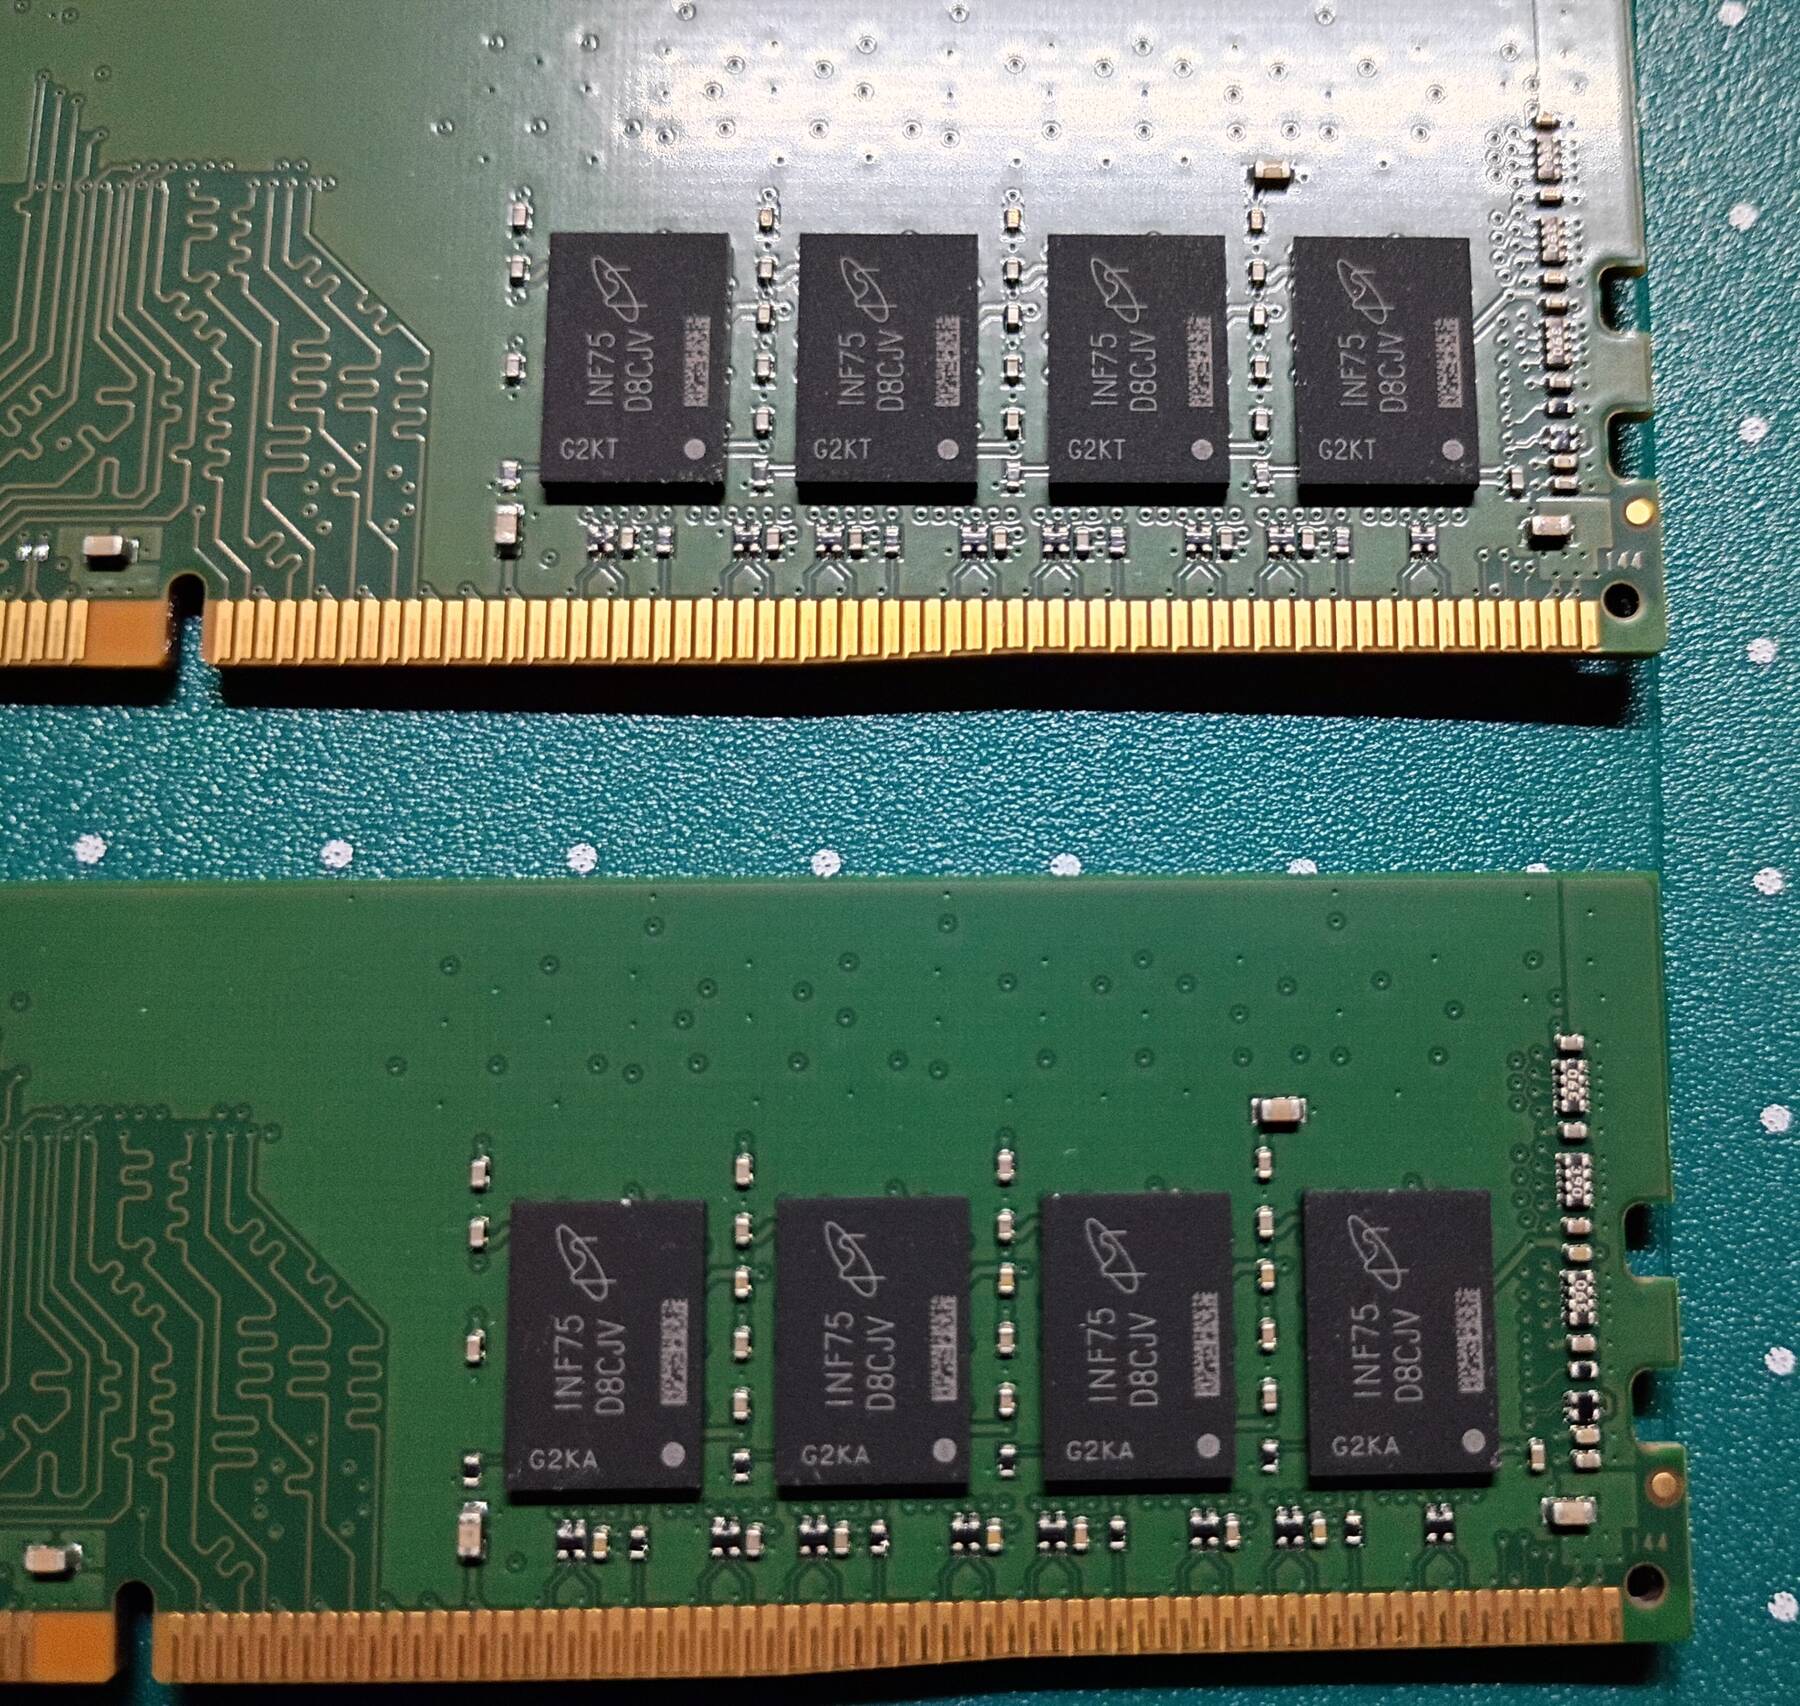
I still wanted 32GB so I decided to go for a pair of 16GB OWC ECC DIMMs. These are 1.2V, DDR4-3200, 1RX8, ECC Unbuffered. They came labeled as part number: OWC3E2D41R816GB. They have Micron chips with FBGA code D8CJV, which corresponds to MT40A2G8SA-062E:F.
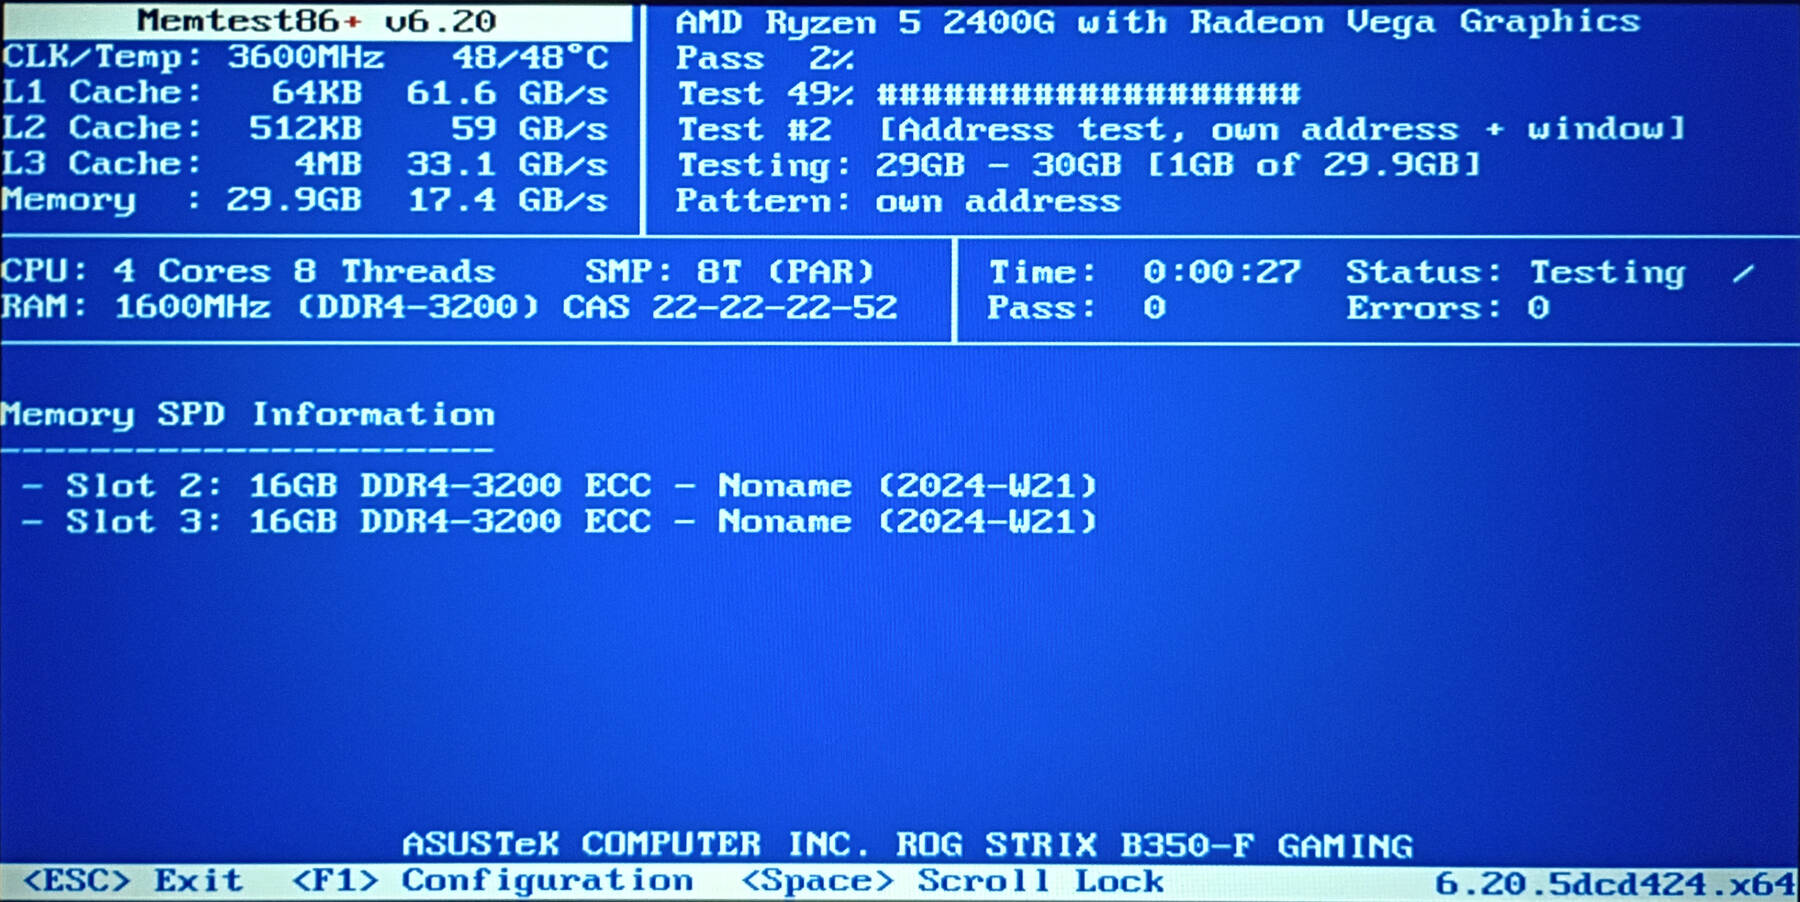
I ran them on chaos to verify they passed a Memtest before I took my desktop down.
While installing them in dreadnought, I took the time to also add an extra drive mount to turn my storage mirror into a 3 drive mirror. These DIMMs don't seem to have XMP/DOCP settings stored on them, but setting everything to auto in the BIOS got the correct values.
First boot, and not much has changed in my memory config. Mostly I just see that the total memory width has changed from 64 bits to 72 bits:
 Memory Device
 	Array Handle: 0x0030
 	Error Information Handle: 0x0038
-	Total Width: 64 bits
+	Total Width: 72 bits
 	Data Width: 64 bits
-	Size: 8 GB
+	Size: 16 GB
 	Form Factor: DIMM
 	Set: None
 	Locator: DIMM_A2
Internet places indicate Asus PRIME X470-PRO supports ECC, and so should the Ryzen 5000 series CPUs. I dove into the UEFI configuration, and found a ECC Enable setting which I switched from Auto to Enabled, but it had no effect.
dmesg has no mention of ECC, and edac-util -s reports 'No memory controllers found'.
After some more research I found the source of the problem. Ryzen 5500 is Cezanne based (Zen 3 APU with iGPU disabled), and aside from lacking PCIe 4.0 of normal 5000 series, it also to lacks ECC support. Maybe later I can upgrade, but for now I have some overpriced RAM that at least won't crash my machine.
Back to the drive. I tried adding it to the mirror with zpool attach, but it complained because the drive already had a filesystem. I formatted the drive blank with gnome-disks. Then I attached the new drive (HGST) to an existing drive from the mirror (WD80EMAZ):
sudo zpool attach zstorage /dev/disk/by-id/ata-WDC_WD80EMAZ /dev/disk/by-id/ata-HGST_HUH728080
ZFS went to work resilvering the array, and estimated about 7 hours for the 3.76TB of data.
  pool: zstorage
 state: ONLINE
status: One or more devices is currently being resilvered.  The pool will
        continue to function, possibly in a degraded state.
action: Wait for the resilver to complete.
  scan: resilver in progress since Sun Mar  9 00:30:14 2025
        1.57T / 3.76T scanned at 3.33G/s, 75.4G / 3.76T issued at 160M/s
        75.4G resilvered, 1.96% done, 06:42:03 to go
config:

        NAME                                   STATE     READ WRITE CKSUM
        zstorage                               ONLINE       0     0     0
          mirror-0                             ONLINE       0     0     0
            ata-WDC_WD80EMAZ                   ONLINE       0     0     0
            ata-WDC_WD80EMAZ                   ONLINE       0     0     0
            ata-HGST_HUH728080                 ONLINE       0     0 2.30K  (resilvering)
Firefox video playback high CPU usage
My machine had just been upgraded to Debian's 140.3.0esr-1~deb12u1 firefox-esr package.
I ran into some high CPU usage when viewing the Frigate NVR overview. This page has up to 5 live video streams, and this resulted in a "Data Decoder" process eating about 4+ CPU cores.
This process seems to be something about sandboxing the video decoding process. In theory this is good for security, and may have the added benefit of a decoding crash only taking out the remote process.
In about:config, the related settings are under media.rdd-. I had media.rdd-process.enabled set to true. Disabling this fixes the high CPU, but caused youtube videos to be unable to play.
I tried fixing this by setting media.hardware-video-decoding.force-enabled to true. This sort of works, but then you might run into formats your video card cannot decode, and they won't playback.
As a workaround until I gain better understanding I set:
| media.rdd-process.enabled | true |
| media.hardware-video-decoding.force-enabled | false |
| media.rdd-ffmpeg.enabled | false |
I don't understand exactly what the last one does, but it seems to allow normal youtube playback without high CPU usage on the multi-stream Frigate overview page.
Of other note, in about:support, under HARDWARE_VIDEO_DECODING, I see it has been "Force disabled by glixInfo". However, I am seeing GPU usage during video playback that seems consistent with hardware decoding.
I probably should sort that out, but I'm not too keen on debugging browser things at the moment.
With these settings I noticed the Frigate live dashboard alert videos are not rendering. These are pretty normal h264 MP4 files. Firefox is saying 'no decoder found for video/avc.
I kept running into little issues. I ended up resetting every video related (rdd, vpx, media, ffmpeg, etc.), modified preference I could find in about:config. Firefox still wouldn't detect my VAAPI supported setup, and was using FFVPX (check by running firefox with environment variable MOZ_LOG="FFmpegVideo:5").
I enabled:
media.prefer-non-ffvpx(optional, seems to save an extra check)media.ffmpeg.vaapi.enabledmedia.hardware-video-decoding.force-enabled
So far all the video playback that was giving me issues seems to be functioning again.
New 4K monitor
I got a new monitor (received for review). It is a 32" Samsung M7 M70F (S32FM70YUN). It is 4K60 (3840x2160). Inputs are 2x HDMI, and USB C (65W power). It is also a smart monitor running Tizen.
I used a Chenlenic brand DisplayPort to HDMI cable which claims to be 8K60 capable. Later I learned people have lots of issues with DP to HDMI 2.1 adapters handling more than 4K60. It isn't clear what chip solution this cable uses. So far it is working fine for 4K60, but I haven't been able to get audio out of the monitor. I won't use it in my setup, but it would be nice if it worked. I know it was working with my laptop and the USB C input.
So far the smart features have been a little obnoxious. The onboard buttons are in the center which is awkward. No simple input switching (have to navigate a menu). I had to change the HDMI input black level setting to be low (rather than normal) to get proper blacks. I have seen a couple pop-ups over my screen when I was first getting things in order, but I'm hoping they were just one-time tip things. After I finish reviewing it, I'll probably shutoff WiFi and only use the smart features on rare occasions.
Smart features that were kind of neat:
- USB passthrough, Keyboard and mouse can control the smart interface, but also get switched to your PC through the USB C port.
- There's a half way usable browser which might be handy if I'm troubleshooting with my PC offline.
- Google casting and Airplay work fine, and even do auto rotation.
- Remote desktop features. Wasn't impressed with the image quality on the Samsung Windows 'Easy Connection to Screen', but it is functional.
- When set up with Samsung's Smart Things this can be a Matter hub (Zigbee with an add-on dongle). It can also be a light, sound, and motion sensor (external webcam). I couldn't get the webcam to operate though.
The other issue is a 32" display is getting to be too big for this LCD tech. I'm about 2ft (0.6M) away, and colors fade at the edges if I shift my head out of the center even a bit. This might require some changes to how I do tiling.
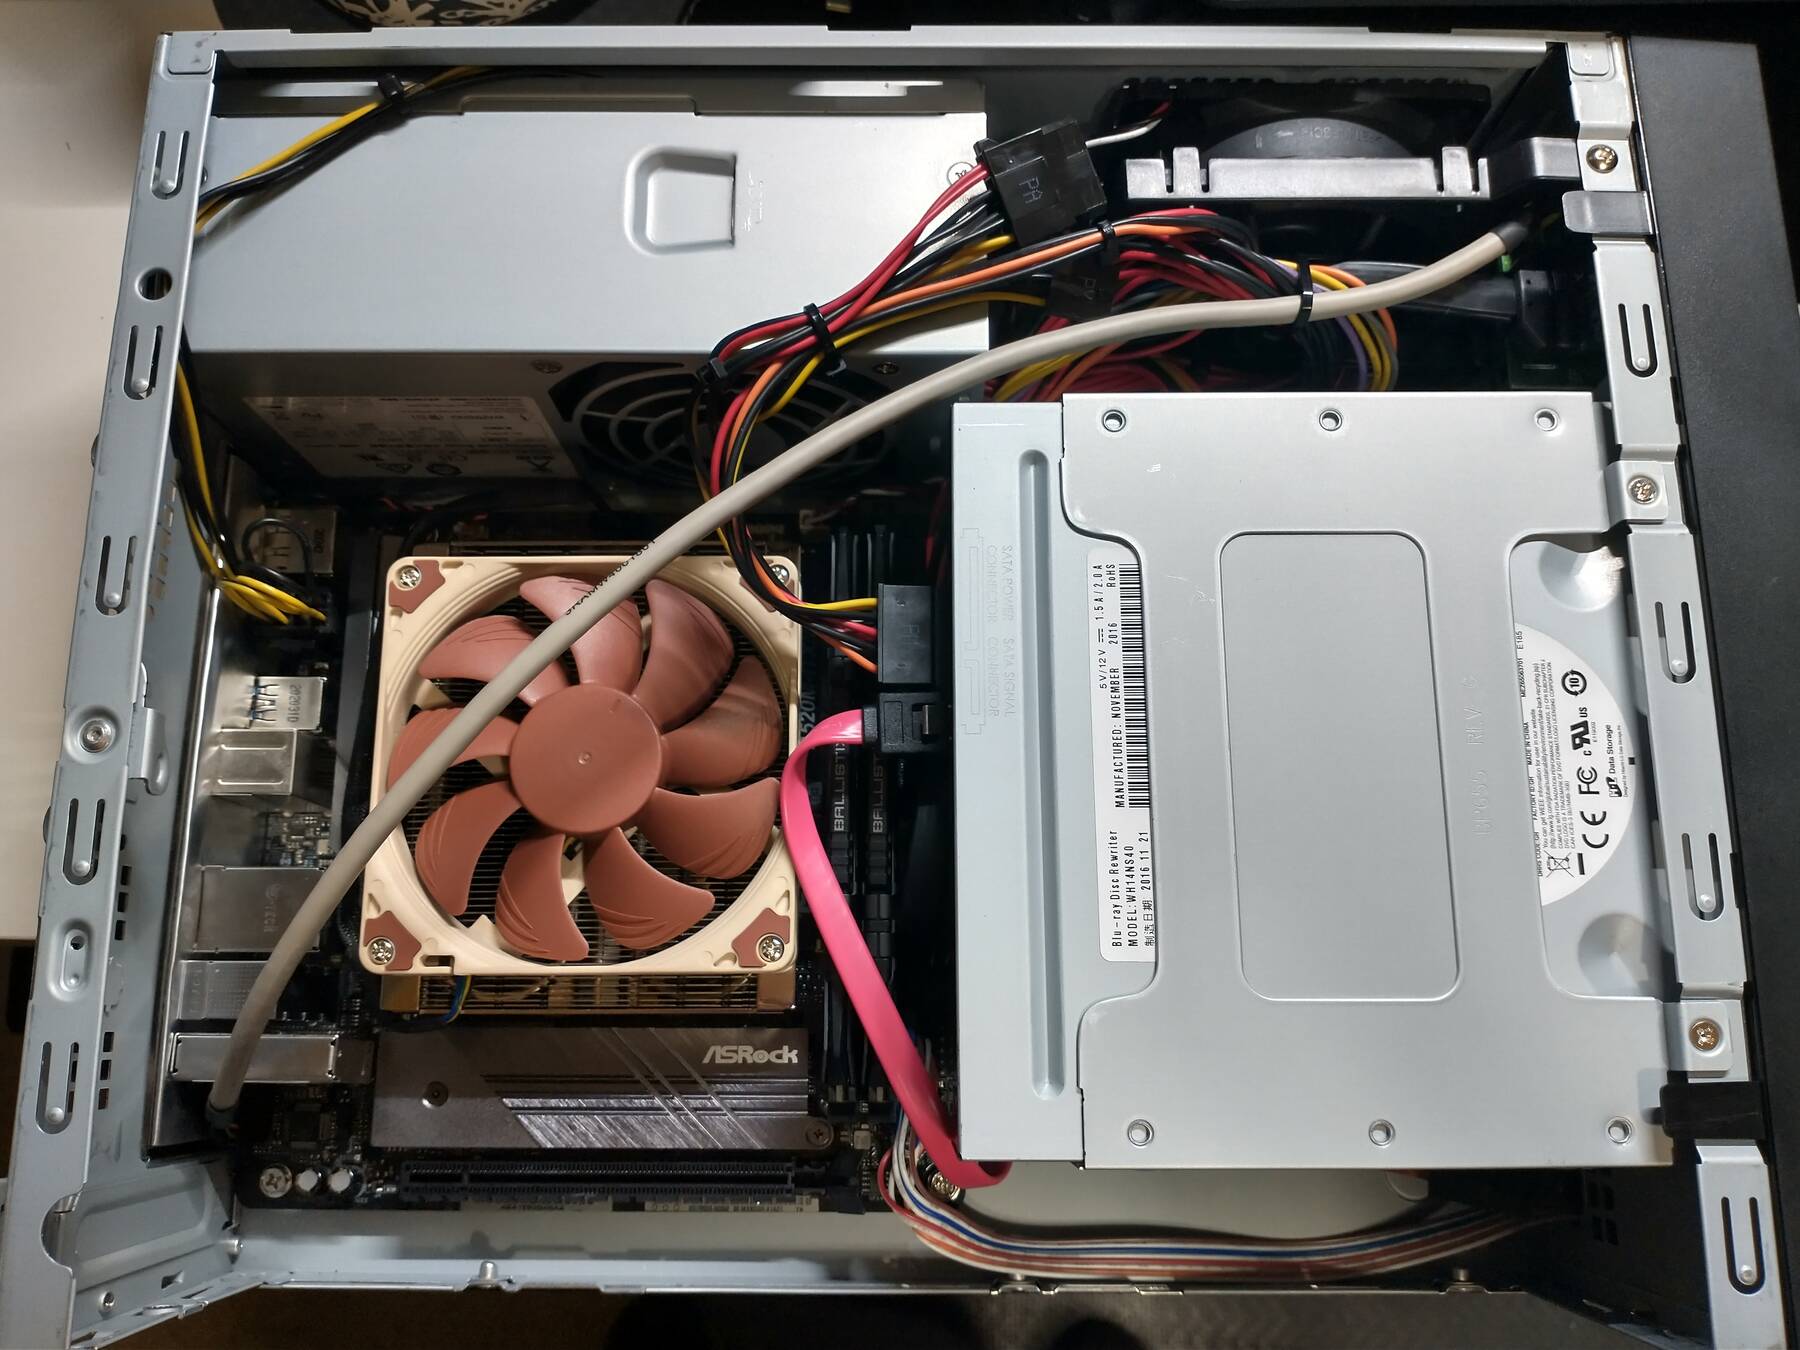
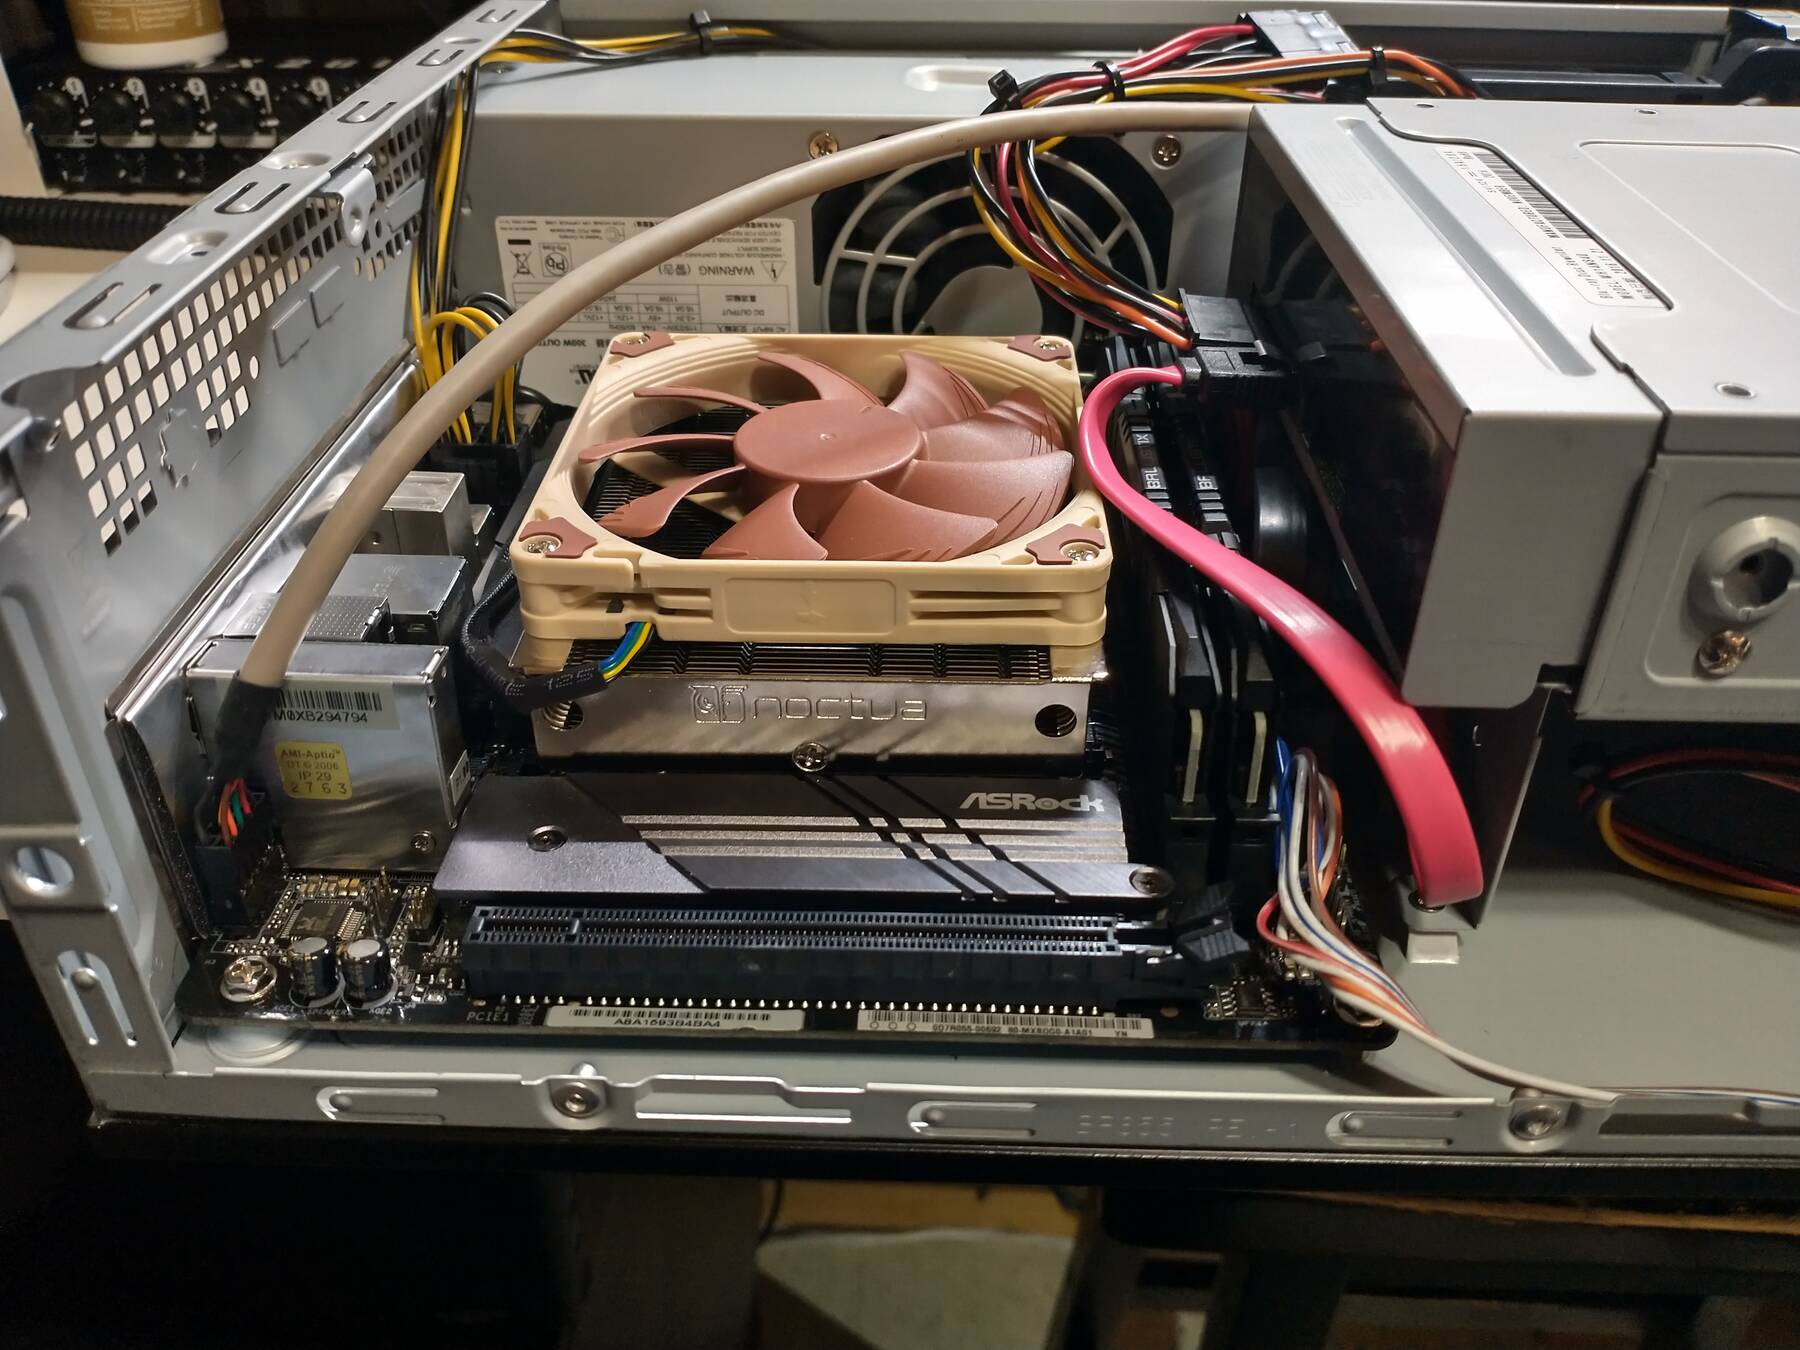
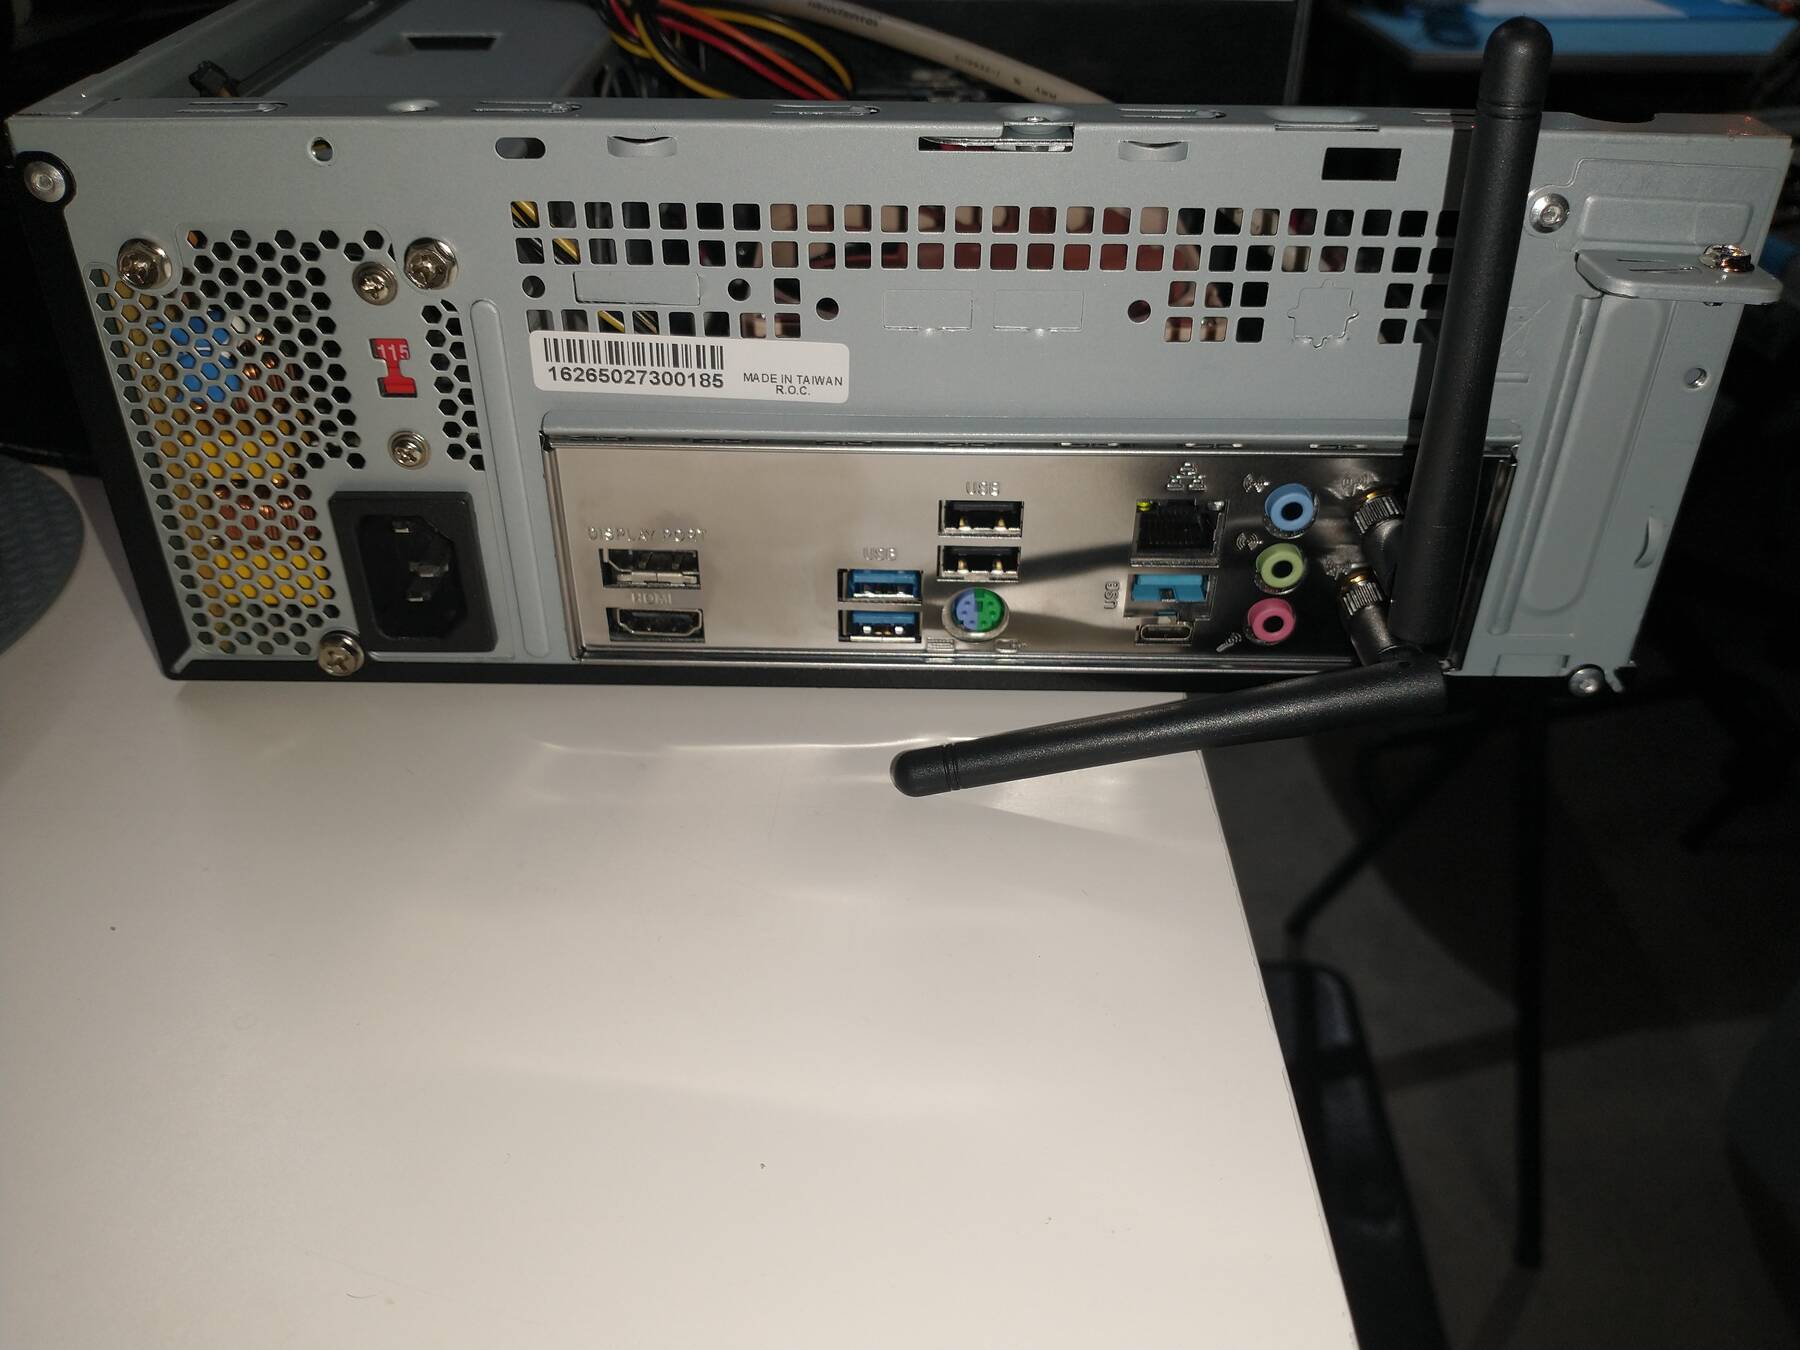
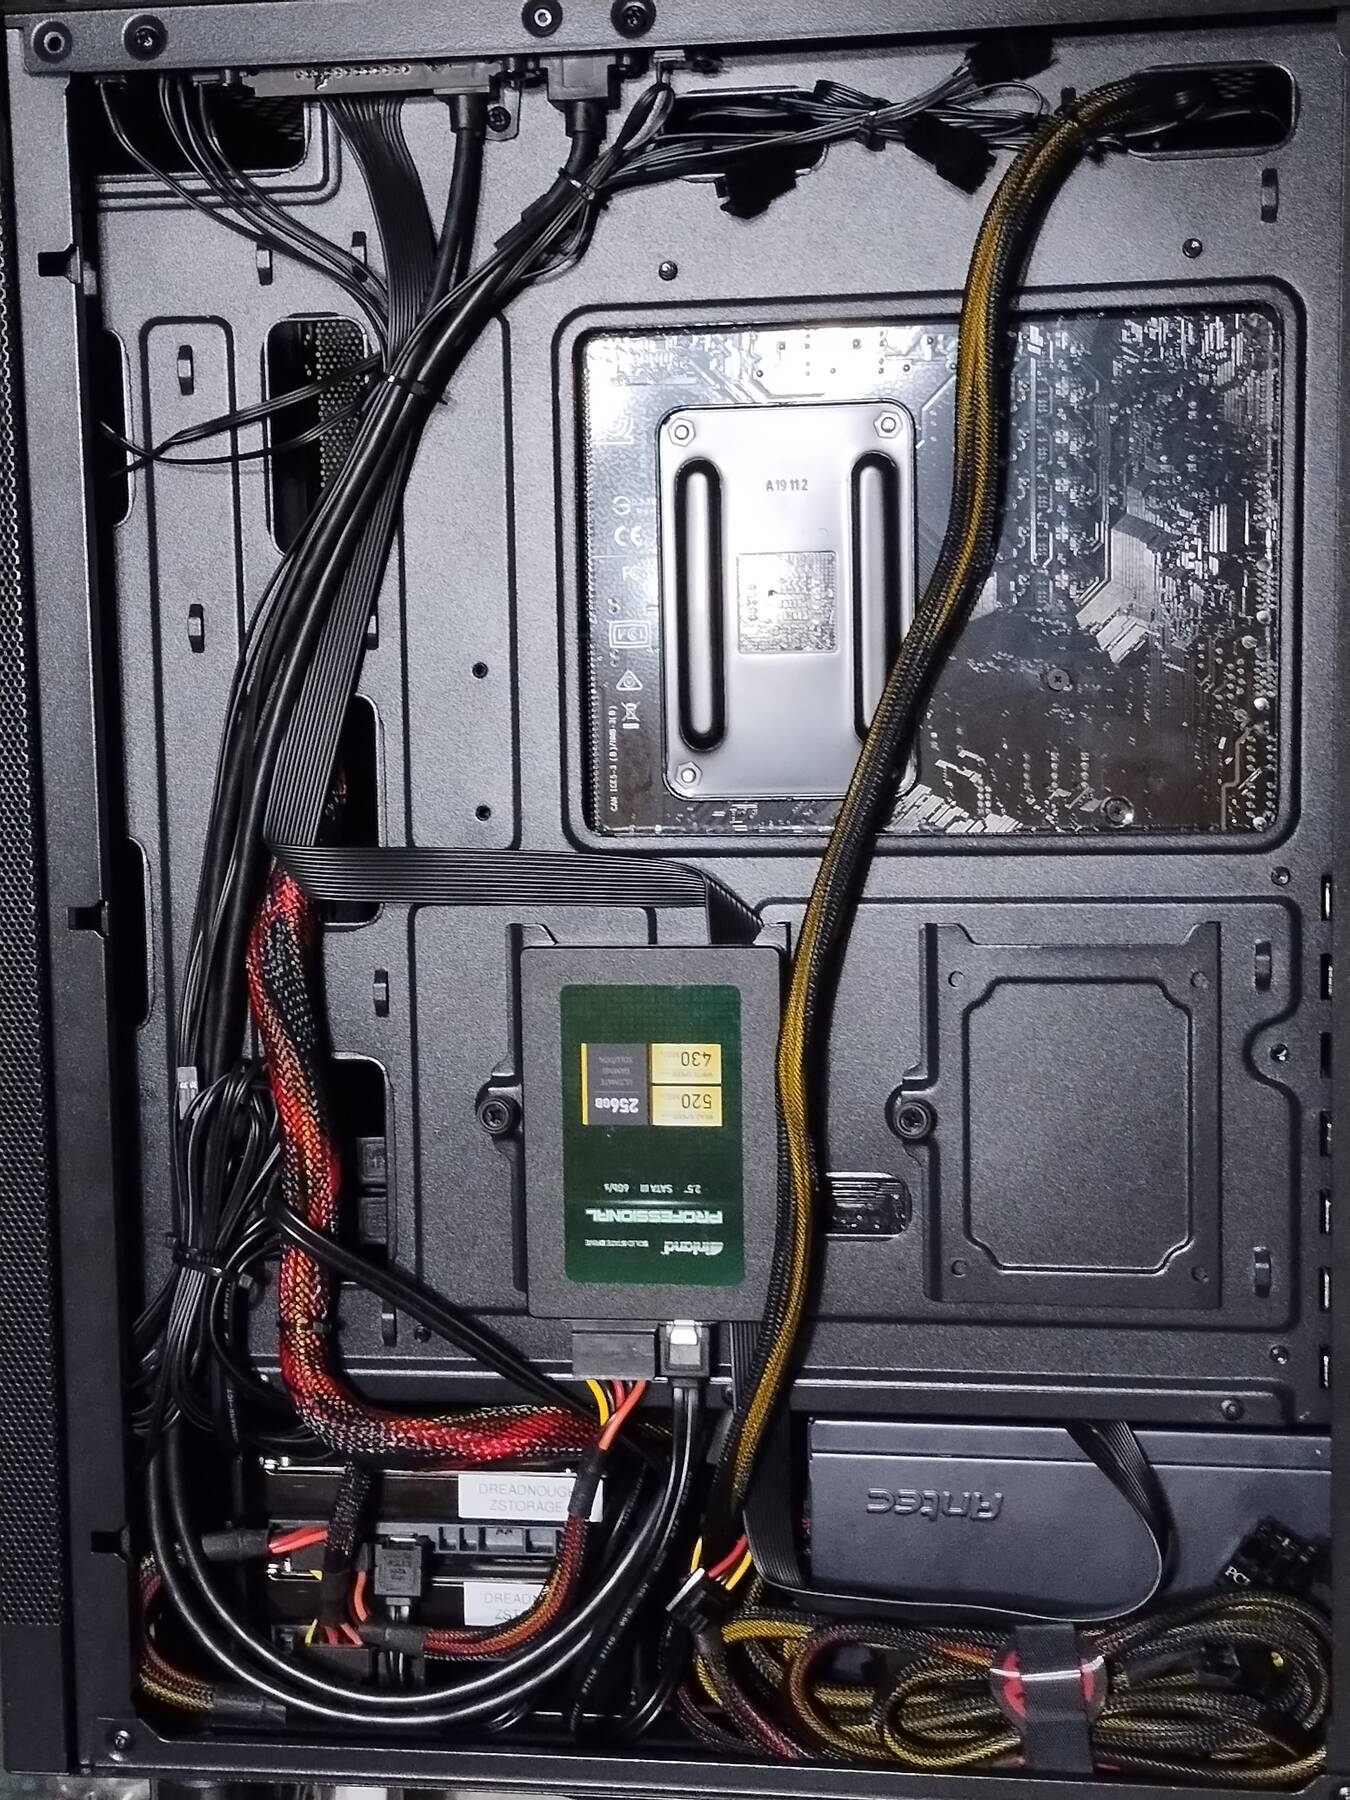
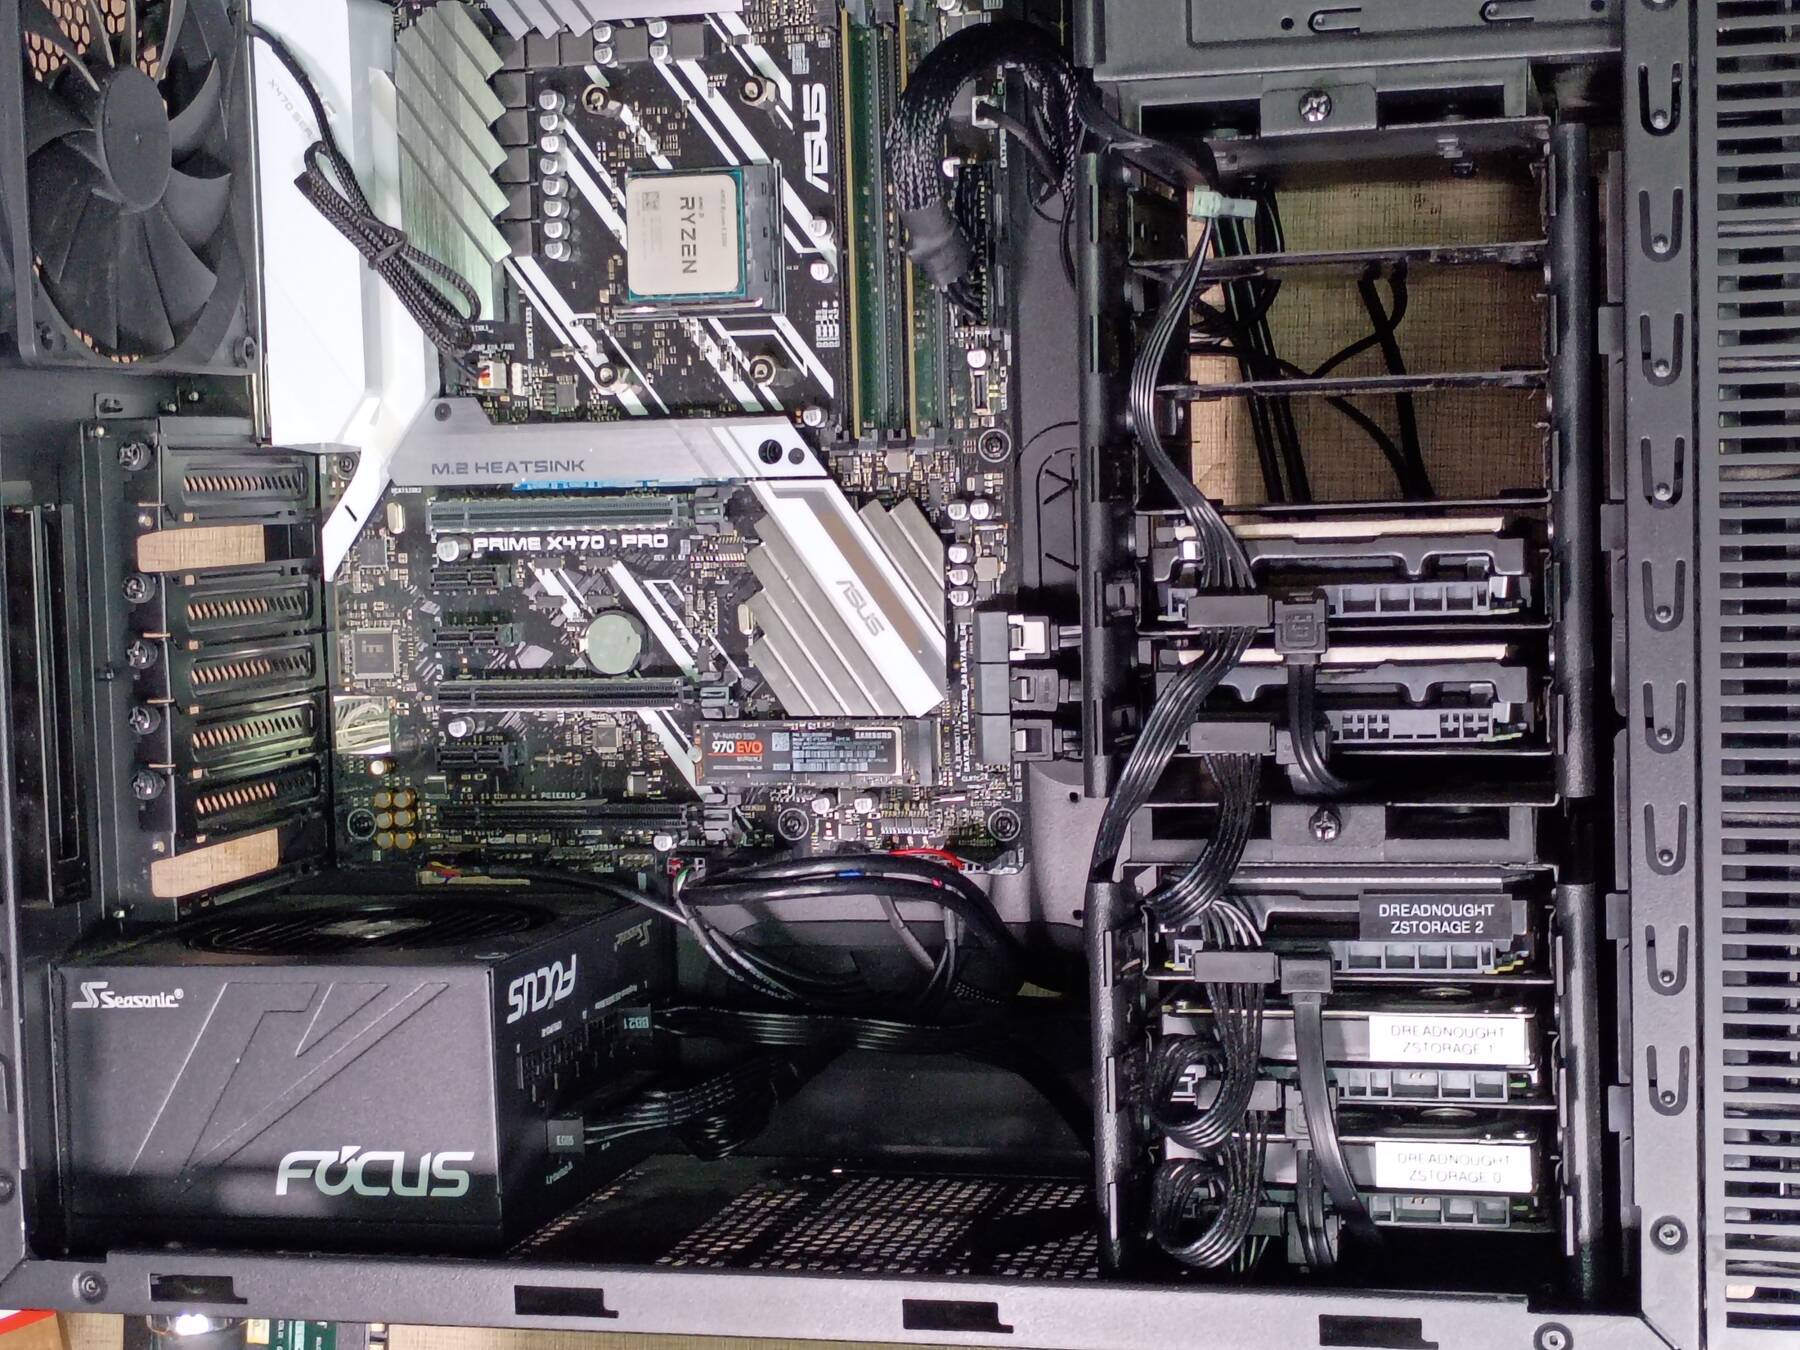
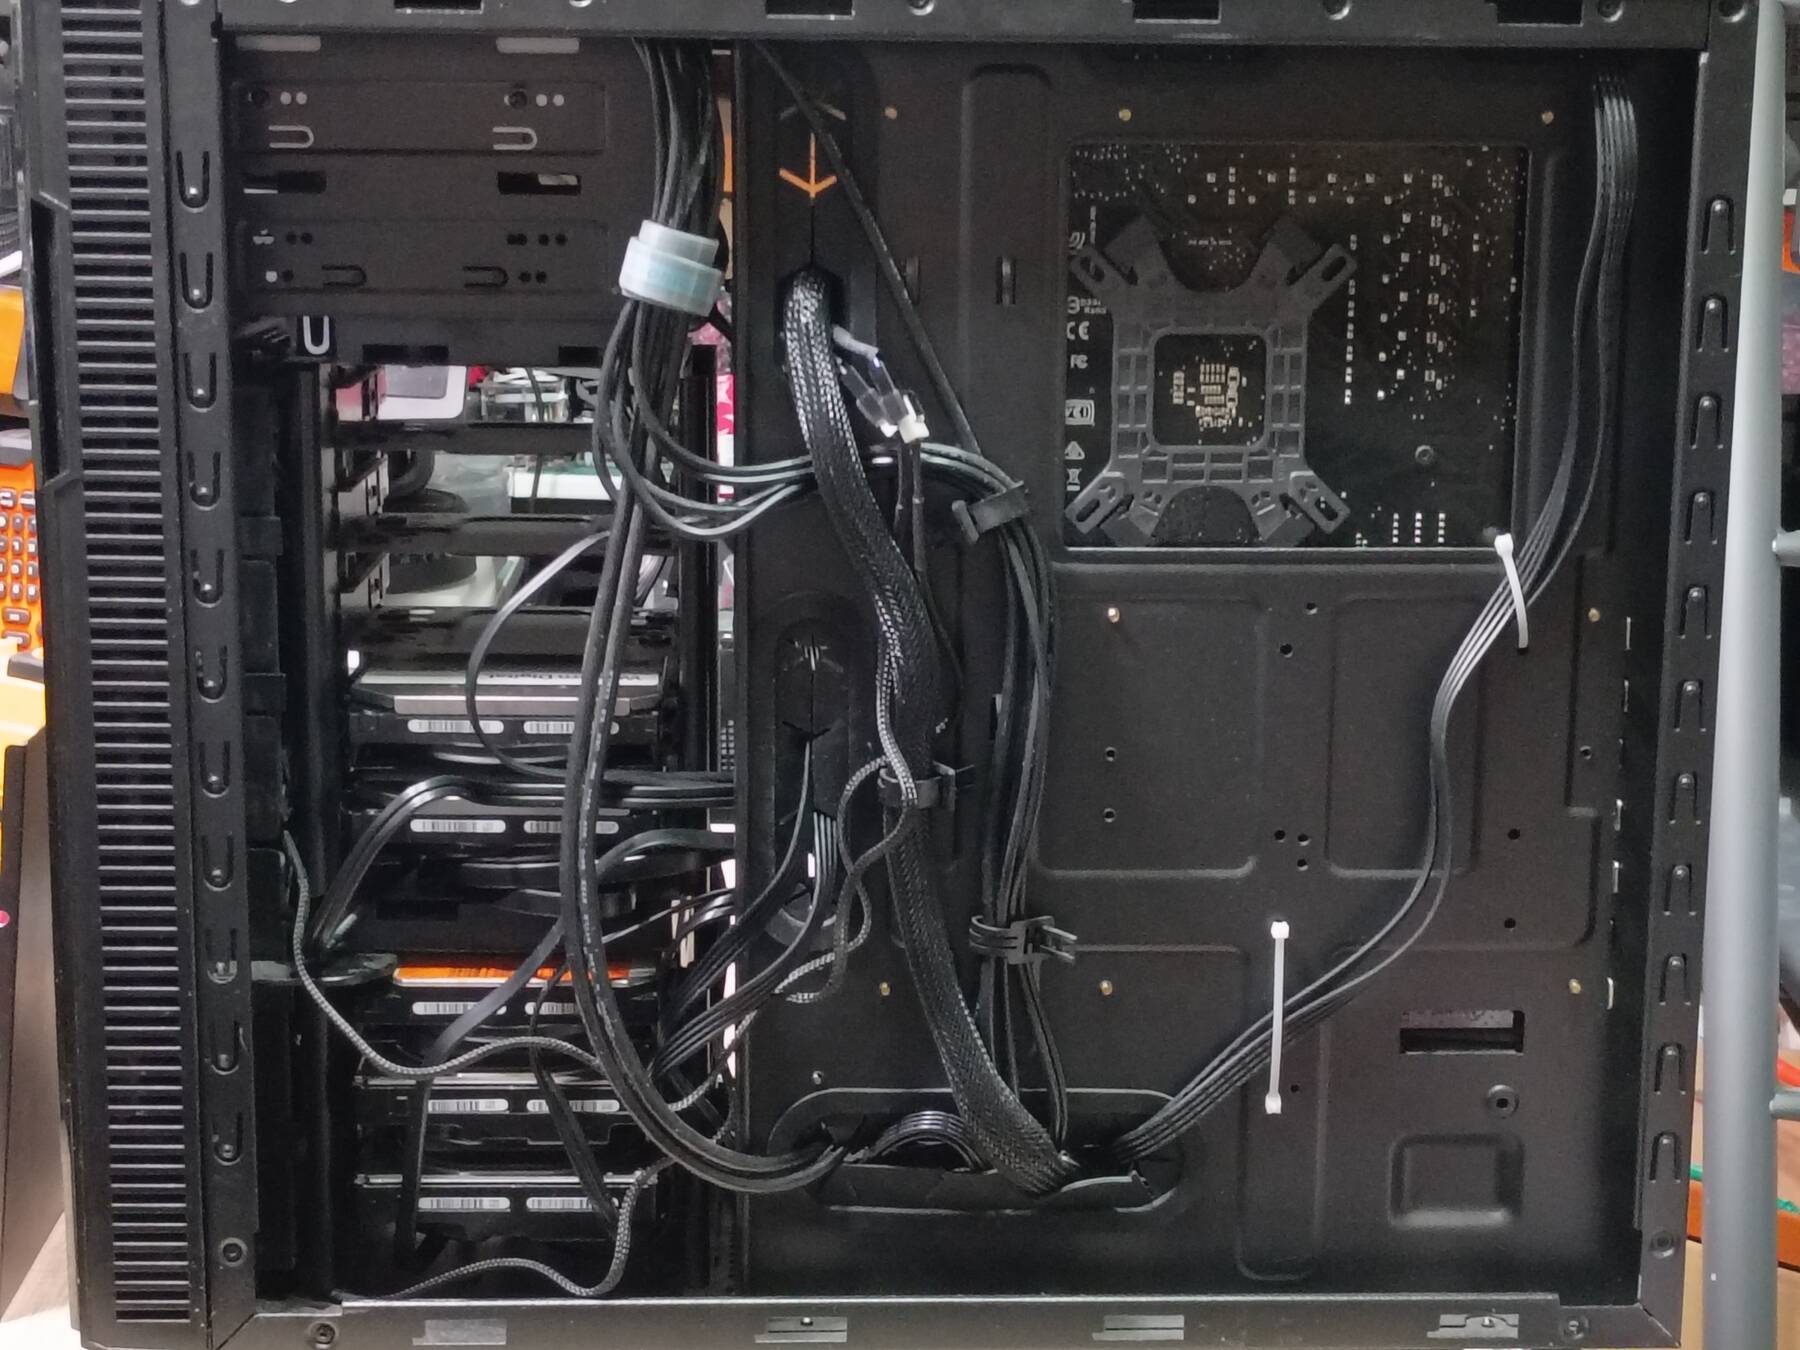
Back into the Fractal Define R4 and some more drives
I moved chaos into another case, and wanted this machine to go back into the Fractal Define R4. It has better acoustics, better build, more drive bays, and even optical drive bays.
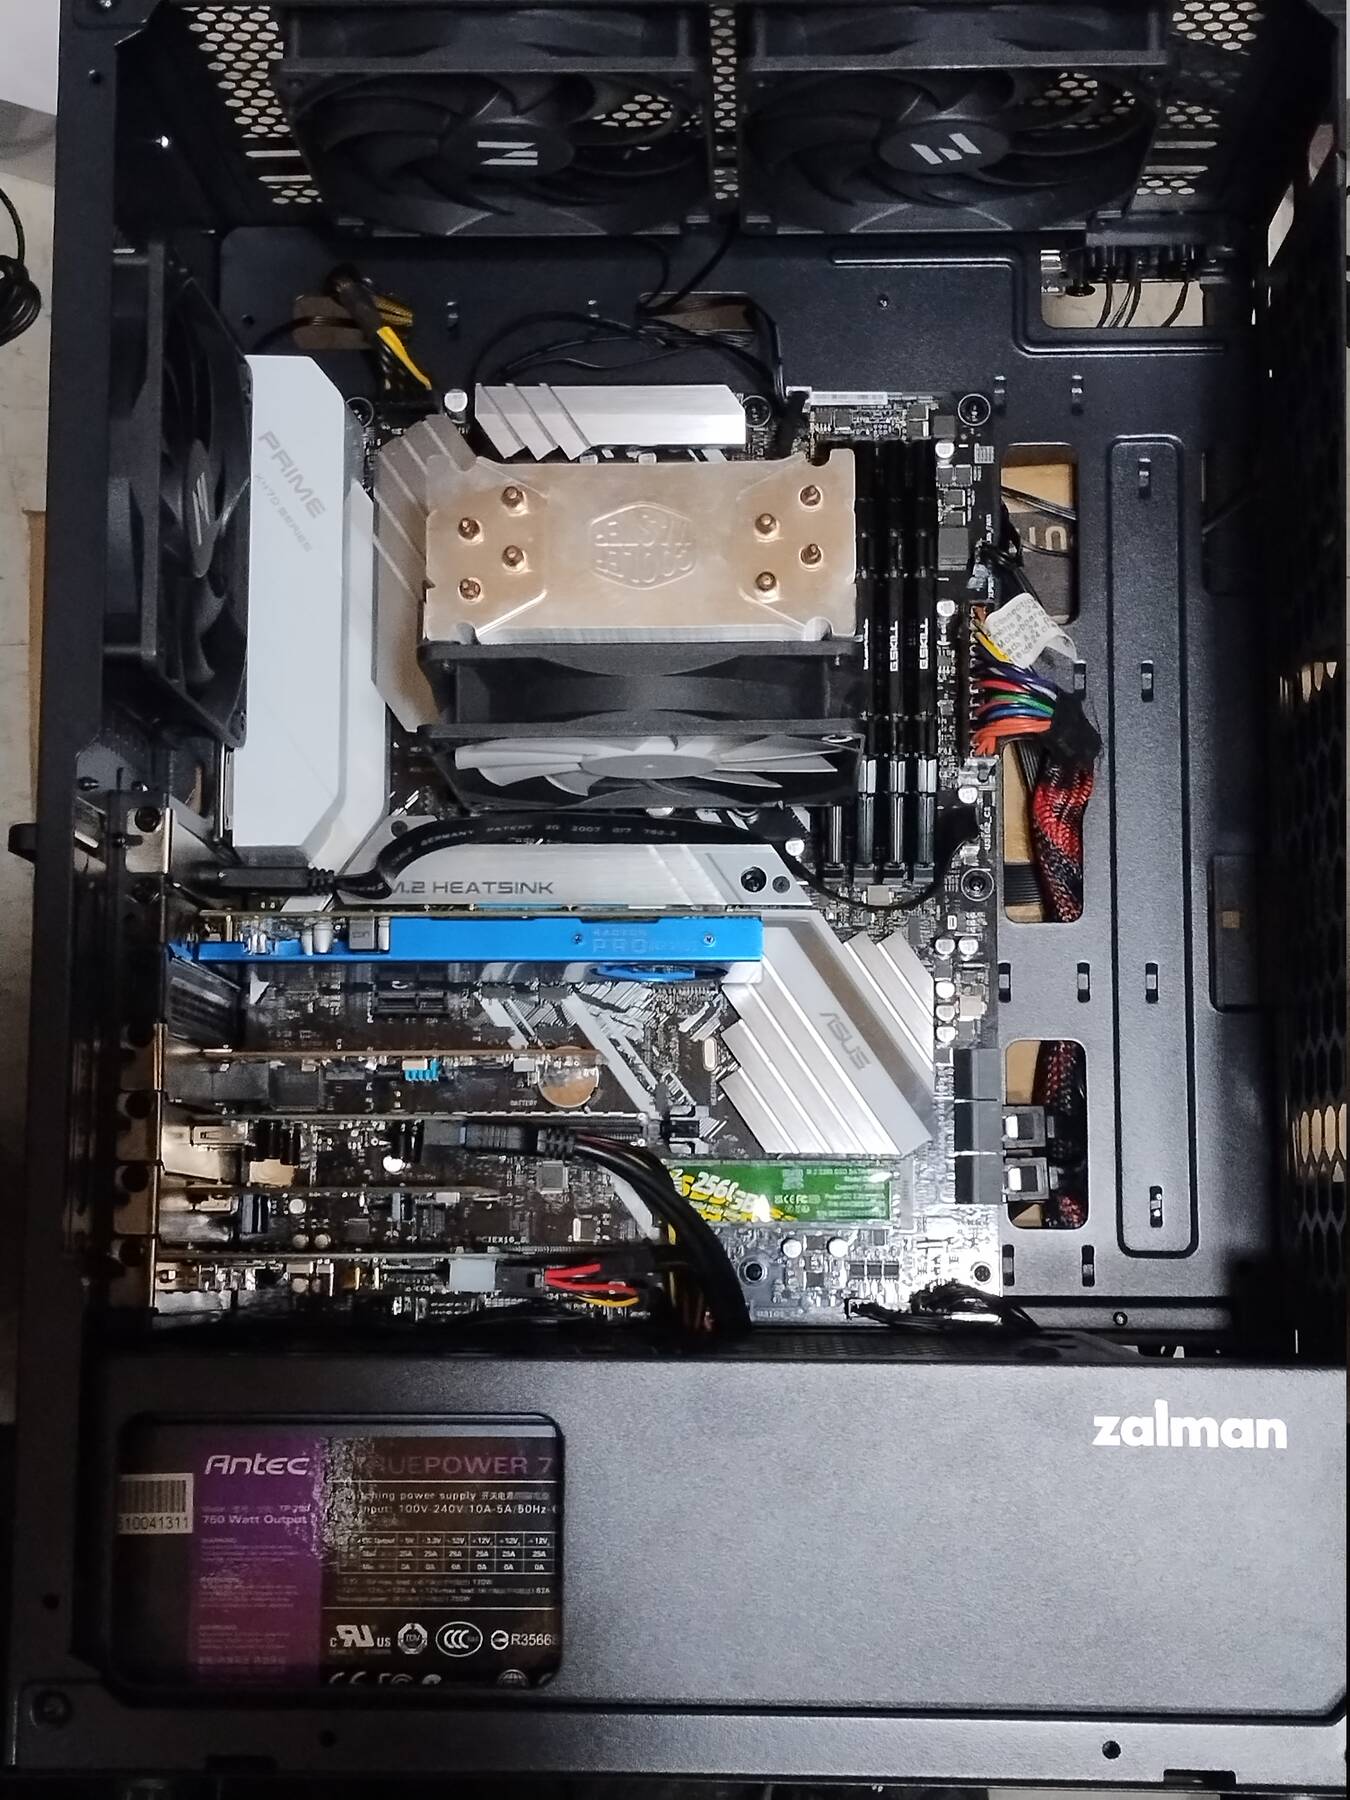
While I was doing the swap I traded out the Cooler Master Hyper 212 tower heatsink for a slightly different variant. Not sure exactly which one, but my other unit uses a mount with different orientation, and the heatpipes are separated by part of the aluminum heatsink base. The tower part seems identical though. Main point is the airflow path is now inline with the cause intake/exhaust.
I had to remove the extra bracket on the Radeon Pro W5500 to allow it to fit.

I removed the case's fan speed controller wiring since it was annoying. I thought I had enough fan headers, but in the end I doubled up the front intake fans on a single header. New fan connections:
| Fan Header | Fans | Fan Control |
|---|---|---|
| CPU_FAN | CPU | PWM |
| CHA_FAN1 | Rear Exhaust (140mm) | DC |
| CHA_FAN2 | Above card cage (92mm) | DC |
| CHA_FAN3 | Drive fans (2x 140mm) | DC |
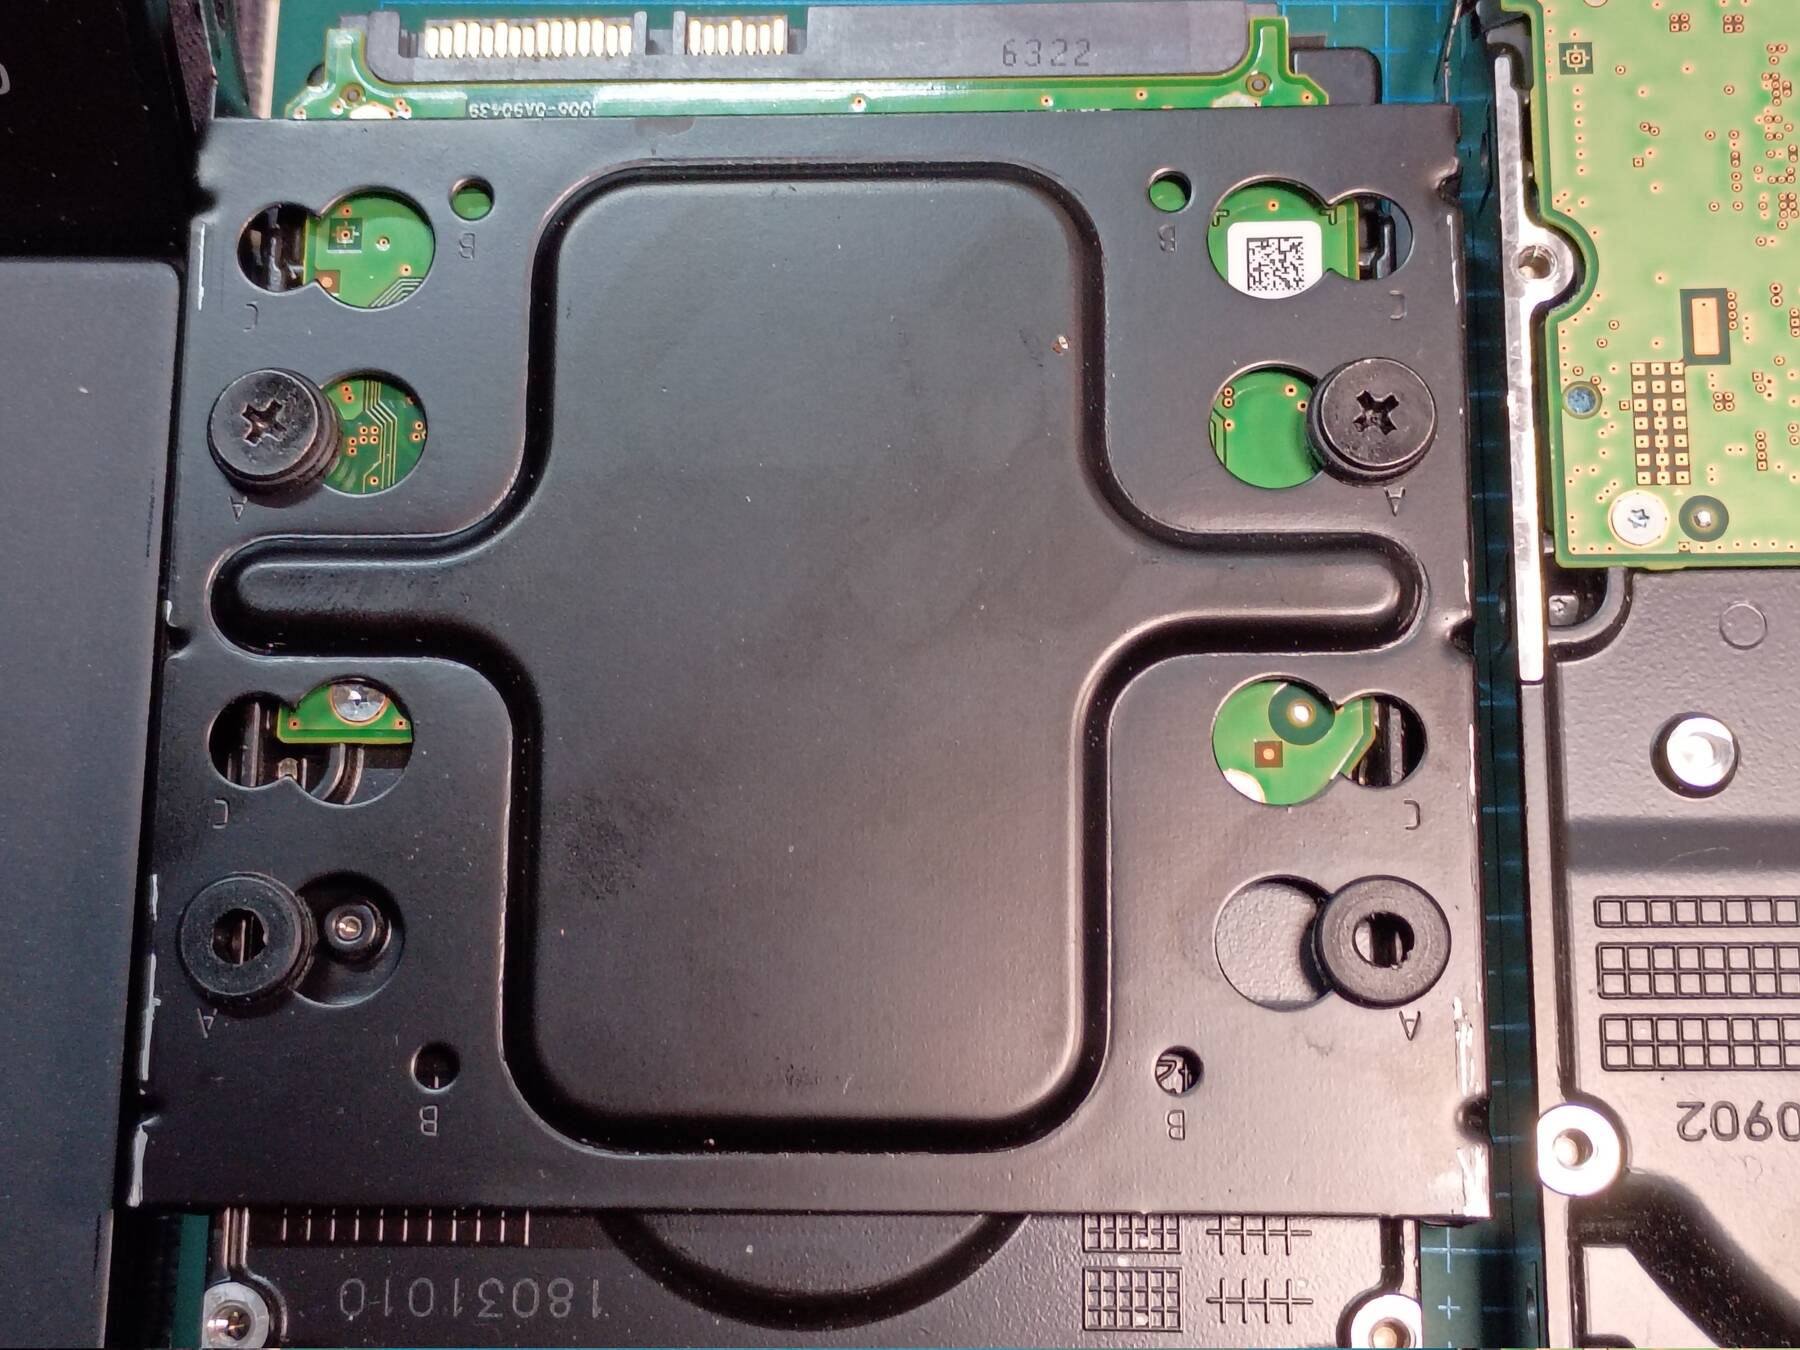
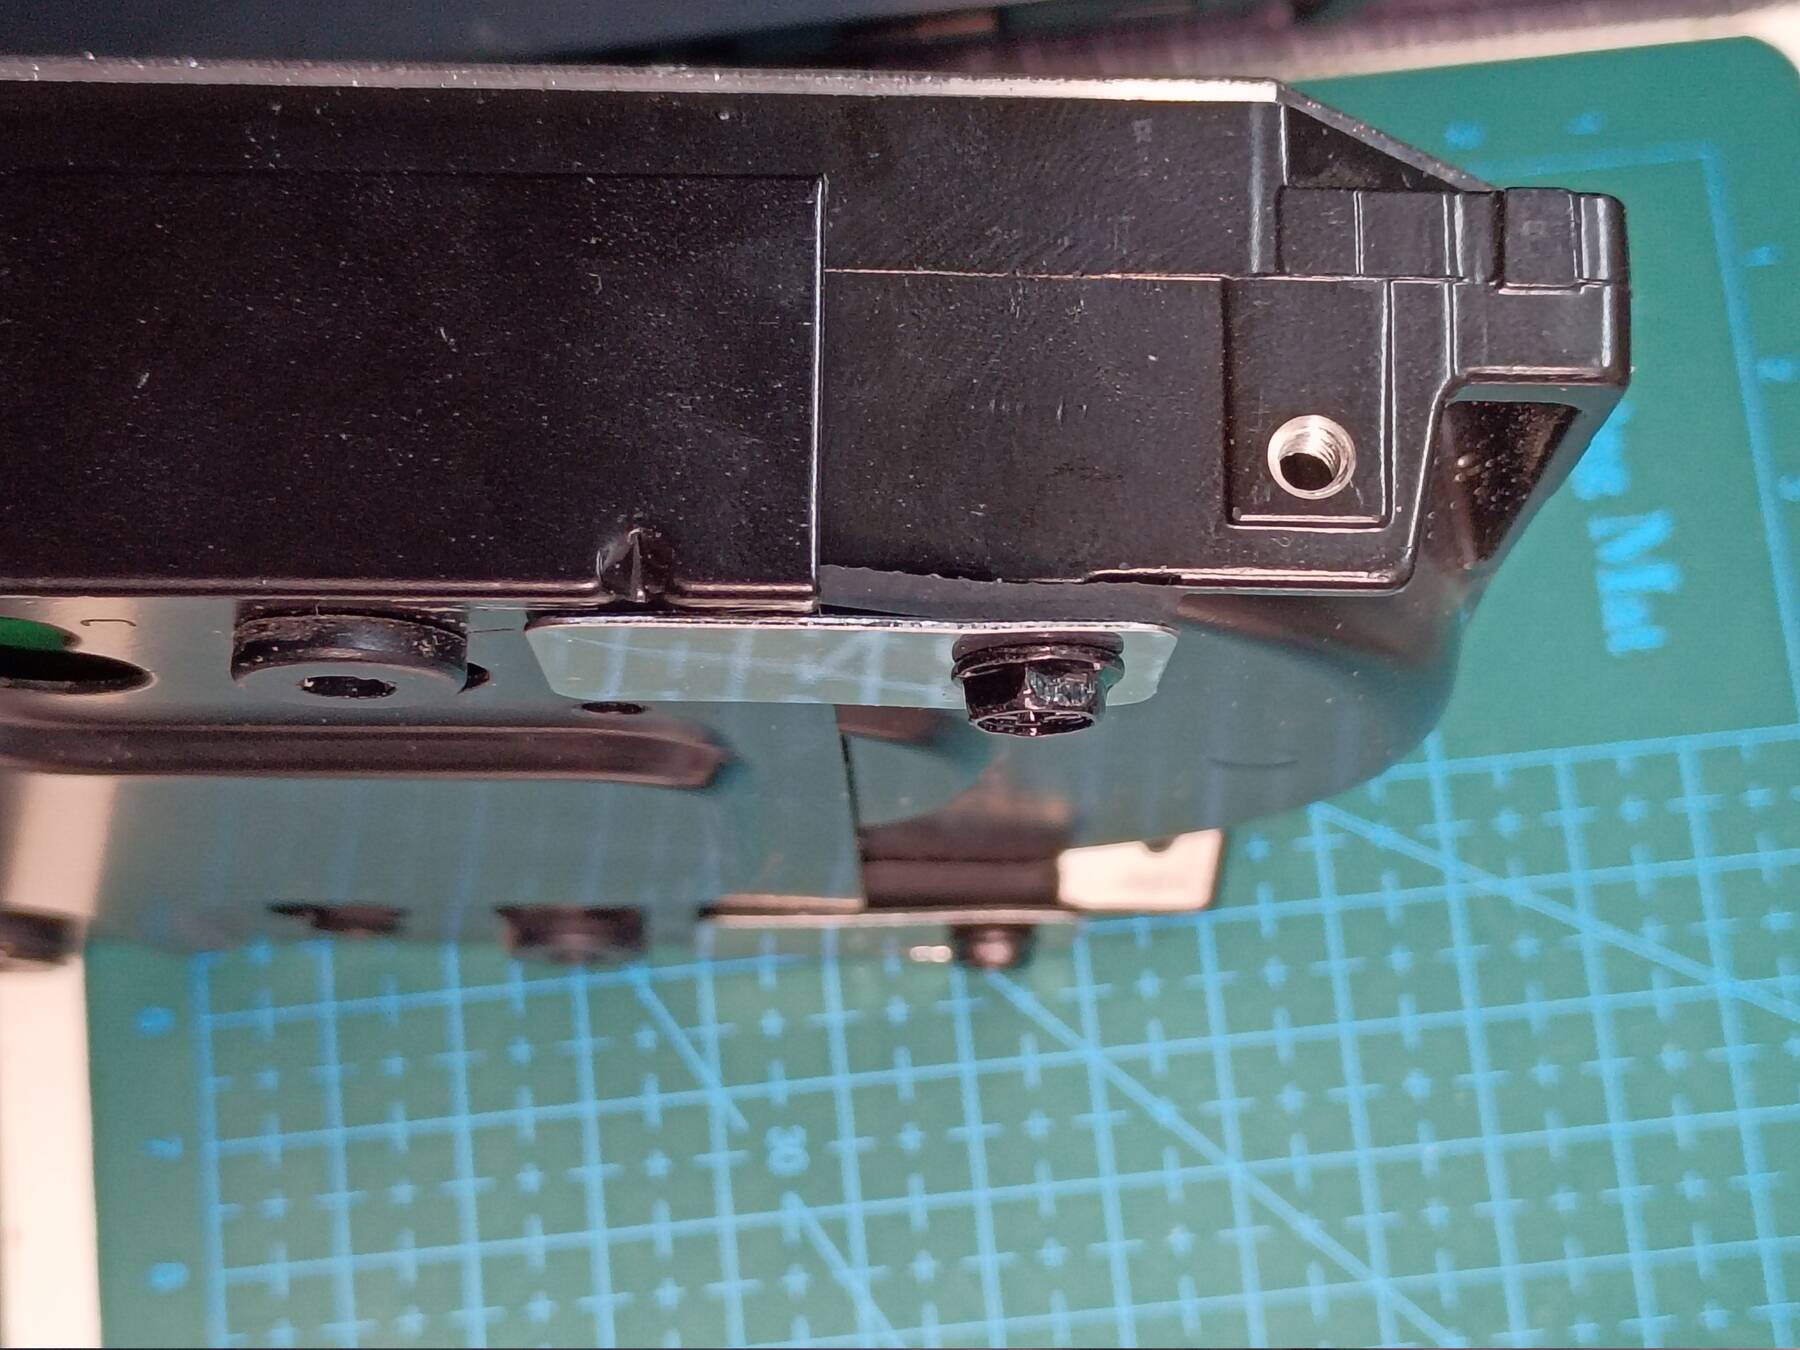
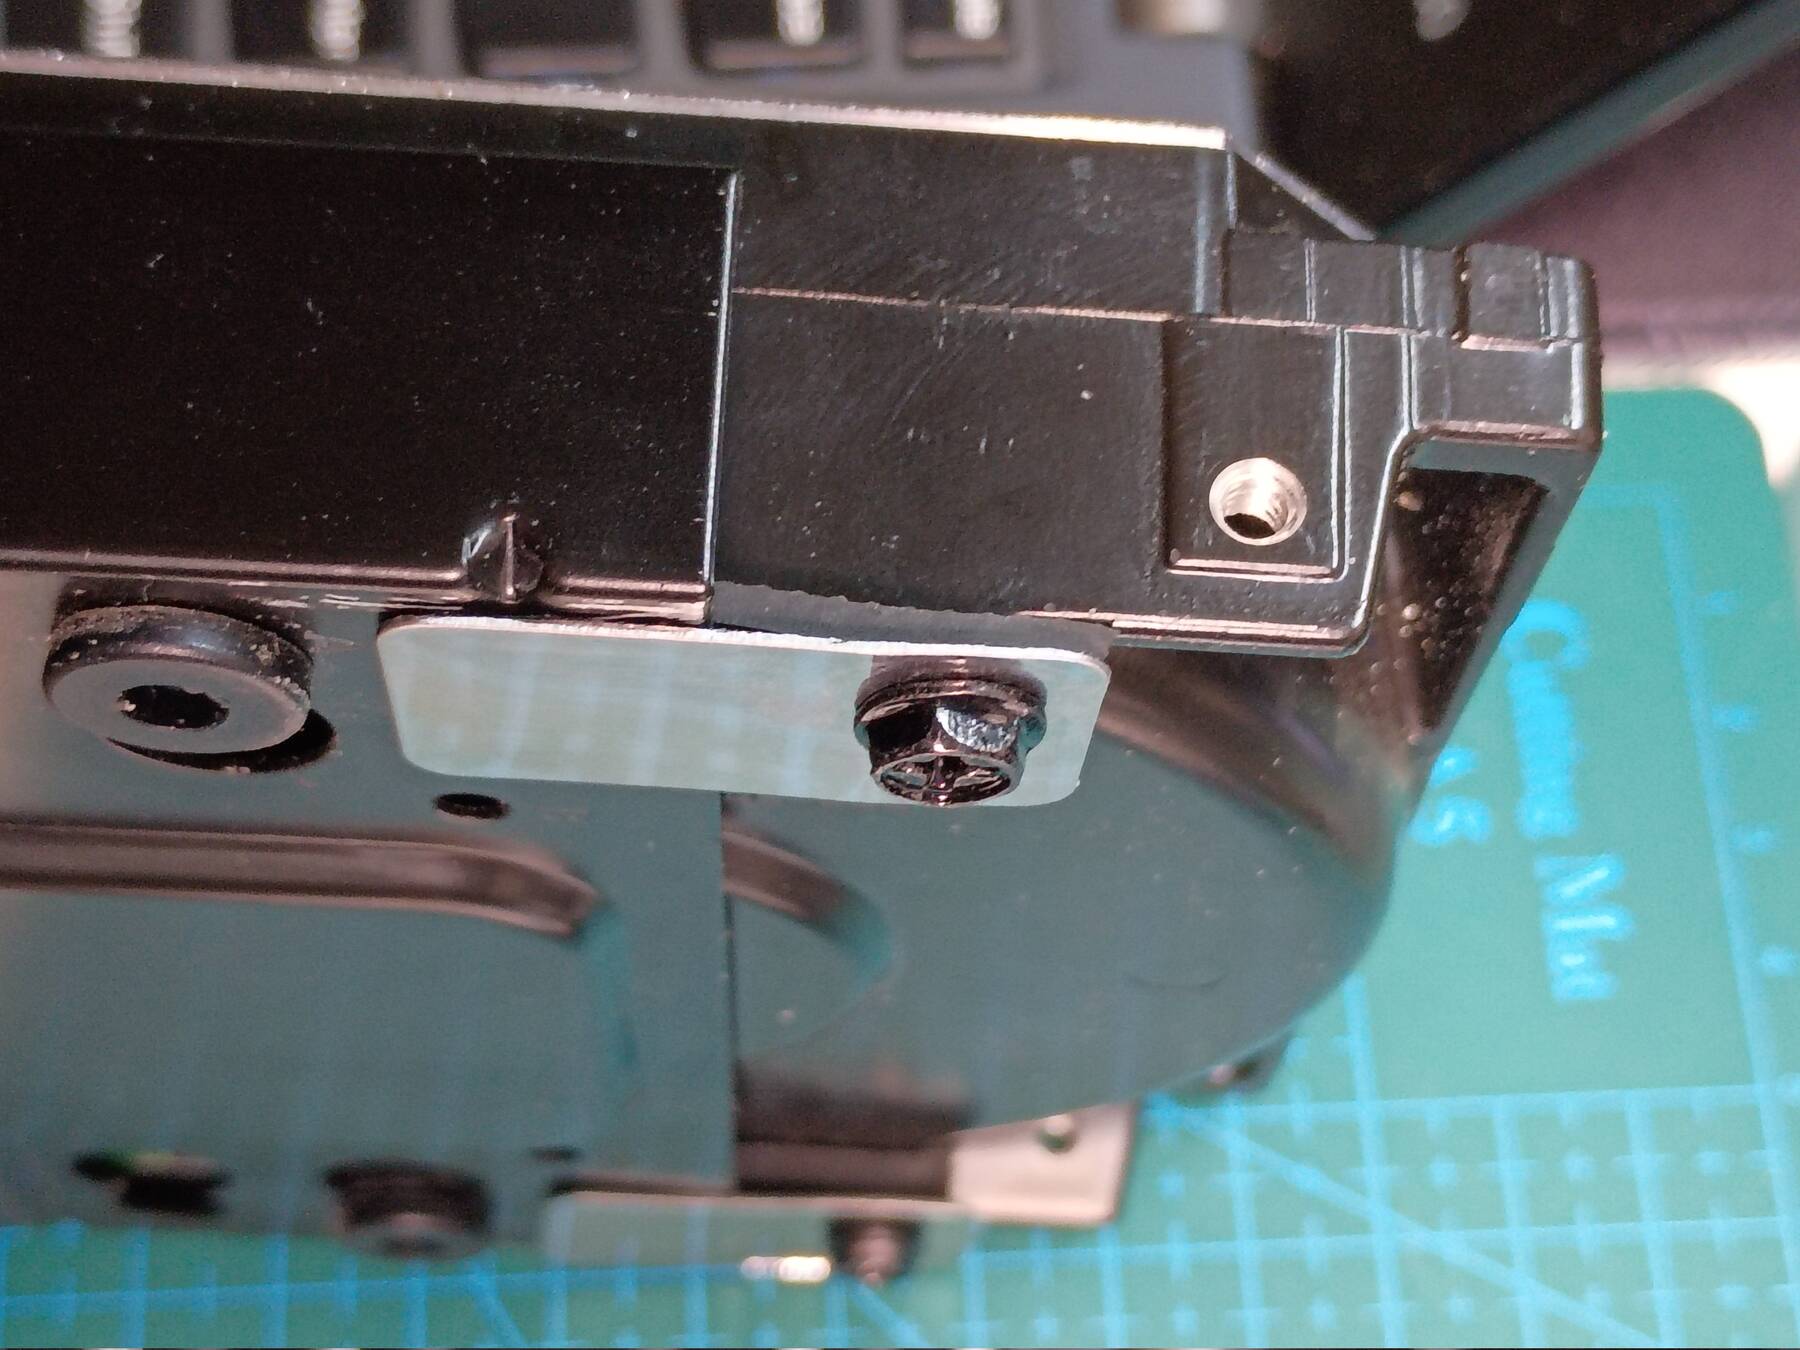
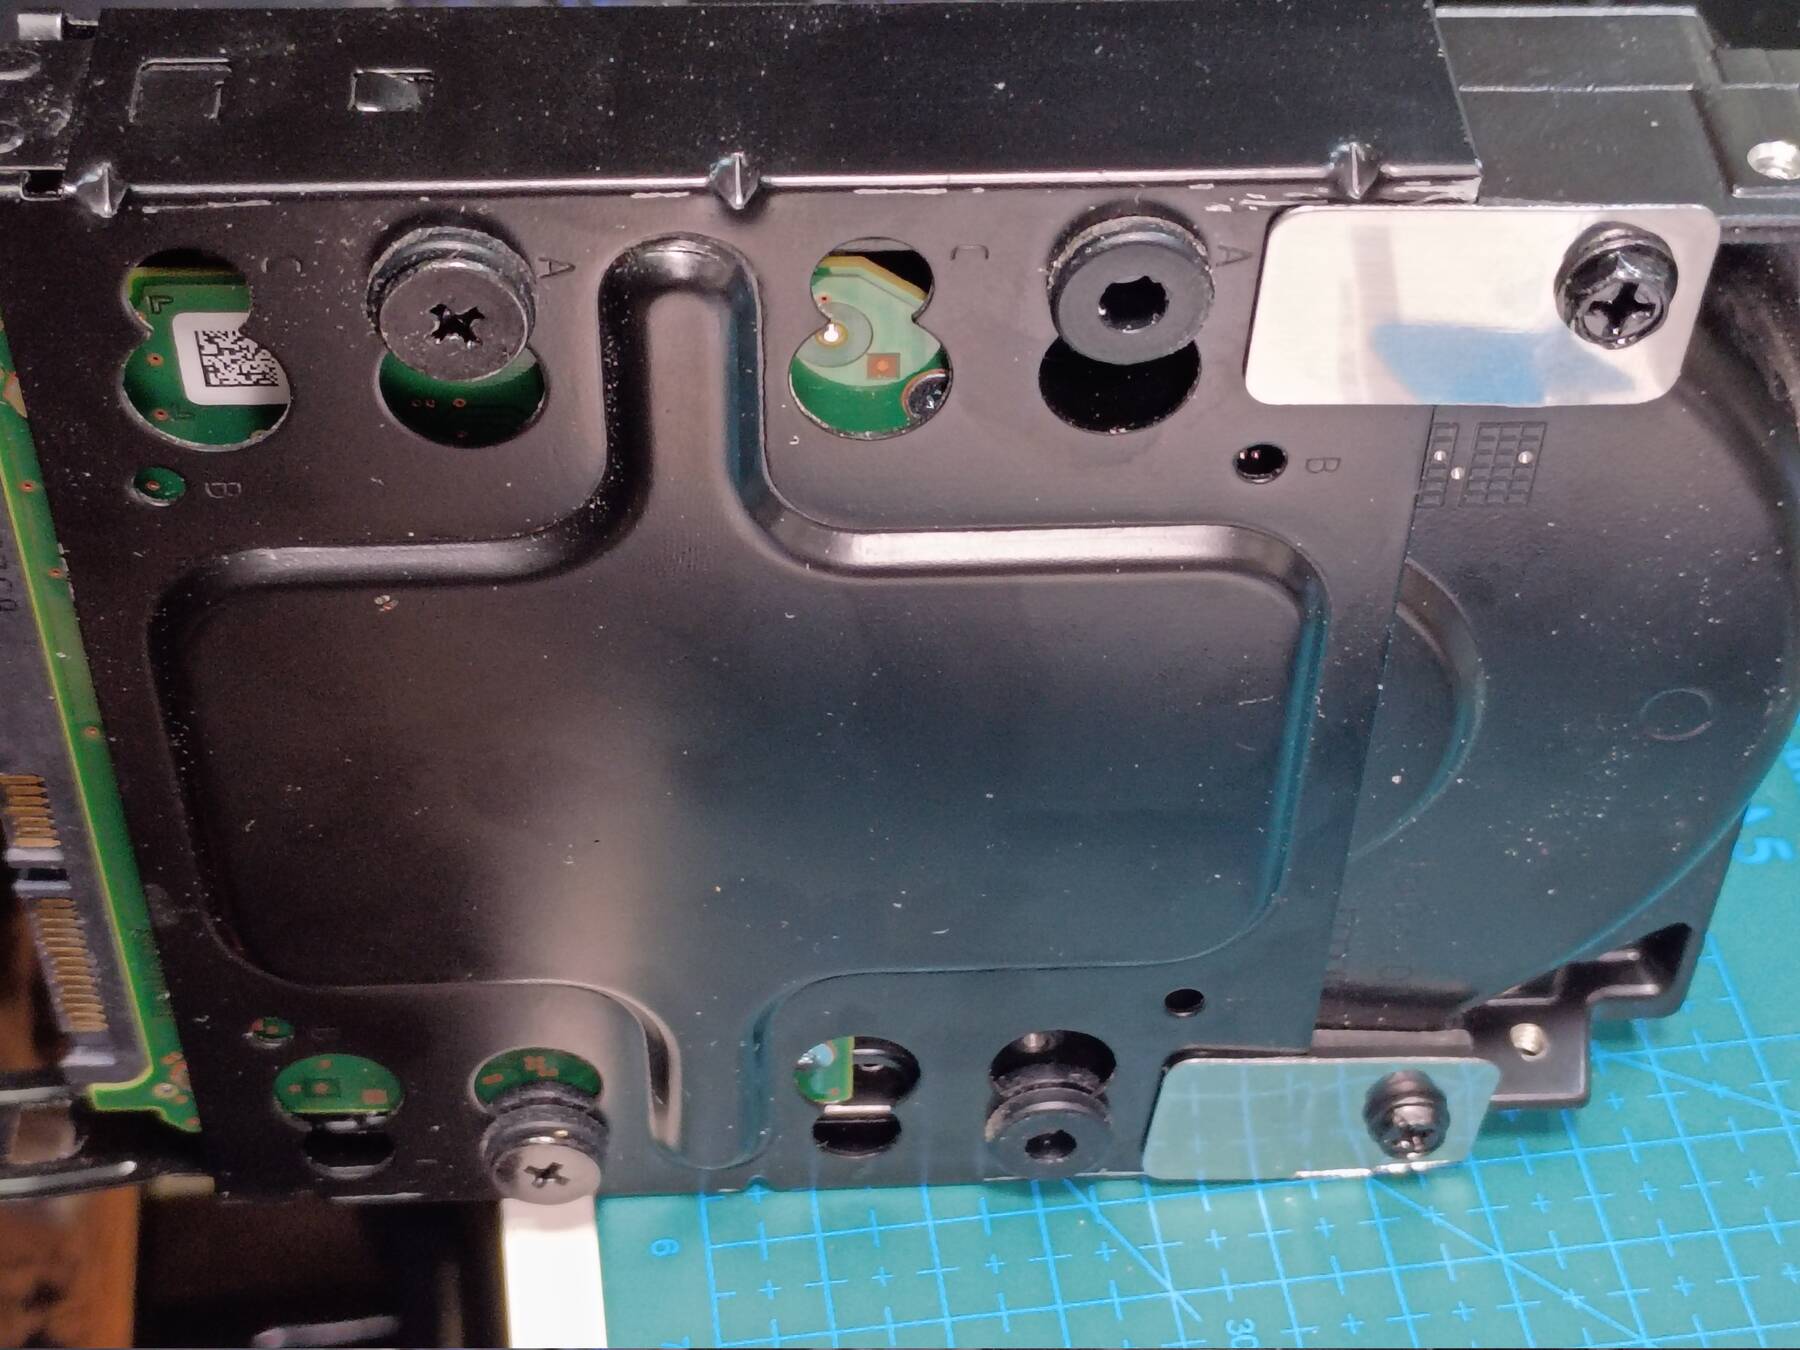
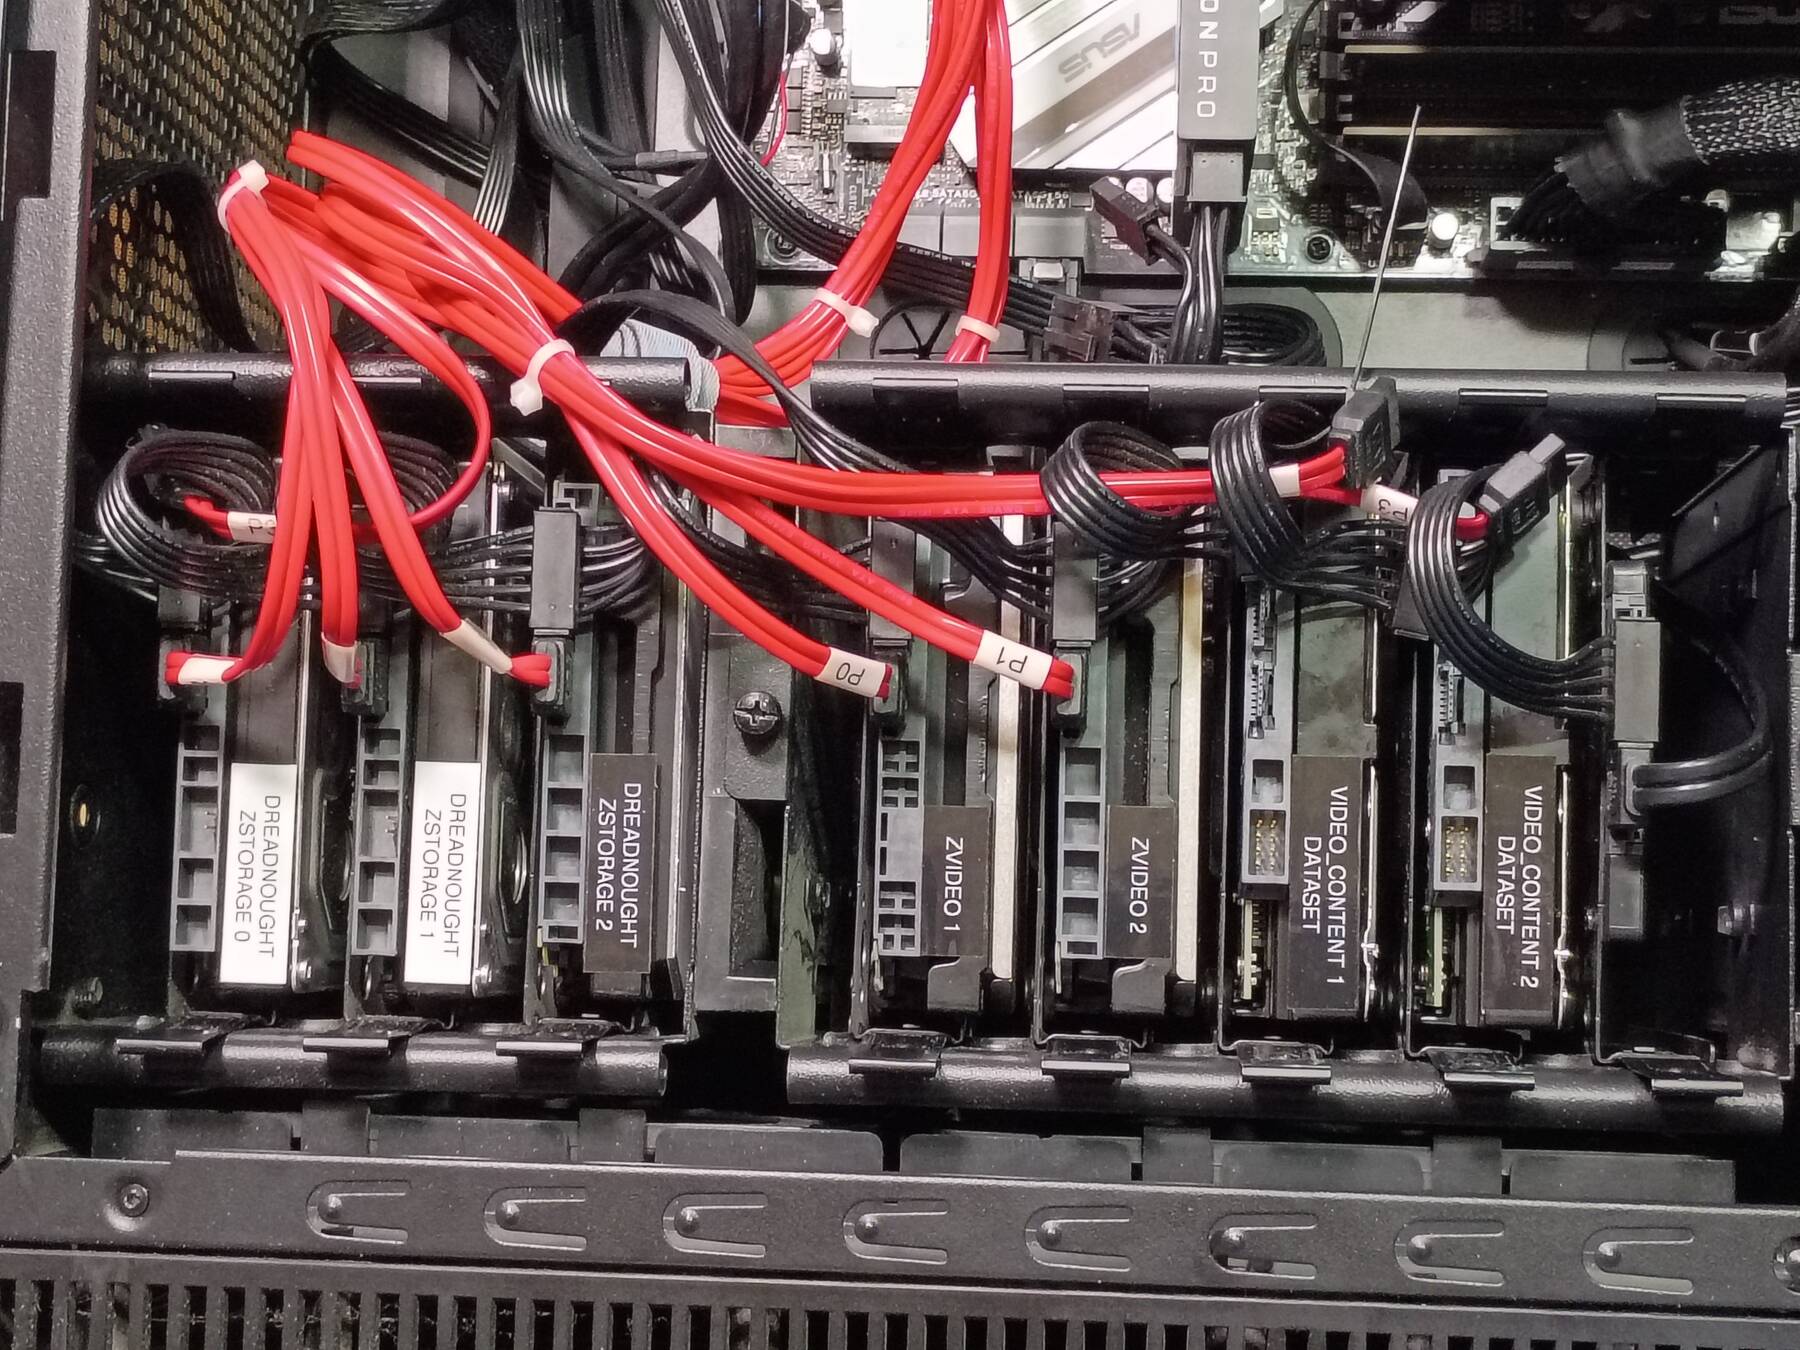
I ran into some trouble with the hard drives. The trays use the older, closer together set of screw holes. More info about the changes in this superuser.com answer. Anyway, I ended up with a weird mod to mount the newer drives securely. I had some adhesive thin metal strips (magnet anchors), and I combined them with rubber strips to try and preserve the soft mount feature. Not as good as the grommet solution, but it was quick.

The drives I added were a couple 12TB holding my media rips. Hoping to do some more ripping and encoding, but I also need to get more drives to hold that dataset since I don't want it filling up the 8TB mirror. I also installed a full size Blu-Ray drive for ripping convenience.
I did have a USB hub/card reader 5.25" device with a couple 2.5" drive mounts, but I wasn't satisfied with the plastic construction so I left it out.
I ran out of SATA ports so I decided to trade out my games SSD for an NVMe drive. Afterwards I got some different ideas though.
- Second phase
Since I want to have some drives for the video content dataset I'm going to need more SATA ports. Installing another PCIe device means losing the PCIe lanes for my second NVMe drive.
I decided the games speed up wasn't really worth it. I'd rather get back to having a drive setup where I can do media ripping, and games are doing fine on SATA SSD speeds.
I put the LSI SAS adapter removed from chaos into the second 16x PCIe slot (downgrades video card to 8x, oh well).
All the spinning rust was moved to the SAS adapter. I added two 4TB drives for a video_content mirror (media encoded from disc rips mostly). After a zfs send I realized one of the drives is a fail, I should have marked it better. So that mirror is degraded until I can get another disk. Not a problem since that stuff is still on at least two other drives, but I'm a bit wary of adding new data until I can sort that out.
The original games SSD was added back, and the SATA M.2 SSD was added back. I'm using it for game install space again.
This results in about 3 copies of my ZFS datasets. I really need to implement better snapshot policy and syncing (probably via
sanoid, orsimplesnap).
Moving to wireplumber/pipewire
Something was annoying about pulseaudio, I don't even remember the particular issue. It could have been that I had to restart pulse/mpd on every boot because the system mpd daemon had issues with the user pulse daemon.
Most of my reasons for sticking with pulseaudio aren't currently in practice (mostly network audio). I switched, and reconfigured mpd as a user systemd unit as well.
This was mostly just installing the right packages (wireplumber, pipewire-pulse), masking the system mpd unit, enabling the user one. I copied the mpd configs over to ~/.config/mpd/, and modified the outputs to be type 'pipewire'. Specifying a particular hardware output also needs a different directive of 'target' rather than 'sink' but the device names were the same.
WirePlumber/PipeWire introduces some extra commands for getting info about sinks and such. There are wpctl status, and pw-link with -o (outputs) and -i (inputs) arguments. There is also qpwgraph if you want a messy visual representation of audio routing.
I also had some issues with the game 'Rage' having crackling audio. The solution was to set clock.min-quantum. Lots of things recommended values of 384 or 1000, but the general idea seemed to be to set it as low as possible while resolving the sound issue. So far I've had good results as low as 256, but I haven't taken the time to test lower. It looks like:
context.properties = {default.clock.min-quantum = 256}
I noticed volume levels getting reset to 40% on each boot. It appears to be an issue with the login manager running under a different user. Since no previous profile is available a default 40% is set. I don't understand why my user's pipewire/wireplumber service wouldn't restore volume properly, but that is how it is. I followed this advice on the Debian wiki for sddm, but ran it for the lightdm user instead.
Some crashes, an SSD swap
I was getting some weird crashes. Like X would freeze up, but the network would still be up for a bit. Another time things kept running for a bit, but bash started giving 'tput: Input/Output Error'. There would be a segfault in the dmesg output, but never consistent. Kind of reads like memory issues.
I had done a couple short memtests, but didn't set aside time for multiple passes yet.
I started thinking disk failure. Not getting any bad SMART errors or NVMe log errors. I ran an extended test and it broke my system from booting. I swapped the Inland NVMe SSD for a Samsung 970 EVO and a fresh Debian install. During about the 3rd reboot it crashed out (X still displaying, responds to pings, no keyboard response). There were several "Oops" and then a couple "BUG" call traces. The initial fault happened in a pulseaudio command.
I did some backups up the original drive without issue so I'm not sure it is actually a problem. Running with the new SSD should at least let me rule it out though.
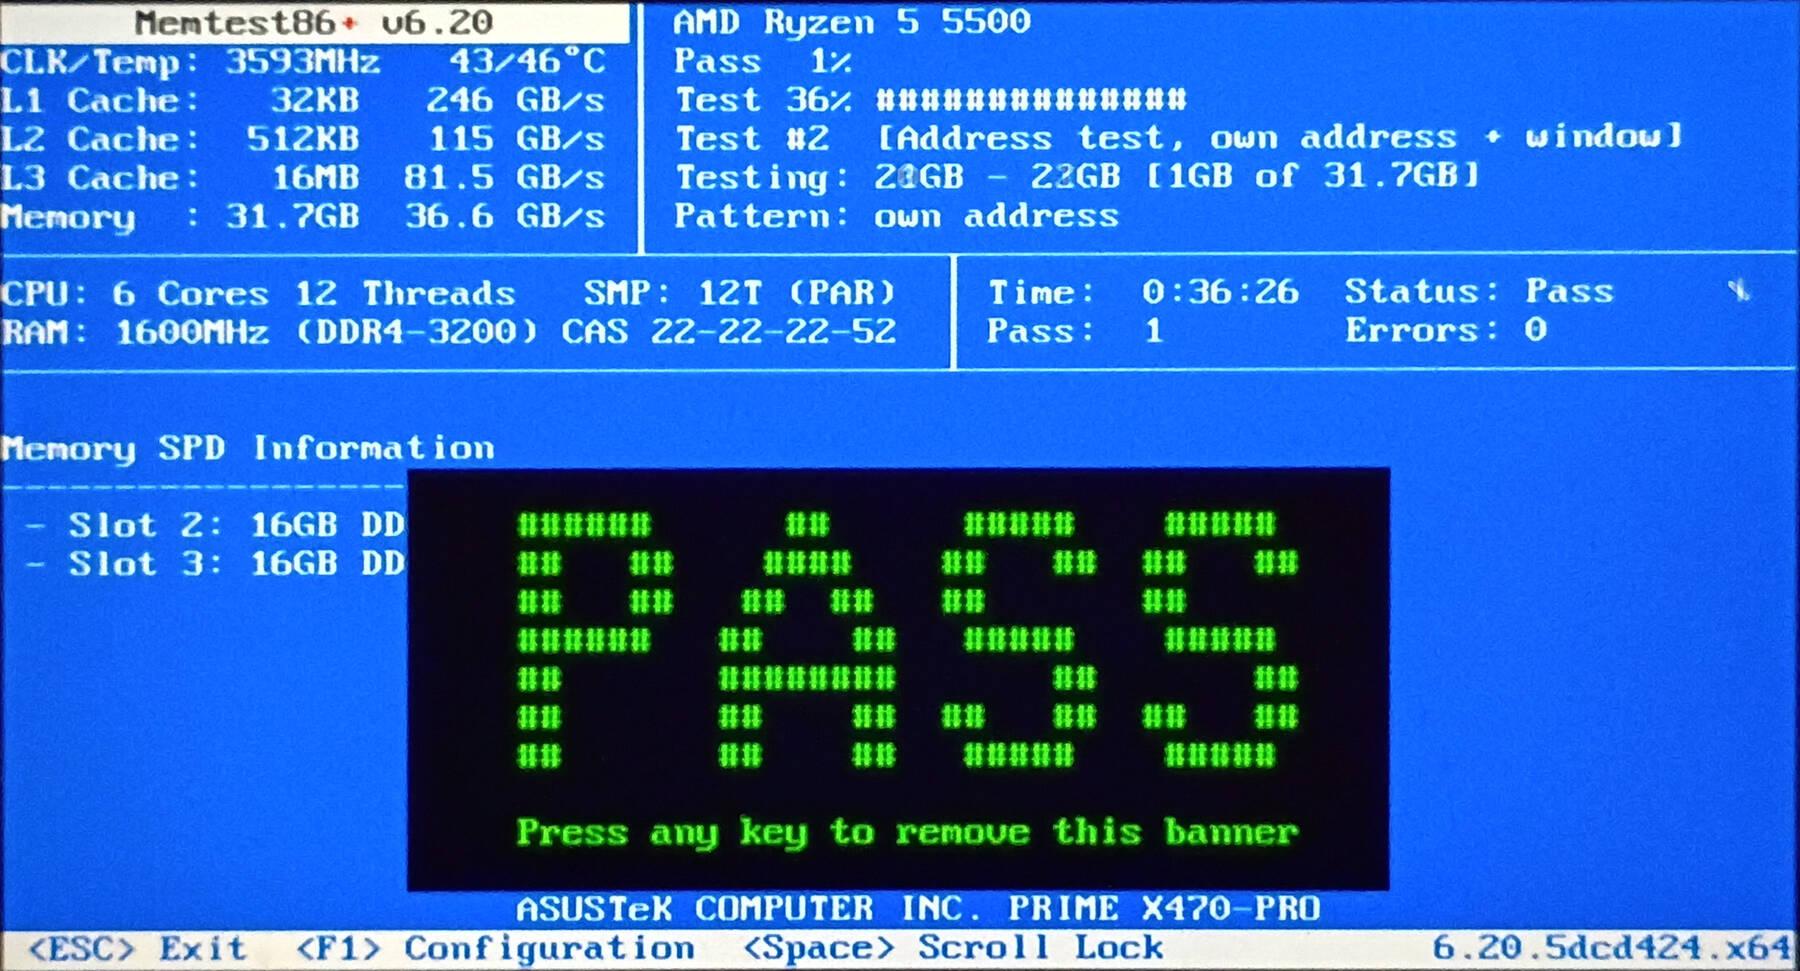
I reset BIOS to optimized defaults (recently updated to 6251). Then I ran Memtest86+ for 7 passes without any issue.
Other ideas:
- Ryzen C-state issues (recommendation is to disable C-states which seems not good)
- I'm only seeing states C1 C2 and C3. Seems like I don't have deep C-states enabled, and a lot of the issues seem to point at C6
- Revert to an older BIOS
- Asus has a newer BIOS 6254 Beta. It "improves system compatibility".
- Archwiki suggests enabling
rcu_nocbsfor all cores if your kernel freezes on low loads/soft lock freezing - Freeze on reboot (only had once) might be mitigated by "Power Supply Idle Control" setting in UEFI Setup, change it to "Typical Current Idle"
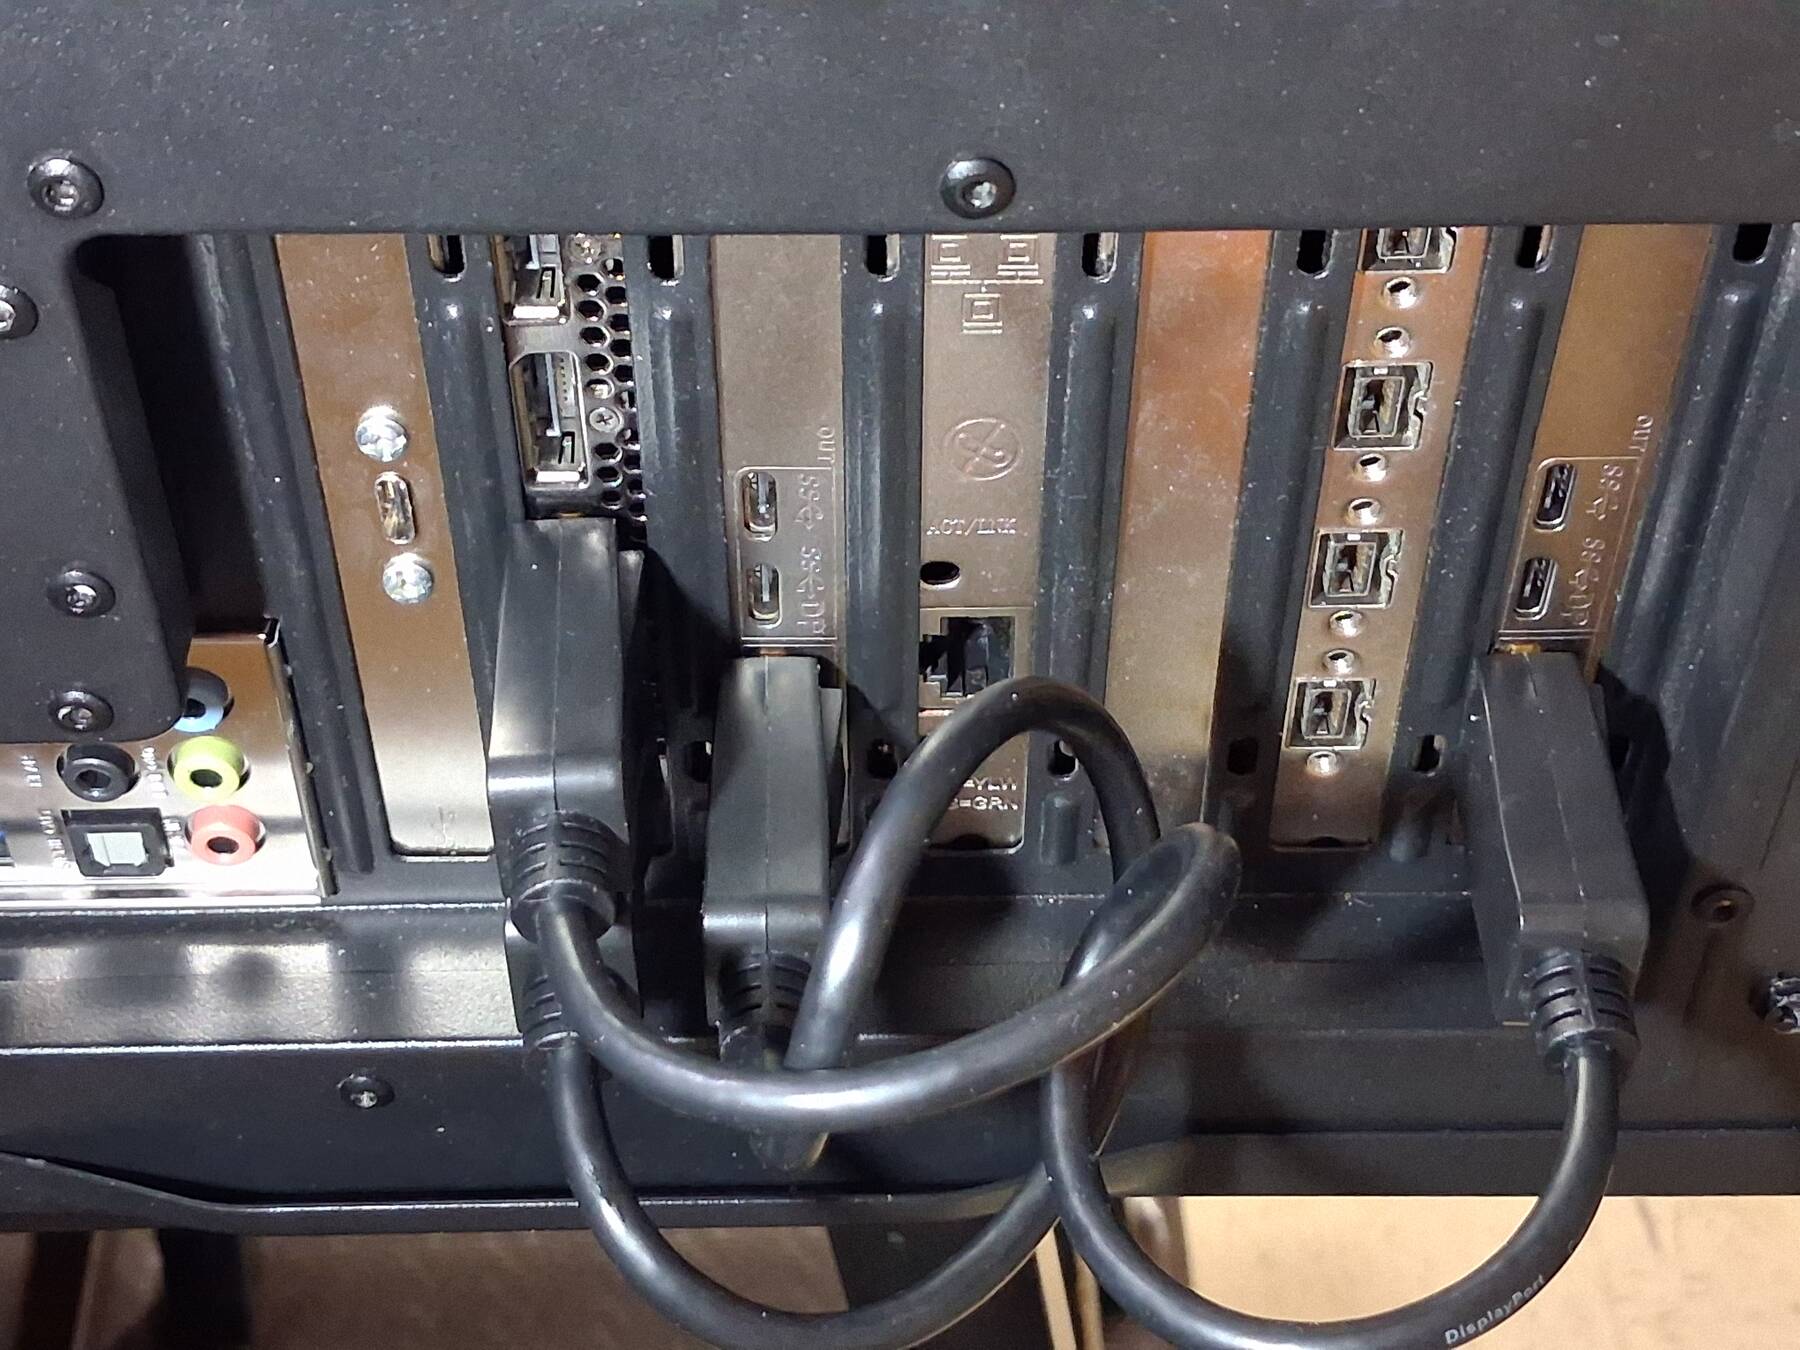
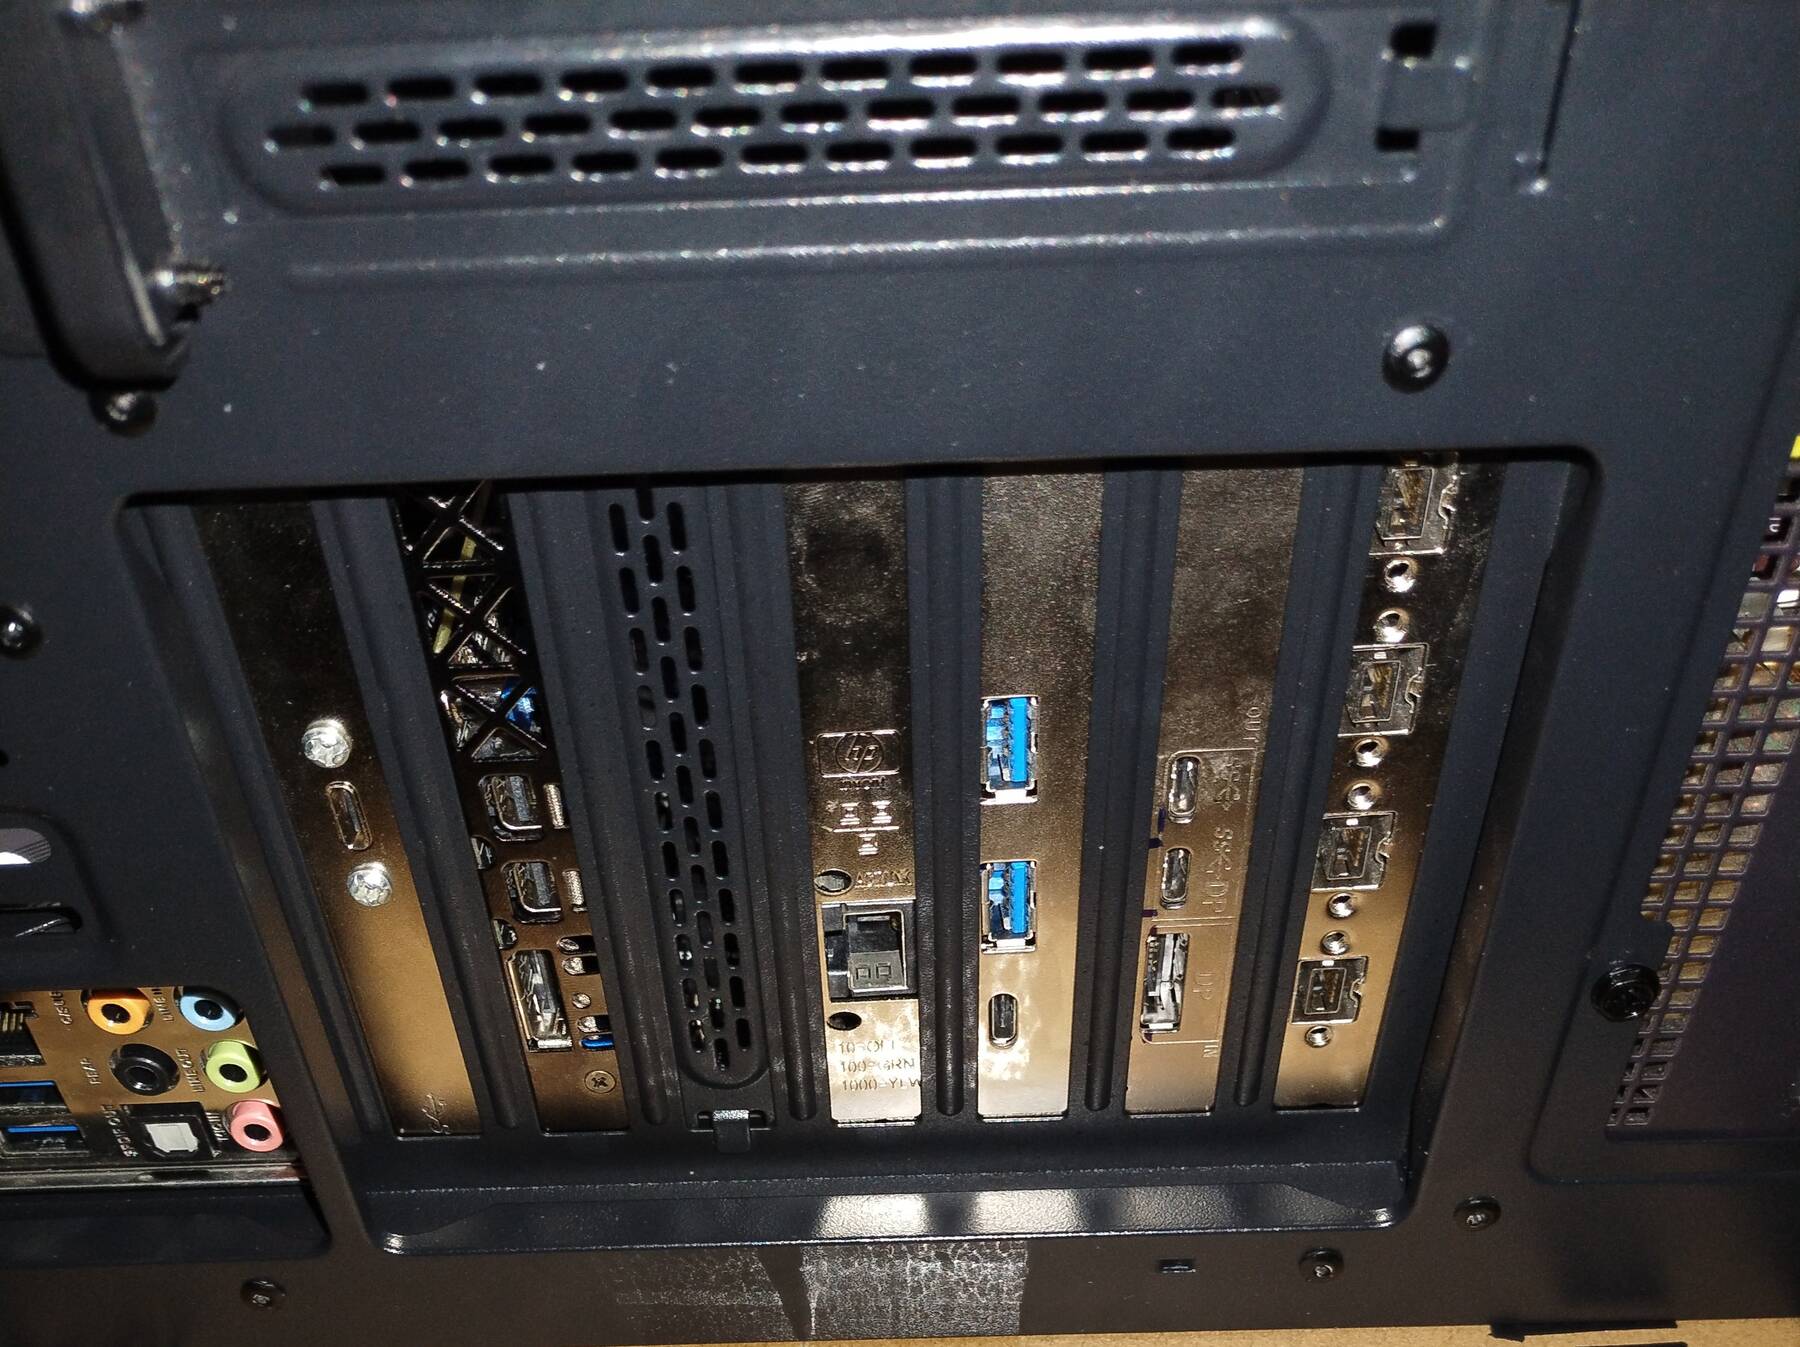
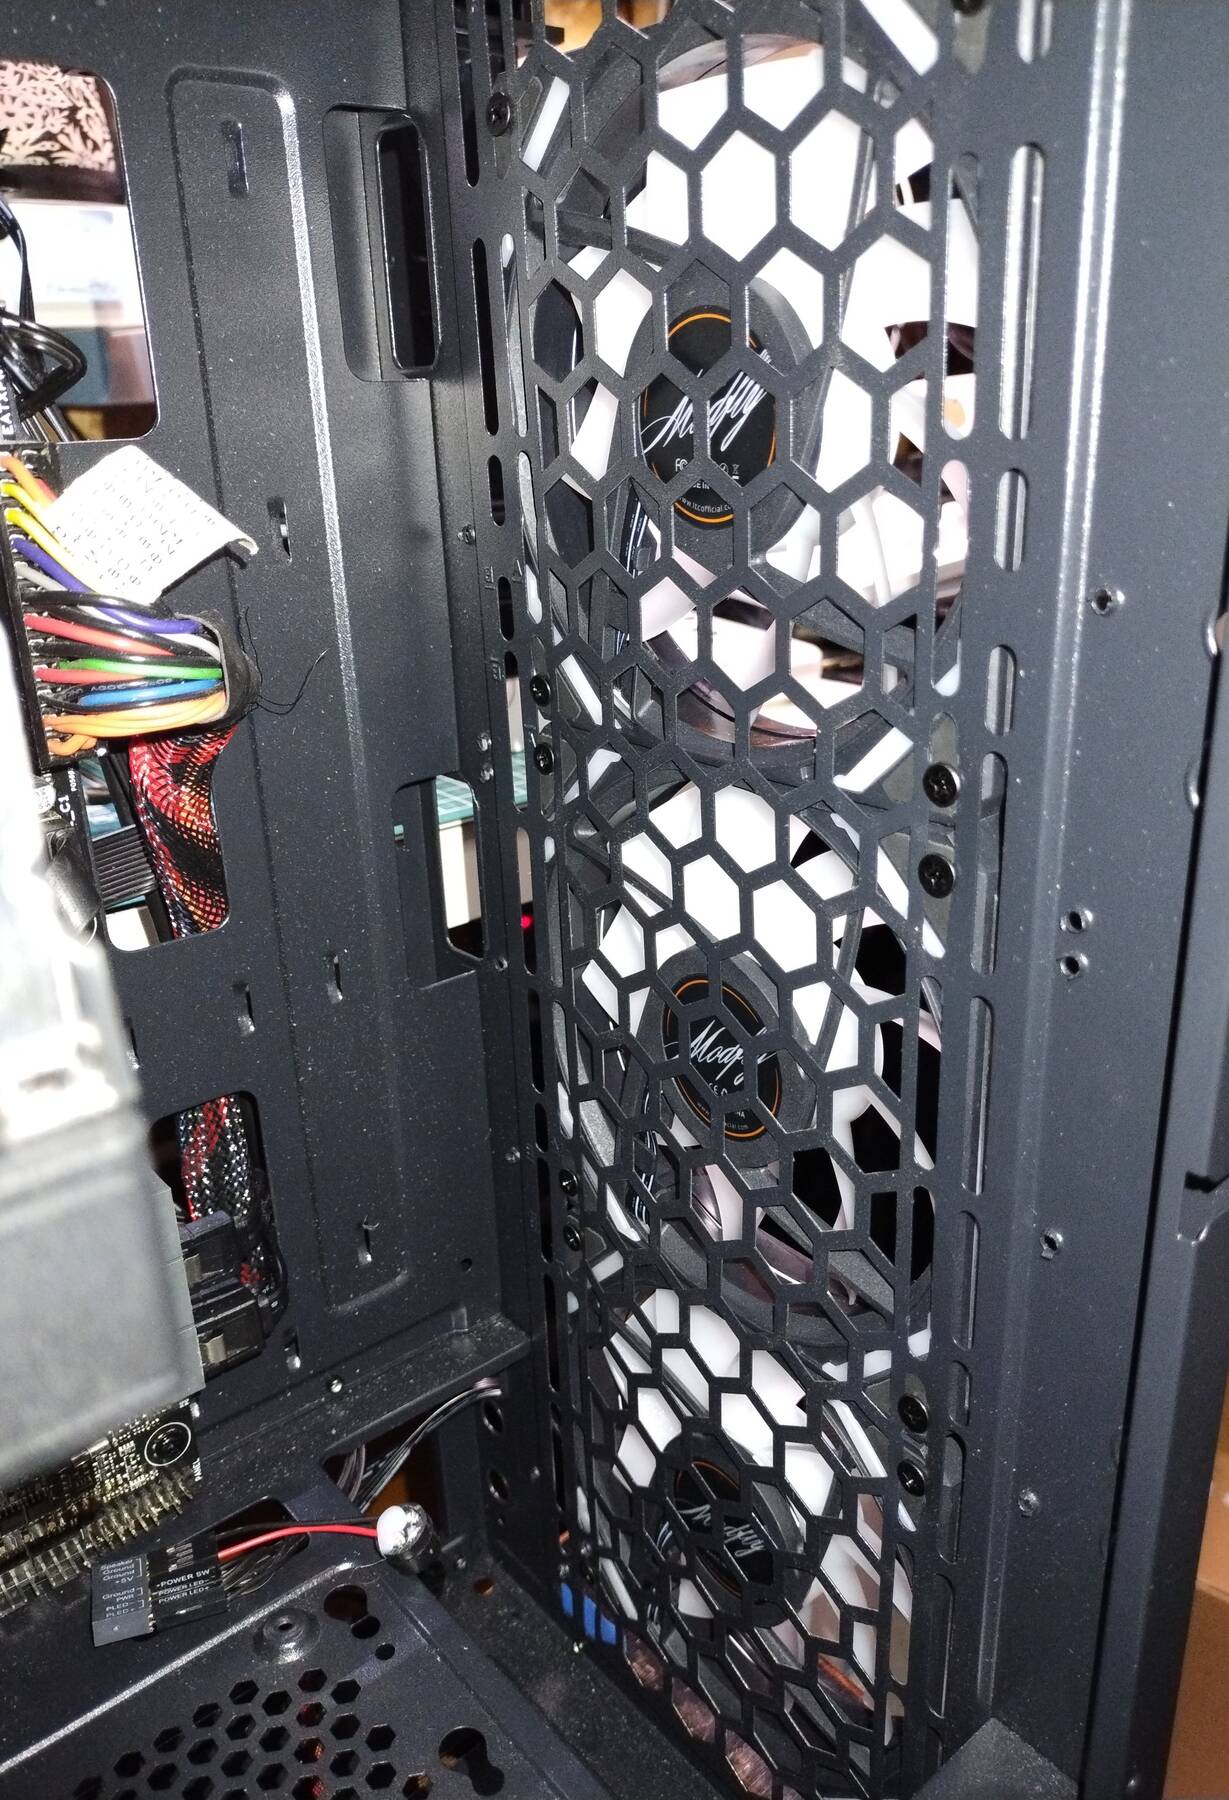
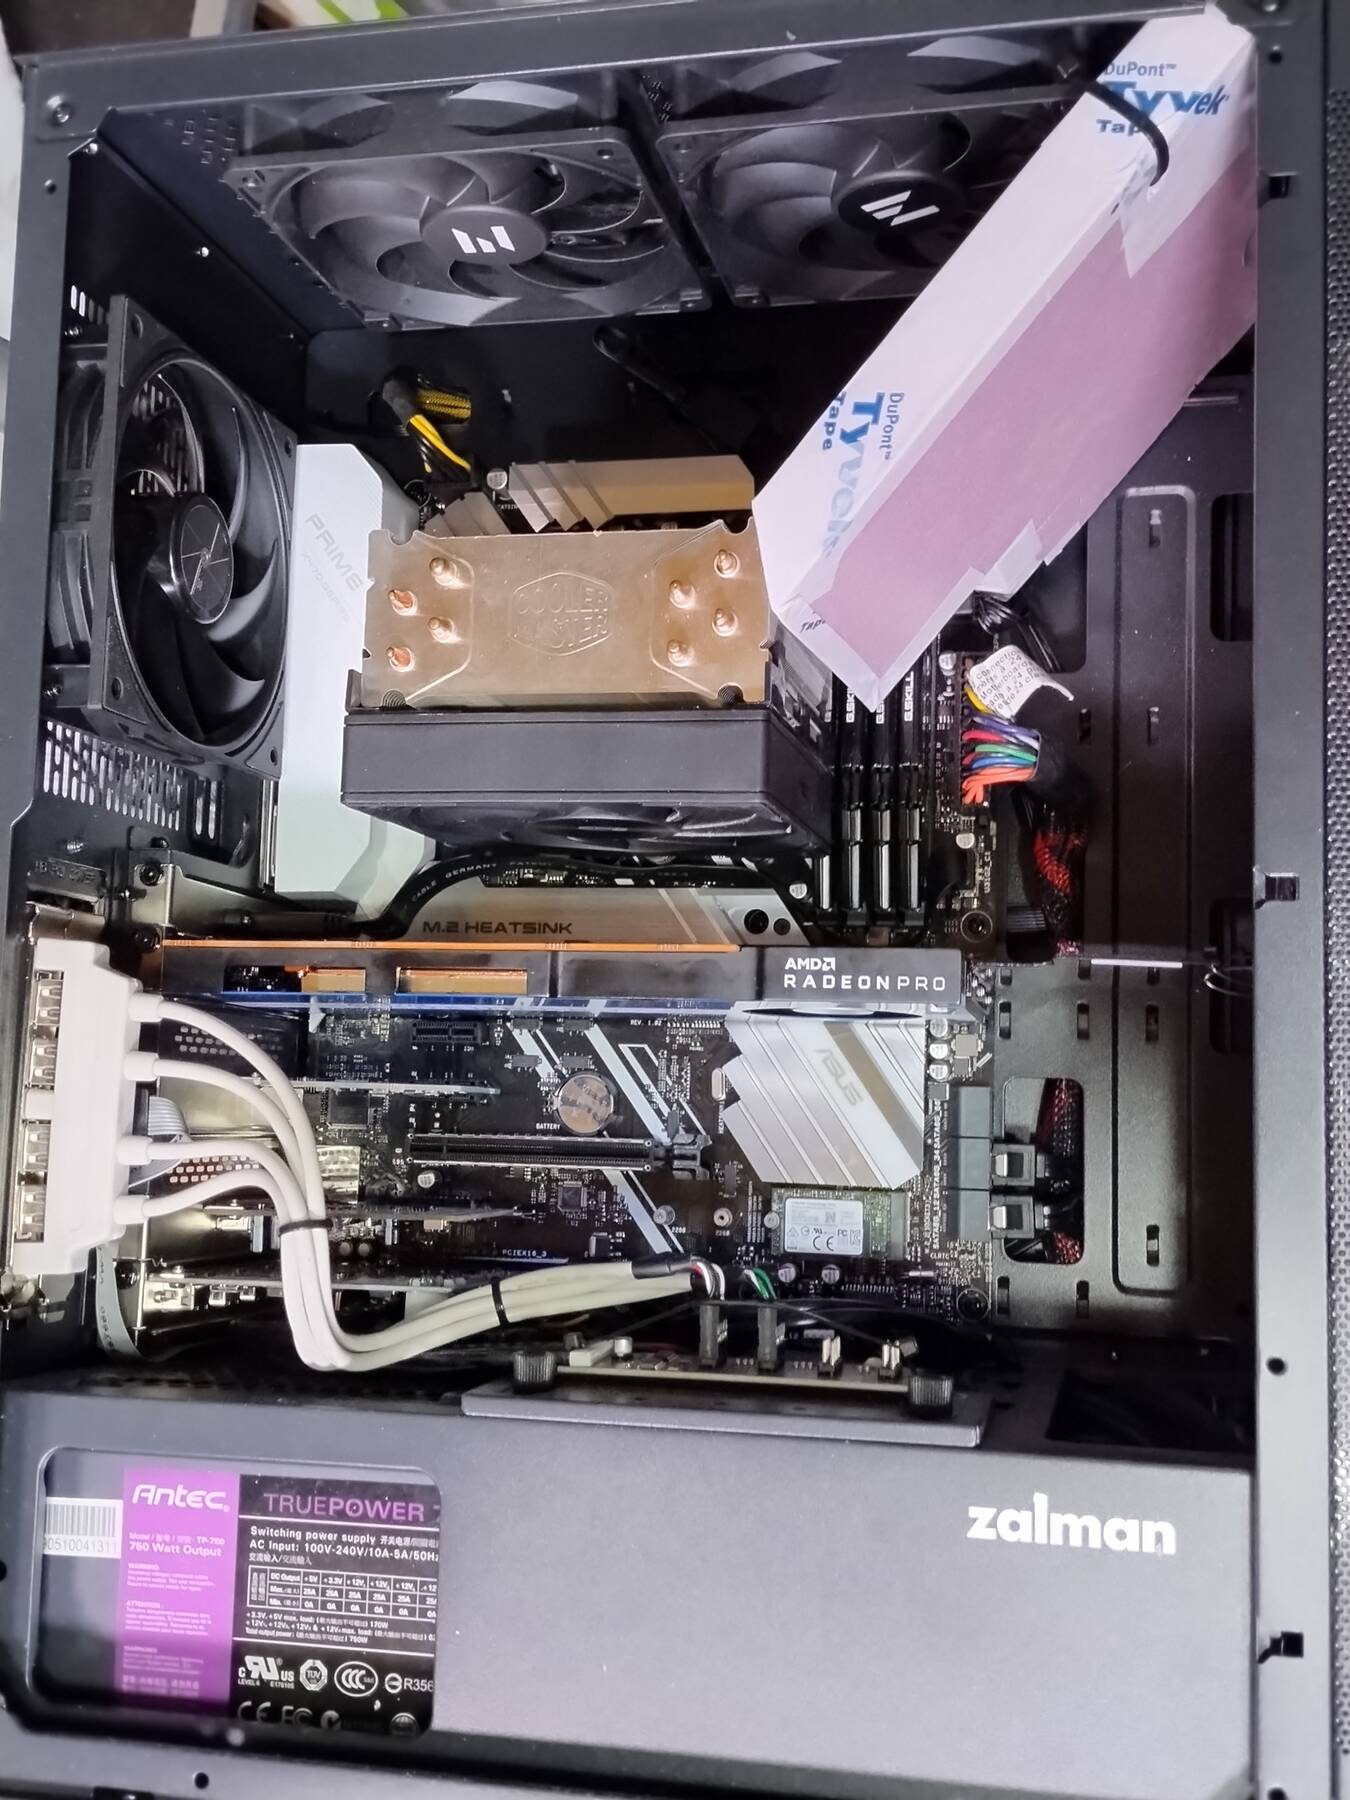
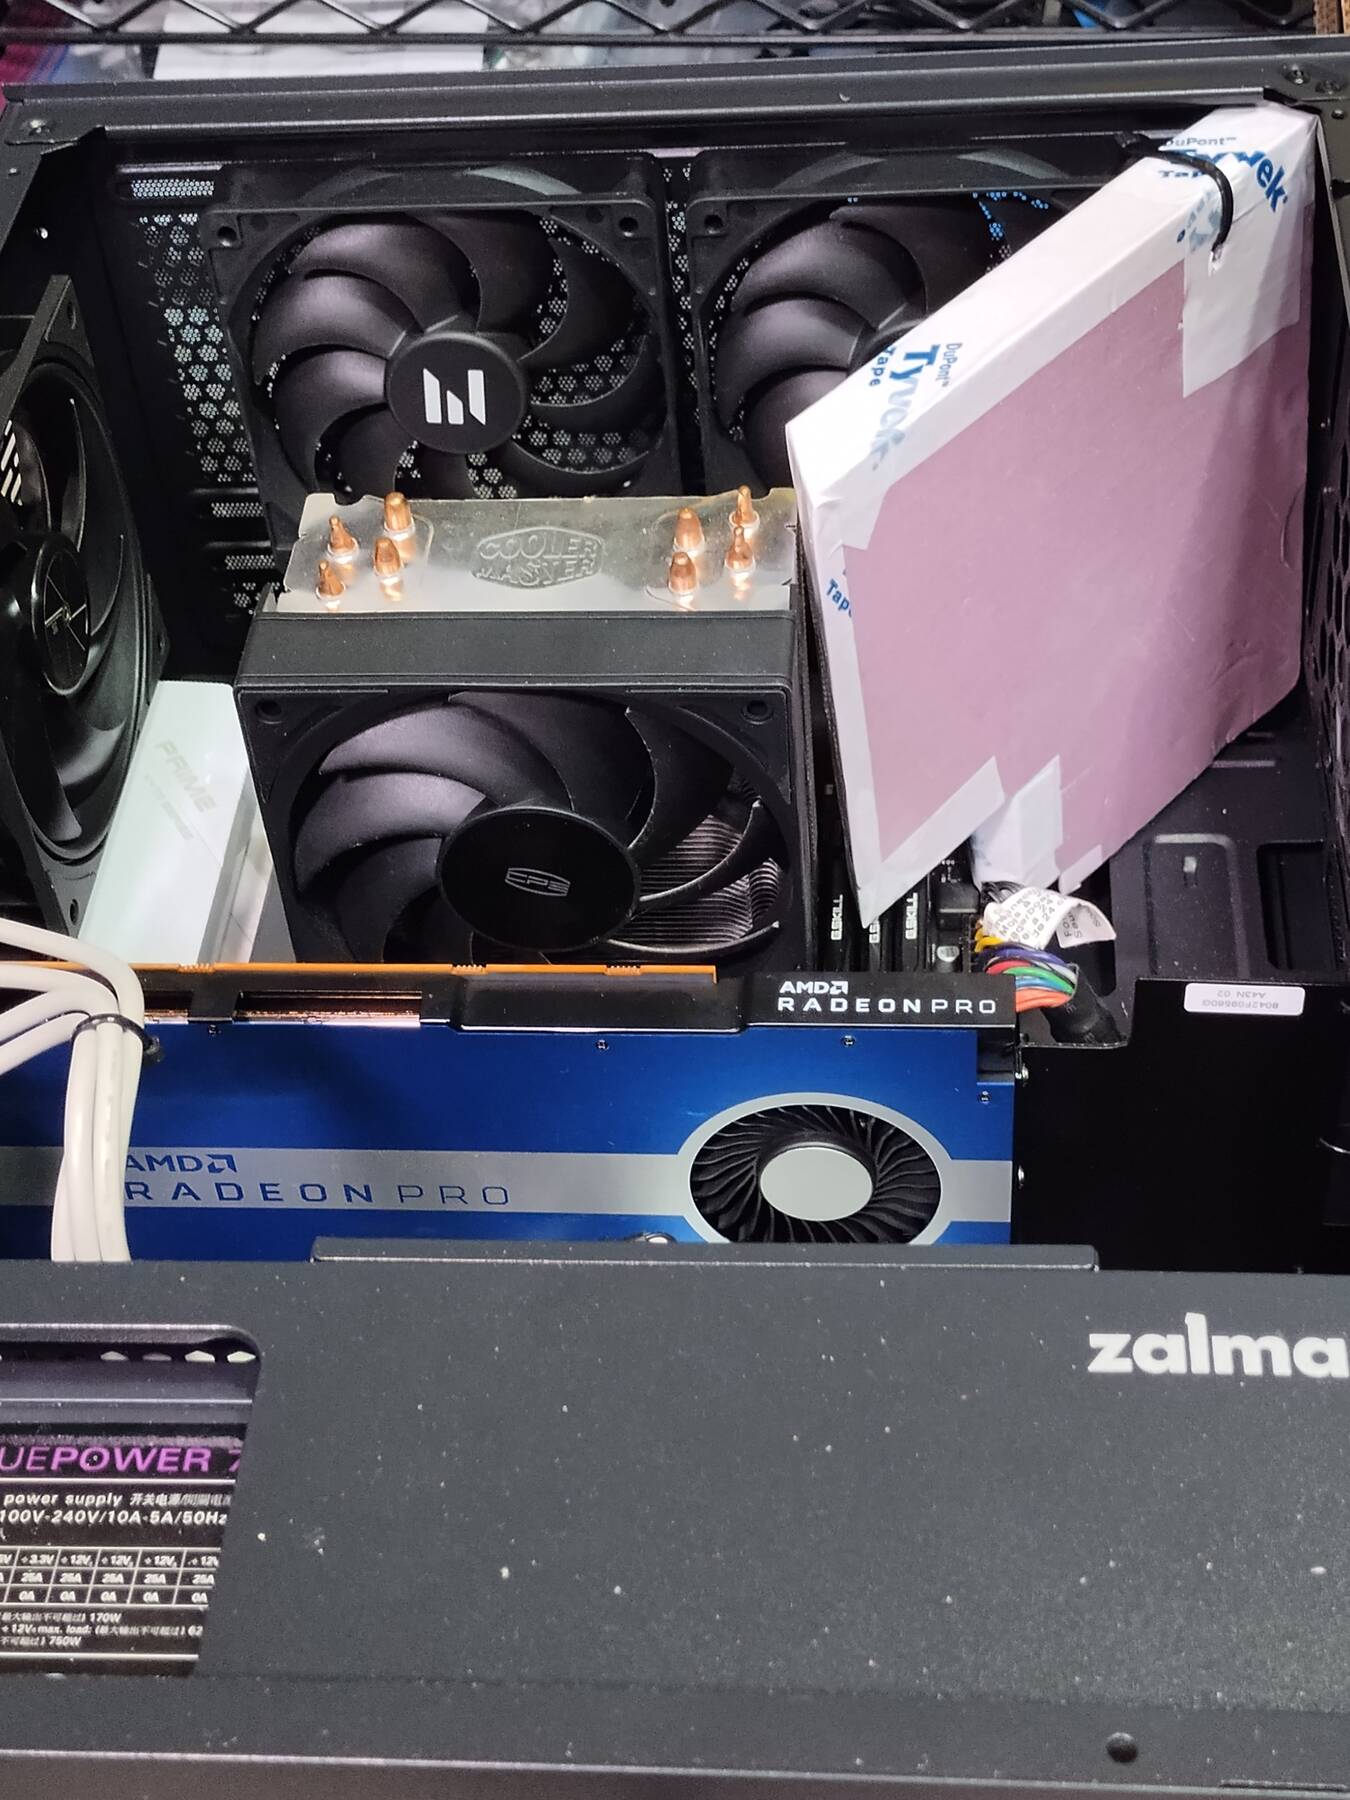
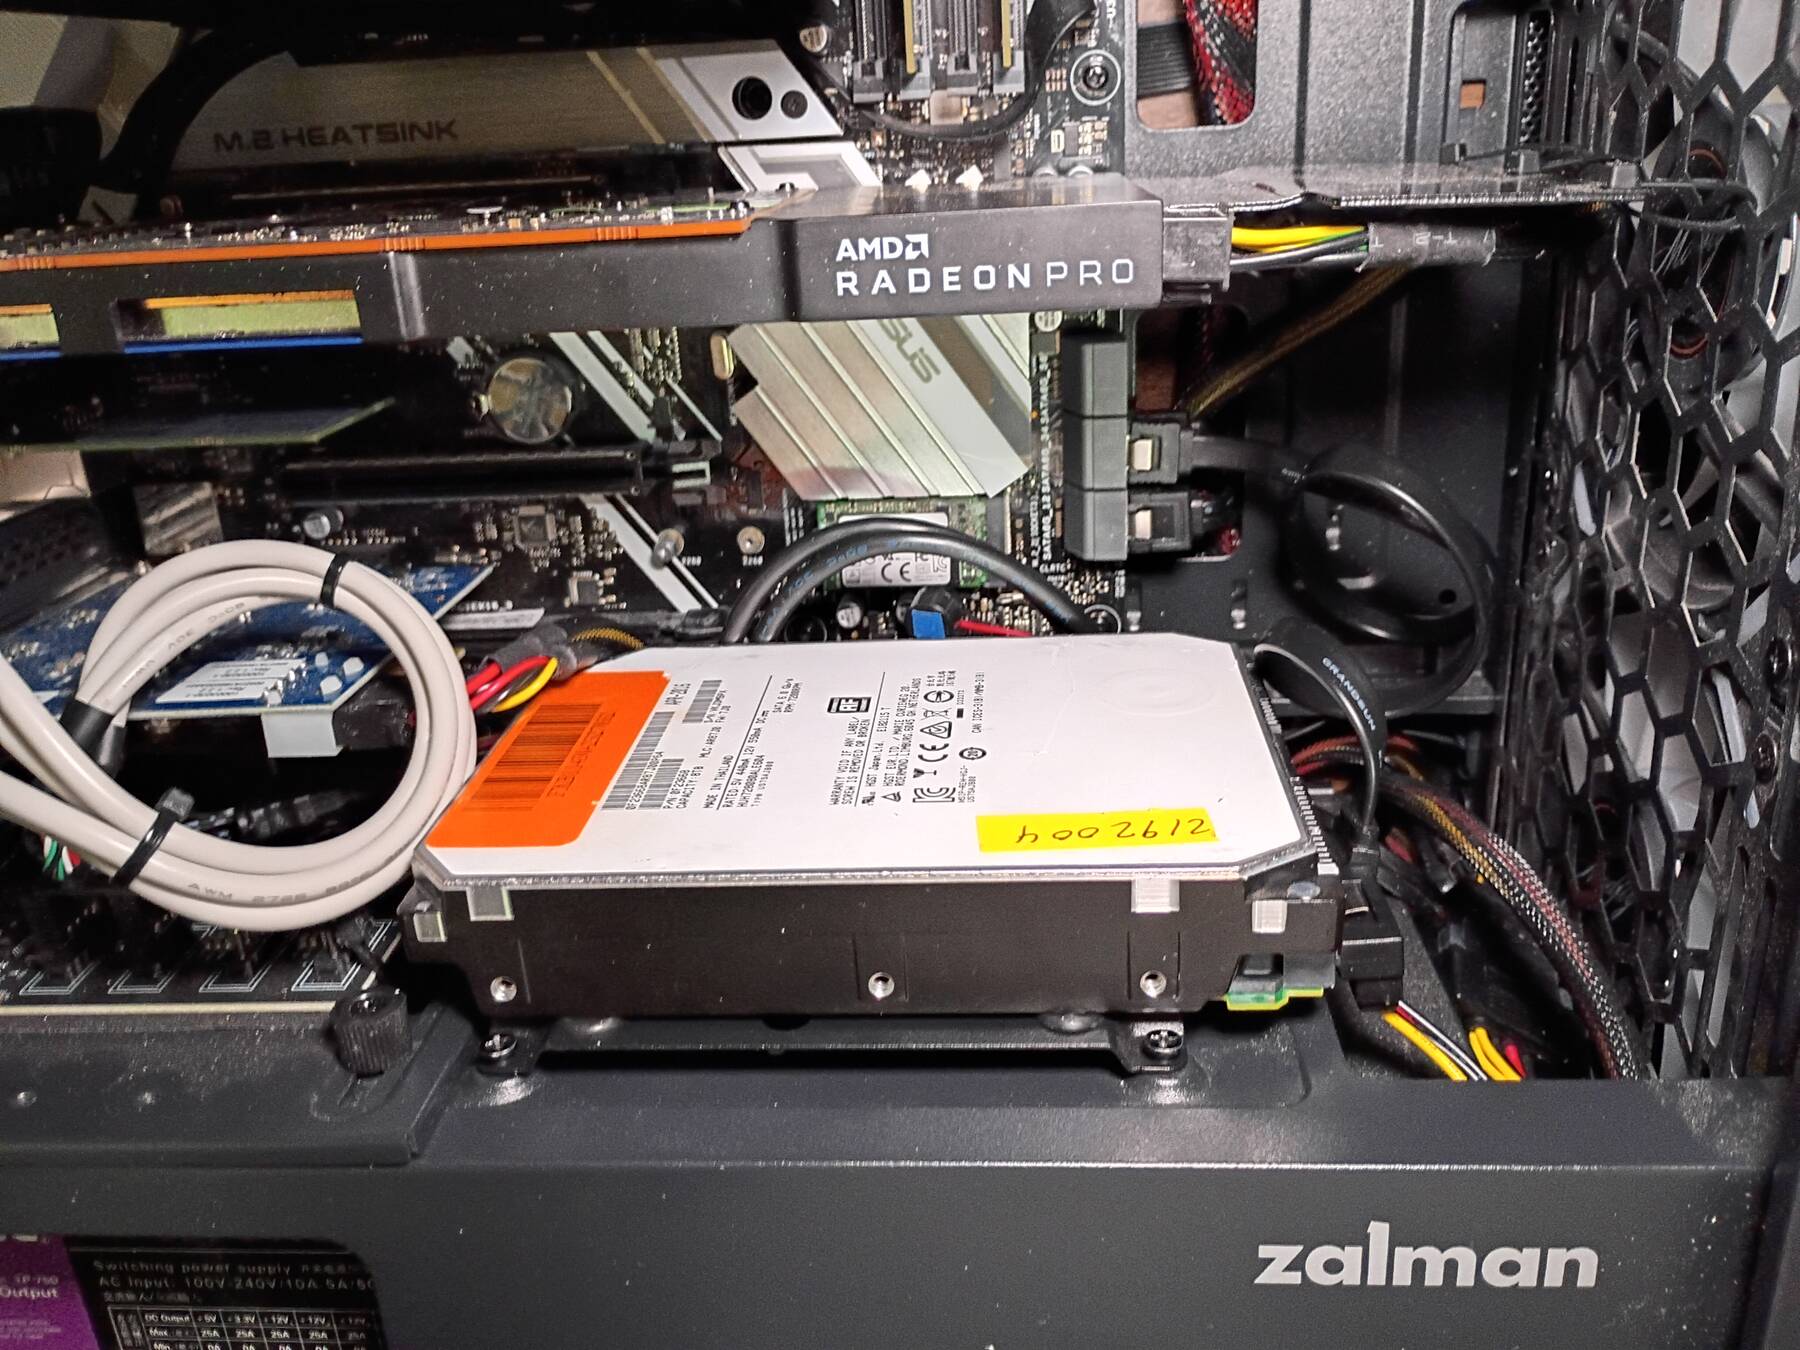
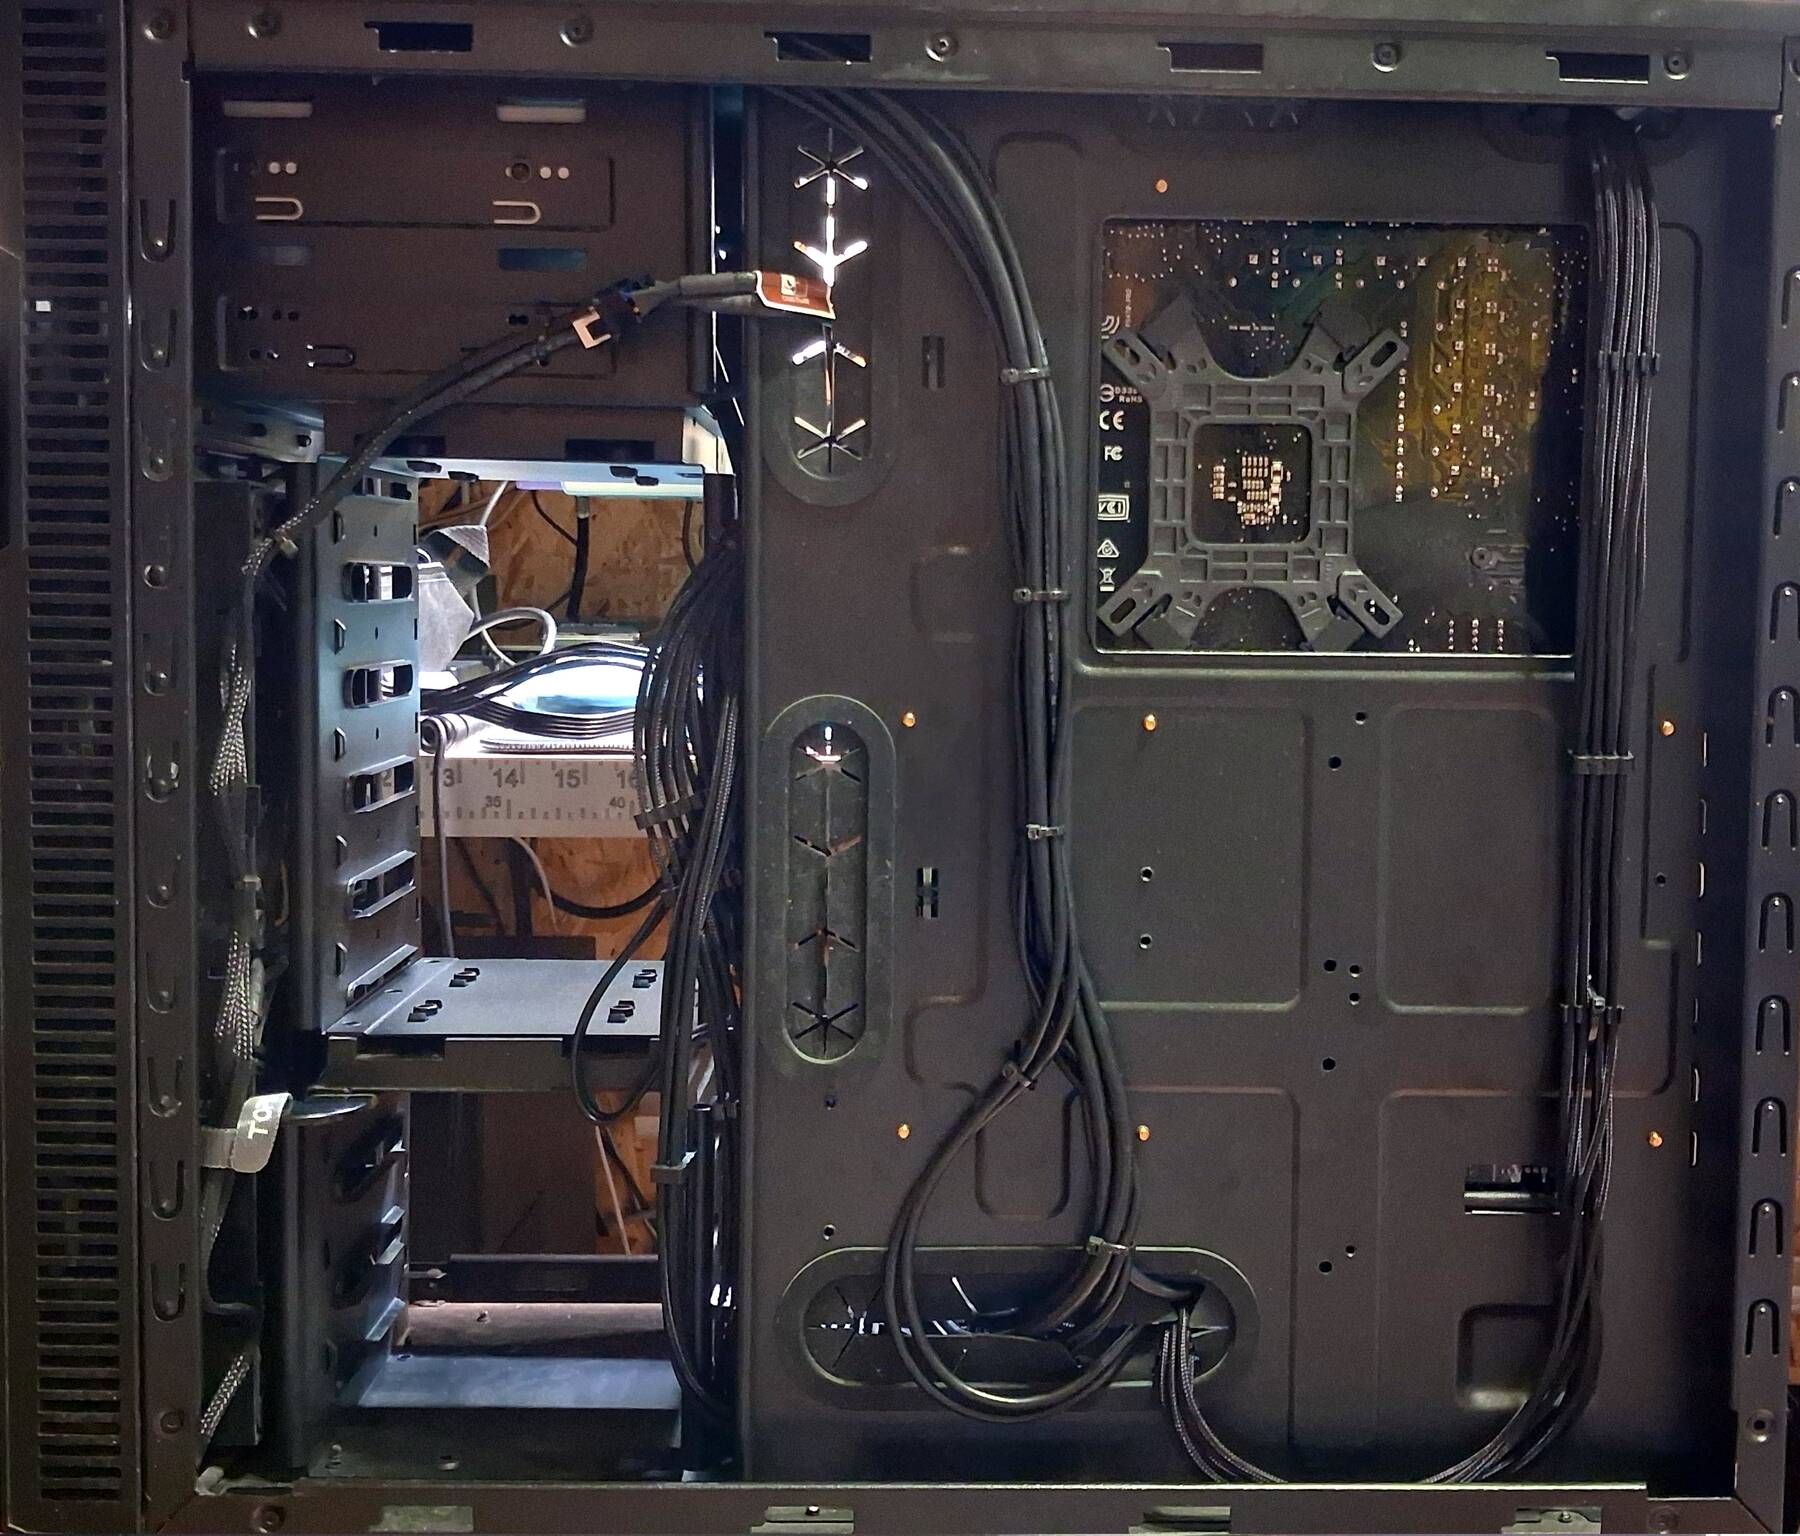
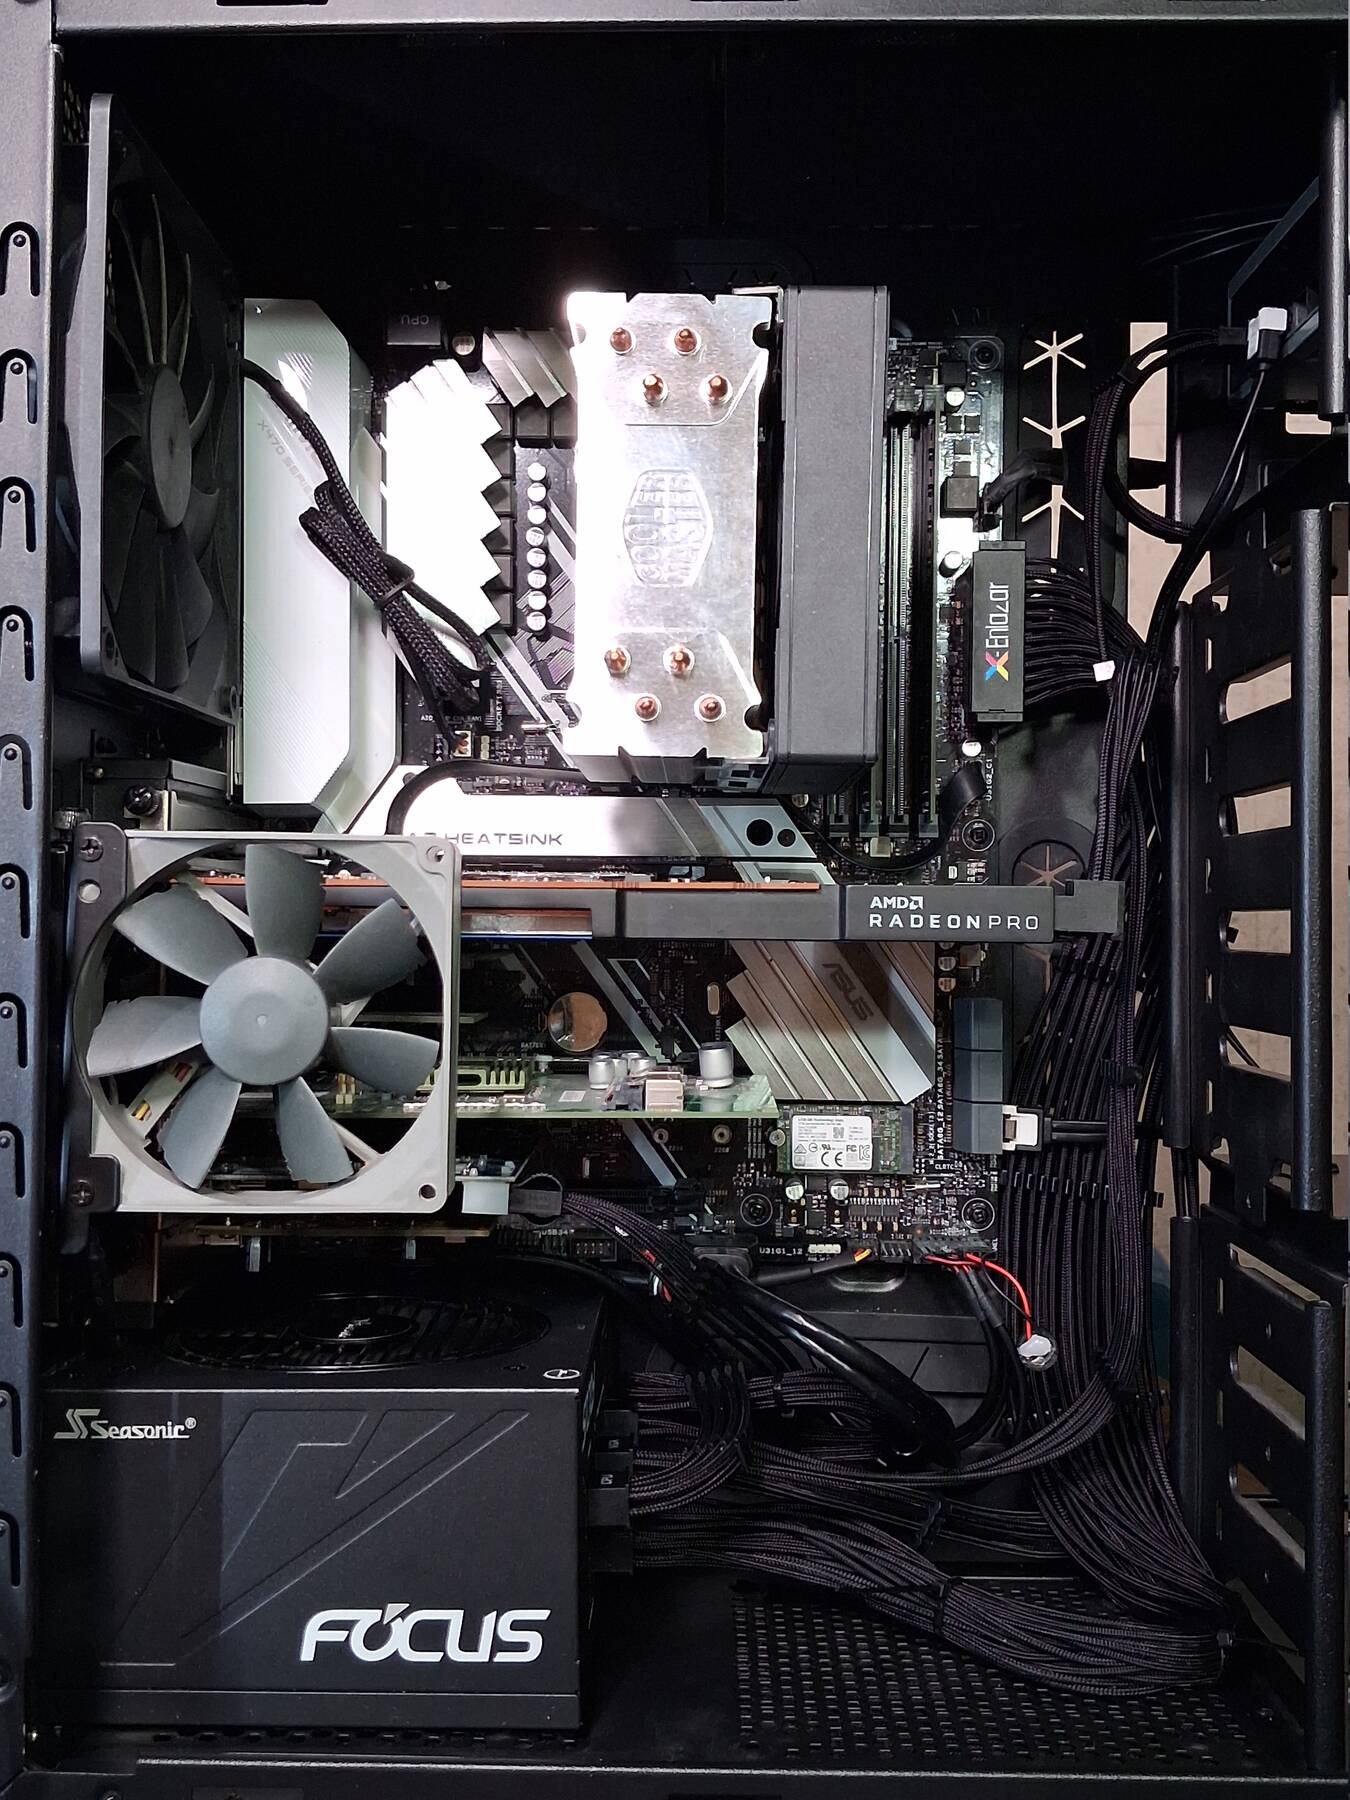
I forgot to take photos after moving back in to the Fractal R4 so here they are now:
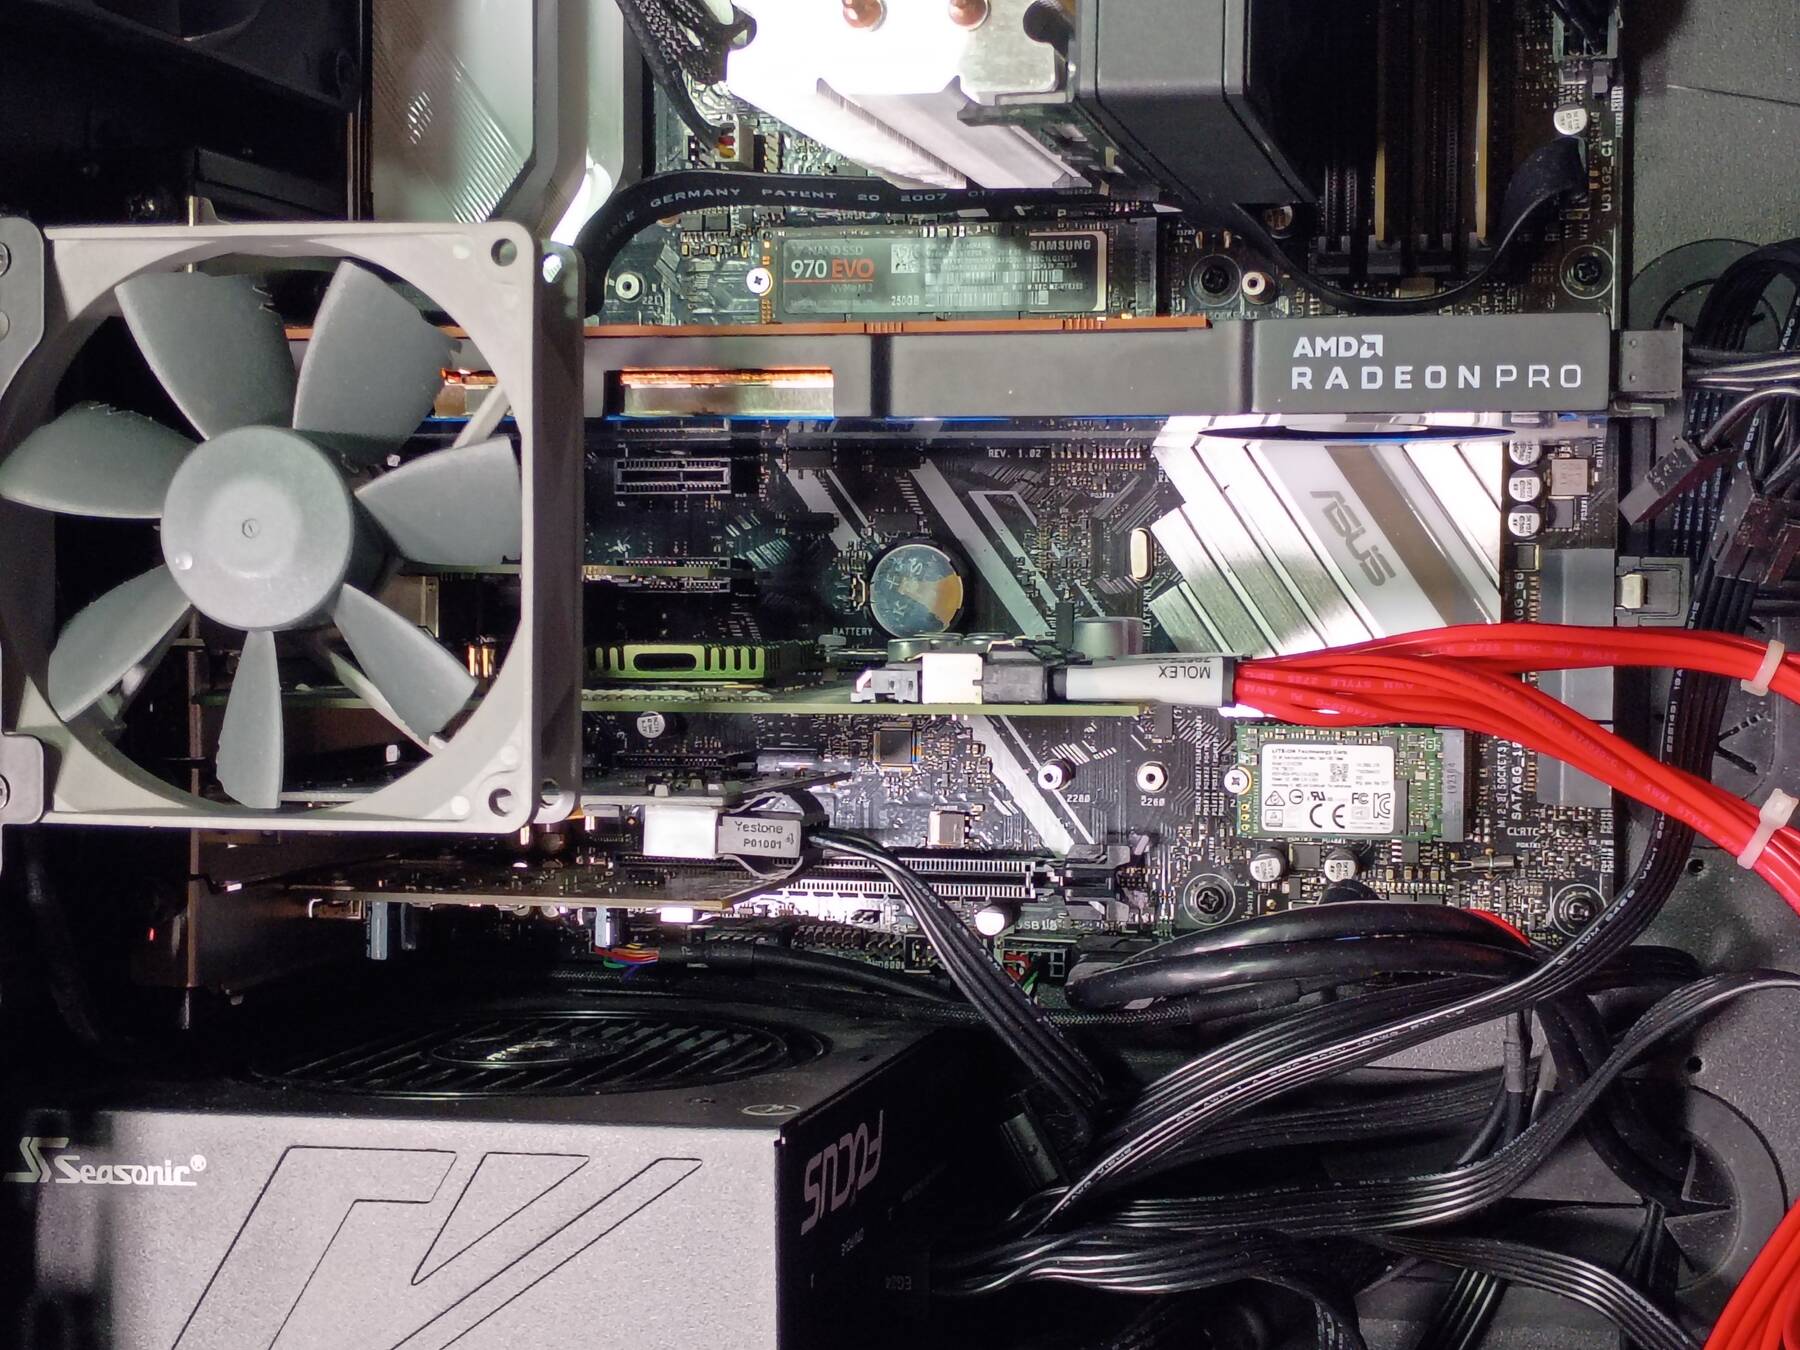
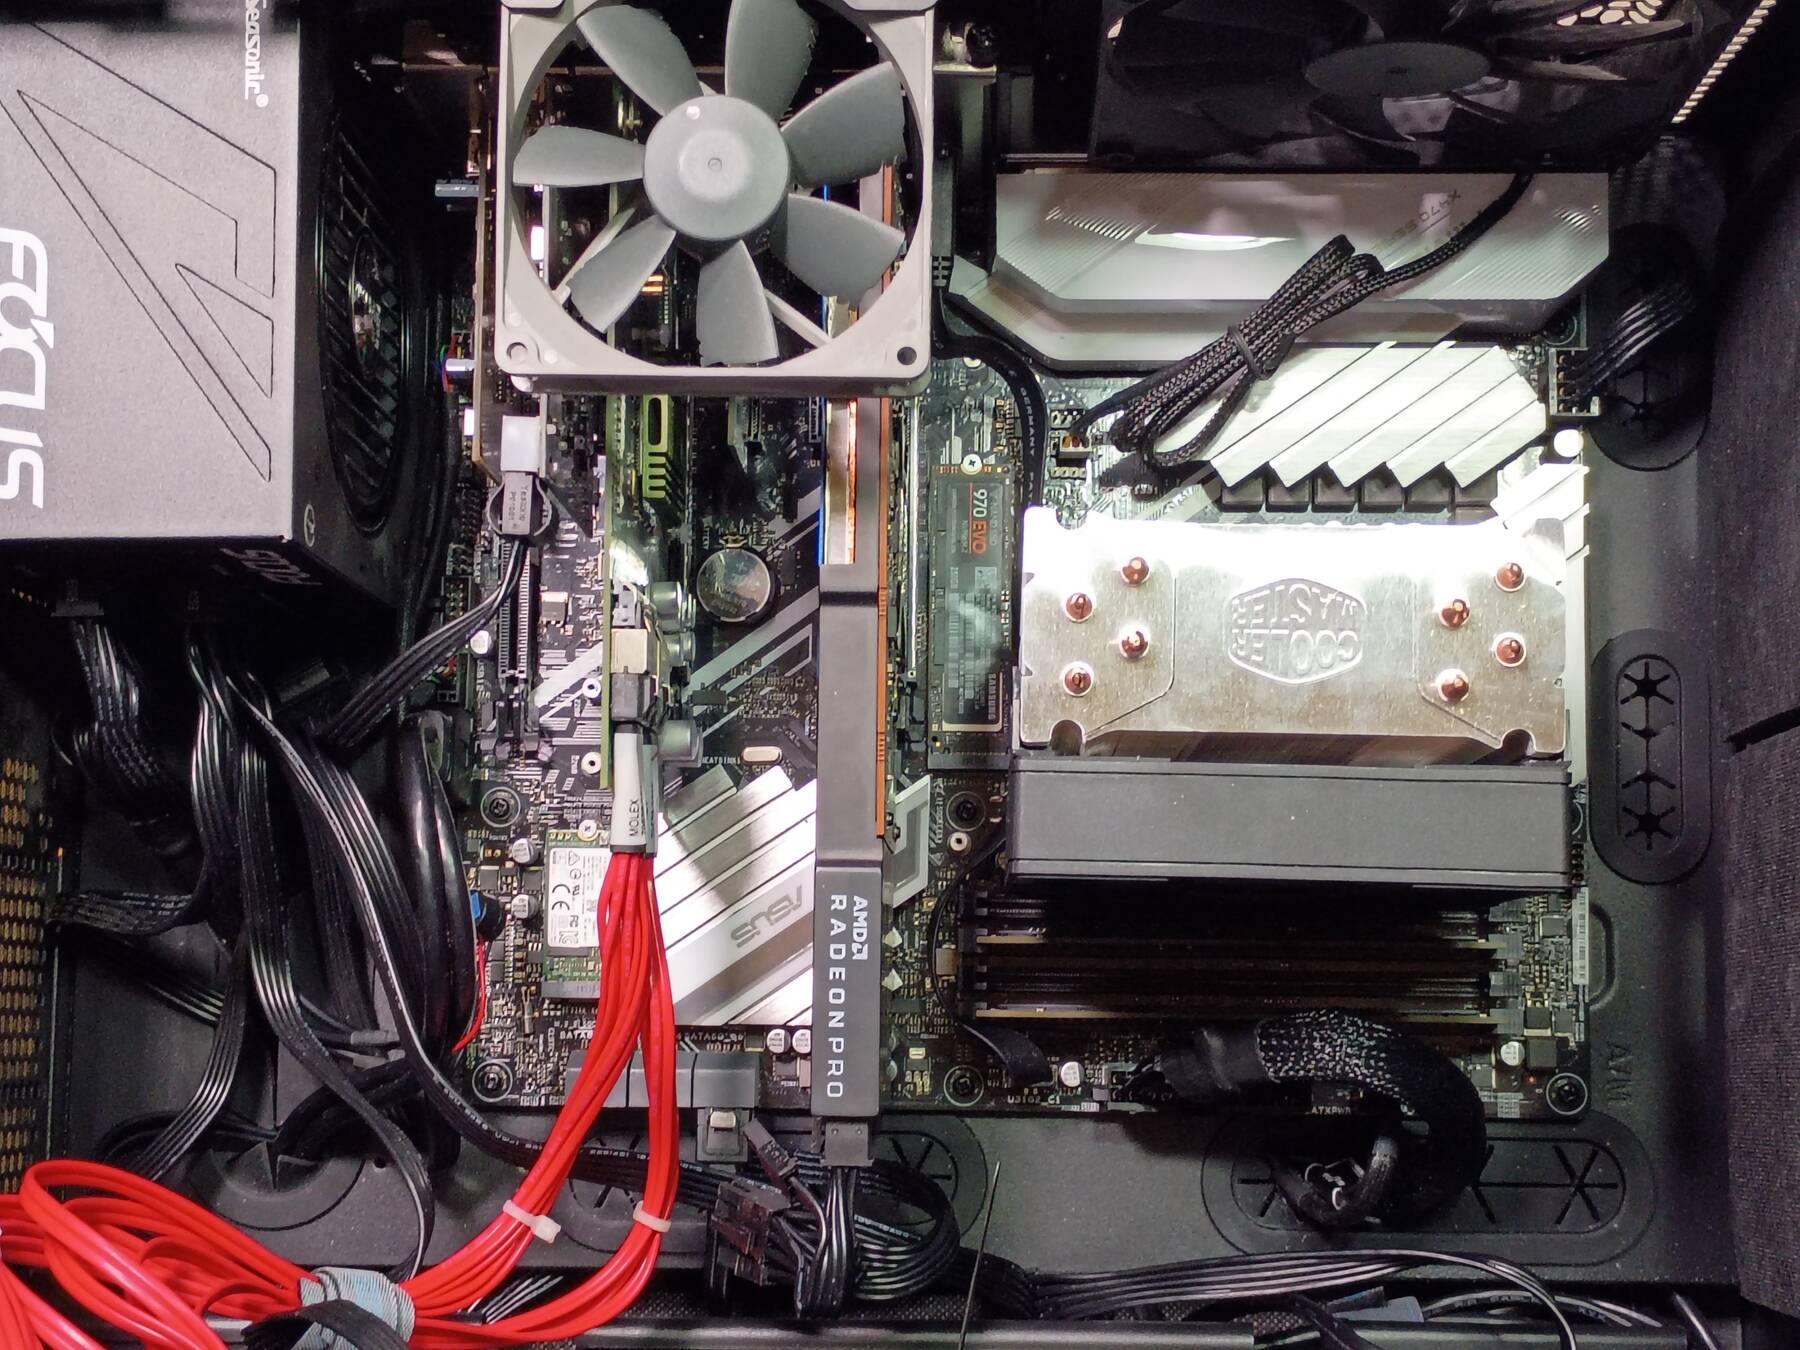
Still crashing
I've had the machine freeze during apt package installs, firefox crashes, and a random segfault before the system slowly grinds to a halt. Nothing that helps narrow down the issue.
My UEFI lacks the "Power Supply Idle Control", and I didn't recall the others while I was in there poking around.
In the interest of being non-scientific I disabled 'Resize BAR Support' and 'SR-IOV Support' in UEFI. Then I added 'amdgpu.gpu_recovery=1 iommu=soft' to the kernel cmdline. Back to waiting for another crash.
New CPU crashes too
I installed the new (used) Ryzen 5 5600X. Posts fine, reset the UEFI settings, configured my RAM, enabled ECC. I ran 1 pass of Memtest86+ without issue.
I try to load the kernel and I get a bunch of mce: [Hardware Error]. I changed ECC to auto, and was able to load X, but then it froze shortly after and rebooted.
I disabled ECC, it booted, ran for probably 20 minutes, chromium crashed, then a bit later it froze and rebooted.
I am fed up.
I decided my best bet is to gather all my available AM4 hardware and just test the crap out of it until I find a consistent issue. Tonight I cleared off my desk from network card testing machines, and gathered up various hardware bits (hdmi multiviewer, power supplies, extracted a couple motherboards).
Bench testing
I extracted the motherboard from dreadnought, and put in a Asus H97I-PLUS with Core i5-4670k, and 16GB DDR3-1600. It is Mini-ITX, so just the SAS card in for now. I also swapped the power supply for a spare 860W (maybe has issues), so that I can test the 750W supply as well. This is enough to be productive.
I had to make some software changes for it to function:
- modify
/etc/network/interfaces - comment out
/etc/X11/xorg.conf.d/30-amdgpu.conf(TearFree config) - delete some old secure boot keys in UEFI because my dkms kernel modules wouldn't load
- switch the default sound device, and set volume levels with
pavucontrol
I got a new 'active' DP to HDMI adapter that did 4K60 with the Radeon, but for some reason (maybe the silly smart monitor) that output is stuck at 4K30 on the Haswell iGPU. Anyway, I can run two monitors, access all my disks, and hopefully have a stable platform to work on. Games will have to wait.
For bench testing my first goal is to establish whether I got a bad CPU from ebay or not. Before that I needed to set up some OS installs, add some stress testing software, and clone the SSDs.
I setup up my two 'good' machines to do a couple different installs. The first was on a 16GB M.2 Optane (NVMe), and it just has command line stuff: memtest86+, build-essential (ffmpeg build as a test), stress, hpcc, and ffmpeg. The other machine used a 64GB M.2 SATA drive, and it got KDE, dhewm3 (Doom 3 engine), a browser, and the stuff from the other install.
I recently got an M.2 cloner so I used it to clone each install to an identical drive, then booted them once and fixed up the host names.
Finally I built up the old guts of dreadnought as my 3rd bench machine, but swapped the ECC RAM because I think it is the most suspect component at this point.
- Initial Test bench configs
PSU Mobo CPU RAM SSD Graphics #1 ThermalTake Smart 500W Asus Prime X470-PRO Ryzen 5 5600X Corsair Vengeance 16GB DDR4-3200 16GB Optane M.2 NVMe Radeon Pro WX 2100 #1 #2 Corsair HX 520W ASRock AB350M-HDV Ryzen 5 2400G Kingbank mixed 16GB DDR4-3200 64GB Sandisk M.2 SATA Integrated Vega 11 #3 Seasonic Focus 550 Gold Asus X470-I Gaming Ryzen 5 2600 Hirvod 32GB DDR4-3200 16GB Optane M.2 NVMe Radeon Pro WX 2100 #2 The basic idea is:
- Run Memtest86+ 8+ passes or so.
- build ffmpeg
- run stress for several hours
- encode something with ffmpeg (maybe shoot some footage with my phone, stick it on an SSD, and reencode)
- run dhewm timedemo a bunch (gui system only)
- run a browser and play a long youtube playlist (gui system only)
Then we rotate some hardware around, and try again. I made a matrix so I can check off parts that have been combined so we'll see how that goes.
Random power offs
I landed on a pretty stable config after the bench testing mess, but then I got some unusual power-offs.
The first one happened after I put the machine in standby, which is something I never usually do, but thought I might try reducing power. I swapped the supply for my spare 860W that uses the same cables. That seemed to be going fine, but then it would die under gaming load. That supply had some issue before so I ignored it, and swapped my regular one back in. I could live without standby.
The power offs continued. Maybe a week or so apart. A couple within 30 minutes of each other. Some were while I was away, but when I was there nothing seemed to indicate a particular issue. I was starting to think my supply was just bad. Then it failed again, and would not turn back on. I decided to poke around.
I started by removing cables (USB, DP, network, audio), and pressing the power button a lot. Nothing restored power.
I got the machine up on the bench with just power attached. I started by unplugging various internal power cables (drives, fans). Then I pulled PCIe cards. Finally I pulled RAM. When I was inserting a stick back in, the machine briefly powered on.
I shut off the PSU switch, put the RAM back in, and started poking around near there. Then I noticed that bumping the power supply connector would cause it to briefly power. It would turn on, but touching the wiring there would still cause it to lose power. I inspected the pins and found a couple were unusually spread out. Probably from lots of removals, and me tipping the connector because the 24-pin connector is hard to remove.
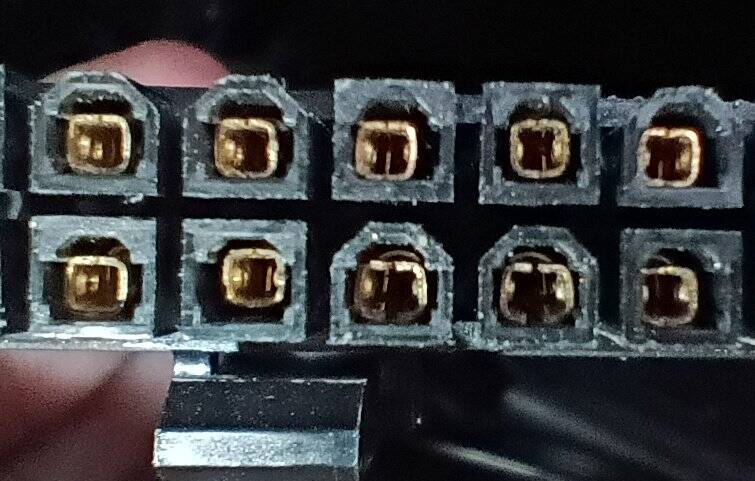
I squeezed the pins back together with some tweezers, and reseated it. Prodding at the connector didn't cause any more shutdowns so I'm hopeful I actually fixed the issue.
New PSU cables, and a second SUNIX UPD2018
I got an X-Enlazar cable kit for Seasonic PSUs (free for review). Seemed like a good idea after my previous pin-bending fix.
I replaced all my cables except the drive cables. There weren't enough for all my drives, and I didn't want to bend the new cables up when the old ones were fine.
I wasted a bunch of time playing with the cable combs and routing things a little bit nicely. It looks ok, and nobody is going to see it except here.
I also got a second SUNIX UPD2018 (USB C host controller with a DisplayPort input for DP ALT injection). I thought it might be nice to have the weirdo Samsung smart monitor on USB C instead of DisplayPort to HDMI, but it didn't work out. My setup was:
Sunix - USB C cable - USB C switch (2-port 20Gbps) - Samsung M7
I tried both the Sunix cards, and one was slightly better (sometimes it flashed 1/6 of a screen with the rest full of color noise). I think I have to spring for one of the UPA2015 cards with DP 1.4 support.